Saturday, August 31, 2013

SATURDAY STEP X STEP, A FRILLY VINTAGE CARD .....

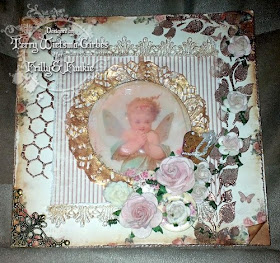
Hey there guys it is Saturday so that means it is TIME for another STEP X STEP....this time it is my turn, Terry....and I will show you what I made in a "few" steps.....So this time I will tell you HOW I made a Vintage Frilly Card....with lots of yummie stuff to play with.......


So what I did was.....I was looking around what I wanted to work with and this time I really wanted to work with the Vintage Photo, the Doily, paper and offcourse the georgous Embossing Paste from The Wendy Vecchi..... when I am in my Creativity Room the ideas start flowing through my head......and I just had to make a card with the little angel....


The paper is from Pion Design and I just love the colours and the images it has.....I folded a piece of cardstock to make a card with size 15 x 15 cm. 


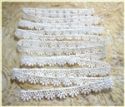
The other products that I used are the georgous lace ...I could not make up my mind what lace I was going to use so I thougth I would put lots of the lace on my workdesk...lol.....the paper for the centre of the card, a doily, the vintage angel ....


So I started out with the doily and used the Embossing Ink on it, on top I placed the Perfect Pearls, this time the copper colour and a bit of a gold colour.....


So I had prepared the doily to put that lovely Vintage Angel on top of it. Isn't she just cute....To protect her I placed lots of Glossy Accents on top. 


So I had placed the centre of my card and was not happy about it YET.....so I thought why not use the Dyan Reavely Stencil and work on the sides a bit......


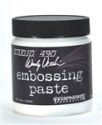
And this is the result on the right side.....I first worked with the Embossing Paste from The Wendy Vecchi, did you ever use it......you did not???????? duhhhhh you better play with that wonderfull stuff it is absolutely fabulous to work with and what I found out was that if you place the embossing powder on top and work on it with the heattool you get a really amazing result....you really should try it out guys......


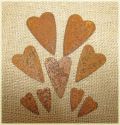
So for the decoration of my card I found a few fabby buttons, a rose from Melissa Francis and the cute little rusty heart and the corner......wanna see what the result is?????????


Here it is....I finished my card by putting the roses and buttons and the rusty heart underneith the Angel, the finishing touch . I hope you like my project and it would be great if I can help you out with some inspiration.

Have fun and enjoy....
Hugs Terry xxxx


Friday, August 30, 2013

Friday Focus - Wendy Vecchi Stamps

Editor's Note:  With the Wendy Vecchi stamps on Friday Focus 15% off this week we are including Wendy's Art Parts.  Also we have a new shipment of Wendy Vecchi stencils in so stencils will remain 15% off through Monday, September 2nd.  

Hello ! It's Sue here and today I'm very excited to be focussing on Wendy Vecchi stamps ! I love the many sentiments that Wendy includes in her sets and that coupled with the fact that the large sets come with a gorgeous background stamp, just makes them all the more attractive. If you've seen the latest releases from the CHA you'll have seen that Wendy is now doing background stamps as singles too !


If you're not familiar with Wendy's stamps, they come already mounted on foam and on a storage sheet. So, I thought I would not only show you the stamps but a great way to store them too !


First of all I cut 2 pieces of mount board making sure that the stamp storage sheet would sit comfortably on them.


Then, to protect the edges I've used Tissue Tape which is easy to use as it's already sticky so clings to the mount board perfectly.


Now to the stamping ! I cut a piece of white card from an A3 sheet and used the Vintage Tapestry background stamp with Plum Archival ink. Because the stamps are trimmed right up to the image it makes it really easy to do repeat stamping and create a continuous pattern.


I then blended Distress Ink around the edge of the panels to take away the starkness of the white card. I don't need to go completely over the card as there will be another panel on top of this one.


For this panel I've blended Scattered Straw Distress Ink over it and then used the Honeycomb stamp from the Art for You set with coffee Archival ink. I've not used an acrylic block as I didn't want to completely cover the card. You can get some great effects if you roll the stamp over the surface you're stamping on to.


I then used the script stamp from the Art from the Heart set using coffee Archival ink. The two flourishes are from the Daisy Art set. I've also used the background stamp from the Heirloom Art set with Sepia Archival ink and again I've stamped it without an acrylic block.


I then used Antique Linen Distress Stains over some white card and stamped this gorgeous flower from The Purpose of Art set, making sure just the flower head was stamped onto the Distress Stains. I then painted the leaves using Distress Markers and also added some further colour to the flower. Once painted I then cut the flower out.


This flower is from the Daisy Art set and I've painted it again with Distress Markers and then cut it out.


I love this butterfly on the Nature's Art set ! I've stamped it onto some card that's had Distress Inks blended over it and then I stamped it again on to some Clearly for Art. I heated the Clearly for Art butterfly so that I could shape the wings then stuck it on top of the card.


I stamped the leaves from the Nature's Art set using Peeled Paint Distress Ink and the border across the top and bottom is from the Art from the Heart set. I then mixed some brown acrylic paint with some Wendy Vecchi Embossing Paste and used it with the Classic Words stencil. I then added the flowers and butterfly.


The sentiment is from The Purpose of Art set and I've mounted it onto a piece of card that I've stamped using the background stamp from the Nature's Art set. Love this sentiment !


Here's a close up so you can see how wonderful these stamps are !


This is the panel I made for the back cover, using the same techniques.


Here's the finished panel on the back cover.


And a close up of the stamping.


To finish I lined the two covers with card that I stamped with the background stamp from the Heirloom Art and blended more Distress Ink over. The two covers are joined together with split rings.


 Here is how the storage folder opens out to display your stamps.

I hope you've enjoyed this focus on Wendy Vecchi stamps and as they are the Friday Focus product they will have 15% discount for one week !

Wednesday, August 28, 2013

MY STEAMER TRUNK . . .

Hi everyone, welcome back to the kick off of Week 2 of our travel themed challenge called My Steamer Trunk.  We hope the catchy name of the challenge didn't make you think you had to use a steamer trunk in your entry. Nope, it's merely a travel challenge so show us your favorite travel stamps, designer paper, embellishments and what-have-you.  Last week we shared the Frilly side of the team's projects and today we have our Funkie team here with some sensational inspiration.


Sue Carrington - Stamping Sue Style 


Trace - inkypinkycraft


Linda Coughlin - The Funkie Junkie
You still have one whole week to play along.  Can't wait to see where you will be taking us on your travels


**********Week 1 Post*********

Welcome back to Frilly and Funkie and we hope you enjoyed your two weeks By The Seaside - your projects were fabulous.  Since many of us are still in vacation mode, we think it would be fun to travel somewhere else so we are calling the next two-week challenge MY STEAMER TRUNK.  We want you to create vintage or shabby chic projects that depict what comes to mind when you think of a steamer trunk - it can be what you pack in it or where you are taking it, or both.

Our Frilly  design team have created some wonderful inspiration to get you started.

Cec Wintonyk - CW Card Creations
 
Rebecca Deeprose ~ PaperPrimrose

Terry- Cards & Creativity


Linda Coughlin - The Funkie Junkie

Whether you are a Frilly or a Funkie crafter we hope you will join us for this challenge because we would love to see what you create. You may upload your project at any time. If you are using a public forum, please use keyword F&F. Don't forget to provide a link back to our challenge in your post and please, please, please be sure to turn off your Word Verification so our design team can leave comments on your blogs. You are reminded that you can only play in 4 other challenges besides ours.