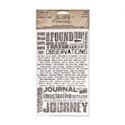
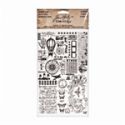
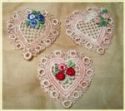
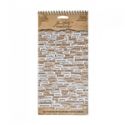
Cec here and today I am presenting the Friday Focus featuring the Melissa Frances line of products. For the next week all the Melissa Frances products will have an extra 15% taken off the already discounted price at The Funkie Junkie Boutique.
My Sister-in-Law has a birthday coming up so I decided to alter a journal for her. I don't know if she writes in a journal but if she doesn't, she can use the pages to write her weekly grocery list - LOL.
I started with a journal I picked up on sale somewhere.
Then I ripped the inside out of it. Because I was going to be recovering it, I had to take enough pages from the back of the blanks so that it would fit again. There were loads and they weren't dated so she won't miss any.
Next I covered it with some pink paper with tiny butterflies from my stash and then re-inserted the inside adding a piece of plain white paper to act as an inside front and back cover.
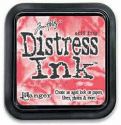
The next step was to take some Worn Lipstick Distress Ink and randomly sponge swirls all over the paper. Then I used the same ink and a Dylusions stencil to add the dots on the front.
Then I made the focal point, a huge rosette from two Melissa Frances ribbons and added a pink button from my stash and a pearl from Melissa Frances.
I then took a Copic marker and coloured some more of the pearls to add to the lace heart and the lace strip.
Next I added a die cut flourish, a whole bunch of paper flowers, a few of which started out as white but were coloured with the Distress Ink and some bead charms that I made myself. To finish it off I added the sentiment, which was inked with the Distress Ink.
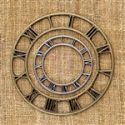
When I started this project I really had intended to use this wonderful frame from Melissa Frances but no matter how hard I tried I could not work it into my design and make it look good so it is still sitting on my desk and I will find a way to use it in some other project in the future.
I hope my Sister-in-Law likes her new journal and I hope you will check out all the Melissa Frances embellishments at The Funkie Junkie Boutique. The following items used in the creation of this project came from The Funkie Junkie Boutique:
Friday, January 31, 2014
Thursday, January 30, 2014
Welcome to today's Guest Designer, Mo !
Today we are welcoming Mo of Almo Craft as our Guest Designer. Mo was chosen by the DT as the winner of the New Year Resolution challenge. So, now it's time to hear from Mo!
I started crafting when I was a young girl. I loved making pretty things from stuff that would otherwise end up in the bin and was usually found altering and decorating egg boxes, jam jars, old tins etc. to store my bits and pieces in in my bedroom.I took up dancing in my teenage years which was my main hobby for a long time. I picked up on my crafting again to fill a void when I retired from dancing about 10 years ago. I don't think I have a particular style, I am quite eclectic and I love using different layers and textures. I was brought up in the country so a botanical theme tends to show up in my work quite a lot. I love birds especially owls, trees flowers and all animals. I dont really plan my projects beforehand, I just tend to go with how I am feeling or thinking at the time.
The project was done with my DH in mind as we were never blessed with children so there is just the two of us. We both love birds and celebrate our Pearl 30th anniversary this year. I wanted to use a variety of textures so I started by stamping onto inked and painted backgrounds and used texture paste through stencils one of which was coloured.
I used die cuts coloured with distress paint and embossing powders to use as a frame, and die cut 2 little birds onto which I used Ranger crackle paste to add interest.
The flowers started as die-cut spirals from inked copy paper which have been rolled up and the petals rolled back to make little roses. The roses were brought to life with a few little dots of glossy accents for raindrops. Die-cut leaves and pearl embellishments were added with the title die-cut sentiment. The 'You and I' are chit chat stickers onto a small pearl flat bead from my stash.
I'm sure you will agree that Mo's project is absolutely gorgeous! If you would like a chance of being a Guest Designer all you need to do is join in with the current challenge.
Saturday, January 25, 2014
Saturday StepXStep
Hi friends, Linda here today with a Saturday StepXStep post. I have made a grungy chic art journal page. At least I think that's what I've made. I've been very slow in embracing art journaling, but I finally decided that I needed some forum for all the playtime pieces I have made. This piece is made on an 4.25x5.5" piece of card stock.
I started by inking up my background by smooching a Worn Lipstick ink pad on my craft sheet, misting it with a mister bottle and then also adding a bit of Heirlook Gold Perfect Pearls mist to the mixture. I didn't mist with much water because I wanted some intensity of color which I did get. Plus I love the splotches of gold mica that the Perfect Pearls leaves. Once I got my reinker mix on my craft sheet, I blotted not dragged my paper through it.
Next I created a large heart stencil from a piece of thin cardboard because I didn't have a large enough heart stencil for my design. I sketched it in pencil and then cut it out with an X-acto knife.
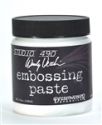
Using a Prima stencil, I applied white Wendy Vecchi embossing paste to the heart which was centered on the sheet. I taped it down with masking tape because I didn't want any movement to spoil the design.
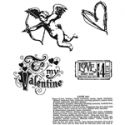
Once dry, I sponged the embossing paste with Worn Lipstick distress ink and then again with Vintage Photo. The Love definition from Love Struck was stamped second generation in the lower left corner.
Did you see how Tim Holtz added some rub-ons to his tag and then sanded them to give a worn look? Well, I guess this is a practice makes perfect scenario because I put down the word "original" and it looked great. Then I tried sanding it with sandpaper from my sanding grip but I guess I sanded too heavy because I sort of smeared. If you know what I did wrong, please let me know. If I ever try it again, I'll use light short sanding stokes.
For my main focal image, I have 4 layers of hearts stacked, including the texture paste one. I trimmed the scalloped edges off this doily, misted it with Heirloom Gold Perfect Pearls and when dry, sponged the edges with Frayed Burlap. Next is a white card stock die cut heart stamped in Potting Soil archival ink with a Wendy Vecchi script stamp. I sponged the edges with Frayed Burlap Distress Ink. This heart was also misted with Heirloom Gold Perfect Pearls.
I topped it off with a Venise lace heart appliqué plus a small tri-bud appliqué, both of which were hand painted with a mixture of reinkers. If you look closely (double click the image for a close up), you will see that I have added several small sentiments using Remnant Rubs.
I wanted to do some heart stamping, but there wasn't time to create a brand new piece so I stamped the 'doodle' style hearts directly onto the page.
The "To My Valentine" sentiment was stamped in black archival and clear embossed, then sponged with Vintage Photo. And that was a wrap.
Thanks so much friends of Frilly and Funkie for visiting us today!

These supplies were used to make the project above and are available at The Funkie Junkie Boutiqe where Ranger/Tim Holtz products and most other brand-name products are always 20% below MSRP.

Friday, January 24, 2014
Friday Focus: Prima
Hello to all! Nancy here! Today I have the great pleasure of hosting the Friday Focus on Prima. I adore all things Prima, so I'm excited to let you know that for the coming week Prima products sold at The Funkie Junkie Boutique have an extra 15% discount applied. You can find them HERE. I recently acquired some of their Vintage Trinkets, Vintage Mechanicals, and Vintage Baubles and it was love at first sight! I'm showcasing several products from these lines and demonstrating how they set the stage for the theme of my project.

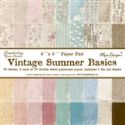
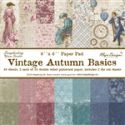
I wanted to create something that looked as though it was discovered in a long forgotten Victorian hope chest, so I went with sepia tones. I call this card 'Timeless Beauty.' Maja's Vintage Summer and Vintage Autumn papers were perfect for what I had in mind. The image of the sweet girl comes from the same collection. I distressed all the edges with a Tim Holtz Distress Tool.
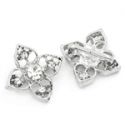
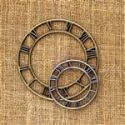
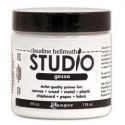
Here's a close up of several Prima products I used. The small clock on the bottom is from the Vintage Mechanical collection, the clock on top is from the Vintage Trinket collection, and the little crystal treasure is from the Vintage Bauble collection. I wanted to make my Mechanicals a bit darker and more 'time touched', so I applied Gesso followed by layers of Ranger Old Paper and Walnut Stain Distress Paint. After everything was totally dry I sanded gently to reveal a hint of the lighter paint layer below. The bauble started out white, but I did a little of altering with Alcohol Ink to age it up.
This is a close up of the opposite corner. Here I used the larger Vintage Mechanical clock and Vintage Trinket gears, aging them in the same manner as the other items. If you look in the background you'll see a new product I received from the Frilly and Funkie Boutique. It's from a roll of Linda's rusty tin wire net. I've been wanting to use this since the moment I first saw it, and it was a perfect accent to my project.
The word 'beauty' is another Vintage Trinket. I did nothing to change it except for a little shaping to add dimension. I kept layering everything up, created some leaves from a Tim Holtz Alterations Die, and some handmade flowers. All the gorgeous Prima embellishments pulled my entire project together. They add the perfect touch to everything!
If you're interested in any of the products I used you'll find a list just below my post. I had such a great time playing with all the Prima goodies and creating this card! I hope it brings a little sunshine and warmth on this chilly winter day. I thank you for stopping by to take a peek and I wish you a wonderful weekend!
Hugs,
Nancy


