Monday, March 31, 2014

Challenge Winners - Neglected Dies

Welcome everyone to the Frilly and Funkie challenge blog for the start of a new week. It's time to announce the winners of  the 'Neglected Dies' challenge. We had so many absolutely fabulous entries for this one and it was great to see you all reaching for dies that had been put to one side and left. Thank you to everyone who took the time to enter. The DT had a hard time picking a winner, but after much debate our final decision went with #27 Nicola aka 'Paper Profusion'.


Nicola's vintage shabby chic card showed a really imaginative way of layering up die cuts. Congratulations Nicola on being our favourite for the 'Neglected Dies' challenge and winning the opportunity to be a Guest Designer here at Frilly and Funkie for a future challenge.


And Random.org has chosen a winner for our $25 gift certificate to The Funkie Junkie Boutique. Our congratulations go to #15 Barb Thompson.

A huge thanks from the Frilly and Funkie team to everyone who took part in this challenge and congratulations again to our winners. Please email Linda at thefunkiejunkie@gmail.com for the codes for the winner's badge and to give us your email address for the Guest Designer details (Nicola) and for the gift certificate details (Barb).

Our current challenge, 'Time After Time', runs through Tuesday, April 8th. We hope to see you entering this time around so that you too can be in with a chance to win. And remember, you can enter up to 10 challenges including ours, and a maximum of 3 entries per person to our challenge. Please remember to link back to our challenge in your entry and mention in your post that you are entering this Frilly and Funkie challenge.

Have a great week!

Saturday, March 29, 2014

Saturday Step X Step - Hey Mr Music man .

Well it is Trace here and my turn to show you a step X step. Now as soon as I saw the new Brett Weldele stamps ..I knew some of them were for me..the quirky style just appealed ...so here is my step X step make using Brett Weldeles' Music Man set . Linda has all the new designs from Brett Weldele in store now ...so why not check them out. Here is the set I have used.
 
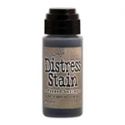
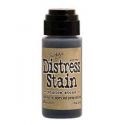
I started with a #10 tag. I applied some distress stain in pumice stone and frayed burlap to my craft sheet , spritzed the tag and swooshed through the stains..drying and spritzing until happy with it. Then set this aside.
I then took a #8 tag and tore off the bottom part , covering with some Tim Holtz paper with music design.This is too dark for the final creation but with a little picket fence distress stain magic it can be toned down see below.
I wanted a hint of the design but not for it to over take the whole finished piece, so a couple of coats of picket fence distress stain and the detail is still visible but not the focus ...
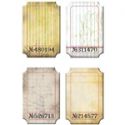
Now for planning out the design of the final tag. I die cut some of the new trellis framework die from the same paper...found an adage ticket which I cut in two and also added some tissue tape to the smaller tag. I always leave my pieces loose until the end , as I like to play around and sometimes change the design but laying them out helps plan the final layout.
Here it is with the main image stamped out, I will fussy him but just using this to get the layout in my mind.
Once happy with the layout I stuck down the trellis using the plain side of the paper and then filled in the gaps using the patterned music side of the paper. I also added the two pieces of the adage ticket and some music tissue tape. For the sentiment I stamped in jet black archival and then tore the bottom part and cut the other edges . I coloured using frayed burlap distress ink and over stamped with the music stamp from the set in frayed burlap too, edging in walnut stain DI.
 Here is the detail , so you don't have to stand on your head!
Now for the main image ..I stamped him in jet black archival and then added colour using my treasured distress markers and water brush.
Now for the final touches...which again before gluing I lay onto the piece and fiddle around until happy.


So here are the details ...
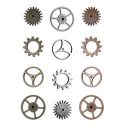
Some rolled music tissue tape inside the little vial wrapped with wire . Some cogs too.
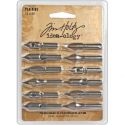
At the top of the tag some seam binding dyed with frayed burlap distress stain, a type charm filled with piece of the same music paper and covered with layer of glossy accents, a gorgeous new idea-ology arrow and also some more cogs x
Well hope you like this make and make sure you hop across to see all the other new goodies in the boutique...there are lots more Brett stamps to choose from as well of lots of other goodies x


Friday, March 28, 2014

Friday Focus - Wendy Vecchi Stamps and Stencils

Happy Friday Frilly and Funkie friends, it's Linda with this week's Friday Focus.  If you've been over to The Funkie Junkie Boutique recently, you will know that I have stocked up on lots and lots of Wendy Vecchi goodies including the new stamp sets, the Stamp It Stencil It sets, stencils, new archival inks and reinkers and all those yummy embossing pastes.  This week, we're doing the Friday Focus on Wendy Vecchi stamps and stencils.  That means all those products, including the new SiSis, are all 15% off our already discounted prices.  Check out the Friday Focus tab at the boutique to see all the great products on sale.  
A couple of new Art Parts products that Wendy Vecchi introduced this season were the binders for her stamps, stencils and a journal cover.  I grabbed one for my stamps and one for my stencils as soon as they came in, but haven't had time to do any artwork on them so this tutorial was a great chance for me to get out my stencils, embossing pastes and inks.  I haven't used these products a lot so this was basically a play session, experimenting with some techniques.  I had some success and some things that I wish I had done differently and will the next time.  I'll point those things out as I go along.

First I decided to see how clear embossing would work under embossing paste (turned out, not so good).  
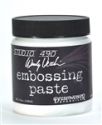
Next, white embossing paste was spread over the Art Parts cover to create a base for the crackle embossing paste to adhere to.  I covered the clear embossed flower very thinly with the white embossing paste hoping it would show through.
Next I decided to try some stamping to see how it would look under the crackle paste.  I know it's a little tough to stamp on the crackle paste so I thought I would see how it looked under the crackle.  (turned out, not so good - again).  

Before I move on, I wanted to mention two products here that I really like.  One is the Tim Holtz Gridblocks.  I started using them a couple of months ago after using the chunkier, heavier acrylic blocks for many years.  Also, I ordered these large #3 Jet Black archival ink pads for the boutique by mistake.  I thought I was ordering the regular sized ones and was a little upset with myself when they arrived and realized my mistake.  But I thought, what the heck, opened one up an started using it.  Now I LOVE it.  It is great for inking up those larger sized stamps!

Next I stenciled on more white paste through a stencil to create some leaves.  
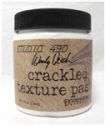
Once the overlay of white past was dry, I slathered on some crackle embossing paste.  I put it on fairly thin because I wanted the crackles to be small.  I wish I had varied the thickness a bit more, putting it on thicker in some areas.  
Once the crackle paste was dry, I inked it with a combination of Potting Soil and Leaf Green archival reinkers mixed with rubbing alcohol.  
Once the color was applied, the edges were sponged with Walnut Stain distress ink and the stamping was applied.  My clear embossed flower got lost under the crackle paste and color.  
I didn't put anything 3-D on the cover because I will be storing it book style on my shelf and I didn't want anything that would pull off or stop it from sliding easily on and off the shelf.  
This binder works fantastic for storing my Wendy Vecchi stencils but it also works great for storing the Wendy background stamps!
Thanks for hanging in with me for my learning experience.  I hope you were able to take away some valuable tips.  Be sure to stop by The Funkie Junkie Boutique and check out our Friday Focus tab to see the sales and also the Wendy Vecchi/Studio 490 tab to take a look at all the Wendy goodies on stock.


Check out these products at The Funkie Junkie Boutique where Wendy Vecchi and most other name brand products are alway 20% below MSRP: