Thursday, January 28, 2016

Our Newest Guest Designer - Amanda Pink

Please join us in welcoming our newest Guest Designer, Amanda Pink from Ink-A-Pink, a Top Pick from our 'Tis The Season challenge.


Hello Everyone , Amanda here ,otherwise known in the blog world as Ink-A-Pink

It is a real honour to be featured as a Guest designer here today. Thank you so much to ALL the  Frilly and Funkie team for giving me this wonderful opportunity to share some of my creativity with you all.

I'm a Yorkshire girl ‘born n bred’ living in England's Steel City, Sheffield. From a very young age I have always had a keen interest in anything Arty or Creative whether it be in the 'doing' or the 'viewing'. I have hand painted T-shirts, knitted, sewed, made cards, painted in watercolours and pencil sketched over the years and though I occasionally still let my pencil take a walk along the page or let the paint flow freely from the brush I now spend most of my time crafting making either cards, journal pages or mixed media projects. I began devoting a lot more of my time to crafting in 2011 and started blogging in February 2015 so despite having an arty background I feel my creative journey is only just beginning as I have so much more learning and playing to do! To quote Picasso - 'Art washes away from the soul the dust of everyday life' - and for me this is never truer!


With the current challenge theme being  ‘Enjoy your Embossing ‘ I have altered an empty glass perfume bottle using Wendy Vecchi Faux granite technique . I have also embellished the  bottle ( isn’t it cute)  with an embossed poinsettia  and my ever fave hex nuts .

I do hope you like my embossed bottle and if you wish to see more you are very welcome to pop by my blog.

* * *

Amanda. thank you for sharing your wonderful little bottle with us.  If you too want to get in on the 'Enjoy your Embossing' challenge and be in with a chance of being a future Guest Designer, you have until February 9th at 11:55 pm EST to create something and we would love to have you join us.

Friday, January 22, 2016

Friday Focus: Texture Fades

Hello, It's Zoe here with Friday Focus at Frilly and Funkie. Friday Focus is when we highlight a particular product or range from The Funkie Junkie Boutique and for the following two weeks there will be an extra 15% discount off that particular product.

This week we're featuring Texture Fades embossing folders!


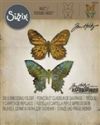
I'm a big fan of Texture Fades and have quite a collection. I love the new dies that come with Texture Fades folders so you can cut and emboss, like the butterfly duo on these cards.


I embossed distress watercolour card stock with the globes texture fades folder and sprayed with antique linen, broken china and walnut stain distress sprays. Once dry I cut numbers and stars from the side and bottom of the card with the Thinlits shape strips dies and mounted metallic card stock underneath.

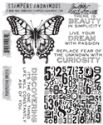
I stamped a sentiment from the perspective stamp set by Tim Holtz onto sticky back canvas with jet black archival ink and coloured with distress markers. I mounted onto metallic cardstock and 3D foam and attached to the card.


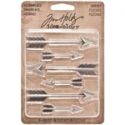
I added a strip of vintage dictionary paper and lace from Tim Holtz Idea-ology range. Finally I added an adornment arrow to the body of the butterfly and stitched the edges with my sewing machine.


For this card I used the mesh texture fades folder and distress inks instead of the sprays to give a less intense colour.


I used another sentiment from the perspective stamp set onto sticky back canvas. I love stamping onto sticky back canvas  because it has a real vintage look.


Texture fades folders are a great way to make an interesting background or bring highlights to the dies with accompanying folders, such as the butterfly duo.


All the products I used are available from The Funkie Junkie Boutique and don't forget that all texture fades embossing folders will have an extra 15% discount for the next two weeks.

Thanks for stopping by.
Zoe 


Wednesday, January 20, 2016

Sing, Sing, Sing

Editor's Note; Before diving back into the latest challenge we have some good news to share here at Frilly and Funkie; we are thrilled to announce that the amazing Kathy Clement (Kathy by Design) will be joining us as part of the Frilly team! Look out for Kathy's fantastic projects coming soon.


It is Cec here and I am the hostess for the second week of the new challenge. I don't know about you but this time of year can be a bit of a let down after all the festivities of the holidays are over and winter is setting in so I decided to create an uplifting theme. I am calling this one 'Sing, Sing, Sing' - pretty interesting coming from me because I can't sing or play an instrument but I do love to listen to music. Here is what the challenge is all about:

Make a shabby chic or vintage project with music as the central theme. You can add musical instruments, music paper, sentiments about music or even vintage images with a music theme.

The team will choose their top four picks with the winner being invited to join us in a Guest DT spot here at Frilly and Funkie and the next three will receive badges to display on their blogs. Everyone who enters and follows the rules will be entered into the draw to have the chance to win a $25 spending spree at The Funkie Junkie Boutique.

The guidelines for entering are simple; create a new vintage or shabby chic project following the challenge theme, link it below to your post (not just your blog) and also include a link back to this challenge in your post. You can combine our challenge with up to 10 challenges (including this one) to be in with a chance of winning. Make sure you follow these rules as unfortunately we have had to eliminate entrants from the prize draws in the past when they have entered too many other challenges. If you are entering through a public forum please use keyword F&F. Also, please be sure to turn off your Word Verification so our Design Team can leave comments on your blogs.

The Funkie side of the team has created some fabulous inspiration for you and if you would like the details of their projects, simply click on their blog name to be taken directly there. Once you have been truly inspired then I hope you will come back and share your creativity with us and show us your musical projects.

Jenny Marples - Pushing The Right Buttons

Sue Carrington - Stamping Sue Style

Zoe Hillman - iGirlZoe


******************************************************
WEEK ONE


And now here's even more inspiration from the first week where the Frilly side of the team created yet more amazing projects for you.

Pamellia Johnson - My Little Craft Things

Cec Wintonyk - CW Card Creations

Nancy Dynes - Tattered Treasures

We'll be back this coming Friday with more on our latest Friday Focus (Maja Design and Pion Design papers) with the wonderful Nancy so make sure you join us for that.


Monday, January 18, 2016

Challenge Winners - Holiday Hues

Welcome to the beginning of a new week and our first winners of 2016 here at Frilly and Funkie! Thank you so much to everyone who took the time to enter our 'Holiday Hues' challenge; there were so many incredible projects to choose from and the Design Team loved seeing all your fabulous entries. After much deliberation we chose our winner, #16 Kezzy.


Kezzy spoiled us with not one, but three stunning mixed media cards which truly got our hearts racing! Make sure you take a closer look on her blog at these as they really do deserve to be admired. Congratulations Kezzy on being our favourite for the 'Holiday Hues' challenge and winning the opportunity to be a Guest Designer here at Frilly and Funkie for a future challenge.

And now for the next three winners of our Frilly and Funkie Top 3 Badges. In numerical order they are... #4 Lainie Michel, #21 Sara Emily and #29 Inkysplatters!!! Please email Linda at thefunkiejunkie@gmail.com for the codes for the Top 3 badges so that you can display them proudly on your blog.


And finally Random.org has chosen a winner for our $25 gift certificate to The Funkie Junkie Boutique. Our congratulations this time go to #8 Autumn (Sew Paper Paint)!

A huge thanks from the Frilly and Funkie team to everyone who took part in this challenge and congratulations again to our winners. Please email Linda at thefunkiejunkie@gmail.com for the codes for the winner's badge and to give us your email address for the Guest Designer details (Kezzy) for the Top 3 badges (Lainie, Sara Emily and Inkysplatters) and for the gift certificate details (Autumn).

Our current challenge, 'Sing, Sing, Sing' runs through Tuesday, January 26th. We hope to see you entering this time around so that you too can be in with a chance to win.

Have a great week everyone!

Saturday, January 16, 2016

Saturday Step x Step - Journal cover

Hello ! Welcome to today's step x step, it's Sue here and I'm back to show you how I put together a journal cover for the 'Holiday Hues' challenge. The book I wanted to cover was orange when I started and I guess that this triggered where I wanted to go with the colour palette.


First of all I cut a piece of thick white card to fit the front cover. Creating on a seperate piece I find easier especially when it comes to stamping.


I tore up pieces of dictionary paper and glued them randomly over the card, trimming back the edges, and making sure that the whole thing had a coat of Glue 'n' Seal. This does what it says in it's name and seals the paper so when the next layers are paint are added the paper doesn't disintegrate. 


Using a baby wipe I blended the autumnal colours of acrylic paints over the cover. The baby wipe allows you to blend different colours together without leaving any streak lines.


To make the cover look aged I used more acrylic paint with the baby wipe and rubbed it around the edges.


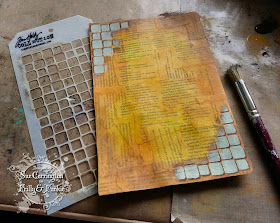
Using the Tim Holtz Tiles stencil I stencilled around the 2 opposite corners first of all with brown acrylic paint, then I 'bumped' the stencil and went over the top with a pale green acrylic paint. This creates a subtle shadow and also gives the effect of 3D.


I stencilled with the Tim Holtz Wild Flower stencil keeping it subtle as I wanted this layers to almost disappear into the background, but not quite, so that it added depth.


The lovely dandelion stamp is by Impression Obsession and I've stamped using Potting Soil Archival ink, building on the layers.


Now to bring an image more to the forefront of the design, I stamped the Poppies stamp from Yvonne Blair Designs by Impression Obsession then painted the flower heads using acrylic paints that are translucent, this allows the layers and more importantly the text from the dictionary paper, to show through.


You'll notice I added a further poppy to the left, this was done by masking off the rest of the stamp so one single flower could be stamped. I then needed to add some stamping to tie everything together, the Tim Holtz Ledger Script stamped with Potting Soil Archival ink was just the ticket !


When I do any design I always think in 3 levels, background, middle and foreground. So now I was happy with the background and middle I needed to work on the foreground. The beautiful flowers from Wendy Vecchi's Artful Life were the perfect solution! I painted some white card first of all then stamped several flowers and painted them, again using acrylic paint and then cut them out.


I arranged the flowers on the front and for the 2 lowers ones I cut up one flower and layered the top part on one flower and the lower part on the other. I think you can just about see it on the above. I then used a Stabilo pencil and a damp paintbrush to create a shadow around the flowers.


The final thing to do was to add a sentiment and the recent addition to The Funkie Junkie Boutique of the Impression Obsession stamps by Yvonne Blair have made me very happy! The sentiments are fabulous and I eventually settled on the one above (mainly because it sat very nicely in the space I had!) Actually there was one more thing that I did and that was to use Wendy Vecchi's gold embossing paste and rub it around the edges with my finger. It gives a really lovely golden, aged sheen!


You can see how the flowers are layered up on the above photo.


One last photo to share with you which shows the wonderful sentiment.

I hope you've enjoyed today's step x step as much as I enjoyed creating it!

Sue
x