Hello and welcome, Zoe here. I am delighted to be your host for this final
Saturday Step by Step of the year with Frilly and Funkie. I created a gift tag for the current "
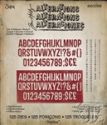
Home for the Holidays" challenge and have an additional tag to share with some personalisation using the Alphanumeric Thinlits dies by Tim Holtz.
(click on each set of images for a closer look)
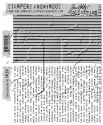
Step 1: Put a few drops of Picket Fence Distress Paint onto a non-stick craft mat and pick up with a brayer. Roll the brayer over a background stamp until covered.
Step 2: Stamp onto a manila tag and dry.
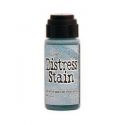
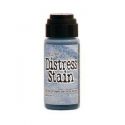
Step 3: Swipe different colour distress stains onto a non-stick craft mat, spritz the tag with water and drag through the Distress Stain. Dry with a heat tool.
Step 4: Blend in Vintage Photo and edge with Walnut Stain Distress Inks.
Step 5: Lay a mini stencil over the tag, secure with tape and tap clear embossing ink through the stencil.
Step 6: Remove the stencil, cover with Sticky Embossing Powder, tap of excess and melt with a heat tool.
Step 7: Rub foil sheets over the sticky embossing powder.
Step 8: Run a Mini Collage Glue Stick along the edges of the tag and immediately apply foil sheets.
Step 9: Die cut "Believe" from metallic kraft core and underlay with black card.
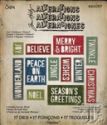
Step 10: For personalisation of your gift tag, use the Alphanumeric Thinlits dies to create your own wordband. This one's for my brother.
Step 11: Adhere the wordband to the center of the tag and attach mini fasteners to the corners. Colour the center of the word with a glitter pen.
Step 12: Stain linen ribbon with Vintage Photo Distress Stain.
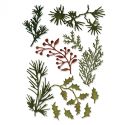
Step 13: Die cut Distress Watercolor Cardstock with the Mini Holiday Greens Thinlits set.
Step 14: Blend in Forest Moss Distress Ink and dry with a heat tool.
Step 15: Add Candied Apple Distress Marker to the berries of the Holiday Greens and once dry, cover with Garnet Liquid Pearls.
Step 16: Adhere the Holiday Greens above the wordband and add Jingle Brads.
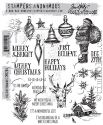
Step 17: Stamp baubles from the Tim Holtz Holiday Drawing stamp set onto Distress Watercolor Cardstock with Black Soot Archival Ink.
Step 18: Colour with Wild Honey and Broken China Distress Markers, blend with a water brush and add glitter with a pen.
Step 19: Fussy cut the baubles removing the loop at the top.
Step 20: Turn the fussy cut images over, add 3D tape and a silver wire loop with a blob of Glossy Accents.
Step 21: Attach a strip of wire through the wire loop and tuck under the wordband. Stick the fussy cut baubles into place with the 3D foam.
I hope you have enjoyed the step by step. Don' forget to take a look at the current "
Home for the Holidays" challenge and have a great weekend.
Zoe x


