Monday, October 30, 2017

Challenge Winners - 'Tis Near Halloween

Hi everyone! Today we announce our latest Frilly and Funkie winners but first, a big thank you to everyone who entered the 'Tis Near Halloween' challenge. We had so many fabulous submissions from you all and the Design Team really enjoyed seeing all the amazing projects when picking our overall winner.


This time we chose #33 Darianna with her wonderful altered book. We loved how layer after layer of texture was used to build the design to such dramatic effect. Congratulations Darianna on being our favourite and winning the opportunity to be a Guest Designer here at Frilly and Funkie for a future challenge. You will be contacted shortly with all the details.

And now for the three winners of our Frilly and Funkie Top 3 Badges for this challenge; the choices in numerical order are... #5 Wendy, #20 Louise and #23 Kerstin! Please email Linda at thefunkiejunkie@gmail.com for the codes for the Top 3 badges so that you can display them proudly on your blog.


And finally we have a randomly chosen lucky winner for the $25 gift certificate to The Funkie Junkie Boutique. Our congratulations this time go to #1 Toni! Please email Linda at thefunkiejunkie@gmail.com for the gift certificate details.

A big thank you again from the Frilly and Funkie team to everyone who took part in this challenge and congratulations to all our winners. The current challenge, 'Trick or Treat' runs through Tuesday, November 7th. We hope to see you entering this time around so that you too can be in with a chance to win. And don't forget to check out the inspiration from the Funkie side of the Design Team which will be shared on Wednesday, November 1st.

Have a great week everyone!

Friday, October 27, 2017

Friday Focus - Carabelle Studio

Hi everyone and welcome! Jenny here to shine a spotlight on the Carabelle Studio range available to purchase at The Funkie Junkie Boutique. I love their deeply etched, cling mounted rubber stamps and embossing folders, all of which have versatile images that coordinate beautifully or as stand alone designs. Linda stocks a great range so it's been a real treat to create lots of cards to inspire you. And with an extra 15% discount applied through November 9th now's the perfect opportunity for you to add to your own supplies.

I'm sharing three ideas here today and will be back next Friday with even more, so remember to check back here for that. First up something floral that is really easy to recreate (click on any image to get a closer look);


Dip white card into diluted Seedless Preserves and Salty Ocean Distress Oxide Inks. Cut a square for your background and die cut flowers and branches from the rest. Emboss the background using the Unite de Mesure Embossing Folder then brayer Dina Wakley's White Acrylic Paint over to bring the design to life. Add subtle highlights by rubbing the Tarnished Brass Distress Crayon across a few spots. Stamp the image from the Metre Steampunk Stamp Set onto white card using Wendy Vecchi's Forget Me Not and Cactus Flower Archival Inks and tear around the top of each piece. Blend Antique Linen Distress Oxide Ink around the edges of the background and ruler images before layering them together. Add the die cut flowers and branches (highlighted with the Tarnished Brass Distress Crayon again) together with lettering cut from Metallic Kraft Card. A few drops of Brass Liquid Pearls finish the flowers perfectly and once matted and layered with coordinating card you have something special to celebrate a birthday.

Now for a less feminine design;


This time dip white card into diluted Cracked Pistachio, Salty Ocean and Vintage Photo Distress Oxide Inks. Cut a square for your background, emboss it using the Rouages Embossing Folder then brayer Dina Wakley's White Acrylic Paint over to accentuate the cogs. Add subtle highlights by rubbing the Tarnished Brass Distress Crayon across a few spots and blend Vintage Photo Distress Oxide Ink around the edges before matting and layering. Stamp and heat emboss the second image from the Metre Steampunk Stamp Set onto card left over from the background (use Emerald Creek Charred Gold Embossing Powder). Highlight the ruler images with the Tarnished Brass Distress Crayon again, cut out and layer onto the background. Die cut cogs from more of the left over background card, embellishing them with more Liquid Pearls and some Metallic Kraft Card/White sentiment die cuts.

Finally for something completely different;


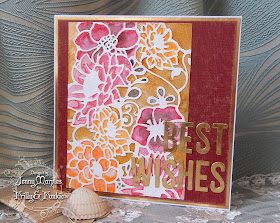
Emboss a piece of card with the Composition Florale Embossing Folder, heat embossing the raised areas with White Embossing Powder. Colour with heavily diluted Dina Wakley Acrylic Paints (Cheddar, Umber, Ruby, Tangerine, Blushing and Gilt) allowing the colours to blend as they air dry. Mount onto Classic Kraft and Metallic Kraft Card, adding a coordinating die cut sentiment to finish.

So that's three ideas to tempt you. I'll be back next week with even more as we celebrate all things Carabelle Studio at The Funkie Junkie Boutique with that extra 15% discount.

Take care of yourselves and get creative!
Jenny


Thursday, October 26, 2017

Guest Designer - Donna Billek

Say hello and welcome to our Guest Designer for the Trick or Treat challenge.  This is Donna Billek of Inkysplatters and she was the Design Team's favourite from the To Everything There is a Season challenge.


I am so excited to be invited back as a guest designer for the latest challenge Trick or Treat! I had a great time creating today’s project and I hope that it inspires you to join in on the challenge!

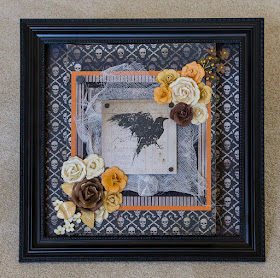
I live in the beautiful state of Colorado – every day I am in awe of the beauty and ruggedness of the Rocky Mountains. Autumn here is short lived but beautiful. Soon the snow clouds will be rolling over the mountains ushering us closer to winter. I live with my handsome, lovely British husband, our clowder (a fancy word for a group of cats), and a pup. I love Autumn and Halloween – it’s just a fun time to decorate and work with things like skulls, pumpkins, leaves, and creepy crawly things like spiders. I love the darker side combined with the sophisticated side! With that in mind, I created today’s project:


On the outside it looks like a frame that could hang on the wall but hidden behind it a shadow box with little bits and pieces of Halloween.


And then another little hidden key!


Happy late Autumn to each of you!  Thank you to the Frilly and Funkie Design team for inviting me back with another project to share with everyone.

* * *
To find out how Donna made this tricky frame with all its treats, just go to her blog

We would love it if you would create a Trick or Treat project to share with us and you have lots of time because the challenge runs until 11:55 pm EST on November 7th and you can find it HERE.

Saturday, October 21, 2017

Saturday Step by Step - Haunted Tiny Houses

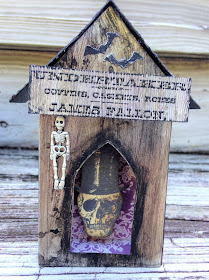
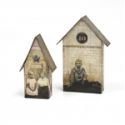
Welcome friends! It's Sara Emily here bringing you today's Step By Step. Since our current challenge is 'Tis Near Halloween, I decided to make some Haunted Tiny Houses. I'll be sharing what I call my Smokey Mercury Glass technique that I've used on these three houses and my journal  covers HERE. This is a pretty lengthy post, so pull up a chair and sit a 'spell'! Click on any photo to make it larger.


These Tiny Houses are so fun to make, and I can see them as a must have for any holiday's decor project. How about tucking in a gift card to give as a house warming gift? I had so much fun decorating them for Halloween after assembling them. TIP: A quick drying, strong adhesive such as Glossy Accents or Multi Medium Matte is a must have for getting those roofs installed. Links to both are below.

If I get bored looking at one side of my houses, I can always turn them around!


I've used a trio of Linda's spooky charms for my houses, and I finished them in no time with a dab of Antique Linen Distress paint, followed by a quick heat gun blast for an enameled look. I added some Distress crayon to the spider web while it was still hot, and it melts right on. Need to stock up on charms? Now's a great time, since Linda has all of her Filigree Metals and Charms in the shop on sale for an ADDITIONAL 15% off until October 26.


Here are the steps I took to make my background papers for one larger Tiny House and the small Tiny House.


1. Die cut Tiny Houses from silver Kraft Metallic card stock.

2. Scuff metallic surface using steel wool pad and wipe off dust residue. I found this to be a very important step to get the results I like. It helps the paint to grab just enough.

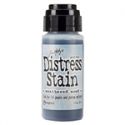
3. Sponge or paint Distress Ground Espresso paint over entire metallic surface. Dry partially and wipe with clean cloth. This will leave you with very subtle color. You can choose how much color to leave, and every one of my projects came out differently.

4. Sponge or paint Black Soot Distress paint over the entire metallic surface. Again you can go heavy or light, depending on your preference. While the paint is still wet, spritz with water either lightly or heavily depending on how much 'swirling' you want to see.

5. Dry with a heat tool, chasing around the watery paint for more swirls.

6. Assemble house.

For this house, I added a few steps before assembling.


1. Die cut the aperture.  Most unfortunately, I placed my card the wrong side down while I was cutting. Too late to turn back now!

2. Smudge crayon around the opening.

3. On a separate 'wall' die cut, heat emboss stamped image repeatedly  in white on kraft side. (For each house you need two walls and one roof.)

4. Blend with Wilted Violet Distress Oxide, splash with water and let dry. Wipe embossed image carefully with clean damp cloth to remove ink.

5. Glue layers of corrugate board behind stamped and heat embossed skull and adhere to back wall. Be sure to do this before assembling the house.

6. After assembling, I realized you could see through the bottom, because of the aperture. Duh! I made a 'floor' for this one by cutting a rectangle shape from my 'test' piece of card. I was pleased I could get it to fit so well and that the pattern lined up nicely with the pattern on the 'wall'. (see photo above) I painted the bottom black to finish.


For the third house, I heat embossed my metallic card prior to applying paint. This is the same technique I used for my JOURNAL COVERS. (On the journal covers I did my Archival stamping first, then heat embossed over them, applying paints, then crayons, last.)


1. Die cut as above.

2. Scuff surface with steel wool and remove dust as above.

3. Heat emboss stamped image using clear embossing powder; I used a border stamp, repeating the pattern.

4. When completely cooled, apply Ground Espresso paint, dry partially and wipe as above.

5. Apply Black Soot paint, then spritz and dry as above.

6. While card is still warm, scribble with Distress crayons--I used Black Soot and Seedless Preserves.

7. Smudge with finger to blend.

8. Splash with water drops and allow to dry or heat dry.

9. Stamp images with Archival ink and heat set.

10. Assemble house.

I haven't tried this with alcohol inks yet, but I think you could get some really cool results with them in place of paints.

Here's how I made my roofs.


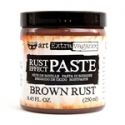
1. Cut rooftops using die and chipboard. Apply brown rust paste; I used a brush.

2. Dry with a heat tool to get that bubbly texture.

3. Scribble with crayon and heat set. I also did the crack where the fold line is and the edges.

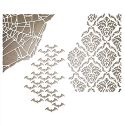
4. For the bat roof, I painted the chipboard die cut with Black Soot paint, dried and applied black crackle paint through the bat stencil. I did one 'side' of the roof first, dried, and did the other side, so the bats faced the right direction viewed from either side.

Here are the houses individually, so you can see the details. The cute/spooky cat is from my stash.


I don't usually cut off little boys heads, but I made a terrible coloring mistake, and it was either off with the heads or throw the ephemera in the trash.


I used Impasto paint to give texture to "boo" and the hand cut witch hat. Is it just my eyes playing tricks on me, or is that a ghostly figure behind the boys? Is that why they look so frightened?


I hope you've enjoyed this tutorial. There's still time to get your craft on and play along with our current challenge 'Tis Near Halloween. You have until this Tuesday, October 24th to wow us with your Halloween or orange, black and purple inspired vintage or shabby project. YOU may be our lucky or chosen winner or one of three Top Picks, so come play along! It would be a grave  mistake to miss this challenge!


Thank you for stopping by Frilly and Funkie today!
Hugs and Blessings!
Sara Emily

The following products used on this project can be found at The Funkie Junkie Boutique: