Saturday, February 29, 2020

Saturday Showcase Featuring Texture Fades & Impresslits Embossing Folders

Happy Saturday, Maggi here to show you how this tag came together using Texture Fades, Impresslits Embossing Folders and some other great supplies from The Funkie Junkie Boutique.


The Details


To create the focal image, emboss a rose using Metallic Kraft cardstock (champagne) and a Texture Fades - Rose embossing folder from Tim Holtz. I love how sturdy this paper is and makes such a great embossed image. The 3-D Texture Fades embossing folders are so awesome as they make such a crisp and deep embossed image. Be sure to lightly mist your embossing folder before running through your machine as that helps to make a really deep impression and run it through your machine several times.

Also die-cut a Fanciful flourish with Tim Holtz's 3-D Impresslits Embossing Folder. These are great as the die cuts and embosses an image at the same time. Mist the two pieces with black mist such as Dylusions. Then lay a paper towel over the two pieces and let the paper towel soak up the excess mist.


Carefully remove the paper towel to reveal a pattern made by the texture of the paper towel. Dry the mist and then frame the piece with a Baseboard Frame or something similar. Set the flourish aside to use later.


Now take a piece of burlap around 9.5" long and 2.5" wide. Stencil on a design with black embossing paste and set aside to dry. I've used Tim Holtz's gingham stencil.


Now let's work on the tag. Cover the tag with design paper, I've used a page from Stamperia's Oriental Garden Collection. The Funkie Junkie Boutique has a great tool set, Ergo Metal Needle File Set - 10pc, that is perfect for sanding paper edges extending beyond the chipboard edge and it's very affordable too!

Then stencil on a additional patterns with Aged Mahogany and Iced Spruce Oxide Inks. I used the Burst and Dots stencils.

Now adhere the burlap along the left side and top with a piece of lace as shown in the photo below.


Now adhere the frame and hole reinforcer (painted black) to the tag. I used dimensional foam tape to pop up the frame. Notice that I cut the bottom left corner off the frame. I did that so that my flowers would sit better against the frame.


Let's "dress up" the metal filigree flowers by adding some embossing powder to the petals. Simpy dab a bit of embossing ink on the metal flowers, sprinkle with metallic embossing enamel and heat. CAUTION: The metal flowers will be VERY hot after heat embossing so allow them to cool before picking them up.

Add a small sentiment to the lower right corner of the frame. I used a Creative Embellishments word Create embossed with Stampendous Aged Ivory embossing enamel.


Finish the tag up by adhering the flourish over the hole and top with a pretty butterfly. Then add the flowers and a small sentiment from the Oriental Garden collection on the right side.


I think you're going to love these 3-D Texture Fades and Impresslits Embossing folders. You can make so many unique projects with them! Thanks so much for spending some of your time with me today!


Tim Holtz Idea-ology Layers & Baseboard Frames
Stampendous Aged Ivory Embossing Enamel
Creative Embellishments Chipboard Word Create
Little Birdie flowers

Monday, February 24, 2020

Challenge Winners - Love Is All Around Us

It is time to announce our winners for the 'Love Is All Around Us' challenge. Thank you to all who entered and played along. There were so many wonderful projects featuring hearts and the team were spoiled for choice when picking the winners.


The team has chosen this fabulous journal spread by #22 Tracey (Hotchpotchcreations) as the overall winner. After creating that gorgeous textured background with all its drips and splattters Tracey took the time and patience required of a surgeon to dissect and reassemble the heart in its many layers to make it look even more realistic! Check out how she did this on her blog here.

Congratulations to Tracey on winning an opportunity to be a Guest Designer at a future date here at The Funkie Junkie Boutique Blog. You will be contacted shortly with all the details.

And now our picks for the three winners of the The Funkie Junkie Boutique Blog Top 3 Badges for this challenge. In numerical order they are #6 Amelia B (Stamped for the Occasion)  #27 Anerijinoustvarjanje (Crafts by Aneri) and #28 Lyla Larimore (A Chief's Wife's Heart's aFire).

Please email Linda at thefunkiejunkie@gmail.com for the codes for the Top 3 badges so that you can display them proudly on your blog.


And finally we have a randomly chosen lucky winner for the $25 gift certificate to The Funkie Junkie Boutique. Our congratulations this time go to #18 Tera Callihan (The Crafty Sugar Addict)! Please email Linda at thefunkiejunkie@gmail.com for the gift certificate details.

Thank you again to everyone who took part in this challenge from all of us here at The Funkie Junkie Boutique Blog  and congratulations to all our winners.

The current challenge 'Leap into the Odd' can be found HERE and runs through Tuesday, March 3rd at 11:55 pm EST so we hope you will join us.

Saturday, February 22, 2020

Saturday Showcase - AALL & Create Blossomed Numbers

Hi there.  It is Cec here to bring you the Saturday Showcase this week.  When you have been checking out all the wonderful new products that are coming to The Funkie Junkie Boutique you will notice that the shop will be carrying some of the AALL & Create line of stamps so since I have a couple of them I thought I would show you what a treat you are in for.  I have made a canvas using the Blossomed Numbers stamp set.


The AALL & Create stamps are clear stamps made of photopolymer and this one is an A4 size - that is one big stamp 8.27" × 11.69" - but it has two distinct images so the first thing I did was cut them apart to make them a little easier to use.

I would recommend that you condition your AALL & Create stamps before you use them for the first time.  I did not do that with one of the pieces and didn't get as great an image as I wanted so I did the smaller section (the one I used for this project) and was much happier with the result. I will follow up with the other image.

Also, in case you are more used to using red rubber stamps and Archival Ink like I was, don't panic when you notice that the Archival Ink tends to really stain the clear stamp but it doesn't harm it.  Just make sure you have some stamp cleaner available to clean your stamps.

OK, so now that the technical stuff is out of the way, here is how to create this canvas:


  • Stamp the smaller image on a piece of good tissue paper (I used Memento Tuxedo Black to ink it this time)


  • Crumple up some inexpensive (a.k.a. cheap) tissue (Dollarama), flatten it back out and glue to the canvas
  • Tear the tissue around the image and glue on next
  • Use Texture Paste (Ranger) through a Checkered Dots stencil (Dylusions) to add texture on opposite corners
  • Cover the canvas top and sides with White Gesso (Dina Wakley)


  • Paint the canvas completely with Lime Acrylic Paint (Dina Wakley)
  • Add a few second generation stamp markings using Jet Black Archival Ink (Ranger)
  • and a number stamp from the Ultimate Grunge set (Tim Holtz)
  • Use a scruffy paint brush to add Evergreen and Peacock Acrylic Paint (Dina Wakley) randomly 
  • Add more marks with Peat Moss Archival Ink (Wendy Vecchi) and a Bubbles stencil (Tim Holtz)


  • Use Jet Black Archival Ink to stamp the flower portion of the stamp twice onto card stock


  • Ink both flower images with Scattered Straw, Wild Honey and Spiced Marmalade Distress Ink (Tim Holtz)
  • Go back and add some Fired Brick DI (not shown in process photo)
  • Fussy cut both flowers


  • Using a Micron Pigma Pen and the Dylusions stencil, draw some circles on card stock and give them some markings
  • Ink the circles with Scattered Straw and Wild Honey DI and then fussy cut them
  • Ink some card stock with Forest Moss DI and then cut numbers using an Alphanumeric Die Set (Tim Holtz)
  • Use some Wild Honey DI to ink a piece of drywall mesh tape
  • Create computer-generated text for a sentiment and ink the pieces with Wild Honey and Fired Brick DI
  • Add some lengths of raffia on top of the stem area of the stamped image
  • Add both flowers popping each of them up with some dimensional foam
If you want to play with these great stamps run over to the shop and get your pre-order in and you should be ready to go soon since February is almost over.

Supplies List:

(FEBRUARY PRE-ORDER) AALL & Create A4 Stamp Set - Blossomed Numbers #109
Dina Wakley Media Mediums - White Gesso MDM41689
Ranger Texture Paste Opaque Matte INK44444
Stampers Anonymous Tim Holtz Layering Stencils - Bubble THS002
Tim Holtz Distress Ink - Wild Honey, Scattered Straw, Spiced Marmalade, Fired Brick, Forest Moss
Dina Wakley Acrylic Paints - Lime, Evergreen, Peacock
Ranger Archival Ink Pad - Jet Black AIP31468
Scor Tape
Ranger ADHESIVE - WHITE FOAM ROLL 1/2" X 1/16"x 2 YDS. IWT40514
Ranger Inkssentials Mini Ink Blending Tool - With 4 Blending Foams IBT40965
Wendy Becchi Peat Moss Archival Ink Pad
8" x 8" Deep Stretched Canvas
Dylusiona Checkered Dots Stencil
Momento Tuxedo Black Ink Pad
Mesh Drywall Tape
Pigma Micron Pen
Tim Holtz Alpha Numeric Die Set 660056

Thursday, February 20, 2020

Guest Designer - Veana R.

Please say hello and give a warm welcome to our Guest Designer for the Leap Into the Odd challenge.  Veana R. can be found at her blog simply named Veana R and was the Design Team's Top pick for the Tic Tac Toe challenge.


Hi ! My name is Zvezdana Rot , aka Veana R. With my husband, teenager with special needs and lovely puppy Gaja, we live in a beautiful house, near the Adriatic sea. I come from Europe, Slovenia - the only country in the world that has the word love in its own name, so let's stay in love.

I love my garden, where I am inspired by colourful and fragrant flowers, I love reading, because one life is not enough for my curiosity and I love scrapbooking, crafting and Mixed Media.

My crafting began 4 years ago with greeting cards for my family and friends. In June 2017 I started writing my own blog and I can say that now I am enjoying my hobby more every day. Today I am here at TFJB Challenge Blog as Guest Designer. Thanks for this opportunity!


The Challenge Theme is Leap Into The Odd! The definition of Odd is unusual or strange. There is something unusual in my card. 


Did you find all the strange and odd things on it? The first one is that the card has a cut line all around , so you can see through and the old paper with text is glued inside the card. Another strange thing is my clock, as it is turned up side down because I wanted the time show 4.30 AM, when roosters are crowing.

There are even more odd items and if you would like to know more, please visit my blog. Wishing you a beautiful day!


Hugs, Veana

* * *
Now that you are curious, pop on over to Veana's blog and check her card out and when you are finished come on back and share your creation with something odd about it. The challenge can be found HERE and runs through Tuesday, March 3rd at 11:55 pm EST.

Wednesday, February 19, 2020

Leap into the Odd

Hi there! Suzz here to bring you the latest Funkie Junkie Boutique Challenge!
2020 is a leap year which means we will have an additional day in February ending on an odd number of days. The definition of odd is "different from what is usual or expected; strange." My challenge to you is to create something odd or unusual. Odd or unusual could include: unusual colors for an images or embellishments (black rose or blue dog), proportions of the size of items to each other (Alice in Wonderland - the small door with a full size Alice), using something for an embellishment that you wouldn't expect (shoe lace or a tea bag). Also you must tell us what is odd or unusual in your project when you share it with us!

The winner will earn a chance to be a Guest Designer at a future date here at The Funkie Junkie Boutique blog, and everyone who enters and follows the rules will go into the draw for the chance to win a $25 spending spree at The Funkie Junkie Boutique. There are also Top 3 Badges for three additional outstanding entries, chosen by the Design Team.

The guidelines for entering are simple; create a new vintage or shabby chic project following the challenge theme, link it below to your post (not just your blog) and also include a link back to this challenge in your post. You can combine our challenge with up to 10 challenges (including this one) to be in with a chance of winning. If you are entering through a public forum (such as Instagram) you'll need to include the words 'Funkie Junkie Boutique Challenge'. Also, please be sure to turn off your Word Verification so our Design Team can leave comments on your blogs. Make sure you follow these rules as unfortunately, we have had to eliminate entrants from the prize draws in the past.

Here is all the DT inspiration to get your creative juices flowing!  To get all the details of their projects and what is odd or unusual about their art, just click on their blog name and you will be taken directly to their blog.

Cec Wintonyk - CW Creations


Suzanne Czosek - Suzz's Stamping Spot

Sizzix Tim Holtz Tattered Butterfly Sizzix TimeKeeper Stamperia House of Roses For The Funkie Junkie Boutique

Sara Emily Barker - sarascloset


Maggi Harding - Scrap, Travel & Bark


Jenny Marples - Pushing The Right Buttons


I hope this has you thinking about what you can create featuring something odd or unusual!   Use the link below to enter and be in with a chance of winning.


Saturday, February 15, 2020

Saturday Showcase - Stamperia House of Roses

Hi!  Suzz here for the Saturday Showcase.  Today I am featuring the new Stamperia House of Roses papers.


These papers are not lacking roses or beautiful romantic images to create beautiful cards.

I started with sorting through the different papers and picking images to use as my focal point and backgrounds to highlight the images. 
 This was my leftover scraps inspired card.  I took some of the pieces that were left from my other cards to assemble a mix of roses and papers.

Steps:

1.  Assemble scraps from other projects.  (Don't forget the die cuts you didn't use or the ribbon bits)
2.  Tear edge of paper.  Distress edges with distressing tool.  Sponge edges with distress ink.
3.   Cut second piece of paper and tear along the same lines as the first paper.  Sponge edges with distress ink.
4.  Layer papers together.
5.  Sponge die cut crochet pieces and attach along edges of the torn surface.
6. Cut out rose images.  Sponge dye ink on edges of cut out images. (This help hides where your cutting might not be as clean. :)
7. Die cut butterfly from excess paper bag.  I used the material that my stamps were wrapped in from my recent order from The Funkie Junkie.
8.  Sponge edges of butterfly with a mix of pink and brown oxide ink.  Stamp script over butterfly.
9.  Roll up extra piece of paper and put a glue dot to hold it together.  Tie twine around and attach to butterfly.
10.  Layer all the flowers and butterfly together with pop dots and tape.

Next I spied this sweet bird and birdhouse on one of the smaller vignettes in the pack. 
 

 I decided to cut out the bird and bird house to layer them with pop dots to add dimension.
 Steps:

1. Cut background panel.  Sponge edges with distress ink.
2. Cut out panel with bird and birdhouse.  Cut out bird and birdhouse.
3. Die cut strips of crochet lace.  Sponge with distress ink.
4. Cut out mini tag and sponge with distress ink.
5. Die Mummy Cloth and flowers with a mix of distress oxide pink and brown distress ink spray.
6. Attach lace trim around the panel with the cut out birdhouse and bird.
7. Attach panel with trim to background panel.
8. Pop dot bird and bird house and place over cut out on panel.
9. Add nest, crochet trim, and flowers to the panel.
10. Add tag with stickers and twine bow.

After that card was assembled I went on to create one more card.


 For this one I was inspired by another panel that I cut out and used as the backdrop to a few other embellishments.


Steps:
1.  Cut background paper.
2.  Apply embossing paste to background using layering stencil. Let dry. Sponge with brown dye ink. 
3.  Cut panel and clock from other sheets of paper.
4.  Sponge all edges with dye ink.
5.  Die cut butterfly.
6.  Spray with distress oxide ink and distress stain spray the butterfly, flowers, mummy cloth.
7.  Roll up scrap papers and glue dot the end to the side and attach to the background.
8. Assemble and layer the images and embellishments.

There is still time to participate in our Love is all around Us challenge until 11:55 pm Easter Time on Tuesday, Feburary 18th.

 Suzz


Products:
Stamperia House of Roses 8x8 Pad 
Idea-Ology Bouquet Findings
Idea-Ology Word Bands
Idea-Ology Tim Holtz Metallic Quotations
Idea-Ology Mummy Cloth
Sizzix Tattered Butterfly
Sizzix Thinlit Dies - Flutter
Stampers Anonymous -  Natures Wonder
Ranger Distress Stain Spray - Ground Espresso
Ranger Distress Oxide Spray - Picked Raspberry
Ranger Distress Oxide Ink - Ground Espresso, Picked Raspberry
Ranger Archival Ink - Jet Black
Ranger Layering Stencil - Doily 
Wendy Vecchi Embossing Paste White
Floral Wood Button 
Prima Say it in Crystals

Monday, February 10, 2020

Challenge Winners - Repeat Performance

It is time to announce our winners for the Repeat Performance challenge. Thank you to all who entered and played along. There were great entries from makers ready to give their 'trash' a second life in art.


The team has chosen this 'Do Nothing Box' by #17 Lyla Larimore as the overall winner. Now this make is so incredible that photos alone don't do it justice so, hoping Lyla doesn't mind, we're sharing her video which explains how it works. And to find out more about how it came together make sure to stop by Lyla's blog post.

Congratulations to Lyla on winning an opportunity to be a Guest Designer at a future date here at The Funkie Junkie Boutique Blog. You will be contacted shortly with all the details.

And now our picks for the three winners of the The Funkie Junkie Boutique Blog Top 3 Badges for this challenge. In numerical order they are #6 ionabunny (Crafty Nomad)  #7 Mary Elizabeth and #12 Elle (Empire of the Cat).

Please email Linda at thefunkiejunkie@gmail.com for the codes for the Top 3 badges so that you can display them proudly on your blog.


And finally we have a randomly chosen lucky winner for the $25 gift certificate to The Funkie Junkie Boutique. Our congratulations this time go to #3 Kathi R! Please email Linda at thefunkiejunkie@gmail.com for the gift certificate details.

Thank you again to everyone who took part in this challenge from all of us here at The Funkie Junkie Boutique Blog  and congratulations to all our winners.

The current challenge 'Love Is All Around Us' can be found HERE and runs through Tuesday, February 18th at 11:55 pm EST so we hope you will join us.

Saturday, February 8, 2020

Saturday Showcase Featuring Ciao Bella Papers

Happy Saturday friends, Maggi here; welcome to another Funkie Junkie Saturday Showcase.  The Funkie Junkie Boutique has a new paper line, Ciao Bella, and I am so thrilled!!  You will love all of their collections, especially if you are a Stamperia fan as I think their designs are often similar.

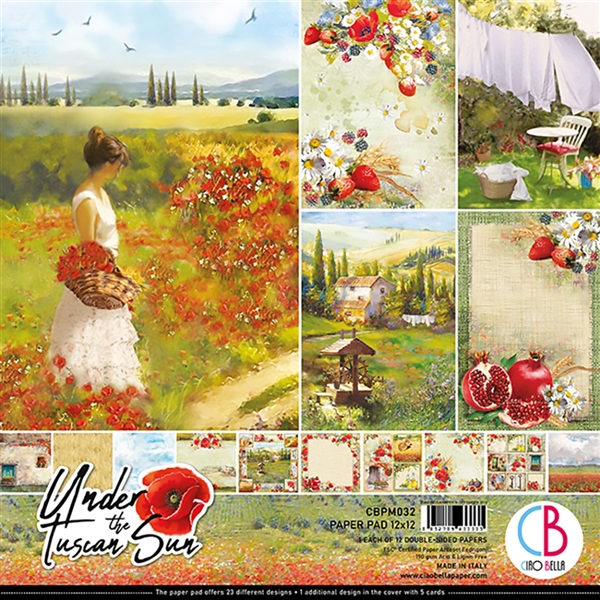
Under the Tuscan Sun

First let's take a look at Under the Tuscan Sun.  WOW, this collection is divine, for me it evoked a feeling of old Europe and made me want to sit on the veranda and sip a glass of wine!  Of course the reds in this collection tug at my heart strings.


The collection includes a page of cut-aparts and I used that as the focal point of this mixed media tag.

To creat the tag, I started with a small Etcetera Tag and masked on a design.  Then I dabbed on some Oxide Ink.  Next I used a burlap stencil and stenciled a burlap pattern randomly on the tag.

Then I tore a couple of pieces of Tim Holtz collage paper and glued to the tag.


Next I a dry brushed Lake Mist paint over the collage paper and parts of the tag.


Next I cut a piece of design paper and I just decided that this funky fold would be cool adhered to the tag.


The final step was to pop up the cut-apart with cardboard and glue to my tag.  Well, of course I had to add some flowers.  I used Little Birdie flowers and gave them a dry brushing of paint so they would blend nicely with the tag.  A few paint spatters, and it's done!


You can see the texture in the background in these two photos.  Onee of my favorite stamps is a sponge stamp that stamps little circles and I used that randomly on the background.


Here's a quick and easy tag that I made using this same collection.  I used a Graphic 45 square tag and covered it with a layer of design paper and topped it with a cut-apart.  Then I stamped on the sentiment, added a couple flowers, 10 minutes tops.  Love that!


Etcetera Tag (I used small size)

Other Supplies
Tim Holtz Lake Mist Paint
Tim Holtz Burlap Stencil
Little Birdie Flowers


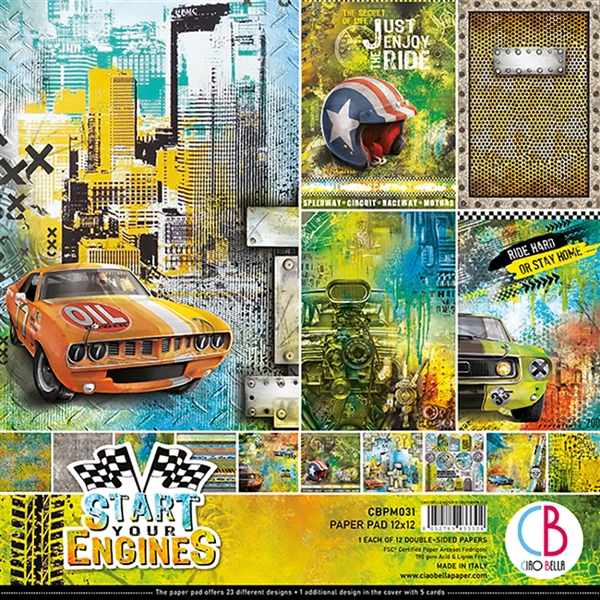
Start Your Engine - A collection for the guys


Ok, time to change gears, LOL!  This is the perfect collection for all the guy layouts.  My husband builds streetrods as his hobby.  The trend in streetrods is "rat rods", i.e. unfinished and ratty looking.  So, here is my husband test driving his rat rod.  I think he had just gotten it drivable when I took this photo.


The paper is so cool and colorful that it really doesn't need a lot of embellishing.  I just masked on a bit of metal markings to mimic the paper under the photo.  I used Tim Holtz's Onyx Metallic Paper under the photo and design paper to break up the bold patterns in the base paper. I liked the shiny look of it, reminded me of oil which is always a part of any garage!

These are chipboard pieces that I heat embossed with Seth Apter Baked Textures by Emerald Creek embossing powders. Love the metallic effect!

It's easy to do multi-colors on chipboard.  I paint on embossing ink and do one color and heat.  After that has cooled off, I paint the next color and so on.  If you want to keep the colors really separate, keep a dry brush near by and brush off any stray embossing powder before heating.


There's a hidden journaling spot here.


Other Supplies:
Creative Embellishments Chipboard Gears
Creative Embellishments Grunge Gear Corner

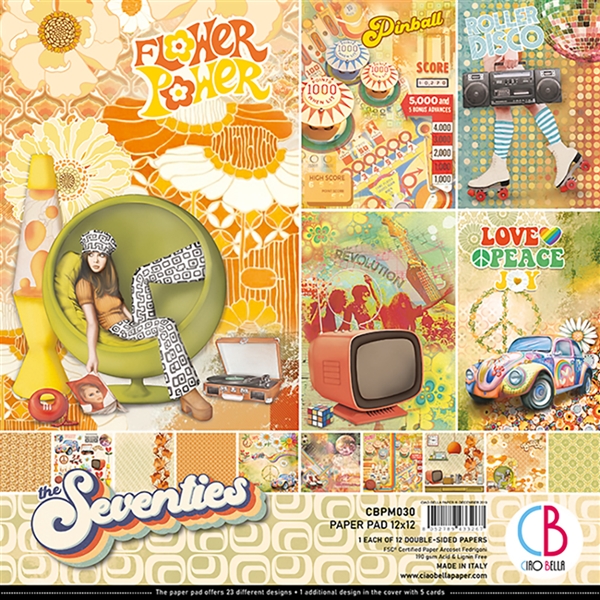
Seventies - A simple layout

I've been waiting for a collection like this for years!  If you were part of the flower child and hippy generation then this collection is for you.  It sure spoke to me!


So do you remember this color of orange?  And there was harvest gold and avocado green.  I do not miss those colored appliances!

This layout is really quite simple, just a few layers or paper, a couple of fussy cuts and that's it.  

Here I am in Key West (a long long time ago 😄) soaking up the sun and obviously posing for the camera!  Behind the photo is a pocket with a tag in it for hidden journaling.


This collection has great patterned papers that will take right back to the 70's and 60's.  I fussy cut this for the title and coated it with Glossy Accents and then popped it up with dimensional foam tape to make it really stand out.


There are lots of fun images to fussy cut.


There are other collections from Ciao Bella at The Funkie Junkie Boutique that are perhaps a bit more traditional and they come in 12 x 12, 6 x 6, and A4 paper sizes.  Stop by the shop and take a peek, I bet you'll find something to love!

Thanks so much for stopping by the blog today.  All of us here at The Funkie Junkie Boutique appreciate the time it takes you.  Wishing you a very crafty day!

Maggi xxoxo