Saturday, October 31, 2020

Saturday Showcase - Stamperia Pink Christmas

Happy Halloween!  How about a Saturday Showcase featuring the beautiful Stamperia Pink Christmas paper?   


I am a fussy cut person. I like cutting out the details with my detail scissors and using them on my art.  The Stamperia papers have a variety of beautiful images with various shades of pink. 

I will usually cut out a variety of the images and set them aside to use as needed with the beautiful patterns used in the background to highlight the focal pieces.  In this project I was using remnants from my second project.  

I actually needed lots of paper for my village so I strategically left focal images I wanted separate and started by curating my village and cutting out the village pieces first.  Then I looked for a piece big enough to create my arch.

I die cut the arch from a thin piece of cardboard and cut it out from the lovely rose background. I then glued the two pieces together and added a touch of white paint to help soften the edges. 


To create a soft background I stamped the lovely tapestry using Versamark ink and embossed with white embossing powder. 

I then sponged Spun Sugar distress oxide ink over the background and edge of the card base.


The next step was to pick and choose which images that I had cut out to use on the arch and where to place them.

With the roses I added more leafy branches behind it as well as using a foam square to add depth.  I also used the pretty metal embellishments to add another texture and shiny bit to the card.  I also added a splattering of white paint to the images to give a softer effect. 

Now onto the village that started me using the lovely Pink Christmas papers. 

The village was inspired by the current challenge "Home is Where the Heart is".  as I was thinking of my family and everyone being home for the holidays. 

I started by cutting out a variety of the houses and purposely using the lovely edges of the paper to give me a visual framing of the houses as well as placing the doors and windows on the houses.  

I had so much fun choosing what windows and doors I wanted on my different buildings.


 After cutting out the pieces I used thin tape to tape along the folded edges.


I then took the front and backs and attached them together.  Then you take the roof and place it on. I found tipping it upside down and pushing along the edges helped getting the roof on securely.


Since my little village was going to be used at the holiday dinner table with place cards I wanted to have bases to hold my housed.  I cut a variety of cardboard bases and covered them with pretty leftover pieces of the paper.  I sponged the edges with a soft distress ink. I also did this with my houses before I assembled them.

Once I assembled the houses I flipped the houses over before I put them on their bases and used a sharp needle to create a hole in the top for my card holder.  I used hot glue on the inside of the house to hold the metal piece in place.  (It took about a minute for the glue to harden and you have to hold it in place until it does. :)


After that I created some little cards to place in the holder using paper bits and the Christmas Remnant Rub Ons. 

My village is all ready for when the family comes home for the holidays!  The village was inspired by the current challenge "Home is Where the Heart is".  You still have plenty of time to join in on the challenge as it runs until November 10th!

Suzz

Products: 

Wednesday, October 28, 2020

Home is Where the Heart is

Hi everyone and welcome. Jenny with you to host the next of our challenges here at The Funkie Junkie Boutique Blog. I'm calling this one 'Home is Where the Heart is'. "What does 'home' mean to you? Maybe it's a place of safety, somewhere you live with family or friends, or a place that holds treasured memories. It may be somewhere you can be yourself or a place from where you can grow and thrive. Whatever 'home' means to you create a project of your choice that represents it."

The winner will earn a chance to be a Guest Designer at a future date here at The Funkie Junkie Boutique blog, and everyone who enters and follows the rules will go into the draw for the chance to win a $25 spending spree at The Funkie Junkie Boutique. There are also Top 3 Badges for three additional outstanding entries, chosen by the Design Team.

The guidelines for entering are simple; create a new vintage or shabby chic project following the challenge theme, link it below to your post (not just your blog) and also include a link back to this challenge in your post. You can combine our challenge with up to 10 challenges (including this one) to be in with a chance of winning. If you are entering through a public forum (such as Instagram) you'll need to include the words 'Funkie Junkie Boutique Challenge'. Also, please be sure to turn off your Word Verification so our Design Team can leave comments on your blogs. Make sure you follow these rules as unfortunately, we have had to eliminate entrants from the prize draws in the past.

The Design Team have created their own projects to give you a kick start;

 Cec Wintonyk - CW Creations

Sara Emily Barker - sarascloset


Suzanne Czosek - Suzz's Stamping Spot


Now it's over to you - we'd love to see your vintage or shabby chic projects for this one. Use the link below to enter them and be in with a chance of winning.

Thursday, October 22, 2020

Guest Designer - Wanda Hentges

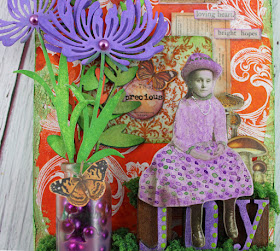
Please say hello to our Guest Designer for the Purple, Orange, Green! Eek! It's Halloween! challenge. Wanda Hentges from Art by Wanda is back with us again after the Design Team chose her project from the Birds challenge as the overall winner.


Hello!!! It's Wanda Hentges here and I am so excited to be guest designing here at The Funkie Junkie Boutique Blog again. I started rubber stamping in 1999 beginning with making cards and then expanding to all things related to rubber stamping and beyond. I enjoy creating cards, ATCs, altered art, mixed media, home decor, jewelry, art journaling, bible journaling, and more. Even when life is crazy busy, just a couple of minutes being creative can make a huge difference in a day.

I've been married for 36 years and we are blessed with children, grandchildren and a great grandchild. Our family all lives close and we get to see the grands often. They are such a joy!!!!


I was happy to see that Sara's theme, although titled "Purple, Orange, Green! Eek! It's Halloween!", could be done with just the colors not including the Halloween part because it is not my "cup of tea". I've created a decor piece using a Mini Etcetera Tag along with Tim Holtz products from Stamper's Anonymous, Ranger Ink, and Idea-ology.


Working on a piece of Mixed Media Cardstock, I stamped all of the scrollwork images, embossed them with white, and then used Spray Stains and Oxide Sprays to add color.

The tag was embellished by adding a shelf using the Etcetera Trims, a "vase" of Wildflower Stems and many Idea-ology products.


You can head on over to my blog to get more details on how this project came together and I hope you are inspired to play along with the challenge even if Halloween isn't your cup of tea.

Heartfelt thanks to Linda and the team for choosing my bird card for the Birds challenge and for inviting me to be a guest again!!

Have a wonderful day!!! Hugs, Wanda

* * * 
Wanda's tag sure showcases how well the three required colours can work together so after you have checked out her details come on back and share a project with us for Halloween or some other occasion. The challenge can be found HERE and runs until 11:55 pm EST on Tuesday, October 27th.

Monday, October 19, 2020

Challenge Winners - Fall Foliage

Today we announce our winners for the 'Fall Foliage' challenge. Thank you to everyone who played along with your beautiful Fall inspired projects.


The Design Team really enjoyed seeing all the entries and chose the set of stunning sketches by #17 Alison Bomber (Butterfly) as the overall winner. We've only shared a few of her gorgeous hand drawn/painted pieces here so a visit to her blog 'Words and Pictures' to see more (including close ups) is highly recommended.

Congratulations to Alison on winning an opportunity to be a Guest Designer at a future date here at The Funkie Junkie Boutique Blog. You will be contacted shortly with all the details.

And now our picks of three additional outstanding entries for the The Funkie Junkie Boutique Blog Top 3 Badges. In numerical order they are #8 Esther Asbury (Shoregirl's Creations) for her fabulous pumpkin camper van card #12 Lisa Hoel (Creative Juice) with her wonderful Autumn Teacup and #21 Elle (Empire of the Cat) who even included fallen leaves on her beautiful journal page . Please email Linda at thefunkiejunkie@gmail.com for the codes for the Top 3 badges so that you can display them proudly on your blog.

And finally for the lucky randomly drawn winner for the $25 gift certificate to The Funkie Junkie Boutique; our congratulations go to #18 Wanda Hentges (Art By Wanda)! Please email Linda at thefunkiejunkie@gmail.com for the gift certificate details.

Thank you again to everyone who took part in this challenge from all of us here at The Funkie Junkie Boutique Blog and congratulations to all our winners. The current challenge 'Purple, Orange, Green! Eek! It's Halloween!' can be found HERE and runs through Tuesday, October 27th at 11:55 pm EST so there's still plenty of time to link your Halloween projects.

Saturday, October 17, 2020

Saturday Showcase - Tim Holtz Chapter 3 Christmas Thinlits Dies

 Hello! It's time for our bi-weekly Saturday Showcase feature. Sara Emily here, and I will be shining a spotlight on five of the Tim Holtz Chapter 3 Christmas dies. These were released in late summer, but fortunately, are still available at The Funkie Junkie Boutique and shipping now so you can get a bit of a head start on your Christmas card stash.

First, I'll share photos of each of the cards and some tips for making them. Then, I'll take you through the easy steps I took to make the backgrounds. Using limited products and working in a simple palette makes quick work of these cards--just what we need as we head into the busy time of year.

***

First, I used the Merry & Bright Thinlits die set to spell out a bold greeting.


Here's an easy tip to prevent tearing delicate die cuts when you are distressing them. After cutting, leave them in the panel you cut them from. Sometime, if they pop out, you may have to reinsert them, like I did here. After sanding and inking them while they remain in the panel, you can remove them and adhere to your card. 

***

Next, I paired the little elf from the Thin Ice Thinlits set with a burst from the Ornamental Birds set and an old (but never yet used) Tim Holtz Mini Globe die. In retrospect, I should have clipped the elf's hands and turned them palm up.


A sticker from the new Christmas sticker book makes an easy sentiment.

Just a little pouncing of an alcohol ink blending tool with a few drops of Gold Mixative and Mushroom alcohol ink gives gold metallic kraft stock a vintage look.

***

The Stunning Snowflake Thinlits die set has so many combination possibilities with just 2 separate dies. So simple, yet so effective on this easy card. The snowflake is very elegant; it needs little else in the way of embellishment, but I added a half pearl to the center.

I stacked up the different die cuts from the set in gold metallic Kraft stock and plain white card and colored the pearl with Gold Mixative and Mushroom alcohol inks before adhering. I used another of the stickers for the greeting.

***

For the next card, I sprayed a kraft panel with Speckled Egg Distress Oxide Spray, and after drying, cut with the Falling Stars die. (This set also comes with three stars in graduated sizes.) I darkened the sky with Ground Espresso ink and layered over a panel of hoarded Deco sheet. This time I used one of the trees from the Thin Ice set along with a shadowed silhouette elf.  I chopped up a few of the stickers to tell the story.


Tip: Don't be afraid to mix your embossing powders. Here, I've mixed some old Soft Fallen Snow powder with Eileen Hull's White Wonder dimensional powder to get the look of  fluffy, shimmering, fresh fallen snow on the trees. Another tip: the tree bough die cuts have embossed markings on them to guide where to apply glue and then stick on the snow die cut pieces. 

***

For my last card, I chose to use the Ornamental Birds set. I cut the birds and one of the ornament layers from a kraft panel I colored with Distress Oxide sprays: Cracked Pistachio and Faded Jeans. All the other pieces were cut from sanded Metallic Kraft Stock in Confections and Jewels. This kraft background is heat embossed with the sparkles stamp (Sparkles & Christmas), Versamark embossing ink and Princess Gold powder.

The sentiment is a stamp from the Modern Christmas set - one of Tim's last year's releases, inked in Faded Jeans Archival ink. I embossed a panel to frame the sentiment  as well as one of the ornaments in Princess Gold powder.

Tip: I use a ruler to help align the tiny die cut dots that make up the ornament hanger. I just add a dot of collage medium at each of the markings so they are evenly spaced and then drop the die cut dot on the medium with tweezers. Don't touch until it's dry.

And now a quick tutorial on how I made my backgrounds:

I spread Transparent Matte Medium on a couple of kraft panels and Translucent Grit paste on a third panel through the Sparkle stencil and allow it to dry thoroughly.

On one of the Transparent Matte Medium panels, I smear  Prima White Gold Metallique Wax over the raised areas with my finger. One the second one, I replace the stencil and apply the wax through the openings onto the raised areas after spraying with Distress Oxide sprays - Speckled Egg and Cracked Pistachio and drying (see first photo in collage directly below for this step). I used this stencil/wax method on the Translucent Grit paste panel as well.

One of the stenciled panels is sprayed directly with Oxide sprays, while the other two were painted. I poured a little bit of the shaken spray out of the bottle and use a paintbrush to apply in layers around the stars. I did get two different results, because I used two different kinds of kraft paper.

Thanks for taking time to visit today to see today's Saturday Showcase featuring Tim Holtz Chapter 3 Christmas Thinlits dies. I hope you are inspired to make some simple Christmas cards to have some on hand for the holidays.

There's still time to enter the current Funkie Junkie Boutique Blog challenge 'Purple, orange, green! Eek! It's Halloween!' to be in with the chance of winning one of the great prizes. We look forward to seeing your fabulous creations. Happy Crafting!  Sara Emily

These products can be purchased at The Funkie Junkie Boutique:

Tim Holtz Distress Ink Pad - Frayed Burlap, Ground Espresso
Tim Holtz Distress Oxide Spray  - Speckled Egg, Cracked Pistachio, Faded Jeans

Wednesday, October 14, 2020

Purple, Orange, Green! Eek! It's Halloween!

Hello! It's Sara Emily here, and I'm hosting our new challenge, "Purple, Orange, Green! Eek! It's Halloween!" Please read the description, because I'm giving you two different options with this one, because I know and respect that not everyone is a fan of Halloween.

 "I love Halloween, and I would love to see your vintage or shabby chic Halloween creations, whether it be a card, tag, canvas, or any other make! If Halloween is not your cup of tea, simply use the colors purple, orange and green on your project to play along."

The winner will earn a chance to be a Guest Designer at a future date here at The Funkie Junkie Boutique challenge blog, and everyone who enters and follows the rules will go into the draw for the chance to win a $25 spending spree at The Funkie Junkie Boutique. There are also Top 3 Badges for three additional outstanding entries, chosen by the Design Team.

The guidelines for entering are simple; create a new vintage or shabby chic project following the challenge theme, link it below to your post (not just your blog) and also include a link back to this challenge in your post. You can combine our challenge with up to 10 challenges (including this one) to be in with a chance of winning. If you are entering through a public forum (such as Instagram) you'll need to include the words 'Funkie Junkie Boutique Challenge'. Also, please be sure to turn off your Word Verification so our Design Team can leave comments on your blogs. Make sure you follow these rules as unfortunately, we have had to eliminate entrants from the prize draws in the past.

The Design Team is sharing these wonderful projects to get you started. To see all the details of their projects, just click on their blog name to be taken directly to their blog.

Suzanne Czosek - Suzz's Stamping Spot

 
Cec Wintonyk - CW Creations


 Sara Emily Barker - sarascloset


Now it's over to you - we would love to see your shabby chic or vintage Halloween or purple, orange and green projects using your crafty supplies! Use the link below to enter them and be in with a chance of winning. Happy crafting!

Thursday, October 8, 2020

Guest Designer - Jo of Let's Art Journal

It is time to say hello and welcome to our Guest Designer for the Fall Foliage challenge. Meet Jo of Let's Art Journal who was the top pick from the It's a Wrap challenge.


Hello Everyone, I’m so delighted and honoured to be here as Guest Designer today.

My name is Jo and I blog at Let’s Art Journal. If you haven’t met me before, I live by the sea in the North West of England with my hubby. I’m passionate about art journaling as well as everything mixed media! Art journaling allows me to express myself in words and pictures and as I’m often inspired by things I see and do my pages are often happy reminders of my life too.


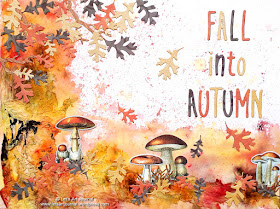
This Fall Foliage challenge was perfect as I love the leaves and colours of autumn so my page was inspired by our woodland walks that we enjoy this time of year. As I also wanted to combine both the American and UK names for this season, I added the saying “Fall into Autumn”.


It was lots of fun creating this page and I hope that you like all the autumnal colours, texture, fungi and fall foliage! To see more photos and find out which products and techniques were used please visit my blog here.

Thanks so much for having me as Guest Designer. I hope that you are inspired by the challenge too and are able to join in the fun!

Thank you. Jo x

* * *

To get all the details on how Jo created this gorgeous fall art journal page just pop over to her blog. Once you are finished come on back and share a fall creation with us. The challenge can be found HERE and runs until 11:55 pm EDT on Tuesday, October 13th.

Monday, October 5, 2020

Challenge Winners - Staying in the Background

It is time to announce our winners for the 'Staying in the Background' challenge. Thank you to everyone who entered and played along with your wonderful backgrounds.


The Design Team really enjoyed seeing all the entries and chose this beautiful card by #29 Zoe (This Little Place) as the overall winner. Zoe's background becomes more dimensional and clever the closer you look at it and we recommend you take the opportunity to see how she made it on her blog here.

Congratulations to Zoe on winning an opportunity to be a Guest Designer at a future date here at The Funkie Junkie Boutique Blog. You will be contacted shortly with all the details.

And now our picks of three additional outstanding entries for the The Funkie Junkie Boutique Blog Top 3 Badges. In numerical order they are #9 Jane Tyrell (Jane's Journal) #20 Chris (pearshapedcrafting) and #32 Elle (Empire of the Cat). Please email Linda at thefunkiejunkie@gmail.com for the codes for the Top 3 badges so that you can display them proudly on your blog.

And finally for the lucky randomly drawn winner for the $25 gift certificate to The Funkie Junkie Boutique; our congratulations go to #24 Senna (be creative)! Please email Linda at thefunkiejunkie@gmail.com for the gift certificate details.

Thank you again to everyone who took part in this challenge from all of us here at The Funkie Junkie Boutique Blog and congratulations to all our winners. The current challenge 'Fall Foliage' can be found HERE and runs through Tuesday, October 13th at 11:55 pm EST so there's still plenty of time to link your Fall/Autumn  projects.

Saturday, October 3, 2020

Saturday Showcase - Eileen Hull Designs Sizzix Scoreboards Die 'Teacup, 3D & Spoon'

Hi everyone and welcome to another Saturday Showcase, the Design Team's chance to share tutorials and products available from The Funkie Junkie Boutique with you. Following the official launch of the new Sizzix Chapter 4 dies this week today's spotlight falls on one of them, Eileen Hull's 'Teacup, 3D & Spoon' Scoreboards L Die. Both this and Eileen's second new die, 'Box, Post' Scoreboards XL Die are available now from The Funkie Junkie Boutique.

In the UK teacups are something of a national institution - we love a good 'cuppa' especially from a vintage teacup, traditionally decorated with floral patterns. So for this showcase I've created three of Eileen's new teacups in this vintage style that could be used to hold gifts like special teabags and maybe some cookies (biscuits).


Let's start by looking at what you get as part of the 'Teacup, 3D & Spoon' Die; below are the various shapes that can be cut with just one pass of the die, in this case cut from sturdy mount board.


In order to make a teacup like the ones shown at the beginning you'll need to cut two cup pieces and a supporting piece for the middle. I painted mine with white gesso before adding the decoration.


For the first teacup I stamped the image from Wendy Vecchi's 'Bouquet' Stamp It Stencil It set using Archival Ink on the front of one cup and the back of the second, colouring the flowers and petals with Seth Apter's Izink Pigment Inks.


To create a 'gilded' border around the top and bottom of the teacup, so often seen on traditional patterns, I took a spare teacup shape and used it as a template to draw a line about 1/4 inch from the top rim and up from the bottom rim with a gold pen. I then coloured above the top line and below the bottom line with the 'Cotton Candy' Izink Pigment Ink.


After embossing the stamped sides of both teacups with Eileen Hull's 'Glistening Glass' Molten Dimensions Embossing Powder I glued the pre-scored supporting piece in place at the bottom of the first cup as shown below. When set I glued the second cup to the other side of the supporting piece.


Moving on to the second cup I went with a very traditional blue and white look. Once again I used a spare teacup to mark a 1/4 inch border at the top and bottom of each cup, masking these areas off with washi tape before stamping them in blue Archival Ink with the image from Wendy Vecchi's 'Garden Fresh' Stamp it Stencil It set.


After drawing over the lines with a gold pen I embossing the stamped sides of both teacups with Eileen Hull's 'Glistening Glass' Molten Dimensions Embossing Powder I glued the pre-scored supporting piece in place at the bottom of the cup pieces as shown already. 


For the third cup I drew on the borders again and stamped the image from Wendy Vecchi's 'Rose' Stamp It Stencil It set with light grey Archival Ink using a stamping platform. This time I painted around the rose with 'Turquoise' Dina Wakley Media Acrylic Paint and painted the rose itself with 'Gilt' Dina Wakley Media Acrylic Paint. The rose was then over stamped with black Archival Ink and the border lines re-traced with a gold pen.


Once again I embossing the stamped sides of both teacups with Eileen Hull's 'Glistening Glass' Molten Dimensions Embossing Powder I glued the pre-scored supporting piece in place at the bottom of the cup pieces.


The matching teaspoon for the first cup was covered with white gesso like the teacups and then I drew lines with the gold pen, filling in the spoon bowl shape with the 'Cotton Candy' Seth Apter Izink Pigment Ink. I then clear embossed the spoon as before.


The second teaspoon was embossed with Eileen Hull's 'Golden Rod' Molten Dimensions Embossing Powder. Once heated until molten I pressed the 'Garden Fresh' stamp onto the handle to create the patterning seen below.


After covering the third teaspoon with white gesso I painted the handle with the 'Turquoise' Dina Wakley Media Acrylic Paint, drawing borders at the top and bottom with the gold pen. The handle was then embossed with an embossing folder and I coloured the raised pattern with a black pen before clear embossing the whole spoon like the first one.


Finally I used one of the teabag die cut shapes, cutting out the joining part and gluing the two main pieces together with some string between before painting it with 'Sand' Dina Wakley Media Acrylic Paint. The thank you words and little dots come from the Wendy Vecchi MAKE ART Stamp/Die/Stencil Set - 'Thank You'.


So with all the steps complete here are the finished teacups;


Thanks for visiting to catch today's Saturday Showcase tutorial featuring Eileen Hull's new 'Teacup, 3D & Spoon' Die.

There's still time to enter the current Funkie Junkie Boutique Blog challenge 'Fall Foliage' to be in with the chance of being a Guest Designer here. We look forward to seeing your amazing creations.

Jenny

Products used to create this junk journal are available from The Funkie Junkie Boutique and are listed/linked below.