Wednesday, May 8, 2024

Lisa's Out of the Vault

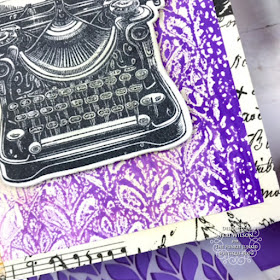
Hello Funkie Junkie fans, Lisa Hoel here! Our focus this time is all about the newest Vault release of Tim Holtz Sizzix dies. They've taken die designs from the past and reimagined them by mixing, matching and changing the sizes. Whether you missed them the first time around or just want to expand the possibilities, these die sets are handy! I used the Vault Boutique and Vault Matchbox sets to create a pair of Mother's Day slimline cards for my Mom and Mother-in-law.

Lisa Hoel for The Funkie Junkie Boutique  #creativejuicefreshsqueezed   #tim_holtz #thefunkiejunkieboutique

I used Gel Press prints from my stash as the backgrounds and layered on stamping and die cut elements. You can find the supplies over at The Funkie Junkie Boutique!

Thanks for stopping by. Keep an eye here on the Funkie Junkie Boutique blog, TFJB Inspiration Ave to see all the inspiring content each week. Don't miss it

Supplies used:

Tim Holtz Stamp Sets - Tiny PrintsCrochet Trims, Ledger Script
Tim Holtz Die Set - 
Vault Boutique
Tim Holtz Die Set - Vault Matchbox
Tim Holtz Die Set - Vault Wildflowers
Tim Holtz Die Set - Flower Field
Tim Holtz Die - Trinket Frames
Distress Collage Medium Matte
Ranger Archival Inks - various

Tuesday, May 7, 2024

Lyla's Out of the Vault

Linda- I totally started this project last night. The one I did was supposed to match with the new TH Dies, and I didn't think it did well enough. My Muse was more pleased with this idea.


Sizzix Vault Dies are back- with the next chapter in a long-awaited line of old favorites from Tim Holtz! Lyla here, introducing one of my new "go-to" Thinlits Set called Watch Gears- straight out of Tim's Vault, and this one is the bee's knee's! I'm sure everyone is excited about the entire Vault set, but we're going to dole them out to you over the next two weeks, with each Design Team Member taking their turn to bring you the latest in Inspiration Ave! Let's get going with this first one; it's simply awesome!


I grabbed another one, but they all went so FAST!
I wasn't able to get a third set before they were all gone.
But, hang on, Sizzix is working hard to get more going.

Meanwhile, here's a list of LINKS to help you find things I used for this make:


I used Th 3D Embosser Mechanics with some Foundry Wax onto a black cardstock,
then trimmed it down to a tag shape.


I sanded the cardstock down a bit then trimmed a sheet of Backdrops Vol 5.


Now I had a main tag and made my own reinforcers for the top.
I also used some leftovers and ragged it all out with the TH Distresser,
then aged it all with some Distress Oxide in Vintage Photo and Black Soot.


TH Out of the Vault Watch Gears... I open mine up and count them out to make sure it's all there.


It's really going to be COOL not to have to haul around the Bigz Dies,
but it's also cool to still have them for heavy duty cutting!


I got busy with a lot of scrap paper stock- just cutting what I wanted.


I make a plan with the dies, take a pic of it and refer to it as needed.


I used my TH Glass Media Mat to space it out evenly.


I used real metal Long Fasteners to secure the gears into the watch.


Then I used Dura Lar for the glass and taped the sides with TH Tissue Tape (retired).

FRONT


A bow from ragged, Distress-Oxided old ribbon.


IdeaOlogy items- some retired.


The gears are all in pastel which I kept unaged/unDistressed. 
My Grandbabies are the gears that keep me going all the time.


Some old TH Ticket Booth


The BACK: The Grandbabies are all characters of many faces & talents that keep me laughing!


That's a wrap for this production!
THANK YOU for joining me for some fun entertainment!

Be sure to check back in at the Inspiration Ave Blog
for more Tim Holtz Vault Die inspirational makes
from TFJB's Design Team- coming up in the next few days!

And don't forget to pop in to The Funkie Junkie Boutique
for all your crafting needs at a price that can't be beat!

Until next time...

Stay Safe &
HAPPY BLOGGING!!

Monday, May 6, 2024

Teri's Out of the Vault

 Teri Wilson - TerisMailbox

Greetings friends. It is Teri with TerisMailbox back for more Tim Holtz fun for The Funkie Junkie Boutique. Just released are four new Vault Dies and I am playing with the Boutique set!

Loving this very aged vintage look created with this great set!

I do have a video here with the details:

Create the Card Base

Start with a piece of A2 size cream or natural Cardstock. Smoosh Worn Lipstick, Spun Sugar and Vintage Photo Distress Inks on a craft mat. Spray with water, run your fingers through to mix and start dipping and drying. Once you are happy with the results, set aside to completely dry. Once dry, trim to 4.0 x 5.25 inches and attach to a craft A2 card base.

Die Cut the Components

Die cut the doily and three banners using Kraft cardstock and the frame with cream cardstock. You will want three to layer. Ink blend the Worn Lipstick and Spun Sugar on cream cardstock and die cut at least 6 of the swirls.

Assemble the Card

Glue the three frames together. Find a photo from Photo Booth. Trim to fit the frame and glue to the frame. Attach the swirls round the frame with the swirls on top and the base beneath the frame.

Add brown ink splatters to the Kraft doily and glue slightly above the middle of the card. Glue the framed portrait on top.

Using CMS 394 Tiny Text stamp and Ground Expresso Archival Ink, add a sentiment to one banner and then glue three together. Use a score board to score folds so the center portion pops up. Use a small piece of red tape on each end to secure the banner in the lower area of the card.

Finally make and use a rose to decorate the top of the frame.

Here is a Home Decor Piece I made at the same time.

I do have another video on it if you are interested: https://youtu.be/K6EjTkaw4fE.


Products Used for the Vintage Card

All of my channel and affiliate links are listed in the Profile on Instagram. I would love to count you as a subbie friend. I appreciate your support. By using my links, I earn a small commission at no cost to you.

Thanks so much for stopping by today! I'd love to have you follow/subscribe on my social media sites InstagramFacebookBlogger and YouTube all named TerisMailbox. Be well. Be creative!


Friday, April 26, 2024

Suzz's Permanently Perfect

Hi!  Suzz here. I hardly ever do perfect... Part of the reason I love the vintage grunge style of crafting is that I don't have to worry about that extra smudge. :)  I love archival inks and the variety of colors along with the ability to not smudge anything and dry quickly!  

The beauty of the archival ink is the ability to use other mediums which you can blend and spray without losing the sharpness of the inked image. I also love the various colors which can be paired with watercolors to change the way the image looks.  I decided to use the same image and ink it up with three different archival inks and color the image with the same watercolor to show  how the outline ink can change your art and how it appears. 


I started with three scraps of paper that I cut into a tag shape.  I then stamped the flower with three different archival inks.  

For my next step I used a pink watercolor pencil and a water brush to add shading to the flowers. 

I loved the effect of all three flowers and how they looked different just because of the ink used on the outline stamp.  The watercolor pencil was the same for all three and yet each flower looks like they have a different shade of pink and green.  

I also used the archival ink to ink up the edges of the tag all around just create a nice crisp line.

Then I took each flower and created a different background  using a mix of distress inks, distress ink sprays, and archival inks to add texture and interest. 

On this first tag I stamped the flower on a scrap paper and cut the flower head out and laid it over my tag's flower.  I then stamped the field label using black archival ink in an alternating pattern.  I then used post it notes to mask off the rectangles to sponge in distress oxide ink in the alternating rectangles. 

I finished with a stamped sentiment which was cut and applied at different angles.  

For the next tag I used a new stencil with the same distress ink to add a little visual effect in the background of the tag. 

I could have used the mask but because I was randomly applying the distress ink, I just sponged around the flower.  

I also used a watercolor pencil (black) to add a hint of shading around my flower to make it pop from the paper.  I used a water brush to soften the shading of the black watercolor and was able to do this because the archival ink will not respond to the water brush. 

I added a hint of distress spray inks to the background and use the same effect on another piece of card-stock to stamp my sentiment and apply. 

For my final tag I wanted to use the archival ink to add the pattern to the background of the tag.

I stamped the pattern using the same archival ink.  The pattern started to take away the focus on the flowers so I smeared watered down white acrylic paint to soften the effect of the archival ink.  

I added shading again with the black watercolor pencil around the outlines of the flowers to make them really stand out.  I finished with a splatter of distress oxide stain spray spritzed onto my craft mat and picked up randomly onto my tag. 

I hope this inspired you to try out your various archival inks in a fun way.  I wanted to share with you the first thing I did when I received the new archival inks.

I always smear a solid section of the ink pad onto a scrap piece of card-stock.  (you also can use labels which already are ready to stick on your ink pad container)

Then I cut strips and tape them to the ends of my ink pads.  Because I have a wonderful ink rack my husband created for me that stores all my archival inks that looks like this: 


It makes it really easy to pick out my ink pads whether they are in the rack or stacked up on my craft desk. 

Suzz

Products:

Wednesday, April 24, 2024

Lisa's Permanently Perfect Tags Featuring Ranger Archival Inks

Hello Funkie Junkie fans! Lisa Hoel here. Our focus this time is centered on the magic of permanent Archival Ink from Ranger. This ink is a real work horse and definitely a supply you want to have in your crafting arsenal. It is the perfect ink to pair with all sorts of mixed media techniques. 

Here is my first mixed media tag for the theme:
This layered tag background features diecuts, Distress Crayon and lots of stamping using Archival Ink. (tutorial below)

Let's take a look at the how-to…
Step 2 - I wanted some stamped images to peek through the die cut areas so I stamped with Archival Ink onto the bottom layer tag.
Step 3 - I glued the two tag layers together and also sealed the top surface with Matte Distress Collage Medium. (Sealing is needed for the next step.)
Step 4 - Using Distress Crayons, I added color to the tag. I blended the Crayons with a damp finger, making sure to get into all the die cut nooks and crannies. I stamped over the background using the new set Curiosity Shop plus various Glitch stamp sets.
Tag #2:
Lisa Hoel for The Funkie Junkie Boutique  #creativejuicefreshsqueezed   #tim_holtz #thefunkiejunkieboutique

As I was hunting around in my technique folder for ideas using Archival Ink, I found this one from Tim Holtz's Creative Chemistry classes (way back when!) You stamp with Archival Inks onto Glossy paper as a resist. Tag number two:

Lisa Hoel for The Funkie Junkie Boutique  #creativejuicefreshsqueezed   #tim_holtz #thefunkiejunkieboutique

Tag #1:
Step 1 - I cut two big tags out of Mixed Media Heavystock and then die cut patterns out of the top layer tag.


Step 5 - Tim has shared in the past how to add color when you make labels using the Vintage Labels Die Set. It's easy! Use a brayer to add Archival Ink directly to the die before you cut. The ink will transfer onto the paper as you run it through your machine. I do like using the Distress Brayer for this. I have other brands of brayers but the Distress brand seems to be best at picking up the Archival Ink. Experiment with what you have to see what works!


Step 1 - Using Archival Ink, stamp with bright colors onto glossy paper. Heat dry the ink to make sure it doesn't smear.

Love the new Crochet Trims stamp set!

Step 2 - Blend a darker Distress Ink color over the background. Buff off the extra ink with a soft cloth. The Archival Ink acts as a resist. Cool background! You can stamp over the background with additional images and using more Archival Ink.


Thanks for stopping by. Keep an eye here on the Funkie Junkie Boutique Blog, TFHB Inspiration Ave. to see all the inspiring content each week. Don't miss it…

Supplies used:

Tim Holtz Stamp Sets - Curiosity ShopCrochet Trims, Inventor 3, Glitch 1, Glitch 2, Mini Glitch
Tim Holtz Die Set - Vintage Labels
Tim Holtz Die Set - Mixed Media #6
Ranger Distress Mixed Media Heavystock
Ranger Gloss Paper
Distress Collage Medium Matte
Ranger Archival Inks - various
Idea-ology Paper Dolls Portraits
Idea-ology Paper Dolls
Idea-ology Ephemera

Monday, April 22, 2024

Teri's Permanently Perfect Butterfly Card Featuring Ranger Archival Inks

Hello friends! It's Teri with TerisMailbox posting for The Funkie Junkie Boutique! I had no idea you could ink smoosh with Archival Inks until I watched a video with Juliana Michaels. Our theme for TFJB Inspiration Avenue is Permanenty Perfect using Archival Inks.


This colorful card has multiple layers of inking, stamping and embossing as well as a three dimensional butterfly!

I have a video HERE if you prefer to watch the process.


Start with a coated cardstock (Kromacote is perfect). Using a glass mat, smoosh the desired colors of Archival Inks onto the glass. Spritz with 91% alcohol and begin dipping the shiny side of the cardstock down. Use your heat tool to dry in between. Make sure your area is well ventilated.


Use Faded Jeans Archival Ink on the top 2/3 of the panel, and Peeled Paint on the Lower 1/3, drying in between dips. Note while these specific colors are currently not in stock, there are a couple other archival ink sets that would be perfect!

Stamp one of the Vines and Roses Backgrounds using Faded Jeans Archival ink and Hickory Smoke Ink the smaller Ledger Script Stamp. If you do not use a block, it is easy to partially stamp the image.


Finish the stamping with one of the blooms from The Botanical Collage Stamp using Mermaid Lagoon Archival Ink.

Use Embossing Ink to stamp one of the Wildflowers from CMS253 and add Fossilized Amber and Rustic Wilderness Embossing Glaze. Heat set to finish.

Die cut the butterfly base from the Pink and Blue section of the rainbow smooshed panel. Cut the detail layer from White Curious Metallic cardstock.


Glue together along the midline. Fold in the center and use a pencil to curl the wings, adding dimension. Add glue to the bottom along the midline and glue to the base panel.

Finish the card up by attaching to an A2 card base and adding Label Stickers (Thought Collection).


Be sure to check out all things Tim on The Funkie Junkie's Boutique page! Too much fun!

All of my channel and affiliate links are listed in the Profile on Instagram. I would love to count you as a subbie friend. I appreciate your support. By using my links, I earn a small commission at no cost to you.

Thanks so much for stopping by today! I'd love to have you follow/subscribe on my social media sites InstagramFacebookBlogger and YouTube all named TerisMailbox. Be well. Be creative!

Products Used
Label Stickers - Thoughts
Fossilized Amber Embossing Glaze
Rustic Wilderness Embossing Glaze
Faded Jeans Archival Ink
Peeled Paint Archival Ink
Hickory Smoke Archival Ink
Mermaid Lagoon Archival Ink
Dusty Concord Archival Ink
Picked Raspberry Archival Ink
CMS 235 Wildflower
CMS 298 Vines and Roses
CMS 241 Ledger Script


Sunday, April 21, 2024

Janna's Permanently Perfect Butterfly Card Featuring Ranger Archival Inks

This week at TFJB Inspiration Ave we are creating to the theme of “Permanently Perfect.” Here we are highlighting Ranger Archival Inks. For this card I am featuring three different ways to use archival inks.

If you would like in-depth step by step detail click the video link here.


Materials used:  Distress Archival Inks Salvaged Patina, Prize Ribbon, Evergreen Bough, Villainous Potion, and Black Soot, Distress Reinkers Mermaid Lagoon, Prize Ribbon, Specialty Stamping Paper, CMS213 Perspective, Idea-ology Kraft Stock Cool Tones, Sand Paper Disks, Ranger Blending Tool.


For today’s project we are going to be focusing on Ranger Distress Archival Inks. As of now there are 24 wonderful colors to create with. In this card today we will be looking at three different ways to use Distress Archival Inks.


To start this card, I embossed a base of Cool Tone Idea-ology Kraft stock with the Sizzix 3D Embossing Folder Kaleidoscope.


Next I used a blending tool and a sandpaper disk to sand the high points of the embossing. The plan is to expose the kraft core under the purple color to prep for the first Archival Ink technique.


Once the high points were sanded I took the large Distress Archival Black Soot ink pad and rubbed it across the top of the card base. This yields a great color contrast to the otherwise plain background.


I am going to be working in three layers for the card. For layer 2 I am going to be stamping with Distress Archival onto the number background stamp from CMS213 Perspective. Using a combination of Salvaged Patina, Prize Ribbon, Evergreen Bough, and Villainous Potion to create a marbled looking print.


Below is the finished stamped panel. I love the blend of the Distress Archival on Specialty Stamping Paper.


I then used some foam squares to attach this layer to the card base.


For the focal point I stamped out the large butterfly from CMS213 Perspective using the Tonic Stamping Platform. I stamped first in Distress Archival Black Soot. Then I colored in the butterfly with Distress Reinkers Mermaid Lagoon `and Prize Ribbon. After coloring with a Water Brush I then stamped a second time to darken up the butterfly lines using more Archival Black Soot.


For the sentiment I picked one from CMS213 “live your dream with passion”. I stamped with Archival Black Soot and Villainous Potion. Since the ink pads are so small it is very easy to stamp out single words in one color and then ink other words in different colors. After stamping I went back and blended some Distress Vintage Photo ink over the top and splattered it with water. The water gave a very cool speckled distressed look.


For finishing touches I added some Idea-ology Metallic Droplets at the corners of the card. The butterfly was attached with some foam squares onto the card front.


Thank you so much for joining me here for TFJB Inspiration Ave. Until next time, happy crafting!

Janna~ 💕🎨💕

I can also be found on :
Instagram: @treasuresofthesea_jannak

YouTube: The Crafty Corner with Janna

Supplies Used:

Distress Archival Black 
Distress Archival Kit 4 
Distress Archival Kit 5
Distress Archival kit 6 
Distress Reinker Mermaid Lagoon 
Distress Reinker Prize Ribbon 
Distress Watercolor Cardstock 
Distress Ink Pad Vintage Photo 
Sanding Disks