I've chosen a few different designs and will be setting up a production line to make a dozen of each. These little sacks will hold something special..perhaps brownies or candied orange rind dipped in chocolate or whatever I'm in the mood to make in December. Having a stack of sweet little gifts is so handy during the holiday season. I can grab a gift on the way out of the door to visit a friend or neighbor or to give to a delivery person.
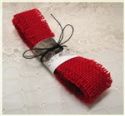
A 5.5 x7" kraft sack is my base for all three designs. Then I selected some gorgeous red jute (burlap) ribbon, contrasting it with red silk ribbon and a small bit of an elaborate white lace...
To make the assembly quick and easy, I applied a 1/4" wide strip of double sided tape onto the straight edge of the lace...
I found it easier to handle this way...
then adhered it over the edges of the lace...
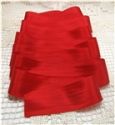
Because sometimes more really is better, I made a red silk ribbon bow and a bow from a double strand of red jute. I just love the contrast of the fine and shiny silk against the rough and rustic red burlap!..
I added a trinket pin to the burlap bow and used a wire cutter to remove the portion of the stem that extends past the center of the bow (and keep the recipient safe!). Because the sharp ends tend to fly around the room, and I have to use both hands to make the cut, I 'flag' the sharp end with some colored tape. Blue or green low-tack tape is always nearby and good for the job. Adhere your layers of bows (I used Fabri-Tac), and weight the center of the layered bows down while they dry. This really eliminates lots of bulk from the assembly. I couldn't resist adding a little snowflake embellishment on top of the pile! When it's time to fill the sack, I will add a glue dot under the fold of the bag.
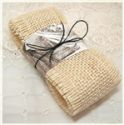
This is a second design using kraft, natural jute and a fluffy white fabric flower with a wood button center for contrast...
This design is super quick to assemble. I cut the large fabric flower apart from the strip it comes on and trimmed off some of the fabric in the center...nothing too fussy, just a couple of snips. This made a little depression for the button to nestle into the center. Distress ink added some character to the wood button and natural jute twine to thread through. I pulled some stray threads from another piece of ribbon and included them under the flower. I like the way they just flow and keep the design from being too rigid. When I'm ready for my 'assembly line' production, I will add some fray check onto an end of the twine, twirling it in my fingers to compact it and then letting it dry before using that end to thread a whole line of buttons! After 'stitching' the buttons onto a long length of twine, I'll space them, cut them apart and tie them. It's so much faster that way~
And a third variation...
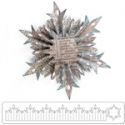
I used the new Tim Holtz Alterations 'Snowflake Rosette' and just love it! The circular image is from Melissa Frances' 'Vintage Cardstock Stickers'. I love the images on this sheet and plan to use a circle punch on some of the square and rectangular stickers so that they can be mounted on the same snowflake rosette for other gift bags. A tip I would like to pass along to you is that when assembling the rosette, lightly fold the dashed lines on your die cut strip, fold just that portion of the strip back and forth~ don't continue the fold into the decorative edge, just the dashed lined area and when you're ready to glue it into the rosette shape, a hot glue gun will give you the quickest result. I used a 1" circle punch of card stock, hot glued under the rosette and hot glued the sticker on the top. It was easy peasy using the hot glue and rather fidgety with my trials using both double stick tape and liquid adhesive. I love the playfulness of the rosette and flourish die on top of burlap and kraft~
It's so much fun making sweet little packages...when I'm not rushed!!! For each of the designs, the only thing needed to finish them off (besides filling them with treats), is a glue dot to hold the flaps closed. So now's the time for me to get going and enjoy the process~
Thanks a bunch for taking time from your day to visit!
*Hugs* and blessings,
Rebecca
First Bag
| Card stock | whisper white | Stampin'Up |
| Kraft sack | 5.5" x 7" | PaperPrimrose/Etsy |
| Embellishment | snowflake | Michael's |
Second Bag
| Kraft sack | 5.5" x 7" | PaperPrimrose/Etsy |
| Tickets | white on kraft | Maya Road |
| Button | wood | Michael's |
| Stamps | tiny tags | Papertrey Ink |
Third Bag
| Kraft sack | 5.5" x 7" | PaperPrimrose/Etsy |
| Digital patterned paper | nordic holiday | Macaulay Arts |
| Die | la rue flourish | PaperPrimrose/Etsy |
| Metallic card stock | foil/silver | Bazzill |


Adorable packages - I love burlap and twine too, and the textures look just gorgeous against the kraft bags! Fabulous tips on using it too, especially the "bow-tying" technique - thank you...
ReplyDeleteAlison x
Thanks Butterfly! I appreciate you taking the time to leave your sweet comment!! Hugs, Rebecca
DeleteSensational Friday Focus, Rebecca. These bags are lovely and so practical too. I will definitely be using your tips to make some for the upcoming season of giving! Thanks so much for sharing with us.
ReplyDeleteHugs,
Linda
Thanks Linda! I'm so glad to be on the F & F design team~ it's a lot of fun! Hugs, Rebecca
Deletewonderful ideas!
ReplyDeleteThanks and so kind of you to leave a comment!!! Hugs, Rebecca
DeleteThanks SO much, Rebecca, for the amazing inspiration! I have all the elements I need to make one of these, so I'll get moving!
ReplyDeleteFabulous Marcy!! Hope you have a blast making them! Hugs, Rebecca
DeleteBeautiful Rebecca and thanks for the inspiration.
ReplyDeleteGreetings Janny
Thanks Janny~so nice of you to leave a sweet comment! Hugs, Rebecca
DeleteI love the look of burlap, especially when the sides are fringed. Beautiful projects!
ReplyDeleteHi Kathy~ I agree! Burlap is such a great material to work with. Thanks very much for your sweet comment! Hugs, Rebecca
DeleteThese bags are beautiful! Thanks for all the tips and inspiration.
ReplyDeleteThanks Pam~ It's such a lot of fun to share and I'm loving F&F! Hugs, Rebecca
ReplyDeleteGorgeous work Rebecca, absolutely stunning ! Sue C x
ReplyDeleteHi Sue~ Thanks for stopping by! Hope all's well..can't wait to see your newest creation! Hugs, Sue
DeleteThese are beautiful Rebecca and you make them look so easy to do (when they are not)! Super tips too - thanks for sharing. Nicola x
ReplyDeleteHi Nicola~ they really are easy..honest!! That's what fray check and double sided tape do!!!
DeleteThanks and hugs, Rebecca
Gorgeous projects and isn't it the case that sometimes the simple things are the best?!
ReplyDeletex
Thanks Samantha! I love simple kraft lunch bags, especially mixed with burlap and a touch of silk!! Hugs, Rebecca
DeleteWow! I love this - Has given me a lot of inspiration - Thank you! x
ReplyDelete