I began by misting some watered-down, white acrylic paint mixed with a pinch of ‘Confetti White’ Perfect Pearls onto a panel of cornflower blue card stock. To set it in place I misted it with a very fine, very light mist of water. I dried mine with a heat gun, but you can also let yours air dry if you’re more patient. Once Perfect Pearls comes in contact with water and then dries, it is set…

The next step was to stamp snowflakes of different sizes on top of the white paint and pearls combo. Using Versamark watermark ink I stamped on top of the misted areas and the exposed card stock. Using a small, inexpensive paint brush I dipped the tip of a dry brush into the dry Perfect Pearls and then ‘painted’ it onto the stamped areas. Once I had applied all the Perfect Pearls I used my secret weapon to clean up the remaining and extra powder…

This ratty, dusty, shaggy thing is a Swiffer duster. I keep one on hand all the time! It picks up Perfect Pearls dust…perfectly! I also push my brush into the middle to clean it off when using Perfect Pearls powders. It will remove the ‘halo’ of remaining Perfect Pearls from your card stock if you wipe the paper with the thin blue fibers underneath the white strips…

When I was thinking about how to use Perfect Pearls for this post, the one thing I hadn't considered in my enthusiasm was the difficulty of capturing the magical effect of Perfect Pearls in photos! As beautiful and ethereal as the effect Perfect Pearls creates, is as illusive as it is as well. The areas that appear grey in the first and second photos are actually shimmering, iridescent white. I added some small stars from my stash. They are cut from iridescent white sequin material and measure about 3/16″. I've been having fun going ‘over the top’ lately! I'm beginning to think that May West was right, ‘Too much of a good thing is wonderful’. While I have no desire to emulate her life, I think she’s right when it comes to paper crafting…at least some of the time


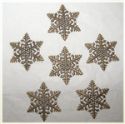
I've found that I love using metal embellishments… when they’re painted! They need to be sealed with a coat of Glue-N-Seal first, so they don’t develop rust spots as the paint dries! After the Glue-N-Seal coat I used Picket Fence Distress Stain and then some more Clear Rock Candy Glitter. The sentiment comes from Tim Holtz’s ‘Old Fashioned Christmas’ stamp set. I love the font!! along with the rest of the images in this set.
If you haven’t played with Perfect Pearls before, you’re in for a treat! Experiment, play, go a bit mad..with your duster at hand, it’s very manageable, even for those of us who don’t particularly like ‘messes’! And as ever, with the Friday Focus spotlight falling on them, you will find the Perfect Pearls range has special 15% discount this week over at The Funkie Junkie Boutique. What a fantastic time to stock up on your supplies.

I randomly dabbed liquid glue around the edges of the panel (with a heavier application at the lower corners) and dipped the wet edges into a pile of Clear Rock Candy Distress Glitter…heavenly and once again, my photos don’t do it justice. Below this panel are die cut snowflakes, cut from glitter paper…

If you haven’t played with Perfect Pearls before, you’re in for a treat! Experiment, play, go a bit mad..with your duster at hand, it’s very manageable, even for those of us who don’t particularly like ‘messes’! And as ever, with the Friday Focus spotlight falling on them, you will find the Perfect Pearls range has special 15% discount this week over at The Funkie Junkie Boutique. What a fantastic time to stock up on your supplies.
((hugs)) and blessings,
Rebecca


Such a magical project Rebecca. Love it! Jenny x
ReplyDeletea really beautiful make and full of a bit of festive magic x hugs xtrace x
ReplyDeleteYour card is stunning, thank you for sharing how you did it to. Anne x
ReplyDeleteA gorgeous project! I love Perfect Pearls and you've used them so effectively. I just love this!
ReplyDeletethis looks just wonderful - what a stunning piece xx
ReplyDeleteAbsolutely beautiful!
ReplyDeletePam
scrap-n-sewgranny.blogspot.com
Great project, the panel looks fan with the perfect pearls treatment.
ReplyDeleteThis is so pretty! I've always been curious about Perfect Pearls. I'm now anxious to try some!
ReplyDelete