Hi! I'm Nancy, the newbie here on the Frilly and Funkie team. I hope everyone is having a great beginning of the new year! Today I'm excited (and a bit nervous) to present my first Saturday step by step. I use flowers in almost every project, so today I'm sharing how I create some of my shabby pastel roses.
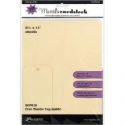
These are quite simple and don't take much time , so you get a lot of bang for your buck! To create one flower you begin by either die cutting, punching, or hand cutting five flowers of the same size from Ranger Inkssentials Manilla Card Stock. I used a Spellbinders die because that is what I have on hand.
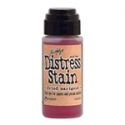
The second step is to add your color. I am absolutely in love with Tim Holtz distress stains. They come in a multitude of colors. I am using Tattered Rose for demonstration purposes, but I've used every color and they are all stunning. Just give the bottle a shake, remove the cap, and spread the gorgeous color over both sides of all of your flowers. Allow the stain to dry, or if you're in a rush you can dry them with a heat gun.
The next step is to begin shaping the petals. My two favorite tools for shaping are the end of my smallest paint brush and a thing I call a 'grabber' which you will see in a photo below. I use the 'grabber' to grasp each petal in the center and fold/squish either side around it. You can also do this with your fingers or a tweezers. I'll get to the use of the paint brush for shaping in just a moment.
The stained petals are a bit bright for my current project, so I created a glaze with glazing medium and acrylic paint, brushing it lightly over both sides of each flower. It lightens them a little and adds some variation to the coloring. Let this dry or dry it with a heat gun and you're ready for the next step.
Now for my favorite step. It's time to add a bit of shimmer with Perfect Pearls Mist! Shimmer is hard to show in a photo, but this product is totally amazing. a few sprays to each flower and you have a fairy tale sheen! Again, allow to dry before you begin the next step.
Since the flowers have flattened out some due to the moisture I do some additional shaping. Here you can see my 'grabber.' I repeat the process of grasping the center of each petal and folding the sides around it. This is what you end up with. It is time to begin forming the bud of your flower.
Use the end of a tiny paint brush and roll one of the petals around it, making the roll as small as possible. Place some Glossy Accents and hold it in place until set. Begin rolling the remaining petals around the center bud, glue in place with Glossy Accents and use the paint brush to slightly roll back the end of each petal.
The second layer is much the same process, but here I begin using my glue gun. Glue the bud to the center of the flower (remembering to stagger the layers of petals) gluing the petals up around the bud, but a bit looser this time. Shape the ends back with the tiny paint brush.
Layers three, four, and five are very straight forward. Just glue the bud to the center of each layer, stagger the petals, leaving the layers open.
Your flower is almost complete. At this point you just play with your flower, shaping the ends with the paint brush or doing a bit more pinching of the petals until you have the shape you want. Like snowflakes, each flower will have its own unique beauty.
You can make these from any size flower petal, add more or less layers, in any color of the rainbow. They add a feminine, romantic touch to any card, lay out, or project!
Thank you so much for stopping by and sharing your time with us at the Frilly and Funky Blog! I wish you a day filled with joy, love, and a touch of fairy magic!
Hugs,
Nancy
Supply list:


Hello Nancy. What wonderful flowers...great job. Karen,x wintonrosepapercreations.blogspot.com
ReplyDeleteThank you Karen!!
DeleteNancy , wow what a way to start your first Saturday step by step ,these are such gorgeous and delicate roses and look wonderul! a really great walk through , with lots of tips on how to create these beautiful blooms! Hugs trace x
ReplyDeleteThank you so much, Trace!
DeleteThese are such beautiful blooms Nancy, and since I'm lucky enough to have that die I'll be giving it a go. Well done on a fantastic first step by step here at Frilly and Funkie! Jenny x
ReplyDeleteThank you, Jenny!! That is one of my most frequently used dies. I just got the Tim Holtz flowers, so I'm playing with those next:-))
DeleteBeautiful roses :)
ReplyDeleteThank you, Joanna!
DeleteO wow they are stunning. ..I can almost smell their sweetness :-) xx
ReplyDeleteThank you so much, Jane!
DeleteAbsolutely beautiful roses Nancy and a fantastic tutorial ! Sue C x
ReplyDeleteThanks so much, Sue!!
Deletehi Nancy - these look beautiful - thanks for the tutorial x
ReplyDeleteThank you, Rachel!
DeleteYour roses are absolutely beautiful Nancy and a super tutorial! I am an avid flower maker myself and it is amazing how we all do similar things but the flowers all look so wonderfully different. Looking forward to seeing more of your work as the months go by. Best wishes Jennie x
ReplyDeleteThank you, Jennie! That's the beauty of paper crafting, isn't it? There is always something new and fun to try out. I would love to see some of your flower techniques!
Deletehi Nancy...thank you so much for sharing the 'How To@ for your beautiful roses. they are absolutely stunning.
ReplyDeletebest Wishes
Annie x
Thank you so much, Annie!
DeleteWhat a great tutorial, Nancy! I love making flowers and I always love to see how others make them, too. Yours are beautiful!
ReplyDeleteThank you so much, Maryanne! I also love to learn new techniques. I would love to see your flowers!
DeleteNancy, thanks for sharing a g-r-e-a-t tutorial!! Your flowers are amazing!! Looking forward to seeing more of your work!!
ReplyDeleteCheers!!
Lorraine
;o)
Thank you so much, Lorraine!!
DeleteNancy....what a great start you made with this fabolous tutorial. Your flowers are stunning. I'm an avid flower maker myself. But your way to make them really inspired me to try your way...
ReplyDeleteThanks for sharing ! Looking forward to your future tutorials.
Hugs from SPAIN
Thank you so much! I would love to see your flowers too!!
DeleteHi Nancy! What a fab first tutorial - the flowers are just lovely!
ReplyDeleteAlison x
My heartfelt thanks to you, Allison!
DeleteHello Nancy, your flowers are stunning and your tutorial is so clear. You have certainly made a great start! Anne x
ReplyDeleteThank you for your kind words, Anne!!
DeleteFabulous tutorial! These flowers are gorgeous! Can't wait to try some.
ReplyDeleteThank you, Pam, and happy crafting!!
DeleteWhat a great tutorial. I just love flowers and will certainly be trying this. Welcome, Nancy. Your tutorial is very clear and understandable.
ReplyDeleteThank you so much for your kind words and warm welcome, Darlene!
DeleteSo beautiful and a good tutorial. thanks. Edna B.
ReplyDeleteThank you so much, Edna!
DeleteThese look wonderfully pretty and feminine Nancy, gorgeously done. Thank-you for a terrific tutorial. Nicola x
ReplyDeleteThank you so much, Nicola!!
DeleteSuper job Nancy!!! Hopefully the 'nerves' are gone! You hit it out of the ballpark! ((hug)) Rebecca
ReplyDeleteThank you. Rebecca!!! You are so sweet and kind. I will keep working extra hard. I am greatly inspired by everyone on this DT. It really stretches my boundaries and imagination when I see all the lovely projects!
DeleteThis comment has been removed by the author.
ReplyDeleteThank you so much for the step by step. They are just beautiful.
ReplyDeleteYvette