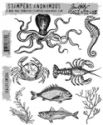
Hello friends and welcome, Zoe here and I'm delighted to be hosting this Saturday step by step. A year ago today my dear husband and I arrived in Copenhagen to begin our new adventure by the sea. I thought it was very fitting to create a card using Tim Holtz new Sea Life stamp set.
Here's how...
(click on each set of images for a closer look)
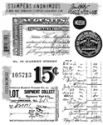
Step 1: Pick up picket fence distress paint with a brayer and roll onto background stamps from the Etcetera stamp set by Tim Holtz.
Step 2: Stamp onto distress mixed media heavystock and set aside to dry.
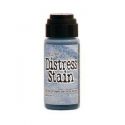
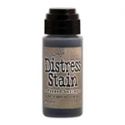
Step 3: Squeeze stormy sky and frayed burlap distress stains onto a non stick craft sheet. Spritz the heavystock with water and pull through the stains. Dry with a heat tool.
Step 4: Blend vintage photo distress ink into the edges.
Step 5: Randomly stamp background stamps from the Etcetera set with watering can archival ink by Wendy Vecchi.
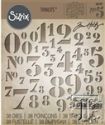
Step 6: Die cut numbers from the stencil numbers thinlits die set by Tim Holtz.
Step 7: Stitch the edges of the background with a sewing machine.
Step 8: Swipe the edges of the background and the stitching with potting soil archival ink by Wendy Vecchi.
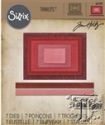
Step 9: Die cut 4 x frames from mixed media heavystock and 1x from classic kraft stock with the stitched rectangles thinlits die set.
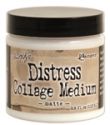
Step 10: Stick the frames on top of each other and adhere with collage matte medium, mounting the black frame on the very top.
Step 11: Using a sanding grip, sand the top of the frame exposing the kraft core.
Step 12: Blend in vintage photo distress ink.
Step 13: Adhere the frame over the background and a piece of black clasic kraft stock under the die cut numbers to make them pop.
Step 14: Using the new Tim Holtz Stamp Platform, (yes I have used others and yes this is by far the best and easiest I have used) I LOVE IT!
Step 15: Position your stamp on top of the heavystock and press the lid down.
Step 16: Open the lid and ink up the stamp and close the lid again to stamp.
Step 17: Remove your perfectly placed, perfectly stamped image! No fuss, no waste!
Step 18: Scribble rusty hinge distress marker onto a non stick craft sheet, spritz with water and pick up with a paintbrush to watercolour.
Step 19: Repeat the previous step using faded jeans distress marker to watercolour other parts of the octopus.
Step 20: Scribble some more faded jeans distress marker onto a craft sheet and spritz generously with water, pick up with a brush and create a wash for the background.
Step 21: One final spritz of water over the heavystock surface and blend with a brush.
Step 22: Stamp and fussy cut an octopus and use as a mask. Ink a background stamp from the Etcetera stamp set by Tim Holtz and stamp over the background, making sure the mask doesn't move.
Step 23: Remove the mask. (I usually use mask sheets by Tim Holtz and then store them on the top of the stamp set, but I can't lay my hands on them so I used scrap paper.)
Step 24: Edge with potting soil archival ink.
Step 25: Mount the octopus onto a gold deco sheet and then onto black classic kraft stock.
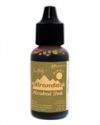
Step 28: Alter an idea-ology quote chip by dabbing on mushroom alcohol ink. Run a sanding grip lightly over the top to further age and scratch. Edge with potting soil archival ink. Adhere with collage matte medium.
I hope you have enjoyed the step by step. Be sure to pop over and take a look at the current 'Something Old' challenge.
Have a great weekend.
Zoe










Quite simply awesome! I LOVE the way you've layered the octopus on the distress background and used framing to such effect. Thank you for sharing xx
ReplyDeleteFabulous i love it and i have the stamp set too ;) xx
ReplyDeleteWow Zoe, this amazing!
ReplyDeleteSo awesome Zoe! Another masterpiece my friend :-)
ReplyDeleteWonderful in so many ways!
ReplyDeleteThis is amazing Zoe! Your pieces always inspire me. TFS!
ReplyDeleteOh ZOE!!! How have I missed you!! I cannot even begin to tell you. Thank you for this amazing step by step!!
ReplyDeleteThis is exactly what I needed to help me think!!
I am doing ICAD and you have given me things to think on!!
Love and hugs,
Liz Walters
Prescott, AZ
This is wonderful Zoe! I am also doing ICAD and today's prompt is "Vintage", so I thought I'd pop over to your lesson for inspiration. I am definitely inspired! Beautiful work.
ReplyDeleteWonderful tutorial, Zoe! And your finished project is gorgeous with it's vintage/grunge vibe! Thank you for sharing your techniques!
ReplyDeleteZoe, I always love the harmony I find in your gorgeous creations. The tutorial is fabulous, but what I love the most is the clever way that you used that frame! So effective.
ReplyDeleteAmazing piece of art! Love this!
ReplyDeleteThanks for sharing nice information . i like your post and all you share with us is uptodate and quite informative, i would like to bookmark the page so i can come here again to read you, as you have done a wonderful job.
ReplyDeletestep and repeat backdrop