Hello and welcome to another Saturday Showcase feature! It's Sara Emily here to shine the spotlight on Tim Holtz Gift Card Package Thinlits die set and a variety of his Ideaology papers and card stocks--products which are available at
The Funkie Junkie Boutique. I think it comes as no surprise that I am a big fan of Tim Holtz products. I love their timeless appeal. As you will see in this post, the older releases marry perfectly with his newest releases. Since our current challenge is
'Tis the Season For Gift Giving!', my mind went straight to Christmas gift cards, but you could easily change out the papers and embellishments to make these gift card holders suitable for any occasion.
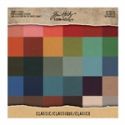
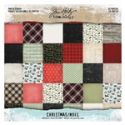
There are so many Tim Holtz papers and card stocks available, but I focused my tutorial on his Forest and Holly Collage Papers, Metallic and Classic Kraft Stocks, Wood Grain Cardstock, and Distress Mixed Media Heavystock. You'll note that I also used his Christmas Paper Stashes from this and last year's holiday releases and Christmas Worn Wallpaper. I kept my embellishments low key, because I really wanted these to be a simple, fast project. Who isn't crunched for time at this time of the year?

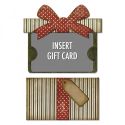
I. LOVE. THIS. DIE. SET. The Gift Card Package Thinlits set comes with six separate dies pictured above. The two on the right make the card envelope and the topper for the insert. On the left is the bow, ribbon strip and the insert that actually holds the gift card in place. At the center is the gift tag. I made my ten gift card packages assembly line fashion, but I took a few photos along the way to show you my process. This is so easy; perhaps the hardest part might be choosing which papers to die cut.
***click on any photo to enlarge***
The tutorial:
Before adhering Holly and Forest Collage Paper to Heavystock, I lined up the paper so that the design would be oriented properly. This piece folds in half and you don't want your words to be upside down on one side! Heavystock is sold in 8.5 x 1, 4.25 x 5.5 inches and #8 tags--you will need the 8.5 x 11 inches to fit the dies.
I die cut one card envelope and two toppers from this panel. I repeated this step with various chosen papers/card to complete my 10 gift card holders. Fold each card envelope on the score lines that are impressed with the die. Because of the thickness of Heavystock, I found it's best to score those scorelines one more time, so you get a nice fold.
I cut three smaller pieces of the Heavystock to fit the insert die and colored them with Distress oxide inks. Starting with the lightest color, I dip and drag the card through watery puddles of each one, drying between each layer of color. I colored both sides of each of these panels.
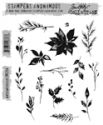
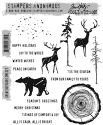
I stamped this one using the branch from Winter Watercolor and oxide ink. Before stamping I spritzed the stamp with water to get the water color look. I overstamped with a sentiment from Great Outdoors in Archival ink.
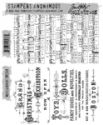
I stamped each of the remaining oxide panels with the music from Music & Advert set with Hickory Smoke. I use my stamp platform to ensure a good impression. Because I wanted a crisper image. I didn't spritz the stamp with water this time.
Die cut the panel, making sure your image is oriented correctly so the music is not upside down when you cut. You can see where I taped my panel to the platform and there is no image. That's fine, because this portion will be covered with the topper panel. But if you want to avoid tape lines, there is a great reusable sticker you can use on the back of your panel to secure it--
Sticky Grid. Tim Holtz shows how easy it is to use in his
Holiday Hacks videos.
I die cut a few card envelopes and toppers out of Distress Woodgrain card and blended with oxides . Splash with a bit of water and heat dry for a nice distressed look. (Again, you will want the larger size of the card, so the dies will fit.)
Have fun die cutting a bunch of card holder inserts and bows/ribbon to go with your packages. Then sand the various pieces that were cut from Metallic and Classic Kraft Stock. I do this on a piece of waste cardboard, so I don't scratch my craft mat.
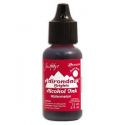
I cut a few of the bows/ribbon from gold Metallic Kraft Stock. I wanted a vibrant red to go with the Holly Collage Paper packages, so I pounced the metallic die cuts with Watermelon alcohol ink using a felt applicator. A bit of Mushroom ink gives it a grungy, vintage vibe.
Next, ink all those edges using a blending tool to give your pieces a vintage look. You can skip this step if you wish; it's just my preference and only takes a few extra moments. If you're inking, don't neglect the opposite side--it will show and it's all about the details.
Stamp your favorite sentiment (I used last year's Christmas Classic set which fit perfectly.) and cut with the tag die. You could also use a remnant rub in place of the stamping or a combination of both stamp and rub. You might write a handwritten message or add one of the Christmas Ephemera or Snippets. This is a great way to put some of those leftovers from last year into play.
This ephemera hides a gluing error. I glued my bow to the wrong side. Things can get a little mindless when you're on the assembly line!
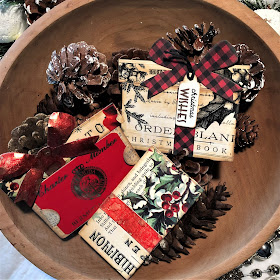
Lastly, glue all your pieces. I used Glossy Accents, because it dries quickly, so I can assemble a bunch of these packages in a very short time. Here's a closer look at the finished gift card packages.
As much as I love Metallic, I've never had much success with photographing it. This is very pretty in real life and my favorite of the group. This is Worn Wallpaper with the insert done in Holly Collage over Heavystock. 25 is an old gilded Remnant Rub on a Snippet.
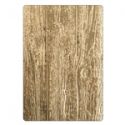
More Worn Wallpaper on one, and Lumber 3D embossing on the other. For the men in your life.
I really had some fun mixing up the prints on these!
Now I need to go buy some gift cards! It just dawned on me how cute these would be on an Advent Calendar. Instead of gift cards you could include a special activity for the day. I hope you've enjoyed today's tutorial and are inspired to make a few of your own personalized Gift Card Packages!
Happy Crafting!
Sara Emily
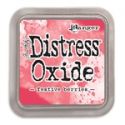
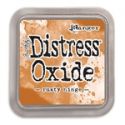
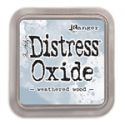
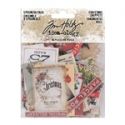
A list of products I used are shown and linked below.





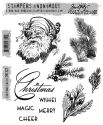
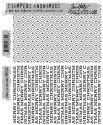






Absolutely beautiful!
ReplyDeleteIt’s clear to see how much fun you had creating with these dies SARA x wonderful details x
ReplyDeleteThank you for sharing
Hugs Annie xx
Such a timely idea, I was just getting ready to use that die for a few gift cards! I love all the ideas for embellishing and the paper choices. Thanks for all the glorious ideas,
ReplyDeleteWhat a lovely way to present a gift card! It's obvious how much love you put into these!
ReplyDeleteSo many clever ideas for creating beautiful Christmas gift card packages Sara Emily! I love that each one has such a different look depending on the ingredients you've used. Thanks for sharing your helpful tutorial xx
ReplyDeleteEach is more lovely than the one before! This is such a clever die, and you've used it to its full advantage here. I love the variety, and your photos are just gorgeous! Thanks so much for the inspiration!
ReplyDeleteBeautiful projects and great tips Sara. This is the most useful die I bought last year and you have given me some good ideas - thank you! xx
ReplyDeleteThese are brilliant!
ReplyDeleteThank you ladies, for these really sweet comments! I did have fun making these gift card packages! Merry Christmas!
ReplyDeleteThese are so cute and clever! With all the kids & nieces and nephews all grown this is the perfect wrapping for most of the gifts!
ReplyDeleteThese little gift boxes are charming - great choice of papers and brilliant inking and detailing to make them even more delightful.
ReplyDeleteAlison x
Beautiful little presents!!! All unique and made with care!!! So inspirational!!!
ReplyDelete