You all inspire me with your stamping, inking and card making techniques. I'm more of a paper artist, just give me some glue, scissors and paper and I can snip up a great project in no time. But give me ink, stamps and paint, well that sends me to the corner to scratch my brow and wonder what to do with it all! We all have our comfort zones, don't we?
Well for me, it's all about stepping out and doing something different, so today I want to share with you my little journey with Tim Holtz's 3-D Texture Fades Embossing Folders. I love the deep impressions you get with these folders.
Something Frilly!
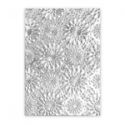
So let's start with a frilly card where I used the Kaleidoscope 3-D folder. I used Core'dinations cardstock and cut a piece to fit the folder. I lightly misted the card stock on both sides so that the impressions would really pop. Then I ran it through my Vagabond 3 times; that ensures maximum embossed dimension. (Caution: the sandwich for these embossing folders is different than the "normal" embossing folders so do be careful! With the Vagabond you use ONLY one cutting pad.)
After running through my Vagabond, I simply applied some white paint to my brayer and brayered lightly over the surface of the paper. I love how the white paint really highlights the raised impression. Finally I gave the paper a light spritz with Lindy's Creme Brulee Cream Mist. Unfortunately, you can't really see the effect of the misty sparkle, but trust me, it looks great, give it a try!
From there it was easy to cut the embossed paper to size and use as a background on this pretty card I made with Graphic 45's Garden Goddess. It's simply layered with design paper and a scalloped border sticker, topped with flowers and a butterfly. Now the card is truely worthy of a garden goddess with that fabulous embossed design!
Now Let's Get Funky!
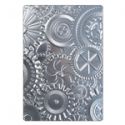
I used the Mechanics 3-D Texture Fades embossing folder to create this next background. Here's where I crawled out of my comfort zone!
First I embossed my card stock. I used tan card stock and misted on both sides before embossing and ran it throug my Vagabond, 3 times, remember that.
Time to create some interest on that background. So, I grabbed a fan brush and Dylusions paint in Slate Grey, Vanilla Custard and Ground Coffee.
I also discovered that you will get a different effect if you have to smoother surface of the paper face up than the textured side up. The one on the left is the smoother side. When the textured side is up, the paint highlights the paper texture as well as the embossed textures.
Now it's a masculine card!
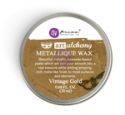
It was really easy to turn this into a masculine card. I think I'll give it to my husband for Valentines, he'll like this a lot better than a hearts and roses card! I cut a card base from Tim Holtz's Memoranda pad and added my embossed panel. For embellishments I "dirtied" up a piece of measuring tape, added some gears and a word band. And of course, I rubbed on just a wee bit of vintage gold Prima wax just because I wanted to give the card a few highlights!
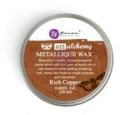
A strategically placed word band finishes off my card nicely. I used copper Prima Metallic Wax to highlight the words.
And finally, something in between:
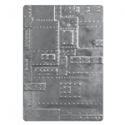
This time I embossed with a piece of silver metallic using the Foundry 3-D Embossing Folder.
After embossing, I painted it over with Dylusions Slate Grey and then quickly rubbed most of the paint off. This served to dull the bright shine of the metallic paper.
Then I misted with black mist letting the mist pool around the raised areas. Before the mist dries, use a paper towl to dab off much of the mist, being sure to leave mist in the crevices and around the "plates and rivets." Let the mist dry throughly before procedding to the next step.
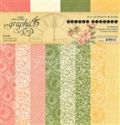
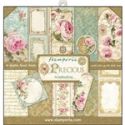
Now you're all set to add this panel to a card and look what a vintage looking card it makes when paired with Stamperia's Precious collection. I cut a 6" card base and fitted the panel to the left side.
 |
I hope you've enjoyed my journey with the 3-D embossing folders. I think you'll find lots of ways to use them as they are quite versatile. Stop by The Funkie Junkie Boutique where you can find the products I've used.









Maggi, you've done an amazing job showcasing these 3D Texture Fades. I love all of your techniques and beautiful cards made with the embossed panels. My favorite is the last; you've taken something masculine and balanced it out brilliantly with feminine details. Wonderful tutorial; thank you for sharing! Hugs!
ReplyDeleteNeat techniques, Maggi! The third card is actually my favorite!
ReplyDeleteGreat techniques! Love seeing the difference between smoth and textured side of the paper after lowlighting.
ReplyDeletevintage gold Prima wax because it smells so good—paper art and aromatherapy at it’s finest.
ReplyDelete