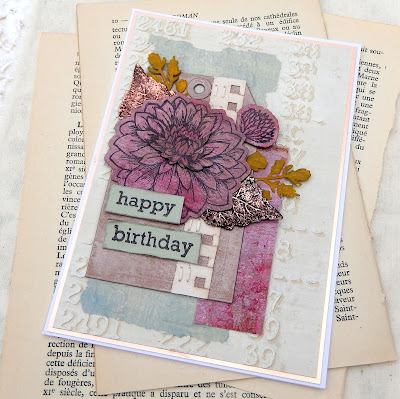
Hi everyone and welcome to another Saturday Showcase, the Design Team's chance to share tutorials featuring some of the products available from The Funkie Junkie Boutique with you. Today I'm sharing an idea for using Prima Finnabair Stencils and some of the waxes from their Art Alchemy range to create backgrounds for cards.
The backgrounds start with a neutral background made using a layer of Dina Wakley Media 'Buff' Paint and White Gesso on a large sheet of mixed media card. When dry sand back the surface to give it an aged worn look. I then cut the card into smaller pieces that would fit onto A6 card blanks.
To make it easier to create the focal point of the card cut a tag from kraft card using one of the tags from Eileen Hull Designs 'Card, Waterfall & Tags' Die Set. Dry brush the tag with one of the Dina Wakley Media Paints.
When each of the backgrounds has been created mount them on coordinating Metallic Kraft Stock. You can also team them up with the matching tags.
Now it's time to pull out those scraps and offcuts from previous projects; team mate Suzz came up with a clever idea to organise them into colour groups so it makes it easier to choose what will work with each background. In amongst these are gel plate prints on thin paper and tissue.
Finally gather your die cuts, stamped images and card offcuts and add them to the tag; this will help you to create that focal point in a restricted space that can then be added on top of the background.
The second card is the one from the 'Living Things' challenge; this one includes the 'Ghostwriter' Stencil with the 'Old White' Matte Wax on the background.
The third card has an Autumnal feel with the 'Victorian Tiles' Stencil used in conjunction with 'Rusty Red' Matte Wax and a bunch of different die cut leaves and Wendy Vecchi orange flower.
The fourth card includes the 'Machinery' Stencil in the background, teamed with 'Charcoal Black' Matte Wax. The spoon and teabag come from an older Eileen Hull Designs Die.
On the fifth card you can see how a different coloured wax can change the look of the 'Victorian Tiles' Stencil; this time it's been covered in 'Faded Denim' Matte Wax and has some simple red fabric hearts added to compliment it.
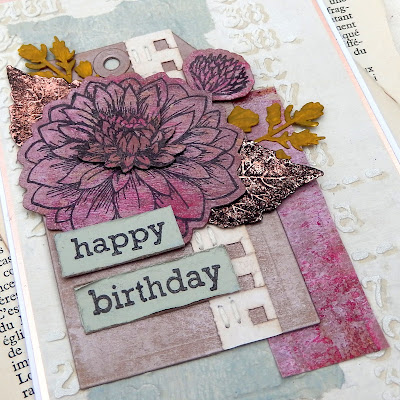
For the last of the cards we return to the 'Book of Numbers' Stencil which this time has the delicate 'French Lavender' Matte Wax on top. Stamps with small birthday sayings on them are included in Wendy Vecchi's 'Birthday Bash' Stamp, Die, Stencil set.
Thanks for stopping by to see today's showcase. I hope you've enjoyed seeing how to create these birthday cards using the Prima Finnabair Stencils and Art Alchemy Waxes for backgrounds.
There's still time to enter the current Funkie Junkie Boutique Blog challenge 'Tag It' which runs through Tuesday, November 30th at 11.55pm. We look forward to seeing your creations.
Jenny
Prima Finnabair Stencil - Ghostwriter


Jenny there are so many beautiful layers and texture on all of these wonderful cards! Lovely showcase!
ReplyDeleteThese are so awesome! Thank you for the inspiration!:)
ReplyDeleteWhat a fabulous tutorial with gorgeous results on each of your cards, Jenny! Your stenciled backgrounds are jaw dropping and the collages you pulled together are the icing on the cake. Just gorgeous!
ReplyDelete