Lets start with the first one I made. These are two fairly generous ovals, quite full in the middle….

To create this double bow, I die cut two of the larger (scalloped) ovals from sheet music. There are two of the smaller, plain ovals cut from dictionary pages...

In order to create 'rounded' bows, I coaxed the middle of the ovals around a thick brush handle, in order to prevent fold lines...

A small dab of quick drying paper glue at one end...

Bring the ends together and press for a few seconds until a bond forms. You will want to repeat this for all four ovals...

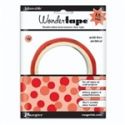
A bit of the same glue to hold each pair together and then you will need a 1/2" x 1-1/4" piece of paper, coated with two strips of double sided adhesive. When the wet glue is dry, join the two halves of the bow on top of the small, tape coated paper, to form the bow...

I scored a two inch length of paper, 1/4" wide and wrapped it around the middle to hide the overlap. After glueing it in place on the back, the excess length of the strip was cut off...

A strip of dictionary paper was folded, ends trimmed and adhered to the bow to form tails. It then became the anchoring feature in this card...

The background was embossed with a Tim Holtz embossing folder. Another strip of dictionary paper forms the central ribbon tag and a die cut scalloped square and plain square support a stamped sentiment. For the next variation, I used some plain, narrow oval dies and some gorgeous Pion papers...


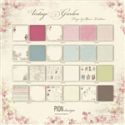
I've kept these card designs simple. The gorgeous seed packet is included in the Vintage Garden, Pion collection and it's irresistible. This one worked so beautifully with the background paper. The butterfly was also cut from one of the accent sheets included in this collection...

Using a typewriter font, I printed out a birthday wish and colored it to work with the packet color. It is adhered without fanfare on the bottom of the packet. The dimensional bow adds a luxurious touch to a card with a 'country' feel... The next bow used three stamped images of a butterfly from the Flower Market stamp set from Artistic Outpost. I used a sheet of scrap paper as you can see...

I positioned the die over the right and then the left wing of the butterfly. The body was cut out of the third image and set aside...

The sides of the bow are assembled as before, each wing forming half the bow...

The body was glued on, to hide the join and two simple strips make up the tails of the bow...

This is another very quick card, made with an assemblage of tags and cards, layered onto some Vintage Garden, Pion paper along with some tags and images included in this collection...

The simple stamped sentiment comes from the Flower Market stamp set. Some half pearls and a single heart, cut from Venise lace, were colored with alcohol markers. The tags and interesting images are all part of the Pion paper collection (except for the round green tag, heart and pearls)...

This 'winged' bow adds a delightfully quirky element and makes me smile ;)
I hope this encourages you to take out some dies and spend some time playing with them. All sorts of wonderful discoveries can happen!
Sending you ((hugs)) and blessings,
Rebecca


These two are gorgeous Rebecca and I love the way you've created those fabulous bows! Must give this a go. Jenny x
ReplyDeleteThanks Jenny :)
DeleteSuch a clever use of your oval dies and your cards are stunning you created. Thanks for sharing x
ReplyDeleteThank you for your very kind comment!
Deleteso very clever - will be trying this xx
ReplyDeleteHope you have fun with this one!
DeleteThanks for step by step, there great. Julie x
ReplyDeleteThanks very much Julie!
DeleteFantastic. Love the butterfly
ReplyDeleteThanks kindly Iona!
DeleteSuch a cool idea, brilliant use of the oval dies. Your cards are shabbily wonderful!
ReplyDeleteHugs,
Linda
Thanks bunches Linda!
DeleteThank you for this very interesting idea...certainly a technique to remember in future...!
ReplyDeleteHope it comes in handy for you! and thanks for your comment!
DeleteThanks for sharing this great idea and easy to follow step by step tutorial will be giving this a try for sure . Your cards are so pretty.
ReplyDeleteMy pleasure, and thank you for your sweet comments!
DeleteOh wow Rebecca, your bows are truly beautiful - how clever of you to use oval dies. Your cards are wonderful - thanks so much for the tutorial and sharing your amazing ideas! Anne x
ReplyDeleteThanks so much for your kind words Redanne!!
DeleteHow smart are these?! I never would have thought of that. Thank you for the tips and techniques.
ReplyDeleteMy pleasure and thank you Jess~
DeleteRebecca, I adore your bows and the beautiful creations you have embellished with them! The butterfly bow is absolutely inspired, You are awesome!!
ReplyDeleteHugs,
Nancy
Thanks Nancy~ you are so sweet!
DeleteRebecca - I totally L-O-V-E-D this tutorial for these bee-U-tee-ful bows - again, thank you for sharing your great ideas with us!!!
ReplyDeleteHugs,
Lorraine
Ontario, Canada
;o)
Thank you Lainie~ for you kind words!!
DeleteI'm so glad you showed us this technique! I love these kinds of paper bows & am anxious to try some myself now!
ReplyDeleteWhat a delightful step by step - the bow-tie butterfly is inspired!
ReplyDeleteAlison x
All I can say is brilliant! Thanks so much for sharing this great technique.
ReplyDeleteAbsolutely beautiful...TFS the tutorial!!!
ReplyDelete