Wednesday, October 27, 2021

Guest Designer - Lisa Hoel

It is time to welcome our Guest Designer for the 'Grunge, Ghouls or Giggles' challenge. Say hi to Lisa Hoel who was the Design Team's top pick from the 'Creating Die-na-mite' challenge.


Hello, my name is Lisa Hoel and I’m a lifelong craft lover. I’ve been ‘arting’ ever since I first picked up a crayon! Paper crafts have been my main focus for the past twenty years or so and I love to make detailed, layered, textured, mixed-media type projects. I am not usually a clean and simple type artist. ;-) My background is in graphic design and I'm blessed to be married to the greatest guy in the world and have two dynamic boys. You can find me here: creativejuicefreshsqueezed.blogspot.com


This challenge theme is right up my alley! I found this grungy lantern at a garage sale and had been saving it for a spooky project. It's perfect for my layered Halloween landscape – full of whimsical die cut details made with Tim Holtz Sizzix dies and lit with eerie purple Tiny Lights.


The lantern came with a broken corner in the front glass but I think that just adds to the Halloween vibe.

* * *
What an incredible spooky lantern and so perfect for the current challenge! That's some transformation of a garage sale find and how cool that it also lights up! Thank you Lisa for your amazing inspiration and for being our latest Guest Designer. Make sure you check out Lisa's blog to see lots more must see close ups. Then come on back and share your 'Grunge, Ghouls or Giggles' projects with us.

The challenge can be found HERE and runs through 11:55 pm EST on Tuesday, November 2nd.

Sunday, October 24, 2021

Challenge Winners - Fall Gratitude

Hello friends. It's Teri here to announce the winners of the Fall Gratitude challenge. Thanks to all who entered this fun colorful challenge.


The team loved seeing the variety of entries and chose #6 Sara Emily (sarascloset) as the winner. She created this wonderful project using layered stamping. Check out her post to learn how she used Microglaze to protect the leaves from the beautiful stamped plaid. The bark base for the mushroom is amazing. Congratulations to Sara Emily on winning an opportunity to be a Guest Designer at a future date here at The Funkie Junkie Boutique Blog. You will be contacted shortly with all the details.

And now our picks of three additional outstanding entries for the The Funkie Junkie Boutique Blog Top 3 Badges. In numerical order they are #1 Bonnie (Paper Crafter at Large), #2 Jo (Let's Journal Art) and #5 Katy D (I Like to Cut and Paste). Please email Linda at thefunkiejunkie@gmail.com for the codes for the Top 3 badges so that you can display them proudly on your blog.

And finally the randomly drawn winner for the $25.00 gift certificate to The Funkie Junkie Boutique is #4 Pam (Pam's Pearls). Congratulations Pam. Please email Linda at thefunkiejunkie@gmail.com for the gift certificate details.

Thank you again to everyone who took part in this challenge and congratulations to all our winners. The current challenge 'Grunge, Ghouls or Giggles' can be found HERE and runs through Tuesday, November 2nd, 2021. at 11:55 pm EST so there's still plenty of time to link your projects.

Saturday, October 23, 2021

Saturday Showcase - Leaf Fragments Dies

Hi Funkie Junkie Friends! Its Teri With TerisMailbox posting for the Saturday Showcase from The Funkie Junkie Boutique. As soon as I saw the Leaf Fragments Dies by Tim Holtz, I knew I had to have them. Today I present seven different cards using these versatile dies.


Once I started making, I could not stop! Each card led to a new idea.

My YouTube video walks you through the entire process from creating the variety of backgrounds to card assembly.


I started with a slimline card created on a Kraft Base. The leaves are cut from a distress inked background from my stash. I added Ledger Script (CMS 241) stamped with Rustic Wilderness Distress Ink.  I added a few dark green strips cut with the Deckle Edge Trimmer to the front, followed by a piece of Ideology Ephemera. The viewfinders are cut from a patterned paper in my stash and added.


I added a small quote from Ideology to complete the card.


I was able to create a two-fer by using the stamped distress inked background.


Check out how I mounted the background piece and added the cutouts to the base. The sentiment is from an older Stampers Anonymous Stamp.


This card uses the Limited Edition Seasonal Mica Distress Sprays #1 in Flickering Candle, Jack-O-Lantern along with Brushed Corduroy Distress Sprays on a cotton paper. The leaves are done in alcohol inks on Yupo Paper.


The sentiment is cut from an older Sizzix Die #661801. The card was easy to assemble once the circle was cut. Add a bit of twine and you are ready to go.


This is my favorite of all the cards created! It started with a Kraft Slimline base. The birch background is created by stamping the Birch Background from the Birch and Pine stamp CMS280 on a thin piece of Cougar Natural cardstock trimmed with the Deckle Edge Trimmer.


The Leaf Fragments are cut from yet another piece of distressed ink background from my stash. I often will just take a day and make many backgrounds using inks and sprays. Do you do that? After mounting the birch piece on dark green from my stash, I cut another set of Leaves to back the inked pieces. The sentiment if from one of my all time favorite stamps Nature's Wonder CMS 343. Backed with another piece of green cardstock, the strip offers a great place to cover the overlap between the two background stamps.

The next card features leaves cut using alcohol ink on glitter paper.


The background is another stash piece cut with the Deckle Edge Trimmer. I told you I make many while I am at it. The sentiment is from CMS 343 Nature's Wonder, a great leaf stamp with many useful sentiments.


Assembly was quite easy. Attach the background, add the leaves with a twine bow and top off with the sentiment!


Another simple card using a distress inked background from the stash. The base of this design is orange cardstock. I did cut one leaf from the center before mounting (a trick I use often to conserve paper). The brown leaf has 2 layers and is inked on the edges with Vintage Photo Distress Ink.


You will probably recognize the leaf from the next card! The sentiment from Nature's Wonder set, embossed in Copper and a twine bow finish this card.


This one started with a piece of acetate with alcohol ink in fall colors applied. Recognize the plaid from a leaf on the previous card? The plaid from Lumberjack CMS 384 was inked with Brushed Corduroy and Rusty Hinge Distress Inks randomly and stamped on Natural Cougar Cardstock. 

After lining up the plaid in the center of the Natural Cougar card base, I lined up the Leaf Fragment Die and cut through the plaid and the front of the card base leaving a window for the inked acetate piece. The acetate is sandwiched between the plaid and the base. 


I lined up an additional orange leaf on the inside to add texture to the leaf.


And yet another sentiment from Nature's Wonder CMS 343 mounted on a strip or orange cardstock highlights the orange leaf.  A few coordinating enamel dots finish this one up.


I encourage you to stop by The Funkie Junkie Boutique to check out all things Tim.

Thanks so much for stopping by today! I hope I have inspired you to be creative with a single focal die set. I'd love to have you follow/subscribe on my social media sites, all named TerisMailbox.

Wednesday, October 20, 2021

Grunge, Ghouls or Giggles

Hello and welcome to a new challenge here at the Funkie Junkie Boutique challenge blog. I’m Janna and I will be your host for Grunge, Ghouls or Giggles. Halloween is just around the corner and this week we are getting our hands dirty. Will your makes be frightful and ghoulish or will they be cute and get giggles? Add a touch of grunge to your makes. Cards, décor, scrapbook pages, journal spreads, we want to see it all. We will be most Distressed if you miss out on the spooky cute Halloween fun! Happy crafting!

The overall winner will be offered the chance to be a Guest Designer at a future date here at The Funkie Junkie Boutique Blog, and everyone who enters and follows the rules will go into the drawing for the chance to win a $25.00 spending spree at The Funkie Junkie Boutique. There are also Top 3 Badges for three additional outstanding entries, chosen by the Design Team.

The guidelines for entering are simple; create a new vintage or shabby chic project following the challenge theme, link it to your post (not just your blog) and also include a link to this challenge in your post. You can combine our challenge with up to 10 challenges (including this one) to be in with a chance for winning. If you are entering through a public forum (such as Instagram) you'll need to include the words 'Funkie Junkie Boutique Challenge'. Also, please turn off your Word Verification so our Design Team can leave comments on your blogs. Make sure you follow these rules as unfortunately, we have had to eliminate entrants from the prize drawing in the past.

Check out all the Designers Inspiration:


Teri Wilson - Teris Mailbox


Laura Gilhuly - Angel Scraps


Tera Callihan - The Crafty Sugar Addict


Suzanne Czosek - Suzz's Stamping Spot


Thanks for joining us. We cannot wait to see your frightful and delightful creations!


Thursday, October 14, 2021

Guest Designer - Lyla Larimore

It is time to welcome our Guest Designer for the 'Fall Gratitude' challenge. Say hello to Lyla Larimore (A Chief's Wife's Heart's 'aFire) who was the Design Team's top pick from the 'De-stress with a little distressing' challenge.


Hello, everyone! It’s always truly an honor to be here at The Funkie Junkie Boutique Challenge Blog as a Guest Designer for any theme! I've been crafting with paper in some way or form just about my entire life, beginning with making my own dollhouses, furniture, and then worked my way up to reality as a homemaker. Those skills came in very handy when my kids got into school. I spent my afternoons making whatever paper project the school's hallways needed for each subject of study, event, or holiday where help was needed. My projects since having to retire from school and photography have toned down quite a bit - but not in the sharing of it!


This time, I’m back with a make that is very personal but definitely has something to be GRATEFUL for. I’ve chosen a few things that were ordered specifically from The Funkie Junkie Boutique with this project in mind.


The new Tim Holtz Mr. Bones makes his debut as my very first Colorize set of dies. I’ve avoided them due to having Rheumatoid Arthritis trouble on very tiny dies, but Mr. Bones just stole my heart and he’s not all that bad on my fingers- and FUN to do! Please stop by my blog, A Chief’s Wife’s Heart’s A’Fire, to see the skeletons in my closet.

* * *
Oh WOW! Isn't Lyla's Halloween themed vignette box amazing!. Thank you Lyla for your wonderful inspiration and for being our latest Guest Designer. Make sure you check out her blog to see the tutorial - Lyla always shares every step of the process so you won't want to miss it. Then come on back and share your shimmering Fall Gratitude projects with us.

The challenge can be found HERE and runs through 11:55 pm EST on Tuesday, October 19th.

Monday, October 11, 2021

Challenge Winners - Chalk It Up

Thanks for joining us today as we announce the winners for our 'Chalk It Up' challenge and thank you to everyone who played along with your wonderful projects featuring chalk based media.


The Design Team enjoyed seeing the way all the entrants incorporated chalk into their projects and in the end picked #2 Alice K (Yellow House Studio) as our overall winner. Alice went with chalk paint and texture paste to give her tag a shabby chic feel and added a phrase which is a lesson for us all. Make sure to drop by and find out more of the details on her blog post.

Congratulations to Alice on winning an opportunity to be a Guest Designer at a future date here at The Funkie Junkie Boutique Blog. You will be contacted shortly with all the details.

And now our picks of three additional outstanding entries for the The Funkie Junkie Boutique Blog Top 3 Badges. In numerical order they are #1 Lucy (Paper Glitter Glue), #5 Jo (Let's Art Journal) and #6 Bonnie Kersey (Paper Crafter at Large). Please email Linda at thefunkiejunkie@gmail.com for the codes for the Top 3 badges so that you can display them proudly on your blog.

And finally for the lucky randomly drawn winner for the $25 gift certificate to The Funkie Junkie Boutique; our congratulations go to #1 Lucy (Paper Glitter Glue). Please email Linda at thefunkiejunkie@gmail.com for the gift certificate details.

Thank you again to everyone who took part in this challenge and congratulations to all our winners. The current challenge 'Fall Gratitude' can be found HERE and runs through Tuesday, October 19th at 11:55 pm EST so there's still plenty of time to link your projects.

Saturday, October 9, 2021

Saturday Showcase: Tim Holtz Idea-ology altering ephemera

Hello I'm Janna and welcome to this week’s Saturday showcase! This week I am going to be showing you how to alter some Idea-Ology ephemera with different distress mediums. Then we will assemble a Halloween themed vignette box. For video instruction on altering ephemera click here.


Here is a list of the different components I will be using today. I will also  of some substitutes that could be made with the new Halloween Idea-ology release as well. 


To get started we will first start by altering ephemera with frosted crystal. For altering with frosted crystal add some distress embossing ink and then add frosted crystal. I like to work over a piece of scrap paper to catch the extra powder. Emboss with heat gun. The trick with the frosted crystal is to go easy with the heat. Too much heat and the crystal look will melt and become glossy.


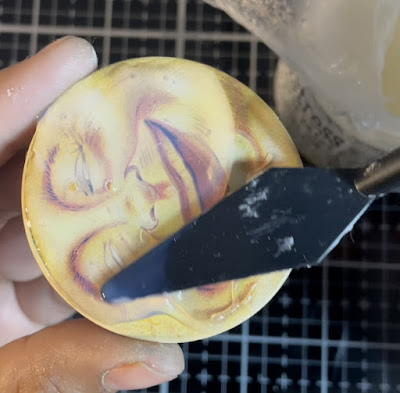
Next medium we will look at is vintage collage medium. This is a tinted collage medium. Here I have added it to an Idea-ology skull and a piece of thick board ephemera.


Regular collage medium is also very useful when transforming ephemera from shiny to mat. Typically when adding to ephemera I find that the medium will take about 2-3min to dry. This will vary depending where you live and the level of humidity.


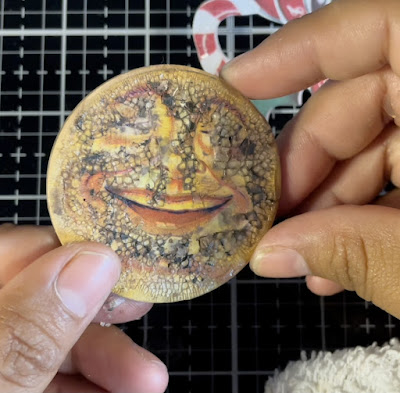
Here I am altering some Halloween ephemera with some distress collage crazing medium. For crazing I like to spread the medium on thick in the middle of ephemera and then fade it out as I get to the edges of a piece. This normally takes about 30-40 min to fully dry for me. This will vary with claimant and temperature of your work space.


After the crazing is dry I then like to add some distress crayon to help highlight the crazing lines. Here I used some distress walnut stain crayon.


Next we will be playing with snowfall grit paste. This distress grit paste is from the Ranger Holiday release and has the added bonus of distress glitter in it to give it a fantastic snowy look. On this ephemera frame I added some snowfall with a pallet knife along the interior edges.


Here is the dried snowfall. Love it so much, it looks just like sparkly snow.


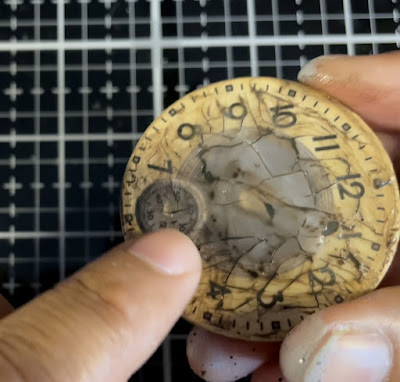
Now let’s checkout distress crackle paint. This is one of my absolute favorite mediums to use for altering ephemera. When hardened it gives a cool broken glass look. Here I added a fairly heavy layer of the crackle paint to a piece of thick board Halloween ephemera. I let the paint sit for about two hours.


Once dry I added some distress walnut stain crayon to help highlight the crackle effect.


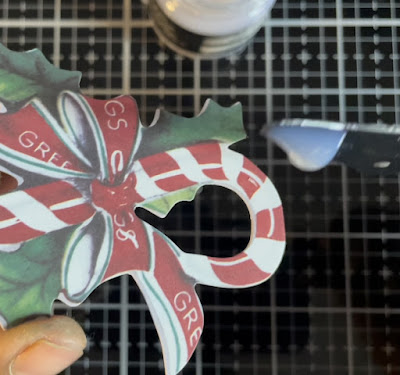
Here we are going to add some of the new distress Ranger icicle to some Holiday ephemera. When working with icicle I found that it has a much lighter consistency when compared to distress crackle paint. Because of this I do not add it on as thickly to ephemera pieces. Icicle spreads with the consistency of butter on toast. I add a thin layer and try to spread it out evenly over ephemera pieces.


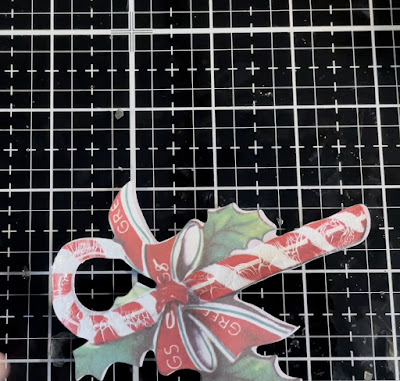
Once dried icicle crackles like ice. The cracks are loser and less square than distress crackle paint the crackles like glass. Icicle also has some added sparkle in it. To add more definition to the icicle effect I rubbed in some distress crayon picket fence.


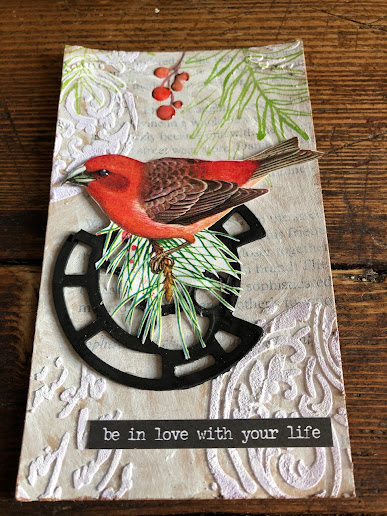
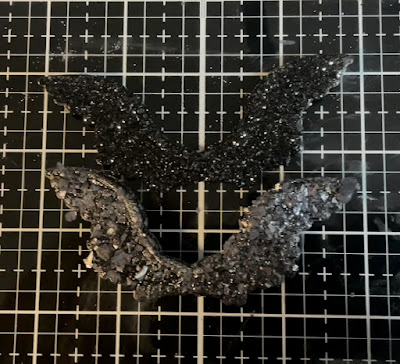
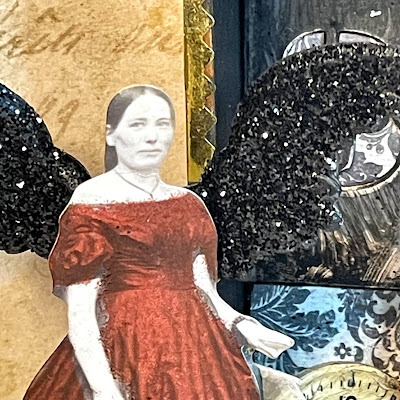
Now lets alter some impresslit wings. For these wings I die cut them from black cardstock and then added some Ranger sticky embossing powder with distress embossing ink pen. When embossing with sticky embossing powder it is necessary to work quickly. The sticky adhesive sets quickly so it is necessary to have all materials open and ready to use. I like to open my jar of glitter and have a pieces of scrap paper already in place when I start embossing. then the second the embossing powder is melted I pour on the glitter. To avoid burned fingers I like to hold the die cuts with the Tim Holtz Sizzix squeazers. For these wings I added nightfall glitter for the top set and midnight mica on the bottom set. The mica and glitter are from the Ranger Halloween release.


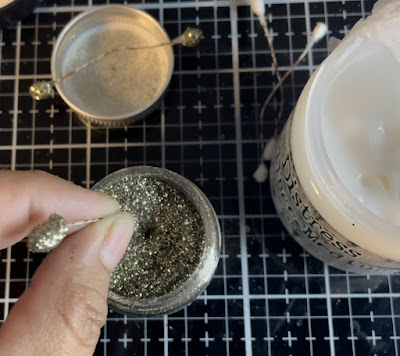
Down here I have altered some of the Idea-ology beaded berries. To alter these berries dip the berries into collage medium and then into some distress glitter. Here you could use any of the distress glitters to alter these berries such as: tinsel, garland, vintage platinum, night fall, or alcohol ink colored rock candy glitter. Once dipped in glitter I let these dry about 30min before they are ready to create with.


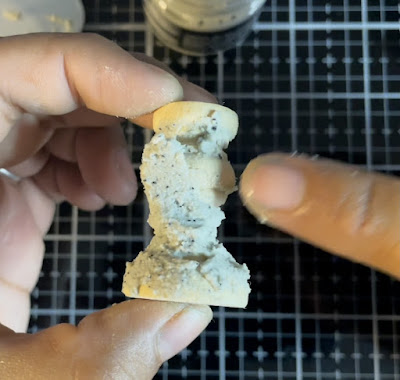
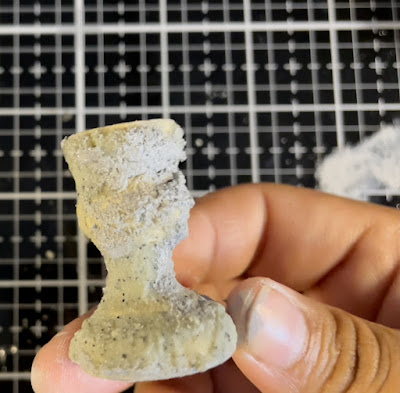
The last medium we are looking at today is distress crypt paste. This stuff is fantastic and has these wonderful dark specks in it. I find that it looks quite like granite. Here I am altering a finial into a granite pedestal. Like other texture pastes this medium works best with porous surfaces. Taking a large scoop of the crypt paste I spread it over the finial with my fingers to cover up the wood.

Since there were some gaps still visible on the finial I decided to add some smoked hickory distress paint.


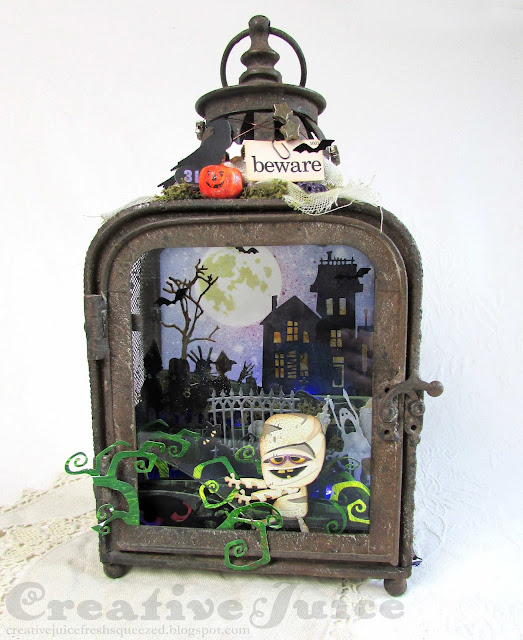
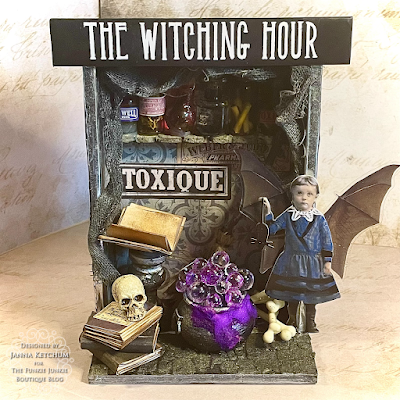
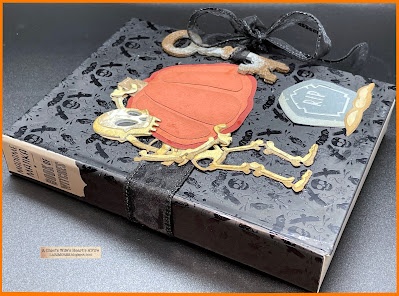
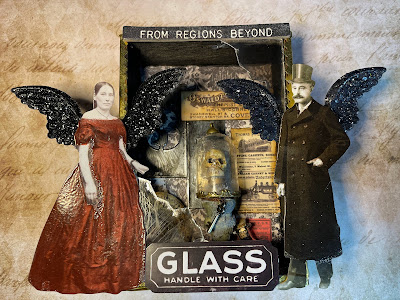
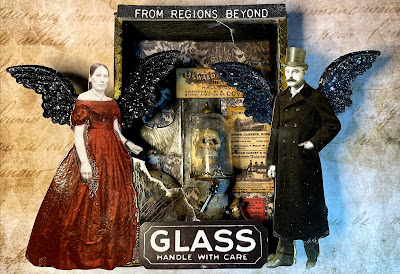
Now what to do with all of this fun ephemera. I decided to use some of the Halloween ephemera to create a Halloween themed vignette box.


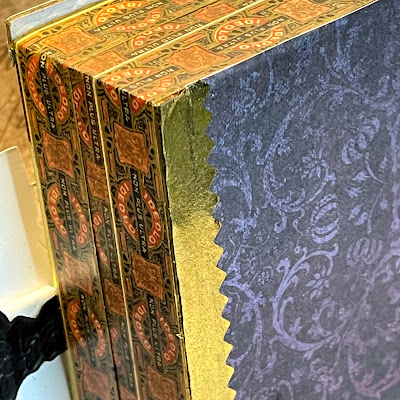
To start this project I lined the box with some of the TH Idea-ology Halloween wallpaper and painted the walls of the box black. Then on the outside I covered the box with washi tape and some TH Idea-ology paper. Click here for process video.


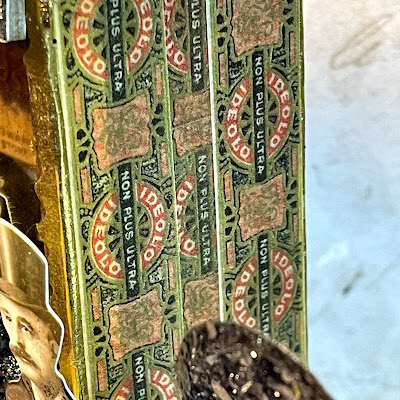
Then around the edges of the back of the box and the edges of the front of the box I added some pinked golden washi tape.


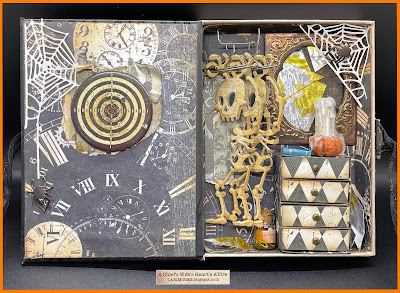
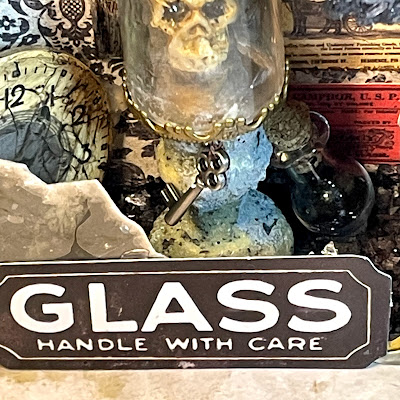
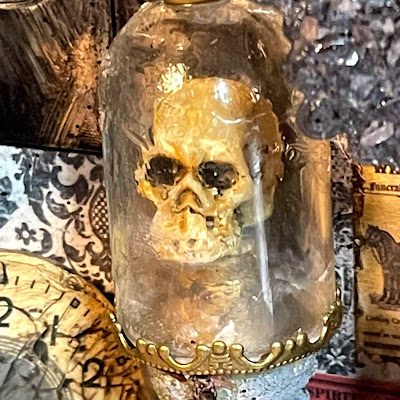
On the inside of the box I used many of the pieces I altered at the begining of this blog. In the background I have some of the thick board ephemera pieces. In the center I have the crypt paste covered finial and an altered Idea-ology skull.


For the skull, I wanted it to be the center piece of this creation. I placed it under a mini Idea-ology dome. The dome itself was also altered. Since the dome is made of glass I applied a layer of distress collage medium first before adding a layer of distress icicle. Adding the collage medium gave the icicle something to stick to. Otherwise it would just flake off the glass dome.


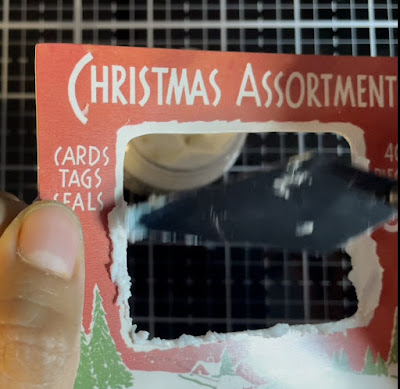
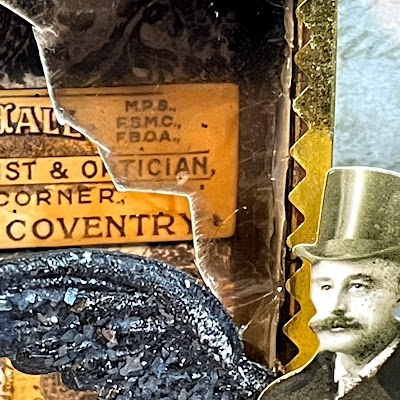
To add some different texture and detail I decided to throw in some mica sheets. These I cut with scissors and scuffed up with some sandpaper and glued them into the corners of the vignette box.


For the wings I decided to add them to some Idea-ology TH paper dolls. Before adding the wings I added some glaze to the paper dolls. To add the glaze I used the distress embossing pens to put down a layer of distress embossing ink. After I added the wings to the backs of the paper dolls with a foam square. For the lady I used fired brick embossing glaze and for the gentleman I used some distress walnut stain glaze.


At the top of the vignette I placed the chip quote that I added frosted crystal embossing powder to.


Thank you so much for joining me today over at the Funkie Junkie Saturday showcase. I hope you enjoyed learning a bit about altering ephemeral and assembling a vignette box. Don't forget that many of these Idea-ology pieces can be taken from old skews  of product and this years new releases. Until next time happy crafting!

~Janna 💕🎨

Collage medium
Distress crackle paint 
Distress glaze Fired brick 
Distress glaze walnut stain 
Distress  embossing ink dabber
Distress embossing ink pens 
Idea-ology Paper Dolls