Wednesday, December 5, 2012

A Light In The Darkness

Welcome back again to the second of our Light in the Darkness challenge.  It's time to see how our Funkie team has interpreted this challenge theme.


Marjie Kemper - She Who Stamps & Scraps

Anita Houston - The Artful Maven Haven

Linda Coughlin - The Funkie Junkie


**********Week #1 Post***********
Rebecca Deeprose of Paper Primrose, here to bring you the new fortnightly challenge which is "A Light in the Darkness".  Create with 'light' in mind.  Think candles, bulbs, lanterns, menorahs, and all things that brighten this time of year, using whatever type of project you'd like. We can't wait to see what you enlighten us with.  Today the Frilly Team is providing you with these beautiful pieces of inspiration!
Sue Carrington - Stamping Sue Style


Rebecca Deeprose- Paper Primrose


Monday, December 3, 2012

Chipboard & Metal Winners

Hello Frilly and Funkie friends!  We are back today to announce the winners of our last challenge - Chipboard and Metal.  Wow, there were some fantastic entries - really sensational work that was shared here!  Thank you to each and every one of you who played along with Marjie's fun challenge.  The design team have voted and we have selected Hettie from Hettiecraft, entry #14, with her fabulous embossed metal wreath as our Funkie Favorite for this challenge.  Wow, what an amazing project!  Congratulations Hettie!  Please email me at thefunkiejunkie@gmail.com for the code to your winner's badge.

We also have a $25 gift certificate winner to shop at The Funkie Junkie Boutique, selected by Random.org.  The gift certificate this time goes out to Silvia, entry #10.  
Congratulations Silvia!  Unfortunately the boutique is temporarily closed so you will have to wait to spend your gift certificate until I reopen in January.  Please email me at thefunkiejunkie@gmail.com to get your gift certificate code.

Thanks so much to all our visitors and players.  Hope to see you playing along with the current challenge A Light in the Darkness.  It is open through December 11th.


Sunday, December 2, 2012

Sunday Share

Good Sunday afternoon friends of Frilly and Funkie.  It's time to close out one Sunday Share and kick off a new two weeks of sharing artwork made with items from The Funkie Junkie Boutique.  Up for grabs is a 25% discount coupon to shop at The Funkie Junkie - that's 25% off on your entire purchase, anything you care to buy.  And even better, when I reopen from my temporary moving close, I will kick off the reopening with another 10% sale.  You simply cannot do better than that.  All my name brand items such as Ranger (Tim Holtz, Dianne Reaveley, Wendy Vecchi, etc,) and Melissa Frances are always sold at 20% below MSRP so combined with the 25% coupon and the 10% off sale you are actually able to buy at my wholesale cost!  Definitely worth playing Sunday Share, right?
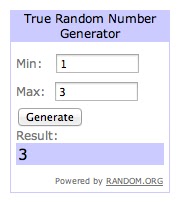
Not too many players this fortnight which gave the players great odds at winning.  Random.org has chosen entry #3 - Nicola from Paper Profusion as our 25% off coupon winner this time.  Nicola submitted this wonderful Christmas card made in part with glassine bags from The Funkie Junkie Boutique.  I absolutely adore that vintage Santa ornament!
Congratulations Nicola!  Please email me at thefunkiejunkie@gmail.com to obtain your coupon code.   And thank you so much to everyone who shared with us this fortnight on Sunday Share.

Have you shopped at The Funkie Junkie Boutique? All you have to do to enter is link up any creation you have made using products from my boutique here at Sunday Share. The only requirements are:

1) you must use something you purchased from The Funkie Junkie Boutique (the new one or Zibbet or Etsy)
2) you haven't shared it already here at Sunday Share
3) you have to mention the product in your post as well as my boutique and provide a link to my boutique

That's it - easy peasy and a fun way for you to showcase your work over here at Frilly and Funkie! So what are you waiting for? Link your work up below. If you need some guidance in knowing how to share your work here, read this post and let us know if you need further assistance.

Sunday Share is currently running for two weeks, every other Sunday from 5:00 a.m. ET until midnight on Saturday night. We will do a random drawing of all the entires that week and the winner will receive a coupon to shop with a 25% discount at the shop. This is our little way of rewarding those who shop at The Funkie Junkie Boutique. What are you waiting for. I know lots of you have already purchased items from The Funkie Junkie Boutique. Link them up here - it's a great opportunity to share your work with us and you just might shop next time for 25% off.

Saturday, December 1, 2012

Saturday Step x Step-Gift Card Holder


I have created a gift card holder using the Tim Holtz Pocket Envelope and the Festive Greenery Decorative Strip die.  At the moment the Funkie Junkie Boutique is closed and will reopen January 20, 2013.  Linda is moving and it is quite the undertaking.  I have used burlap string and the tiny clothespin from the Funkie Junkie Boutique.  There are not many steps in making these cute gift card envelopes.  You can see the open cut out before gluing it together.  I used scor-tape to adhere and then added my embellishments, it was super easy to make and will be great for gift card giving this Christmas.  Hope you have a wonderful weekend...enjoy!


Friday, November 30, 2012

Friday Focus - Crinoline

Please note:  since The Funkie Junkie Boutique is temporarily closed, the Friday Focus products will not be offered at 15% off.

Hi, thank goodness it's Friday!  It's a really good day today as I've also taken a day's holiday to do some much needed crafting! It's Sue here and today's Friday Focus is all about Crinoline. I absolutely love this fabric, it is so versatile whether you are die cutting, stamping or painting.

I recently bought the Tim Holtz snowflake die and thought it would look great made from Crinoline! 


I just used one thickness of the fabric which cut really well.


I then folded it as you would if you'd cut it from paper or card and then took a needle and thread and ran the needle through all of the folds.


The snowflake starts to gather as you pull the thread tight.


Once you reach the end sew the two ends together to complete the base of the snowflake and then I stuck the centre panel with some silicone glue.


Another thing I love to do is stamp onto Crinoline.


I've used Coffee Archival ink and this piece was intended for a background layer so I've used a large stamp.


To be sure the ink has set always heat set it (apologies for the shadow of my heat gun!). This makes sure that if you wanted to paint it as well the ink won't bleed.


Here's how I used the snowflake, I just added a shrink plastic snowflake and a bead  to it.


The background piece, I've used on this birthday card for my niece, it adds a different dimension to your projects.

I hope you've enjoyed today's Friday Focus and you all find some time to craft this weekend!

Saturday, November 24, 2012

Saturday StepxStep:Dylusions Christmas Card

Happy Saturday everyone! A big thanks goes out to all of our followers and participants! We appreciate all of you.
Anita Houston here of The Artful Maven Haven. It's my turn to host the Saturday StepxStep, and I've decided to show you how I've made this fun Christmas tag card using Dylusions, as well as show you snowflakes made with some of Ranger's new products.
 
Using Tissue or Washi Tape, tape two Manila Jumbo Sized (#10) Tags together, on both sides. Trim the excess off.
Using Picket Fence and Metallic Brushed Pewter Distress Stains, apply both randomly on one side of the tag card. Begin drying with a heat tool while misting with water to blend the Stains.
Flip the card over and do the same thing on the back. If there are really wet areas use a paper towel to help dry.
Spray the tag card with London Blue Dylusions Ink Spray. Dry thoroughly, and then do the same to the back.
Using the Pine Needle Cluster image from the Dylusions stamps, begin stamping the image in a pine tree shape, alternating green colors (I used Olive and Emerald.) from the Archival line of ink pads. Dry.
Using the same stamp image, color only the center stem of the pine needle using a brown color (I used Vintage Photo.) of Distress Marker. Randomly stamp this on top of the green areas, and apply color as needed. Color in the rest of the Tissue Tape using the same color for the trunk. Dry.
Using the Snowflake Stencil from Dylusions, place it down on the tag card so that the Candy Cane Border is right in line with the border of the bottom on the card, and tape it down. Use Barn Door and Picket Fence Distress Markers to color in the border. Use Glaze Pens to color around the Dotted Lines in the trim around the Candy Cane. Dry.
Flip the card over and work in the inside area. Using the two Holly Borders and the Merry Christmas Border, stamp the images in Jet Black Archival around the edges of the tag. Color these in with Water Pens that have been filled with Dylusions Ink Sprays (I used Postbox Red, Fresh Squeezed Lime, and Cut Green Grass.) Use Glaze Pens to color in the words, and Distress Markers for the border of the words. Randomly stamp Tim's Snowflakes in White Picket Fence Distress Stain in the blue areas of the tag card. If you want some glitz,  use Christmas Red Stickles to apply to the berries once the remainder of the card is finished. Stamp and cut out a sentiment, and adhere it.
Back to the front of the card (This was done last to keep snowflakes looking their best.). Lay the Snowflake Stencil over the tag card and tape it down where you want it.
Use the Emboss It Dabber to apply the fixative to the stencil through the snowflakes. Remove the stencil, and place the tag card on a scrap piece of paper. Sprinkle Sticky Embossing Powder over the fixative. Turn the card on its side and remove the excess powder. Heat the snowflakes with a heat tool until powder is melted.
When cool, the snowflake will be sticky...how cool is that?!? Sprinkle Rock Candy Distress Stickles Dry Glitter on the snowflakes. Turn card on its side and remove the excess. Repeat process if you want more snowflakes on the card.
Stamp a quirky person image from Dylusions Stamps, and color it in using the Ink Spray in Water Pens as well as Distress Markers. Attach this to the front of the card using foam tape. Color Seam Binding with Barn Door Distress Stain, wad up, and dry. Tie the ribbon to both holes of the tags. Using Clear Rock Candy Distress Stickles and any other color, highlight certain parts of the outfit. Let Dry.
Supplies:

Friday, November 23, 2012

Friday Focus - Sizzix Word Play and Cargo Numbers Dies

Marjie Kemper here, happy to be hosting the Friday Focus.  I've used the Sizzix Word Play die on this art journal page:


This die can cut through card stock, chipboard, fabric, foam, leather, metal foil, and more. My letters were cut from heavy pre-embossed grungeboard:


I  really like  the alphabet - it has a mixture of different fonts and the letter sizes vary from about 1-2".  Here are some other pieces I've made using this (and the companion, Cargo Number) die:

 Calendar page (details)


 Standard tag on an Oversized tag (details)


8 X 8 Canvas (details)


 Oversized tag (details)


12 X 12 Scrapbook layout (details)


Oversized tag (details)

Thanks for visiting us today.  Remember there's still time to play along with our Chipboard and Metal challenge.  It's open through Tuesday, November 27, and all are welcome to join!