Thursday, April 11, 2019

Guest Designer - Pirjo Repo

Please say hello and give a warm welcome to our Guest Designer for the Re-purpose, Re-use, Recycle challenge. Pirjo Repo of Repolainen reissaa & räpeltää was the Design Team's top pick from the Artist Trading Coins challenge.


Hi, I'm honoured to be a guest designer at Frilly and Funkie for this Re-purpose, Re-use, Recycle challenge.

My name is Pirjo Repo from Finland and I am known online as Repolainen.   I have done something with my hands most of my life .... draw, paint, a bit of everything since my skillful grandmother taught me. Now as an occupational therapist I can use my talent in my work too. I also love traveling and spending time with my lovely family!


Here is what I recycled ... a little ice cream container got a new life with cutting dies, stencils, lace and Inka Gold colours.


Inside the container are memories from all over the world.  I made some art "coins" to remember all of those wonderful places where we visited. The coins have been made from rubbish, broken jewelry and birch bark on one side and on the other side are photos of the places visited.


The container with those funny coins also works as a memory game because you can guess which country was visited and when?


I love this kind art and I will make more coins in the future.

I'm really looking forward to seeing how everyone interprets this challenge.

Hugs, Repolainen


* * *
To get all the details of Repolainen's ice cream container transformation and all the coins she creates, just pop over to her blog.  Once you have checked it out come on back and share your creation with us for this challenge.  The challenge runs through 11:55 pm EST on April 23rd and can be found HERE.

On Saturday, one of our designers will be here with a new Saturday Showcase and then next Wednesday the gals on the funkie side of the team will be here with their inspiration for the challenge so do visit us often.

Saturday, April 6, 2019

Saturday Showcase - Prima Marketing Finnabair Elisian Clockworks

Happy Saturday to you!  Suzz here to share a post filled with time!  I am highlighting the Prima Marketing Finnabair Elisian Clockworks Mould.   Now I am going to share what I did with the  lovely Clockworks mould but these techniques will work with any of the many beautiful moulds found in The Funkie Junkie Boutique.

The first clock I created was for the current "March Madness" challenge:

Alice in Wonderland Paper Doll Baseboard Graphic 45 Bloom Paper Sizzix Funky Foliage For the Funkie Junkie Boutique

Creating this beautiful clock had me trying all kinds of techniques to great a variety of clocks.

The clock in my vignette was created using the following steps:

1. Colored the inside of the mold with a Versamark marker to create a sticky surface.
2. Pouring embossing powder into the mold and shaking out the excess onto scrap paper to re-use.
3. Heating up and melting the embossing powder with the heat gun.
4. Repeat multiple times to create a thick enough clock that you can peel out of the mold.
5. After the clock was cool enough I brushed on a touch of gold paint to highlight the surfaces.

This was a time consuming process and the clocks were very fragile when finished. I liked the effect because they were very delicate and shabby. 

Here is the other clock created using this method:

Seth Apter Baked Velvet Desert Prima Marketing Elisian Clockworks Prima Marketing Ancient Coin For the Funkie Junkie Boutique

I used the Seth Apter Baked Velvet Desert for the base on this clock with the highlights from the Prima Art Alchemy Acrylic Metallique.

After creating my delicate embossing powder clocks, I wanted to try another medium and decided to use a no bake clay.

Seth Apter Baked Velvet Eclipse Clay Prima Marketing Elisian Clockworks Prima Marketing Ancient Coin For the Funkie Junkie Boutique

Steps: 

1. Push clay into moulds.  I filled the molds and tried to finish with a flat surface on the back.
2. Let dry.  (Follow instructions on the clay)
3. Peel back the mold.  (On all of my clocks I peeled the mold away from the materials slowly to try
    to prevent any breakage.)
4. Largest clock 
        a.  Spray with Distress Oxide Spray. (Mermaid Lagoon).
        b.  Let dry and then using a paint brush apply touches of gold paint.
5. Small clocks
        a.   Paint with gold shimmer paint.
        b.   Paint with gold paint.
        c.   After paint dries.  Ink up surface with Versamark Ink.
        d.   Sprinkle black embossing powder over surface and heat emboss.

After I finished with the first layer of colors and details I decided to continue with effects to antique the clocks.

Seth Apter Baked Velvet Eclipse Clay Prima Marketing Elisian Clockworks Prima Marketing Ancient Coin For the Funkie Junkie Boutique

Steps:
1.  Spray a mix of distress oxide sprays over the painted gold clock.  Let dry.
2.  Water down brown paint and apply to clock.

Seth Apter Baked Velvet Eclipse Clay Prima Marketing Elisian Clockworks Prima Marketing Ancient Coin For the Funkie Junkie Boutique

For the large clock to tone down the bright colors I added a few more layers of color.

Steps: 
1. Spray with brown distress oxide spray.  Let dry.
2. Add Metallique Wax to the edges and raised surfaces.
3. Smear watered brown paint to edges.
4. After everything dried ink up the entire clock with versamark watermark ink.
5. Cover with clear embossing powder and heat up until glossy.

I then wanted to take another try on using the embossing powders in the molds but wanted a solid fill.  I decided to bake the embossing powders.

Seth Apter Baked Velvet Eclipse Clay Prima Marketing Elisian Clockworks Prima Marketing Ancient Coin For the Funkie Junkie Boutique

Steps:
1.  Pour the various embossing powders into the moulds.
2.  Fill them and push the powders to fill all the spaces and level out the excess embossing powder.
3.  Place onto a lined baking sheet. (I used my toaster oven tray)
4.  Put in the oven and cook.  (I started at a lower temperature 200 degrees and raised it up to 300)  It took about 10 minutes. I just kept checking until the embossing powder was liquid.)
5.  Let cool.
6.  Carefully peel away the mould and pop out the clocks.

Seth Apter Baked Velvet Eclipse Clay Prima Marketing Elisian Clockworks Prima Marketing Ancient Coin For the Funkie Junkie Boutique

Unfortunately when I pulled my two little clocks I broke off a few pieces.  I didn't want to have to go back to the oven, so I popped them back into the mould aligning the broken pieces to where they belonged.  I used my heat gun and melted them right back together.

After I finished this process I remembered my melt pot.  I could have melted my embossing powder in the melt pot and poured it into the mould. (Something to try next time!)

Seth Apter Baked Velvet Patina Oxide Prima Marketing Elisian Clockworks Prima Marketing Ancient Coin For the Funkie Junkie Boutique

I tried a variety of embossing powders:  a teal mixed with gold,  a gold mixed with black,  and black embossing powders.

What happened was the colors tended to split and the back was one color and the front was mostly the color. I ended up with the dark teal as show above and the gold turned into a dark gold effect:

Emerald Creek Charred Gold Prima Marketing Elisian Clockworks Prima Marketing Ancient Coin For the Funkie Junkie Boutique

I decided to highlight both with a touch of gold wax to bring out the raised surfaces.

Seth Apter Baked Velvet Patina Oxide Prima Marketing Elisian Clockworks Mould Prima Marketing Metallique Wax Vintage Gold For the Funkie Junkie Boutique

Here are the final small clocks:

Seth Apter Baked Velvet Patina Oxide Prima Marketing Elisian Clockworks Mould Prima Marketing Metallique Wax Vintage Gold For the Funkie Junkie Boutique

The two on the left are clay based and the one on the right is the embossing powder clock with a wax patina.

Seth Apter Baked Velvet Patina Oxide Prima Marketing Elisian Clockworks Mould Prima Marketing Metallique Wax Vintage Gold For the Funkie Junkie Boutique

And here are the larger clocks.  The one on the left is my teal clock with a layer of collage paper decoupaged over the surface.  The one on the right is the clay clock with many layers of sprays, paints, and wax highlights.

Now what to do with all my clocks?  A box of clocks of course!

Seth Apter Baked Velvet Patina Oxide Prima Marketing Elisian Clockworks Mould Prima Marketing Metallique Wax Vintage Gold For the Funkie Junkie Boutique

I hope you enjoyed spending time viewing the clocks. (He He).  There is still time to play along in the March Madness Challenge and the design team has tons of inspiration in our new challenge starting on Wednesday!

Suzz

Products: 
Prima Marketing Finnabair Elisian Clockworks Mould
Seth Apter Baked Velvet Neutral Combo 
Seth Apter Patina Oxide 
Emerald Creek Charred Gold 
Prima  Marketing Art Alchemy - Acrylic Paint Sparks Unicorn's Hair
Prima Marketing Art Alchemy - Metallique Wax Vintage Gold
Prima Marketing Art Alchemy - Acrlic Paint Ancient Coin 
Stampers Anonymous - The Professor
Distress Collage Medium - Vintage
Tim Holtz Quote Chips 
Tim Holtz Collage Paper - Travel
Prima Marketing - Wild and Free Stamps
Ranger Distress Oxides Spray - Mermaid Lagoon, Walnut Stain
Ranger Distress Oxide Ink - Walnut Stain 
Idea-Ology Quotation Metallic Stickers
Wendy Vecchi Washi Tape
Versamark Watermark Ink 
Versamark Watermark Ink Pen
Ranger Clear Embossing Powder 
Keys 
Idea-Ology Story Sticks
Idea-Ology Swivel Clasps
Stampers Anonymous - Entomology 
Ranger Quick Cure Clay 
Prima Marketing Art Alchemy - Metallique Rustic Brown
Paper Dolls
Rabbit Charms 
Graphic 45 Bloom 8X8 Paper Pad
Idea-Ology Tim Holtz Vignette Box
Idea-Ology Watch Cameos

Wednesday, April 3, 2019

March Madness

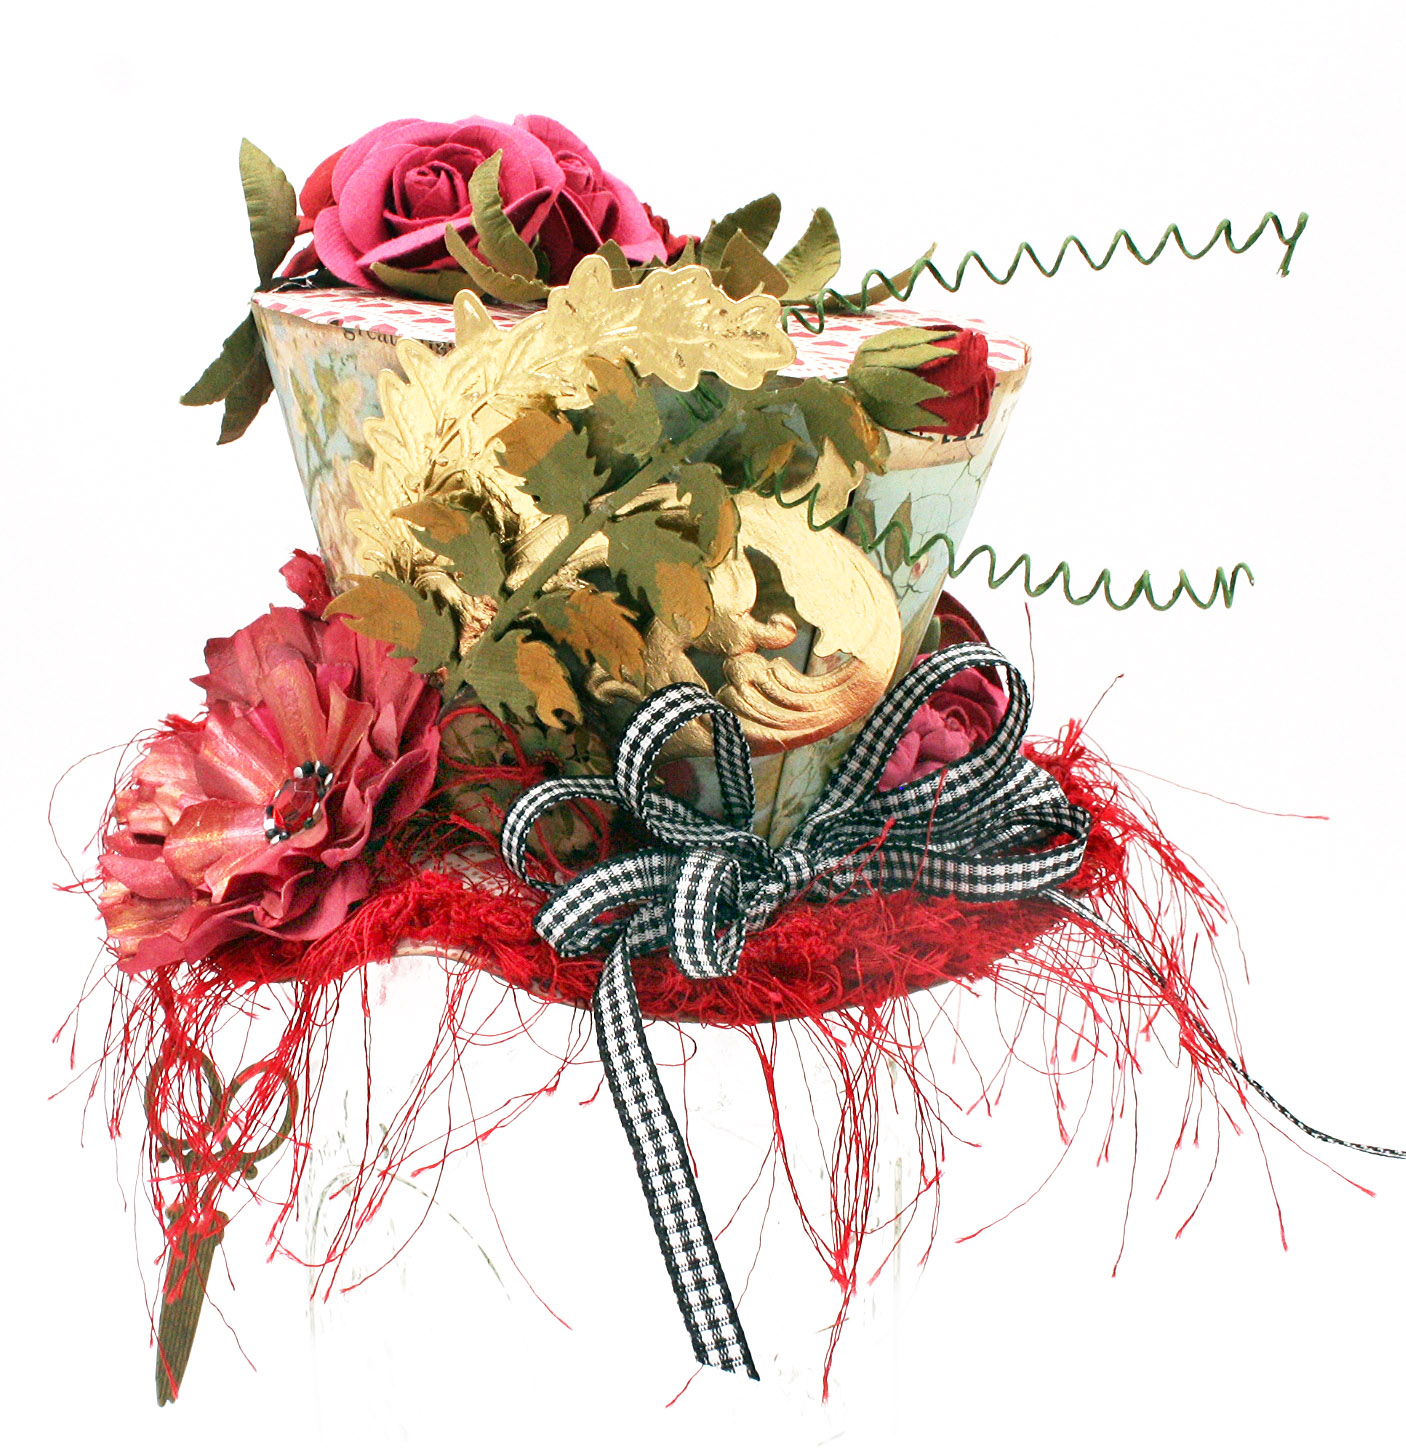
Hi! Suzz here to share the new Frilly and Funkie challenge with you! Don't be afraid because the challenge is called "March Madness", the challenge isn't going to require you to use basketball inspired images.

Instead I want you to be inspired by Alice in Wonderland. I started from this quote of a conversation between the Mad Hatter and Alice: The Mad Hatter asks Alice: "Have I gone Mad?" and Alice replies "I am afraid so. You're entirely bonkers. But I'll tell you a secret.  All the best people are."

The challenge is to take any idea or concept from this wonderful tale to inspire your project. There are so many wonderful bits or pieces to be inspired by like the Queen of Hearts, the Mad Hatter, the looking glass, tea party or Alice herself. The possibilities are endless. Anything can be your inspiration but make sure you reference what inspired your art from the story!

The winner will earn the chance of a Guest Designer spot here at Frilly and Funkie, and everyone who enters and follows the rules will go into the draw for the chance to win a $25 spending spree at The Funkie Junkie Boutique. And there are Top 3 Badges for three further outstanding entries, chosen by the Design Team, because choosing just one winner is so hard!

The guidelines for entering are simple; create a new vintage or shabby chic project following the challenge theme, link it below to your post (not just your blog) and also include a link back to this challenge in your post. You can combine our challenge with up to 10 challenges (including this one) to be in with a chance of winning. If you are entering through a public forum (such as Instagram) you'll need to include the words Frilly and Funkie Challenge. Also, please be sure to turn off your Word Verification so our Design Team can leave comments on your blogs. Make sure you follow these rules as unfortunately, we have had to eliminate entrants from the prize draws in the past.

For more March Madness inspiration, the amazing Funkie side of the Design Team have created these lovely ideas:

Suzanne Czosek - Suzz's Stamping Spot

Graphic 45 Bloom Tim Holtz Baseboard Dolls Sizzix Funky Foliage Ranger Distress Oxides Prima Marketing Elisian Clockworks For the Funkie Junkie Boutique

Sara Emily -- sarascloset


Jenny Marples - Pushing The Right Buttons


*****************************************************
WEEK ONE

To get your March Madness ideas percolating,  the talented Frilly side of the Design Team have  steamed up some lovely ideas:

Kathy Clement - Kathy by Design


Cec Wintonyk - CW Creations


Maggi Harding - Scrap, Travel & Bark!

Time to pull out your Alice in Wonderland inner spirit and craft up some fun. For even more inspiration make sure to join us here tomorrow as we welcome our latest Guest Designer and next Wednesday the Funkie side of the Design Team will be back with their March Madness makes.

Suzz


Monday, April 1, 2019

Challenge Winners - Pass The Tissues, Please!

Today we announce our winners from the 'Pass The Tissues, Please!' challenge. Thank you to everyone who shared their inventive ways for using tissues with us. The team loved seeing what you came up with for this one.


Our final choice of overall winner this time was #3 Suzi (Shabby Crafts)  who made this wonderful shabby chic Easter egg. We loved how imaginatively Suzi used tissue to create the shell and then decorated it all so beautifully. Congratulations to Suzi on being our favorite and winning the opportunity to be a Guest Designer here at Frilly and Funkie for a future challenge. You will be contacted with all the details.

And now our picks for the three winners of the Frilly and Funkie Top 3 Badges for this challenge; the choices this time in numerical order are; #6 Alice K, #8 Drea Slee  and #10 Lyla Larimore. Please email Linda at thefunkiejunkie@gmail.com for the codes for the Top 3 badges so that you can display them proudly on your blog.


And finally we have a randomly chosen lucky winner for the $25 gift certificate to The Funkie Junkie Boutique. Our congratulations this time go to #4 Judy Hale Everett! Please email Linda at thefunkiejunkie@gmail.com for the gift certificate details.

Thank you again from all of us here at Frilly and Funkie to everyone who took part in this challenge and congratulations to all our winners. The current challenge, 'March Madness' runs through Tuesday, April 9th and the Funkie side of the Design Team will be back here this Wednesday, April 3rd with some more inspiration for you. We look forward to seeing your entries!

Have a great week everyone.

Saturday, March 30, 2019

Saturday Showcase: Mad Hatter's Tea Box and Mini Album Tutorial with Stamperia Alice

Hello, Friends!  Kathy here with this week's Saturday Showcase. The current March Madness challenge invites us to create an Alice in Wonderland inspired project.  I created  a super cute  (almost) ATC sized  mini album in a box using Stamperia's Alice collection. Today I'm sharing the details, tips, ideas,  and a tutorial for that project. So go grab a cuppa and a snack because this is a photo heavy post.


One of the things I love about working with Stamperia papers is that they take the trouble to build all the wonderful mixed media effects we love so much right into the paper design.  Another great feature of these papers is that (almost) everything you need to create a project like this one is contained in one 12x12 paper pad: tags, fussy cuts, focal images, circular elements, borders, and backgrounds are just waiting to be brought to life. 

The Graphic 45 Clock Die provides a nice backdrop to the fussy cut teapot that serves as a focal image.

TIP: Back your focal image with foam adhesive to add depth and dimension to the design.  


The base for this boxed album is a Graphic 45 ATC box.  The box measures a dainty 3 1/2" x 4 1/4" and contains 3 Graphic 45 Kraft ATC tags with a brass binding ring. I've used the tags to create a faux lock on the front of the box.  I've dangled some antique bronze teacups, a teapot and a white rabbit charm from the binding ring. 

TIP:   Score each tag  1 1/2" from the domed edge and burnish well with a bone folder.  Then die cut the tag liner using the matching Graphic 45 die.  Cover the tags, then score a second time before adhering the tags to the box lid and bottom. 


I pulled this miniature spoon from vintage spoon collection and used it to decorate the spine of the box.  The bun feet are made by stacking wooden Bingo chips which are then wrapped with 1/2" Scor-Tape and a strip of designer paper. 

TIP: Glossy Accents is a great for attaching metal embellishments to a project.  Just add the spoon as the last detail, then set aside for 24 hours to dry.

A Peek Inside the Box


I've covered the inside of the box with panels of paper from the collection.  I'll share the cutting guide for that below this post.


You'll learn how to create the 2 3/4" x 3 3/4" x 1 1/2" mini album base and page units in the video tutorial below.  


I've wrapped the album spine with printed burlap fabric to provide strength and texture to the composition.  Because the album has to fit inside the box, I kept the fussy cut layers flat.  Use 1/2" Scor-Tape to attach the ribbon closure to the album cover.


The album is made up of 3 pocket page units.  Each unit has turn pages, a pocket page and either a flip page or a flap page.  You'll learn the formula for creating these page units in the video tutorial.  Even though this album is small, I had no trouble using the 12x12 papers to decorate it.  I simple scored pages to make accordion style pull out mechanisms, or flaps.  It was all good fun!


My husband's favorite tea adds lovely quotes to the tags, so I save them.  They add a fun element to this album design.  


I've tucked a tea bag into the side pocket of each page unit, just for fun.

TIP: Turn a fussy cut element into a tuck spot by adhering just one edge to the album base.  


This photo gives you an idea of the size of the album.  That's my hand in the photo.  


Here is another example of how you can make a large element fit into a small album.  The bookmark on the right hand page is almost twice as tall as the album base.  To make it fit, I scored a little flap along the bottom border.  Then I scored a second time to create this cute fold out page.


Here is is opened up.  It also folds down to reveal a quote hidden on the page behind.  I turned the second bookmark from this collection into a little magnetic folio.  You'll see that in the video below.


Here's one of the flap pages from the album.


To fit this fussy cut teapot in the center of the page, I scored it down the middle and folded it in half.  then I adhered one side to the album base, folded it, placed adhesive on the back and closed the page over it.  This way, it can span both pages.  Isn't it fun?


And finally, here is another pull out page with an illustration of the Mad Hatter's Tea Party.  

Mad Hatter's Tea Box and Mini Album Video Tutorial

If you'd like to take a full tour of the album, then learn how to build the base and the page units, please enjoy this video tutorial.


 I hope I've shared some tips, techniques and inspiration that you can use in your own crafty adventures.  I had such a good time creating this project, and hope you'll give it a go.  You'll find a linked supply list and cutting guide below.

Happy crafting!
kathy

Product Links to The Funkie Junkie Boutique

For the box:  Graphic 45 ATC Box 
  • Inside box 
    • (2) 3 7/8" x 2 1/8" for long sides
    • (2) 2 7/8" x 2 1/8" for short sides
    • (1) 2 3.4" x 3 3/4" for box bottom
    • (1) 2 1/4" x 4 5/8" for inside spine
    • (1) 3 1/4" x 4 5/8" for inside cover
    • Cut the playing cards to 2 1/4" high and wrap around the outside box.
  • Outside box
    • (2) 3 1/2" x 4 5/8" for lid and bottom
    • (1) 2 3/8" x 4 5/8" for outer spine
For the Album

  •  (2) 2 3/4" x 3 3/4" Chipboard Covers 
  • (1) 1 1/2" x 3 3/4" spine
  • 9 1/4" x 4 3/4" kraft paper to cover the chipboard covers
  • 7 1/2" x 3 1/2" kraft paper for the spine mechanism
    • score on the long side at 1 1/2, then (9) 1/2" scores
Page Units

  • 5" x 7 1/4"  Score on the short side at 2 1/2" , long side fold in half and pinch, then score.  Each page unit will measure 2 1/2" x 3 5/8" when folded.  
  • Page liners: 2 3/8" x 3 1/2"
  • Fold out pages: 12" x 2 1/4".  Score every 2 3/8" then trim

Thursday, March 28, 2019

Guest Designer - Val Thorpe

We are pleased to welcome a Guest Designer for the March Madness challenge.  Val Thorpe was the top pick from the Let Me Count the Ways challenge and you can find her work on her blog, Val-Belle's Ramblings.


My name I Val Thorpe and I live in Johannesburg, South Africa. I am married (42 years) to Simon and we have two kids, and three grandkids. I have been crafting most of my life in one form or another and I have been scrapbooking since about 2004. I love to make cards, tags, art journal pages and of course scrapbooking. I am honoured to have been chosen to be a Guest Designer here at Frilly and Funkie. I have a blog if you would like to see more of what I do - just visit me HERE.


For this challenge I chose to make a tag. I love tags because I can really play without fear of messing up. I started with a white tag 4 ¼ by 8 ½ made from mixed media paper.


I chose to use two silk screen stencils, one is the stack of teacups and the other is the splats and script, and used white acrylic paint through them to create a resist. I love these stencils because you get such a thin coat of paint through them. I let it dry and then covered the tag with a tea dye distress oxide blend. I went around the tag with walnut stain to darken the edges, then buffed it up to reveal the white stenciling. I used a number stamp in a couple of places and watercolour painted the teacups with distress inks.


I added an acetate clock which I cut and added in two places. The characters from Alice in Wonderland I found on line and cut them out and used the quote from the Mad Hatter that says… ‘Have I gone MAD? I’m afraid so. You’re entirely BONKERS. But I’ll tell you a secret. All the BEST people are.’ I ended the tag off by backing it onto a slightly bigger black tag and put some seam binding in white and tea dye with a bit of black twine and I had attached a key to - to the tag and stuck in a couple of big pearl pins and a few flowers.

* * *
To get all the details of Val's tag and see more of her wonderful work, check out her blog. When you are done there. come on back and share your March Madness creation with us. The challenge runs through 11:55 pm EST on Tuesday, April 9th and can be found HERE.

Don't forget to check in on Saturday for another inspiring Saturday Showcase and then next Wednesday, the gals on the funkie side of the team will be here to share their March Madness creations.

Saturday, March 23, 2019

Saturday Showcase - Seth Apter Baked Velvet Powders and Tim Holtz Typography Collage Paper

Hi everyone and welcome to another Saturday Showcase, the Design Team's chance to share tutorials and products available from The Funkie Junkie Boutique with you and kick start your creative weekend. Today I'm sharing the tutorial for two cards made combining Seth Apter's new Baked Velvet Embossing Powders with Tim Holtz new Typography Collage Paper and Wildflower Stems Thinlits Die Sets. Here are the finished cards (click on each image for a closer look);


Let's get started on making these cards. Begin by covering a 6 inch wide piece of white card with the Typography Collage Paper using Distress Collage Medium Matte and a Collage Brush to stick it in place.


Using the Wildflower Stems dies cut various stems and flowers from the Collage Paper card.


Apply embossing ink over some of the thinner stems and cover with the Aegean Sea Baked Velvet Embossing Powder. Since these powders are translucent when heat set you can still see all the detail from the Collage Paper underneath and the various shades of yellow/brown will also affect the colour seen on top.


Repeat the process for the leaf stems, this time using Dusk Baked Velvet Embossing Powder.


Repeat the process for the flower stems, this time using Vintage Beeswax Baked Texture Embossing Powder.


Cut pieces of white card to fit your card blanks and stamp lines of stitching using Tim Holtz Stitches stamp set with Wendy Vecchi Peat Moss Archival Ink. I used a Stamp Platform for this so that I could easily stamp the same images onto separate pieces of white card for each card.


Apply Opaque Texture Paste through some of the Stitched Layering Stencil between the stamping and leave to air dry.


Stick pieces of lace over the stamping - I used Venise Lace Trim and Metallic Gold Crocheted Ribbon, both available from The Funkie Junkie Boutique.


To finish glue the embossed leaf stems and flowers over the lace and ribbon before adding a Transparent Wings butterfly and stamped sentiment (the two used for these cards came from Wendy Vecchi's new Delightful Art Stamp/Stencil set). Matt the card onto a kraft layer before adding to the card blank.

Here are some close ups so you can see more of the detail;


Hopefully this tutorial will kick start your own ideas for using Seth Apter's new Baked Velvet Embossing Powders and Tim Holtz Typography Collage Paper. Don't forget, if you use tissue in your projects there's still time to enter the current Frilly and Funkie challenge 'Pass The Tissues, Please!'

All the products used are available from The Funkie Junkie Boutique and are listed below.

Have a great weekend,
Jenny xxx