Friday, February 17, 2023

So Many Hearts!

Hello!  Happy belated Valentine's day!  Suzz here, posting about love inspired by the wonderful Tim Holtz Sizzix Stacked Tiles Hearts dies.

The inspiration started from over 30 hearts cut from white cardstock.  They were all spritzed with a mix of pink, yellow, and red mica stain sprays. 


They originally were sprayed a few at a time with different colors.  But then I thought wouldn't it be fun if I created a background by layering them onto a sheet of cardstock and spraying layers of colors.

Then I decided to add another layer of texture and used the Valentine's stencil and opaque distress paste to randomly apply words across the surface.  

After that dried, I laid the stencil back over the words and sponged with red distress ink over the embossed letters to really make them pop out. 

Next up I created a background using the dies as a mask and overlapped them on each other on a sheet of mixed media paper. 


I spritzed over the dies and captured the layered hearts on the background.  Before cleaning the inky spray off of the dies I laid another sheet of mixed media cardstock on top of the dies and picked up the reverse hearts.

Before I started using my hearts on the various cards that I created, I decided to add another layer of texture.  I took some of the hearts and used the sparkle stencil with opaque distress paste to randomly add stars.  I let the paste dry completely and then used the stencil again to sponge on a contrasting ink.  

Then I used them to create a few different Valentine's cards for loved ones.

I added a few die cut letters that were sprayed with the same inky colors to use as embellishments.

Wednesday, February 15, 2023

Loving This Sweet Valentine's Day Curio Clock

Hello, Lisa Hoel here! It's my turn to share my "All About Love" project. I still have Tim Holtz Idea-ology products left from Christmas crafting so I decided to "Valentine" them.

Lisa Hoel for The Funkie Junkie Boutique - All About Love Valentine's Curio Clock  #creativejuicefreshsqueezed  #mymakingstory #tim_holtz #thefunkiejunkieboutique #sizzix

The red Christmas Curio Clock is perfect for Valentine's Day too! I painted a Salvaged Snowman in Valentine colors so he fits perfectly in the scene.

Lisa Hoel for The Funkie Junkie Boutique - All About Love Valentine's Curio Clock  #creativejuicefreshsqueezed  #mymakingstory #tim_holtz #thefunkiejunkieboutique #sizzix

The outside is decorated with washi tape, baker's twine and an Idea-ology token.

Lisa Hoel for The Funkie Junkie Boutique - All About Love Valentine's Curio Clock  #creativejuicefreshsqueezed  #mymakingstory #tim_holtz #thefunkiejunkieboutique #sizzix

Of course I felt compelled to incorporate Tiny Lights because everything is better when it lights up. ;-)

Here's a look at how this came together…

Step 1 – I first painted the Salvaged Snowman with Distress Paints. When the paint was thoroughly dry, I antiqued it using Hickory Smoke Distress Crayon.

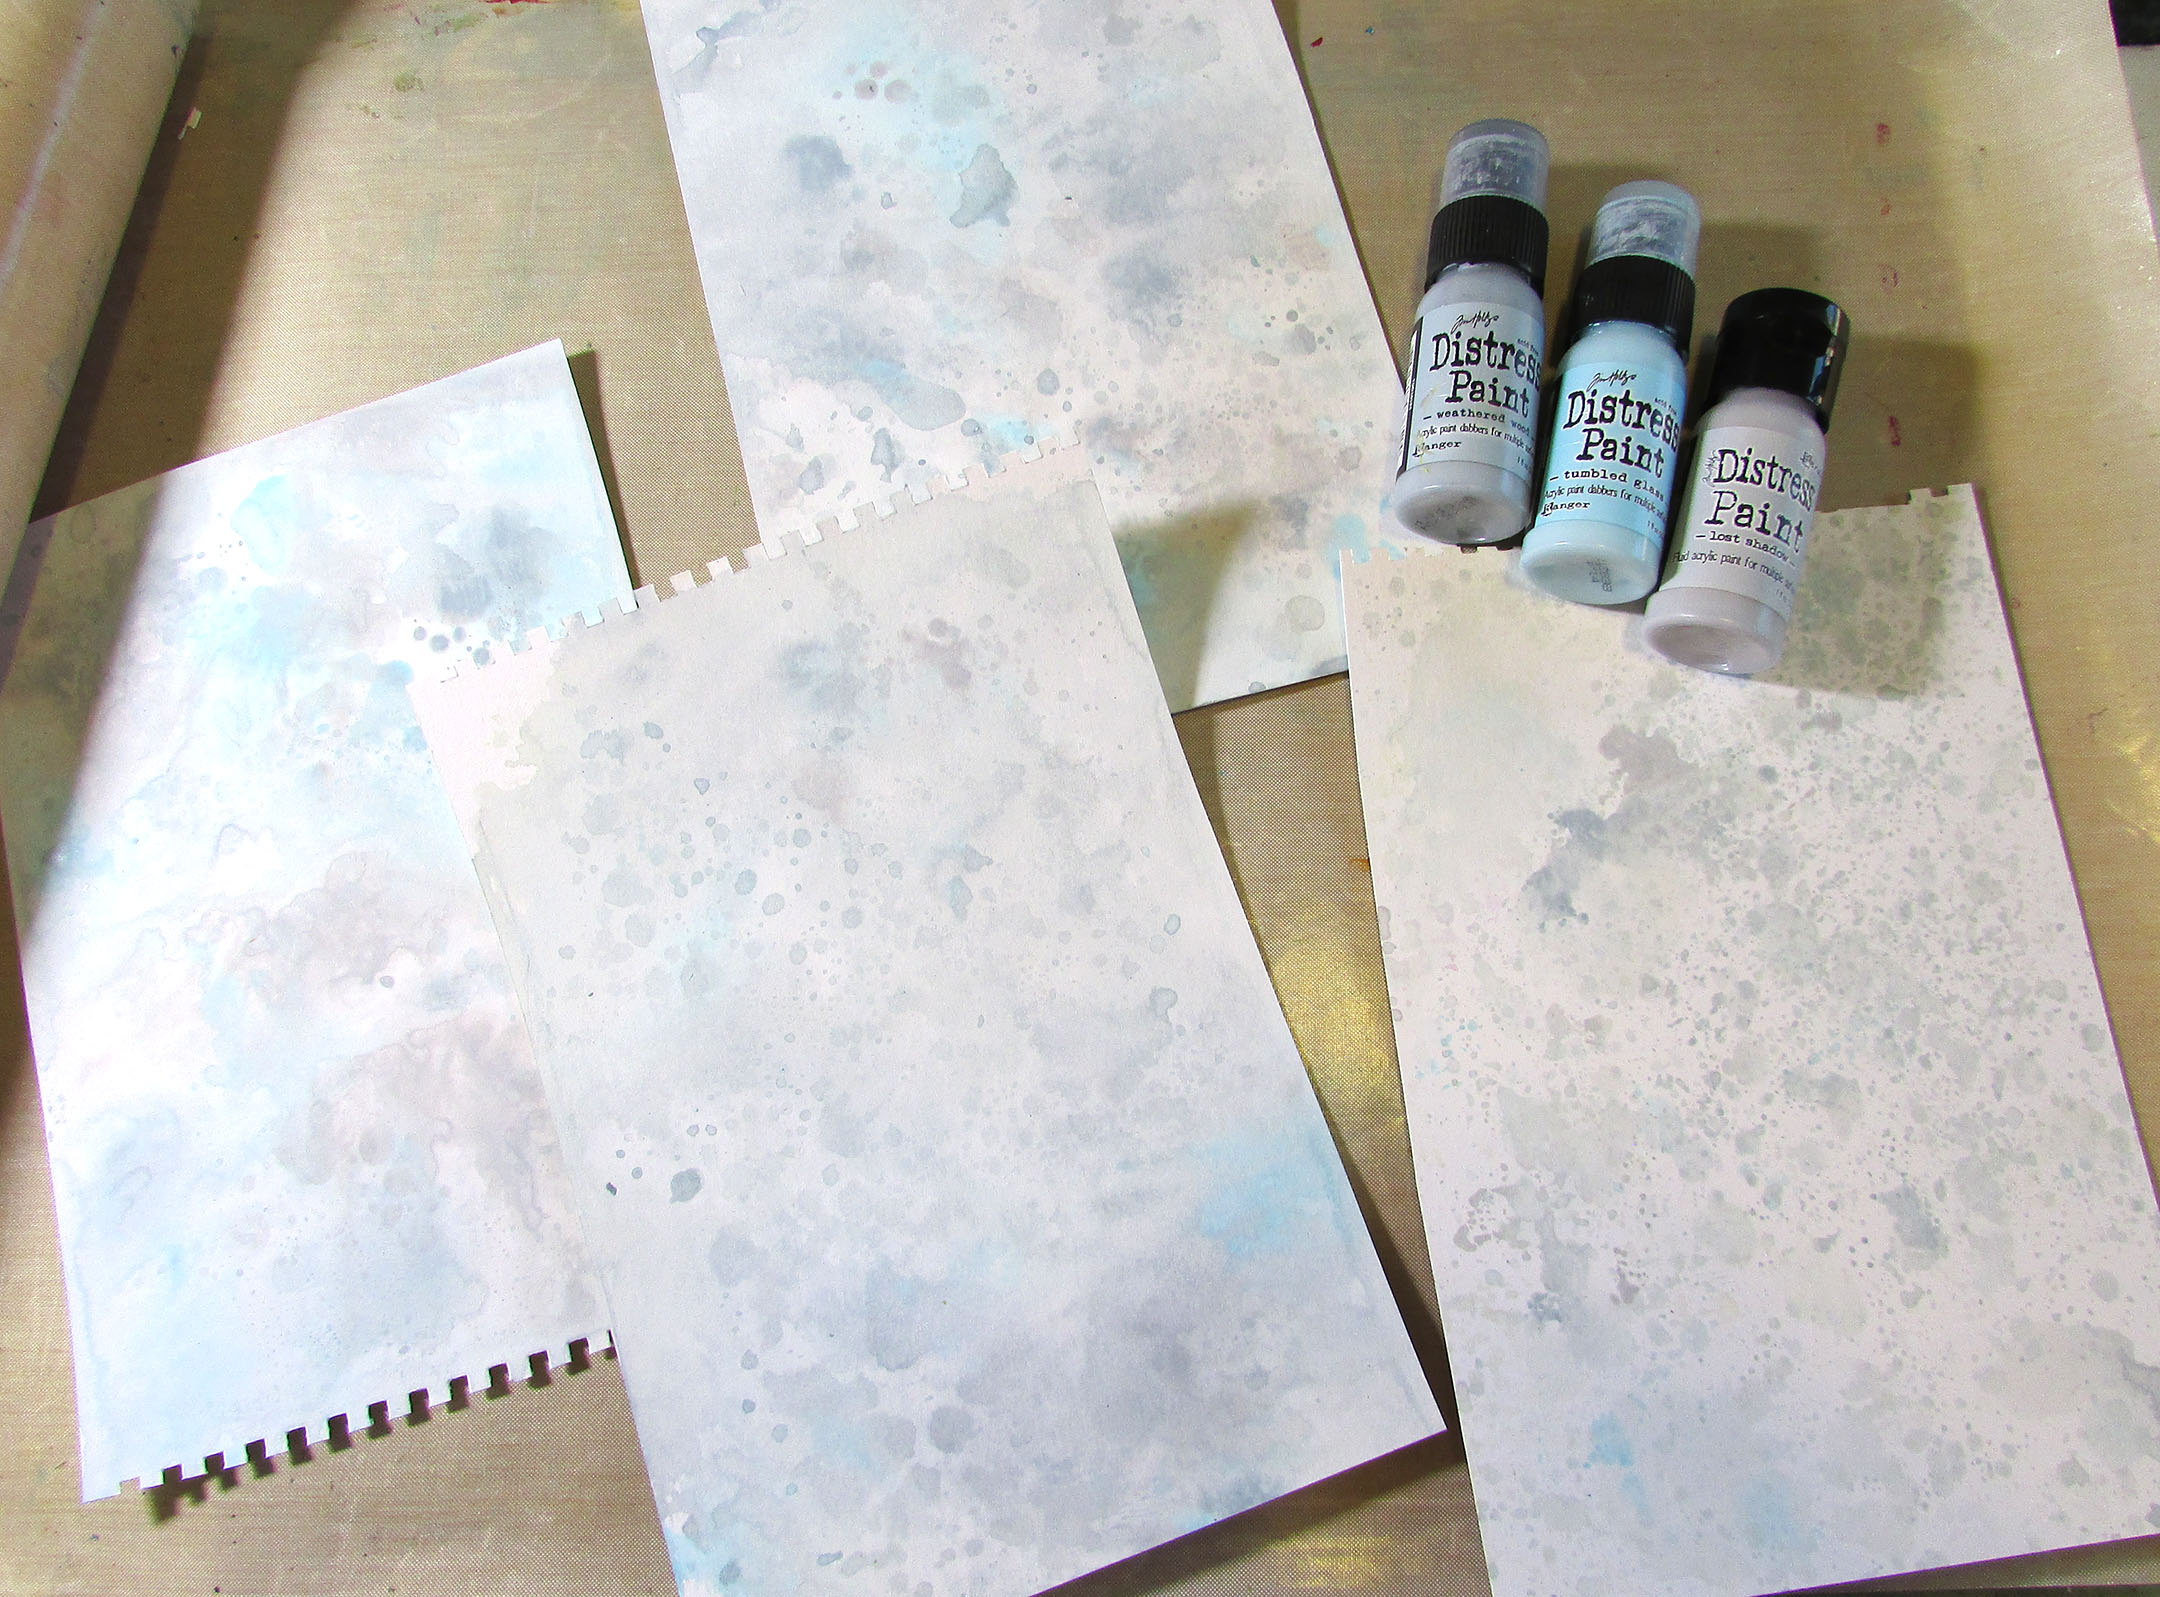
Step 2 – I used Lost Shadow, Weathered Wood and Tumbled Glass Distress Paint to make some backgrounds. These three colors have a great wintery feel!


Step 3 – I used the Falling Hearts Tim Holtz Die to cut into the clock background. I backed the whole thing with a circle of pink glassine paper I had in my stash. (You could use tissue paper or alcohol inked plastic too.)


Step 4 – Installing the Tiny Lights wasn't hard. I drilled a hole through the metal clock backing and coiled the light string around inside. I started out hot gluing it in place but the glue wasn't sticking well to the slick metal. Tape ended up working better. I put some little foam core spacers around the edges of the back to create space between the lights and the paper background.


Step 5 – An older die set, Mini Christmas Things, had the perfect little snowflake shape to add the final February wintery touch.


Not just for Christmas!

Thanks for stopping by. Keep an eye on the Funkie Junkie Boutique Blog, TFJB Inspiration Ave because you are now getting regular doses of expanded (and inspiring) content each week. Don't miss it…

Supplies used:

Tim Holtz Thinlits Die Set - Funky Nordic
Distress Collage Medium Matte
Tim Holtz Idea-ology - Christmas 2022 Curio Clock
Tim Holtz Idea-ology - Christmas Salvaged Santa & Snowman
Tim Holtz Idea-ology - Tiny Lights
Tim Holtz Idea-ology - Woodland Tree Lot
Tim Holtz Distress Rock Candy Dry Glitter
Stampers Anonymous Glitter Duster
Distress Paint - Lost Shadow, Kitsch Flamingo, Black Soot, Ripe Persimmon (discontinued product), Fossilized Amber, Lumberjack Plaid, Gathered Twigs (discontinued product), Weathered Wood, Tumbled Glass (discontinued product(
Distress Spray Stains - Spun Sugar
Distress Oxide Spray Stain - Spun Sugar, Evergreen Bough
Distress Crayon - Hickory Smoke
Distress Mica Stain - Winterberry (discontinued product)


Monday, February 13, 2023

How to Make a Gorgeous Valentine's Day Bag


Hello Friends. It's Teri with TerisMailbox presenting for The Funkie Junkie Boutique. Today I have a fun Valentine's Day Bag with stenciled mixed media and die cuts!


Follow along to see all the techniques used to create this bag!

I do have a video here if you prefer to watch the process:


 Stencil the Front Panel

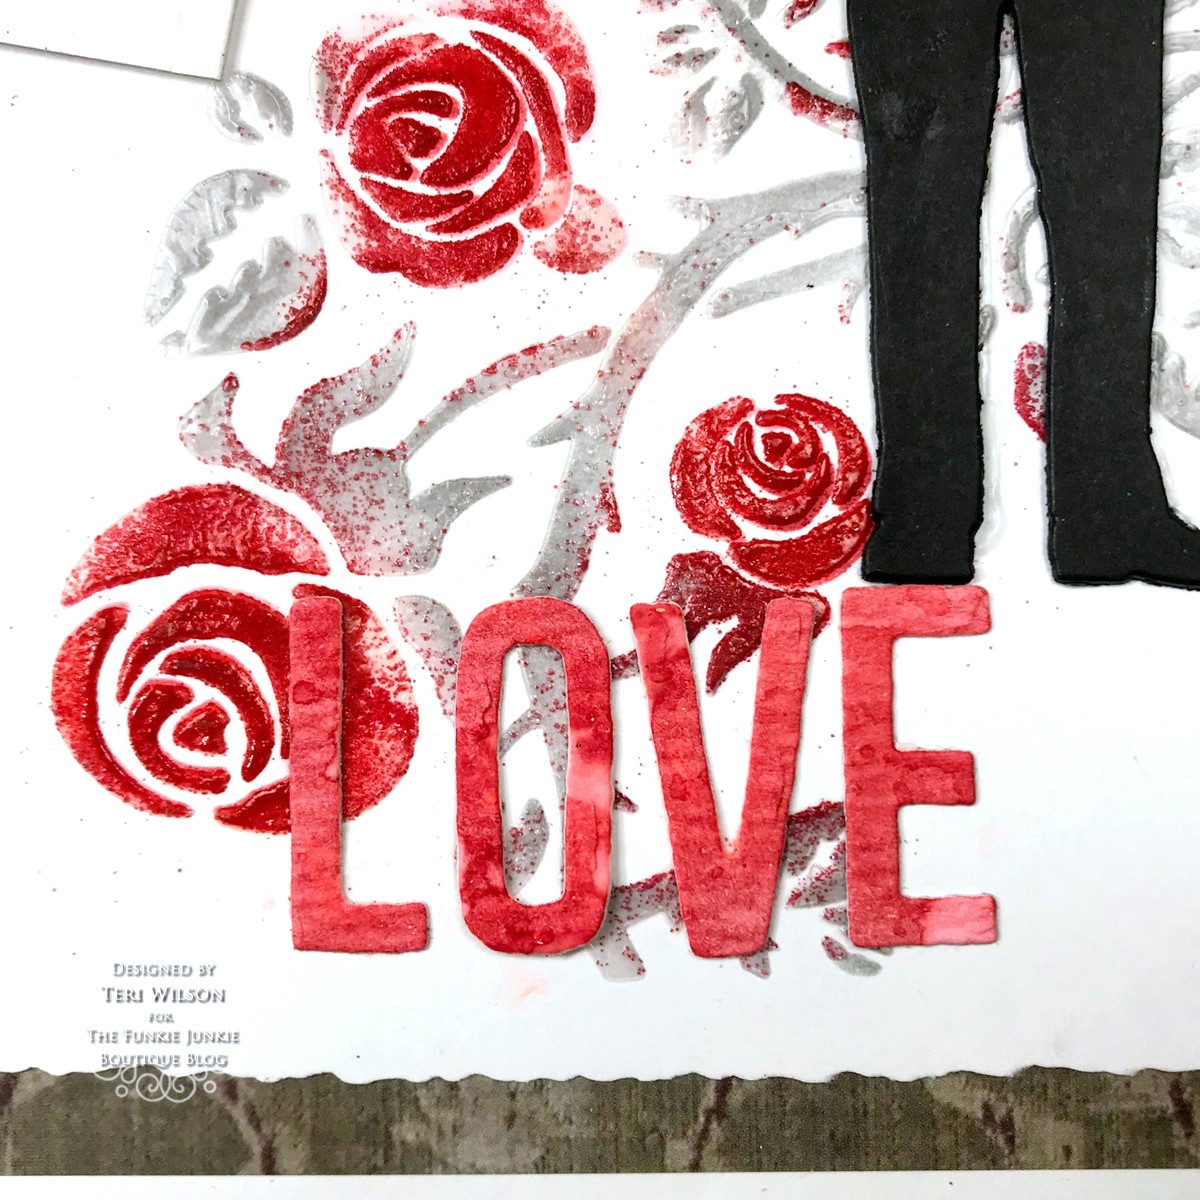
Start with a white gift bag. Cut a piece of white cardstock to 8.5 x 5.5 inches. Center the Thorned Stencil on the cardstock and ink blend the roses with Lumberjack Plaid Distress Ink, and the stems with Hickory Smoke Distress Ink. Clean and dry the stencil.

Match the images up and apply Translucent Crackle Grit Paste. Carefully remove the stencil and sprinkle with Lumberjack Plaid Embossing Glaze on the roses.

Be sure to clean the stencil off as soon as possible.

Tap your fingers on the bottom side of the panel to spread the embossing glaze out. After air drying, heat set to bring out the shine of the glaze.

Assemble the Front Panel

Find an Idea-ology Backdrop paper that compliments the center panel. I used a piece from Volume 3 Backdrops. You may be able to find an appropriate panel in another Backdrop set or maybe one of the Worn Wallpaper sets.

Use a Deckle Edge Trimmer to trim the stenciled panel to 4.25 x 7.5 inches. I love the effect this trimmer creates and unlike the Deckle Edge Die Cuts, you can edge any size panel. Trim the printed panel to 4.75 x 8.0 inches. 

Die Cut the Additional Pieces

Die cut one of the Gentlemen from Black card stock. Cut two and glue them together. 

Use pieces of watercolor ink smooshed card stock from your stash if you have it to die cut the blooms using the Funky Floral 3 set and the word Love using alphanumeric Theory dies.

Die cut a tag using The Tag Die and stencil using the Thorn Stencil like we did above.

Assemble the Bag

Attach the two long panels to the front of the white gift bag. 


Glue the blooms onto the matching stem pieces. Trim the lower leaves off and cut the longer stems apart. Arrange the blooms to form a bouquet with a couple of long stems for The Gentleman to hold. Use a piece of Press N Seal to pick up the blooms as a bunch so you can add Collage Medium to the back of the blooms.

 
Attach the letters to the bottom center of the stenciled panel. Use Collage Medium to glue The Gentleman just above the E. Slide the bouquet in his right hand. 

Dye a piece of seam binding with Lumberjack Distress Ink and dry. Use a piece of twine to attach the tag to the bag.

Thanks so much for stopping by today! Be sure to visit The Funkie Junkie BoutiqueI'd love to have you follow/subscribe on my social media sites InstagramFacebookBlogger and YouTube.  Be well. Be creative!

Products used


Friday, February 10, 2023

Dark & Mysterious Valentine's Day Tag

Here at TFJB Inspiration Ave this week our theme is All About Love.  Its Janna here and I was inspired to make a dark and mysterious Valentine’s Day tag featuring the new Distress color Lost Shadow. For video tutorial click here.


For this project I used Sizzix dies Gentlemen, Alphanumeric Bulletin, Collage Medium, Prima Finnabair Gilding Flakes, Gilding Paste, Distress Sprays Lost Shadow Oxide, Black Soot Spray Stain, and Tart Cranberry Mica Spray Stain, Walnut Stain crayon, Collage Paint Brush, Stencil THS032, Idea-ology Crinkle Ribbon, Mixed Media tag, Lucky in Love Impresslit, Black Heavy Stock and Metallic Kraft stock.


For this project, I began with a Ranger Tim Holtz Mixed Media tag for the foundation.


To add color to the background I used Distress Sprays Lost Shadow Oxide, Black Soot Spray Stain, and Tart Cranberry Mica Spray stain.  Lost Shadow is an absolutely amazing color and will help give a dramatic flair to our background.


Before adding the spray stain I placed the tag in the Splat Box and misted the tag with water from the Distress Sprayer. Below is the outcome from mixing Black Soot and Lost Shadow together to create a moody background.


Next I added a splash of color with some Tart Cranberry. Before spritzing the color, I added some water to help the color flow along a set path.


Below are the finished results. I dried the tag with the Ranger heat tool.


For the crinkle ribbon I altered it with some Black Soot and Tart Cranberry. Then I dried the ribbon with the heat tool.


Next I am going to show you how I added the gilding flakes using Finnabair Gilding flake glue.


To apply the glue, I used a small sponge. For the background, I used the Tim Holtz stencil Flourishes THS032 off to the side. I placed some of the glue using the sponge to dab into the glue, and then onto the stencil.


I quickly lifted up the stencil and immediately washed it so the glue would not stick to it. I let the tag dry until the glue turned transparent and felt tacky to the touch.


With the tag dry, I then added the gilding flakes to the sticky part of the tag. I placed the large flakes down by hand, trying to get a variety of colors.


I used the collage brush to push and swipe the gilding flakes around on the tag. Once I had a fairly good coverage, I used the collage brush to brush off the stray pieces of gilding flakes and reveal the stenciled pattern below.


With our background complete, it’s now time to create a couple of small embellishments for the tag. Since our current theme is all about love, I decided to pull in the Lucky in Love Impresslit die. 

Note: an interesting thing about this particular Impresslit, when cutting out the heart, try turning the folder on its side and running the base of the heart through the die cutting machine first. Normally we would run the folder through at an angle, but because of the distribution of pressure it is necessary to turn this Impresslit on its side to avoid cracking the main part of the heart. Getting a heart to crack can be a very cool look, but sometimes it is nice to have a smooth finished heart.  I learned that little tip from Tim. Now, as a reminder to myself, I have an arrow that points in the direction that I should feed this folder through the machine.


To alter this heart, I added some Distress Walnut Stain crayon.


For the main sentiment, I die cut the letters from the die set Alpha Numeric Bulletin. I die cut the letters twice once from Distress Black Heavy Stock and the second time from Metallic Kraft Paper. Before die cutting, I added double sided tape to the backs of my substrates.


As the main focal point, I added a die cut from the Sizzix set Gentleman.


The final finishing touches included the altered Crinkle Ribbon and the metallic 3-D heart. I also added a secondary sentiment from the Tim Holtz Idea-ology label sticker set.


Thank you so much for joining me here today for TFJB Inspiration Ave challenge. Until next time, happy crafting!

Janna~ 💕🎨💕

I can also be found on :
Instagram: dunhamtreasuresofthesea_jannak

YouTube: The Crafty Corner with Janna


Sizzix Tim Holtz Die Set Gentlemen

Wednesday, February 8, 2023

This Skinny Mini Book Box Is All About Love


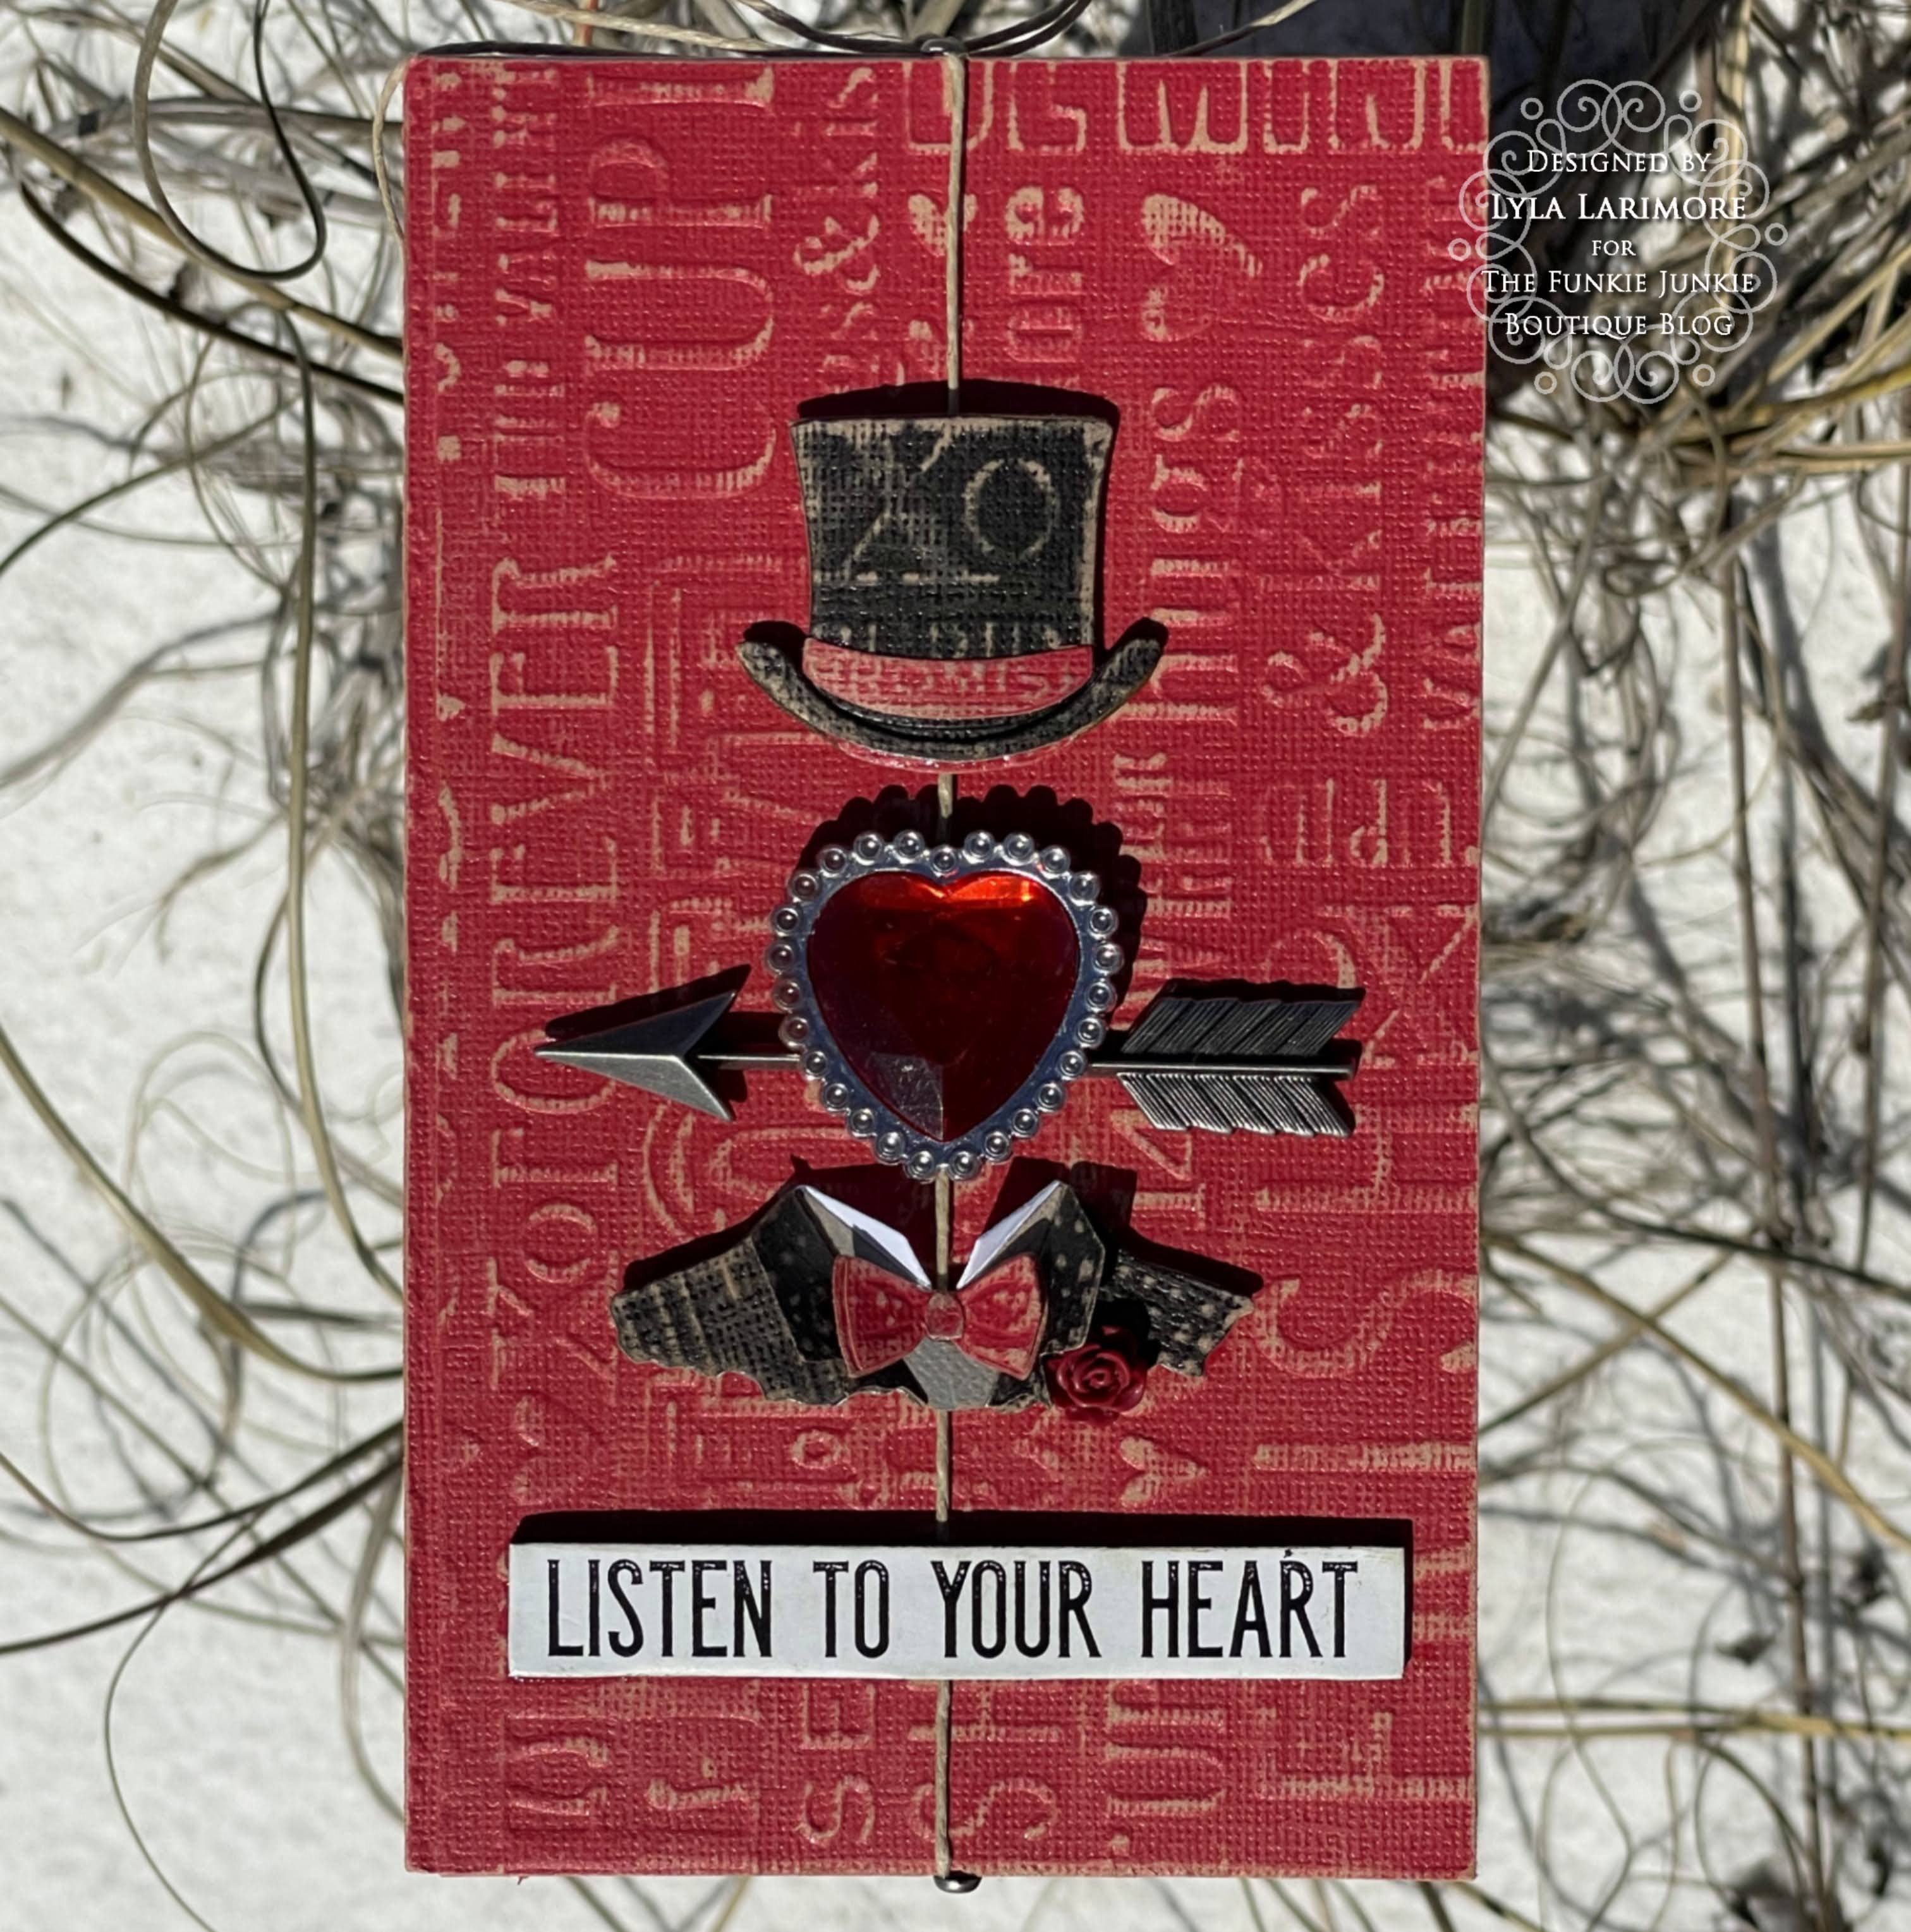
"All About Love" is the theme for The Funkie Junkie Boutique's Design Team.  Lyla here and I'm kicking the 2 week period off with an easy make that pairs up my favorite crafting designers, Eileen Hull and Tim Holtz. I got out my Skinny Mini Book Box die (Eileen's) and started out with a sweet surprise gift from a Bestie last fall- a retired stash of 12x12 Tim Holtz Paperie! I know, right...goosebumps of excitement!


The Skinny Mini Book Die is really easy-peasy to put together. The great thing about this die is how versatile it is!  Now, I know you've heard me say that about several of these XL Dies, but it's true. This die can be either a book box, a book, or- as you'll see here: a gift box! To understand my project better, it's best to see Eileen's video first. (FYI: Closed Captions are available on Eileen's videos as well as Tim's!)


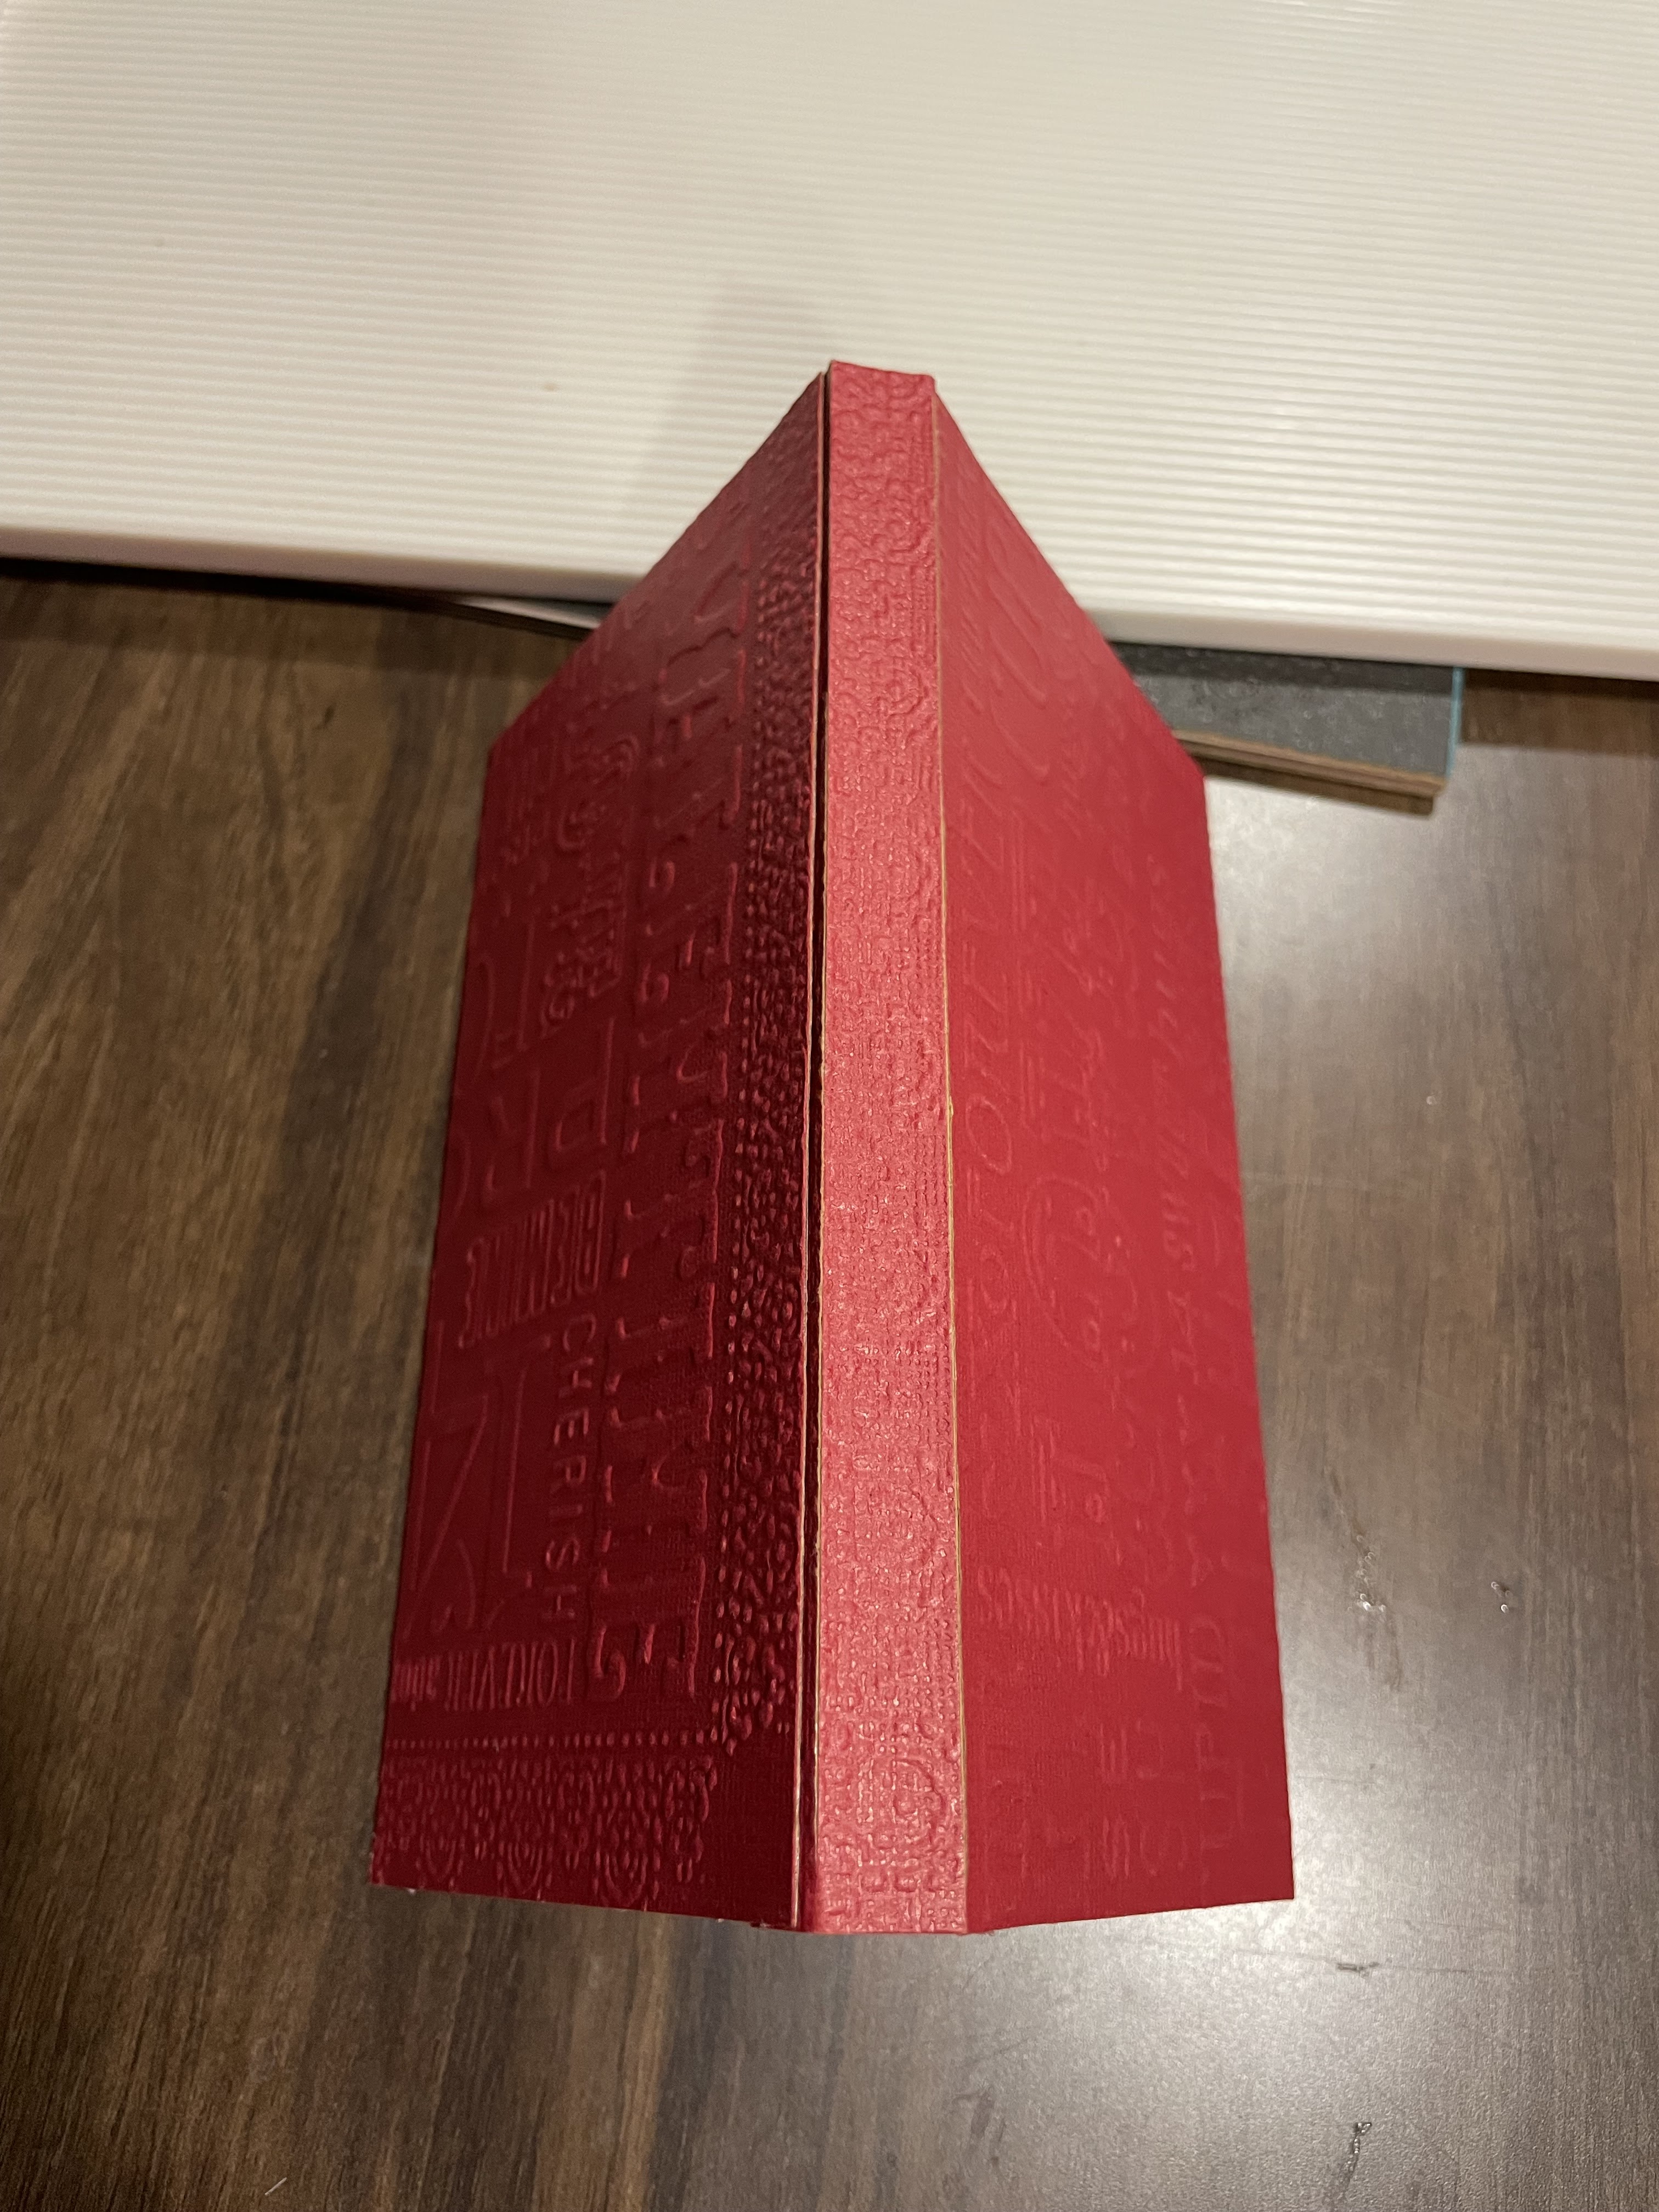
The first thing I did was to use the die to cut matboard, making a shell cover the size I wanted. In this case, I trimmed off everything past the first fold on the spine creases. (If you're into measurements, it's probably 1/4 inch.) Then assembled the two "book cover" pieces as usual to make a book shell. I'm using Score Tape here - it sticks VERY well without warping your project.


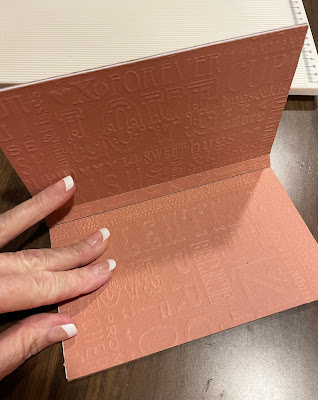
This photo shows the inside of the book cover shell. The matboard gives me a firm material for my gift box. Then set this aside for the next step.


There were 3 sheets in the 12x12 stack for Valentine's Day, in black, red, and pink. I set aside the black for now and took both the red and pink, cutting a full set of each to form both front and back covers, as well as three sides of a box.


I cut each piece according to what the design had on the sheets. Each sheet was exactly the same design and wording, so it was easy to simply match the top and bottom of the front cover, and then do the same matching on the top and bottom of the back cover. As for the sides of the box, and the spine (which actually is the 4th side of the box), I used the edges of the sheets as they had a cute curly design all around. By dividing up the sheets this way, I ended up with a bit extra left over. ;) I did use Score Tape here as well- even being picky to cover every area of each cut sheet so the (planned) sanding would be even.


Here's the inside - note later on that you will see the exact same thing on that outside top cover that you see at the top of this photo (which is really the inside of the front cover- photo is turned).


Now it's time to move on to those box sides. The instructions Eileen gives for making the regular Book Box means using the full sides (about an inch high). All I did here, was score these pieces TWICE for three sided folds. Instead of having one flat wall, I simply folded the wall into itself to form a shorter, squared wall.


I repeated the same folds on the pink pieces putting them wrong sides facing together, and ended up with a nice little strong wall. The spine forms the 4th wall. Glossy Accents used in this step because it's just easier.


I then sanded the entire thing lightly- just enough to let some of the wording and design show through. I chose not to color any of the edges and the overall look came fully together after I added some elements....


My first chance to play around with the all new Tailored Thinlits Set from Tim Holtz's Everyday Collection was a bit of an adventure. It took me a few tries until I figured out exactly how I wanted  my ChiefHubby's heart to look. Good thing I had that leftover paperie!


My stash of Idea-ology came with me to Florida, and I did fill my dividers with some old and more recent Valentine items. The heart-shaped ring at the top is leftover from one of our Grandbabies. It'd been scuffed up, loved, and used well before it found its way into the couch cushions where I rescued it and tossed it into my stash. It seemed to be the perfect reminder of LOVE and I decided to use it. I used my Tim Holtz  Scissors to snip the finger mold off the back.


Tim Holtz's Paper Doll Portraits come with lots of choices to match oneself up with... 


... and some color added by those new Distress Watercolor Pencils matching the swatch of Kitch Flamingo in the ribbon freebie from The Funkie Junkie Boutique. She's edged with some Distress Crayon in Walnut Stain rubbed on with my fingers.


Here's some links to help you find your way to some of the things used:
Sizzix Chapter 3 ScoreBoards XL Die - Skinny Mini Book Box
Sizzix Tim Holtz Thinlits Die Set - Tailored
Tim Holtz Idea-ology Adornments - Quill & Arrow
Tim Holtz Idea-ology Heirloom Florals
Tim Holtz Idea-ology Long Fasteners
Ranger Inkssentials Glossy Accents
Scor-Pal Scor-Tape 1/4" x 27 Yards
Tim Holtz Tonic Studios Kushgrip Snip w/Non-Stick Blade & Cap 7"-Small
Tim Holtz Tonic Studios Black Kushgrip Snip w/Non-Stick Blade & Cap 5"Ranger Tim Holtz Distress Watercolor Pencils (12 Pack) Set 1Ranger Tim Holtz Distress Watercolor Pencils (12 Pack) Set 3Ranger Tim Holtz Distress Crayons - Set #2
Now, let's see what came out of all this...


FRONT
I made a closure using hemp twine secured to the front cover using 2 Idea-ology Long Fasteners. When looking at the twine as it lies underneath the hat and collar; it gives me the memory of all those made-with-love hanging mobiles my kids brought home... and now my Grandbabies make!

BACK


The box is the perfect size to hold just enough: Valentine chocolates for 2 at the beach.


(Pardon the sun shining on her.)


Last of all: the inside (retired Tim Holtz) Gummy Heart belongs to me. The point is not to listen to your own heart, but to listen to one another's.

I hope you've enjoyed your first look at "All About Love" and you're sure to get more at TFJB Inspiration Ave in the next 2 weeks from the rest of the Design Team from The Funkie Junkie Boutique, so check back often!

Until next time...

Stay Safe &
HAPPY BLOGGING!!