

The subject of preparing for the Christmas Holidays is what brings me to this last make for 2022; it's all about Tim Holtz- anything Tim! I was a bit sad watching everyone else put up their tree and get out all the decorations. I'm all decorated down here in Florida, but while still in Indiana, we leave at the first of December and don't really care to have to take down Christmas decor when we get back by April 1st. So I got to thinking of going smaller... and it cheered me up quite a bit! Follow along and this time, it's a bit different: each of these 3 makes goes together, yet the photos take each one separately into the finished project and then they are put together again at the end of the post for a couple pics together. When it comes to Tim Holtz IdeaOlogy, the theme here is "Buy New Tim Stuff, but Use the Old: One is Silver and the Other is Gold"!
Join me as I rehash to you how these were made!
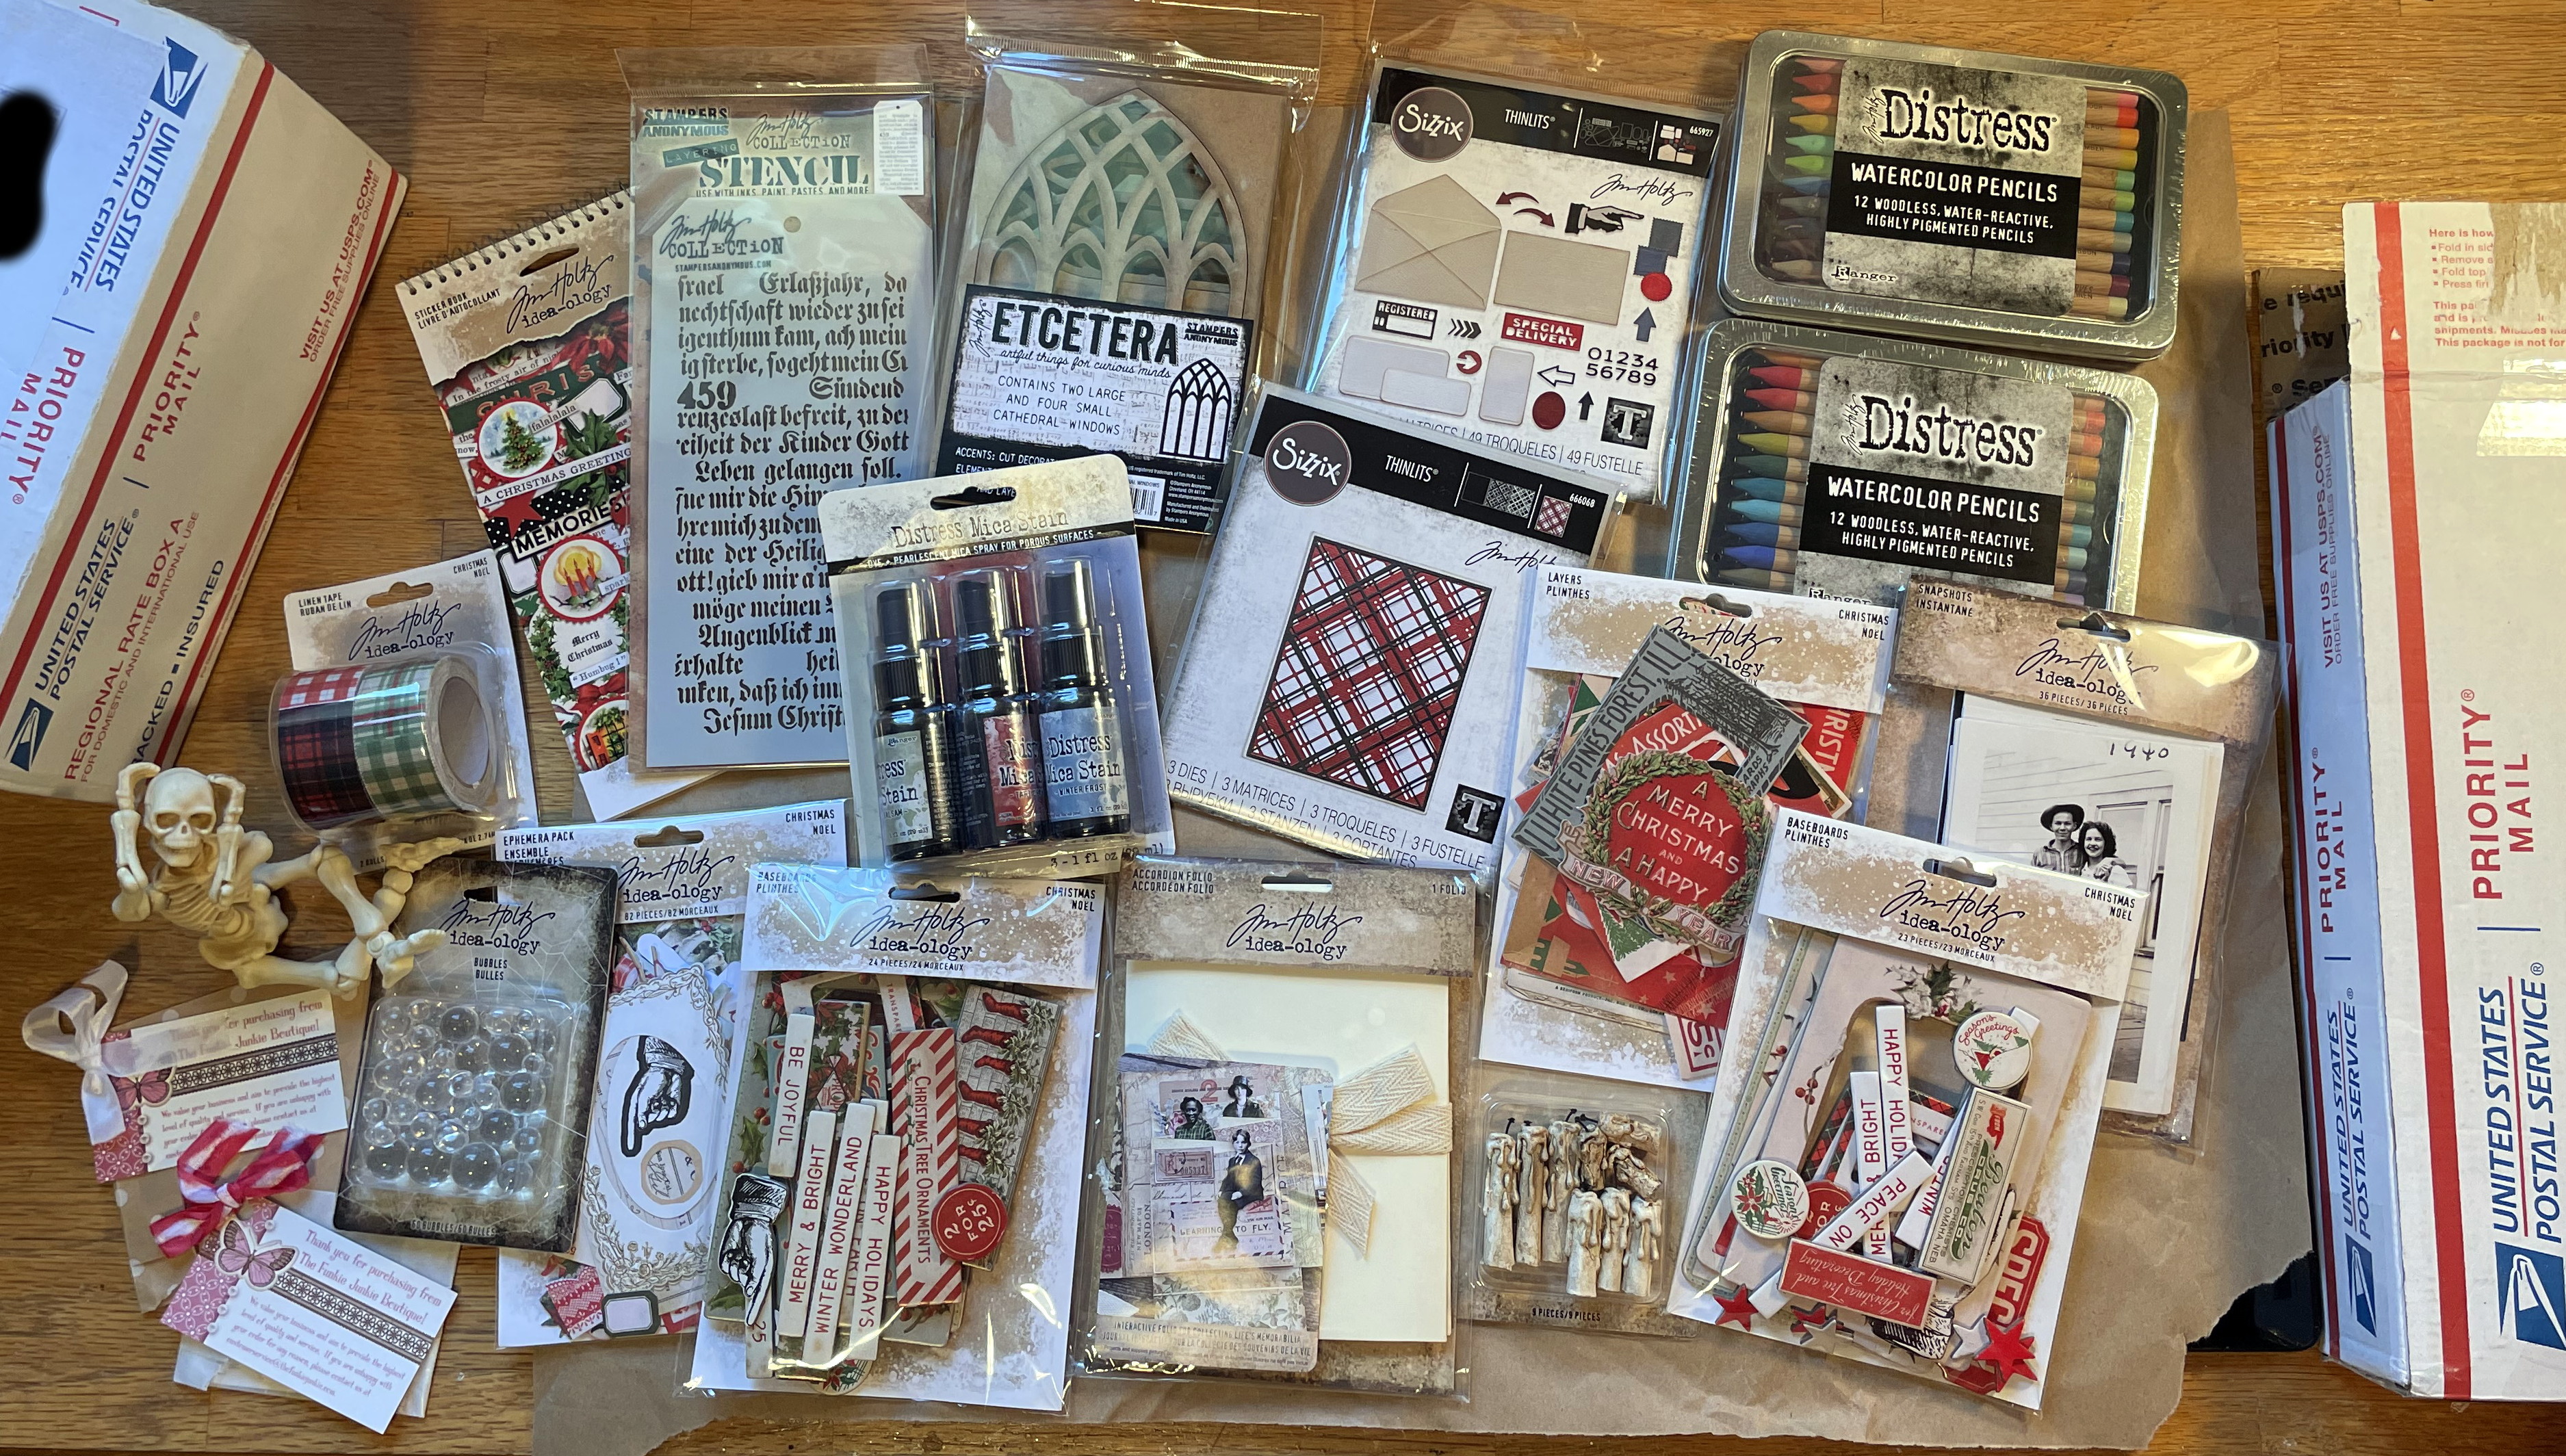
Happy Mail that came back in October came in handy for this one-
IdeaOlogy items didn't all get their chance to shine,
so I pulled out the ones I wanted to use...

... and got out some Tim Holtz IdeaOlogy Structures:
the smallest and the largest sizes from
the Vignette Box Set and a Vignette Display Panel.

Right away, I changed out the Picket Fence Distress Paint
for the Antique Linen.
I first sanded the wood and smoothed out any bumps.
Pleasingly, these structures come pretty well sanded already,
but some splinters may appear after getting bumped
along in shipping. That's to be expected.

I gave all the edges and the backside a couple of good coats
of the Distress Paint, let dry fully in between each coat
and after the last. Then I spritzed up the entire backside
in the newest Distress Mica SpraySet #2... Fresh Balsom.
What a neat effect that made!
I used up some retired TH Tissue Tape (Symphony)
onto all the top edges. And then got out that beautiful
new in 2022 Patchwork Linen Tape!
Check out Paula Cheney's "Small but Bright" post
for another idea on this Linen Tape!

A few old wooden gears from my stash made
some perfect 'stands' for the back
so that beautiful, glittery Mica Spray job would
stay nice and not get scraped up.
And I came up with a tray for my candles!


Now, we head into the 2nd make...

I found these TH Box Tops in my long-forgotten paper filer!
A similar layer of this Box Top can also be found
as just a flat layer (no sides) included
in TH 2022 Christmas Layers!
Both will fit the LARGEST Vignette Box.
In this pic, I am copying over the size of the lid
with my stylus to the same size in
plain cream cardstock for a bottom to match the top.

And then- just by using a copy of the cream cardstock-
I formed another piecethat would fit INSIDE the box.
So that made THREE covers for the box:
outside top, inside bottom, and outside bottom.

I then copied the inside bottom but made it wider
so as to double each wall. I am not a measurer since
I learned long ago that when making more than one
structure: they are not always exact in size,
and I would end up cutting/folding each
differently on measurements. It was just too much work,
and far easier to follow the pre-made fittings sold as
Tim Holtz (Layers, Structures, Vignette Boxes, etc.).

Following the pattern of the doubled-up walls
of the inside 'tray', I folded sets of two walls and
glued them in between longer cuts of the same.
This was pretty easy if you remember to cut V
where the top edges show
(Note the little doubler on the lower right).

Now, all that was needed was to simply give it all
Distress Oxide in Vintage Photo for some "age".

*NOTE: I did put in trash plastic into the lid
AFTER distressing with Oxide Ink!
Do the plastic last because heat drying the
Ink/Oxide will melt your window plastic!

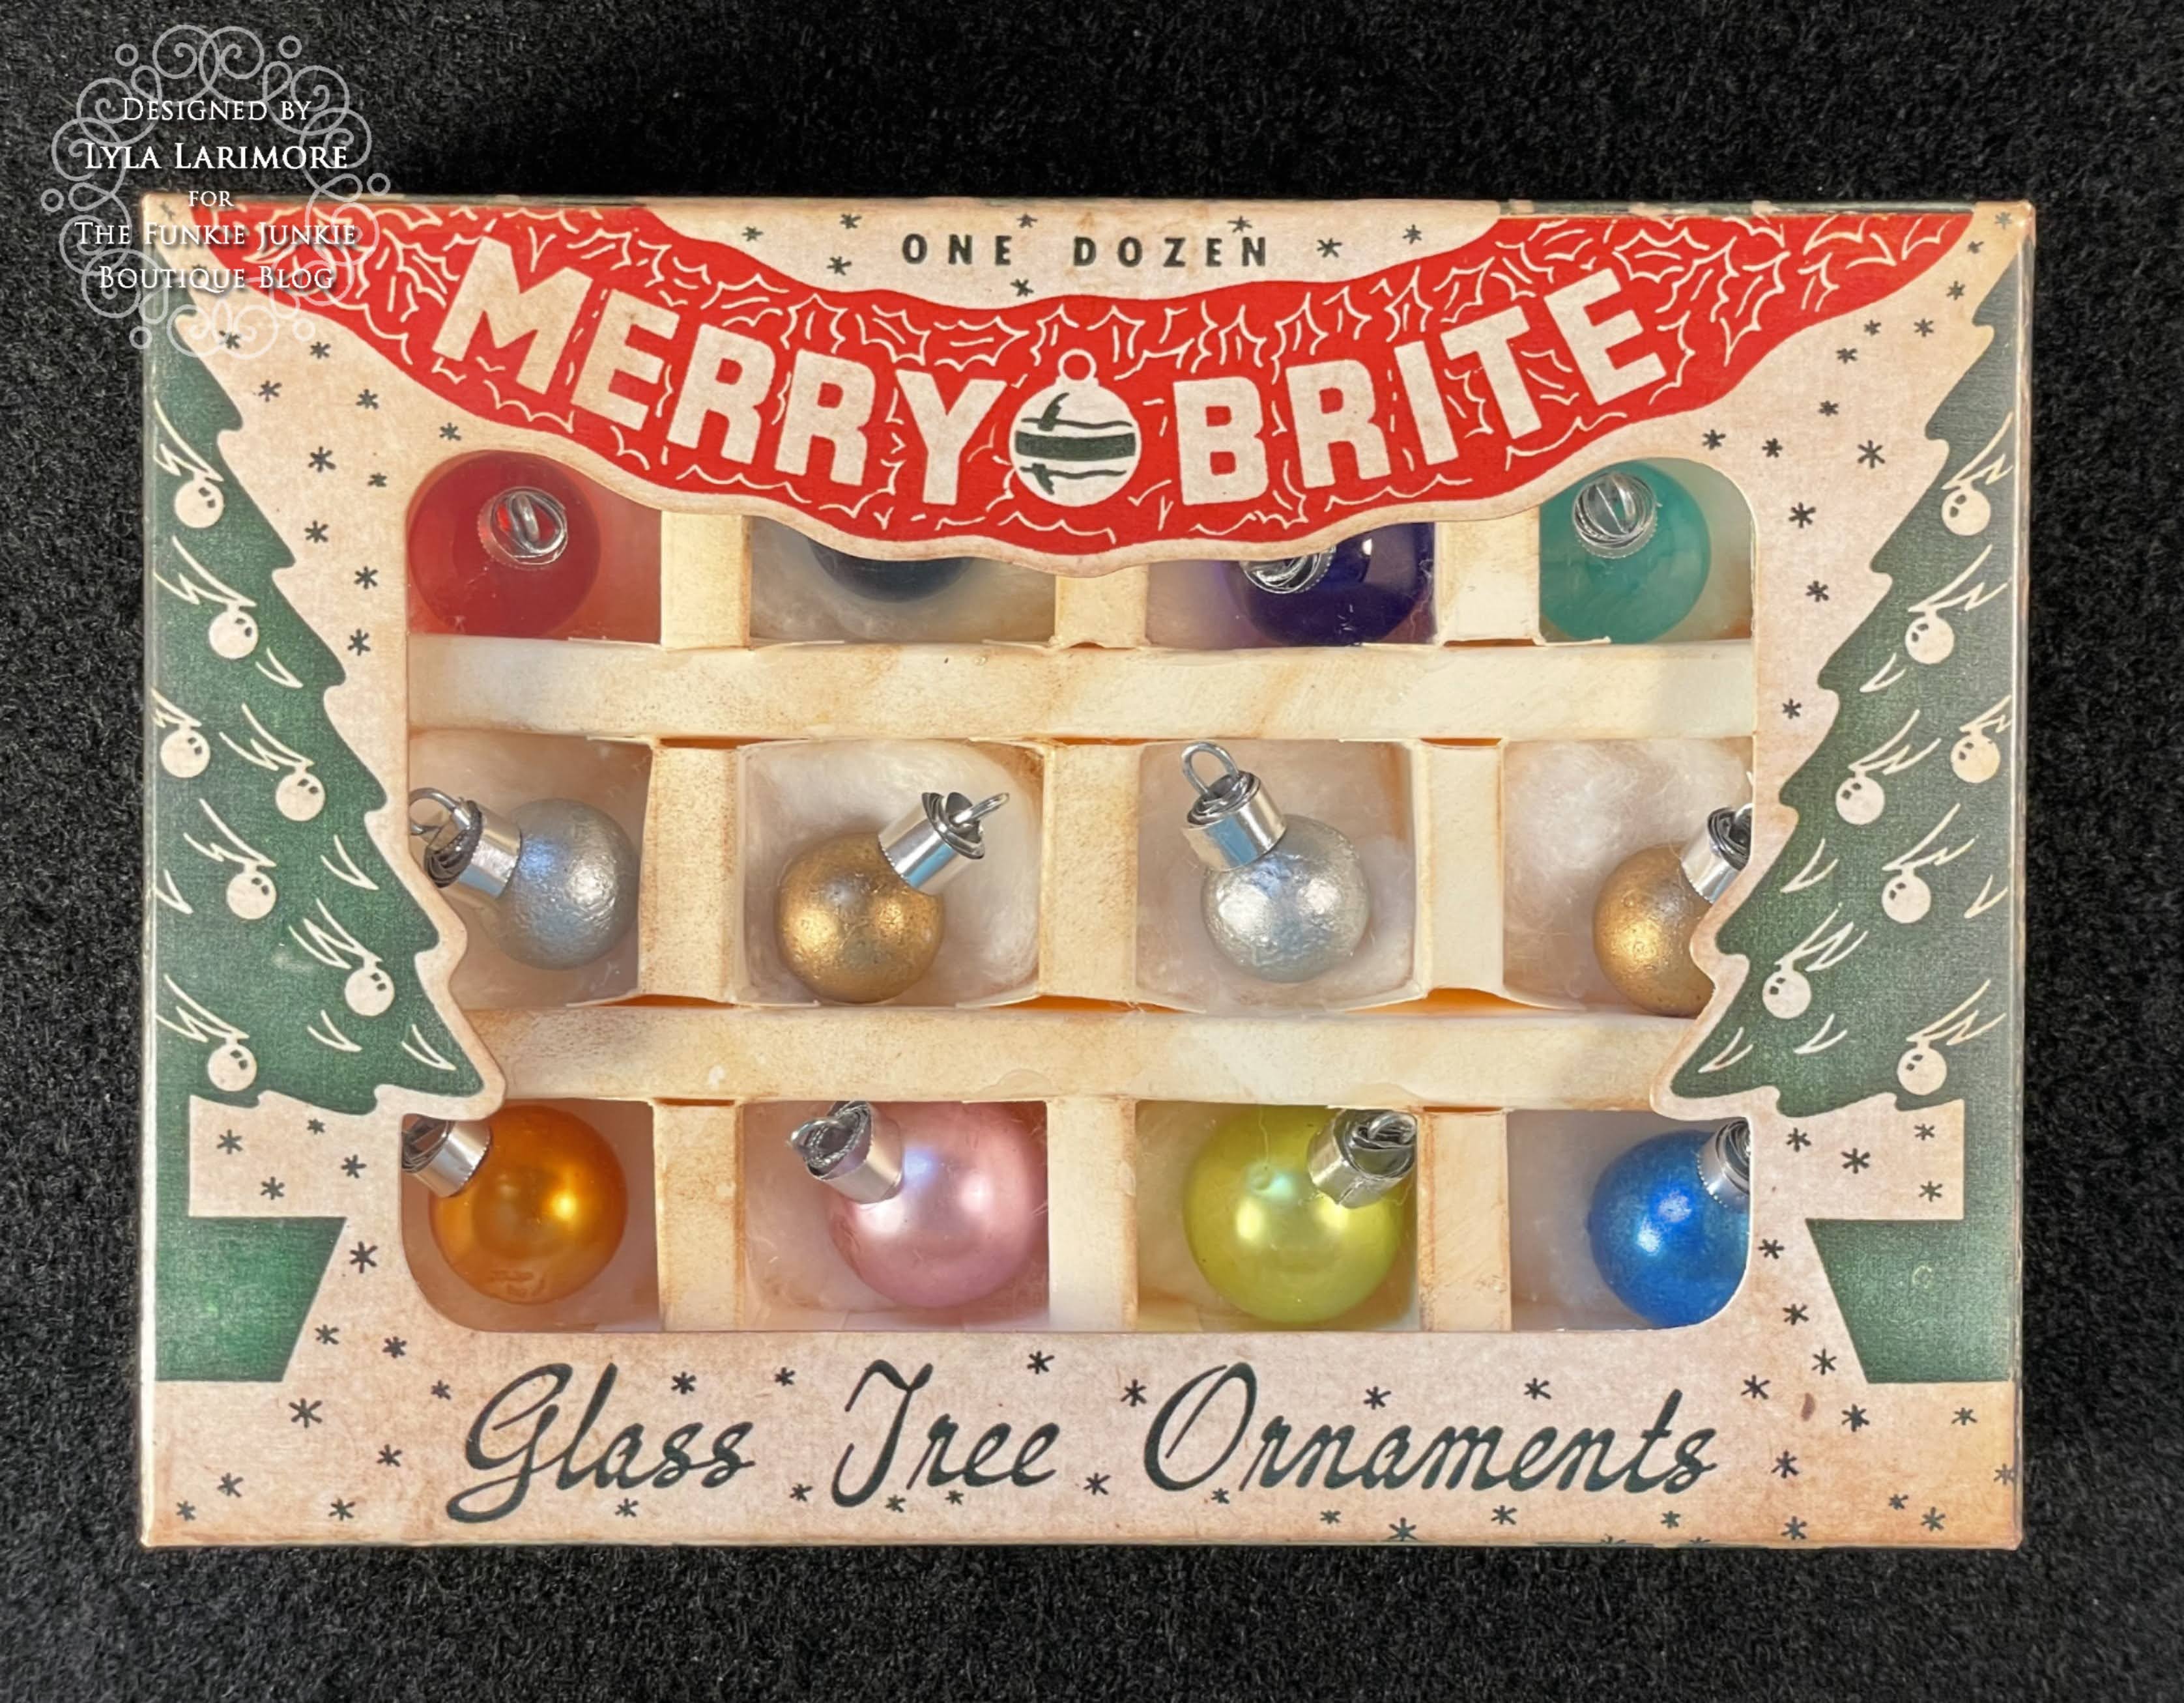
All I needed now was some miniature ornaments...

...out came the TH 2022 Baubles...
and a few of the older pearled Baubles joined in on the fun!

Why not make four smaller Baubles coated
and heated with the TH 2022 Foundry Wax?
In both Sterling (silver) and Statue (gold).

To make the ornament tops:
1) Use similar sized plain silver paper clips to match
the size of what you use.
2) Bend each clip for the smaller rounded end to be used.
3) Clip off about 1/4 to 1/2 inch depending
on how tall you want the top to be.
4) Use pliers to pinch the sides a bit closer together.
Not all the way together, though.
5) Carefully use your Tim Holtz Sheers to cut lengths
of tin foil (half the height of the cut clip piece).
Adhere the cut clip piece to the strip of foil.
Glossy Accents dries fast.
6) After winding foil around cut clip piece until it is tight,
loosen the wind until it
forms the size of top you desire for the ornament.
Use Glossy Accents to adhere.

Pardon all the glue; I am a bit heavy-handed with mine.


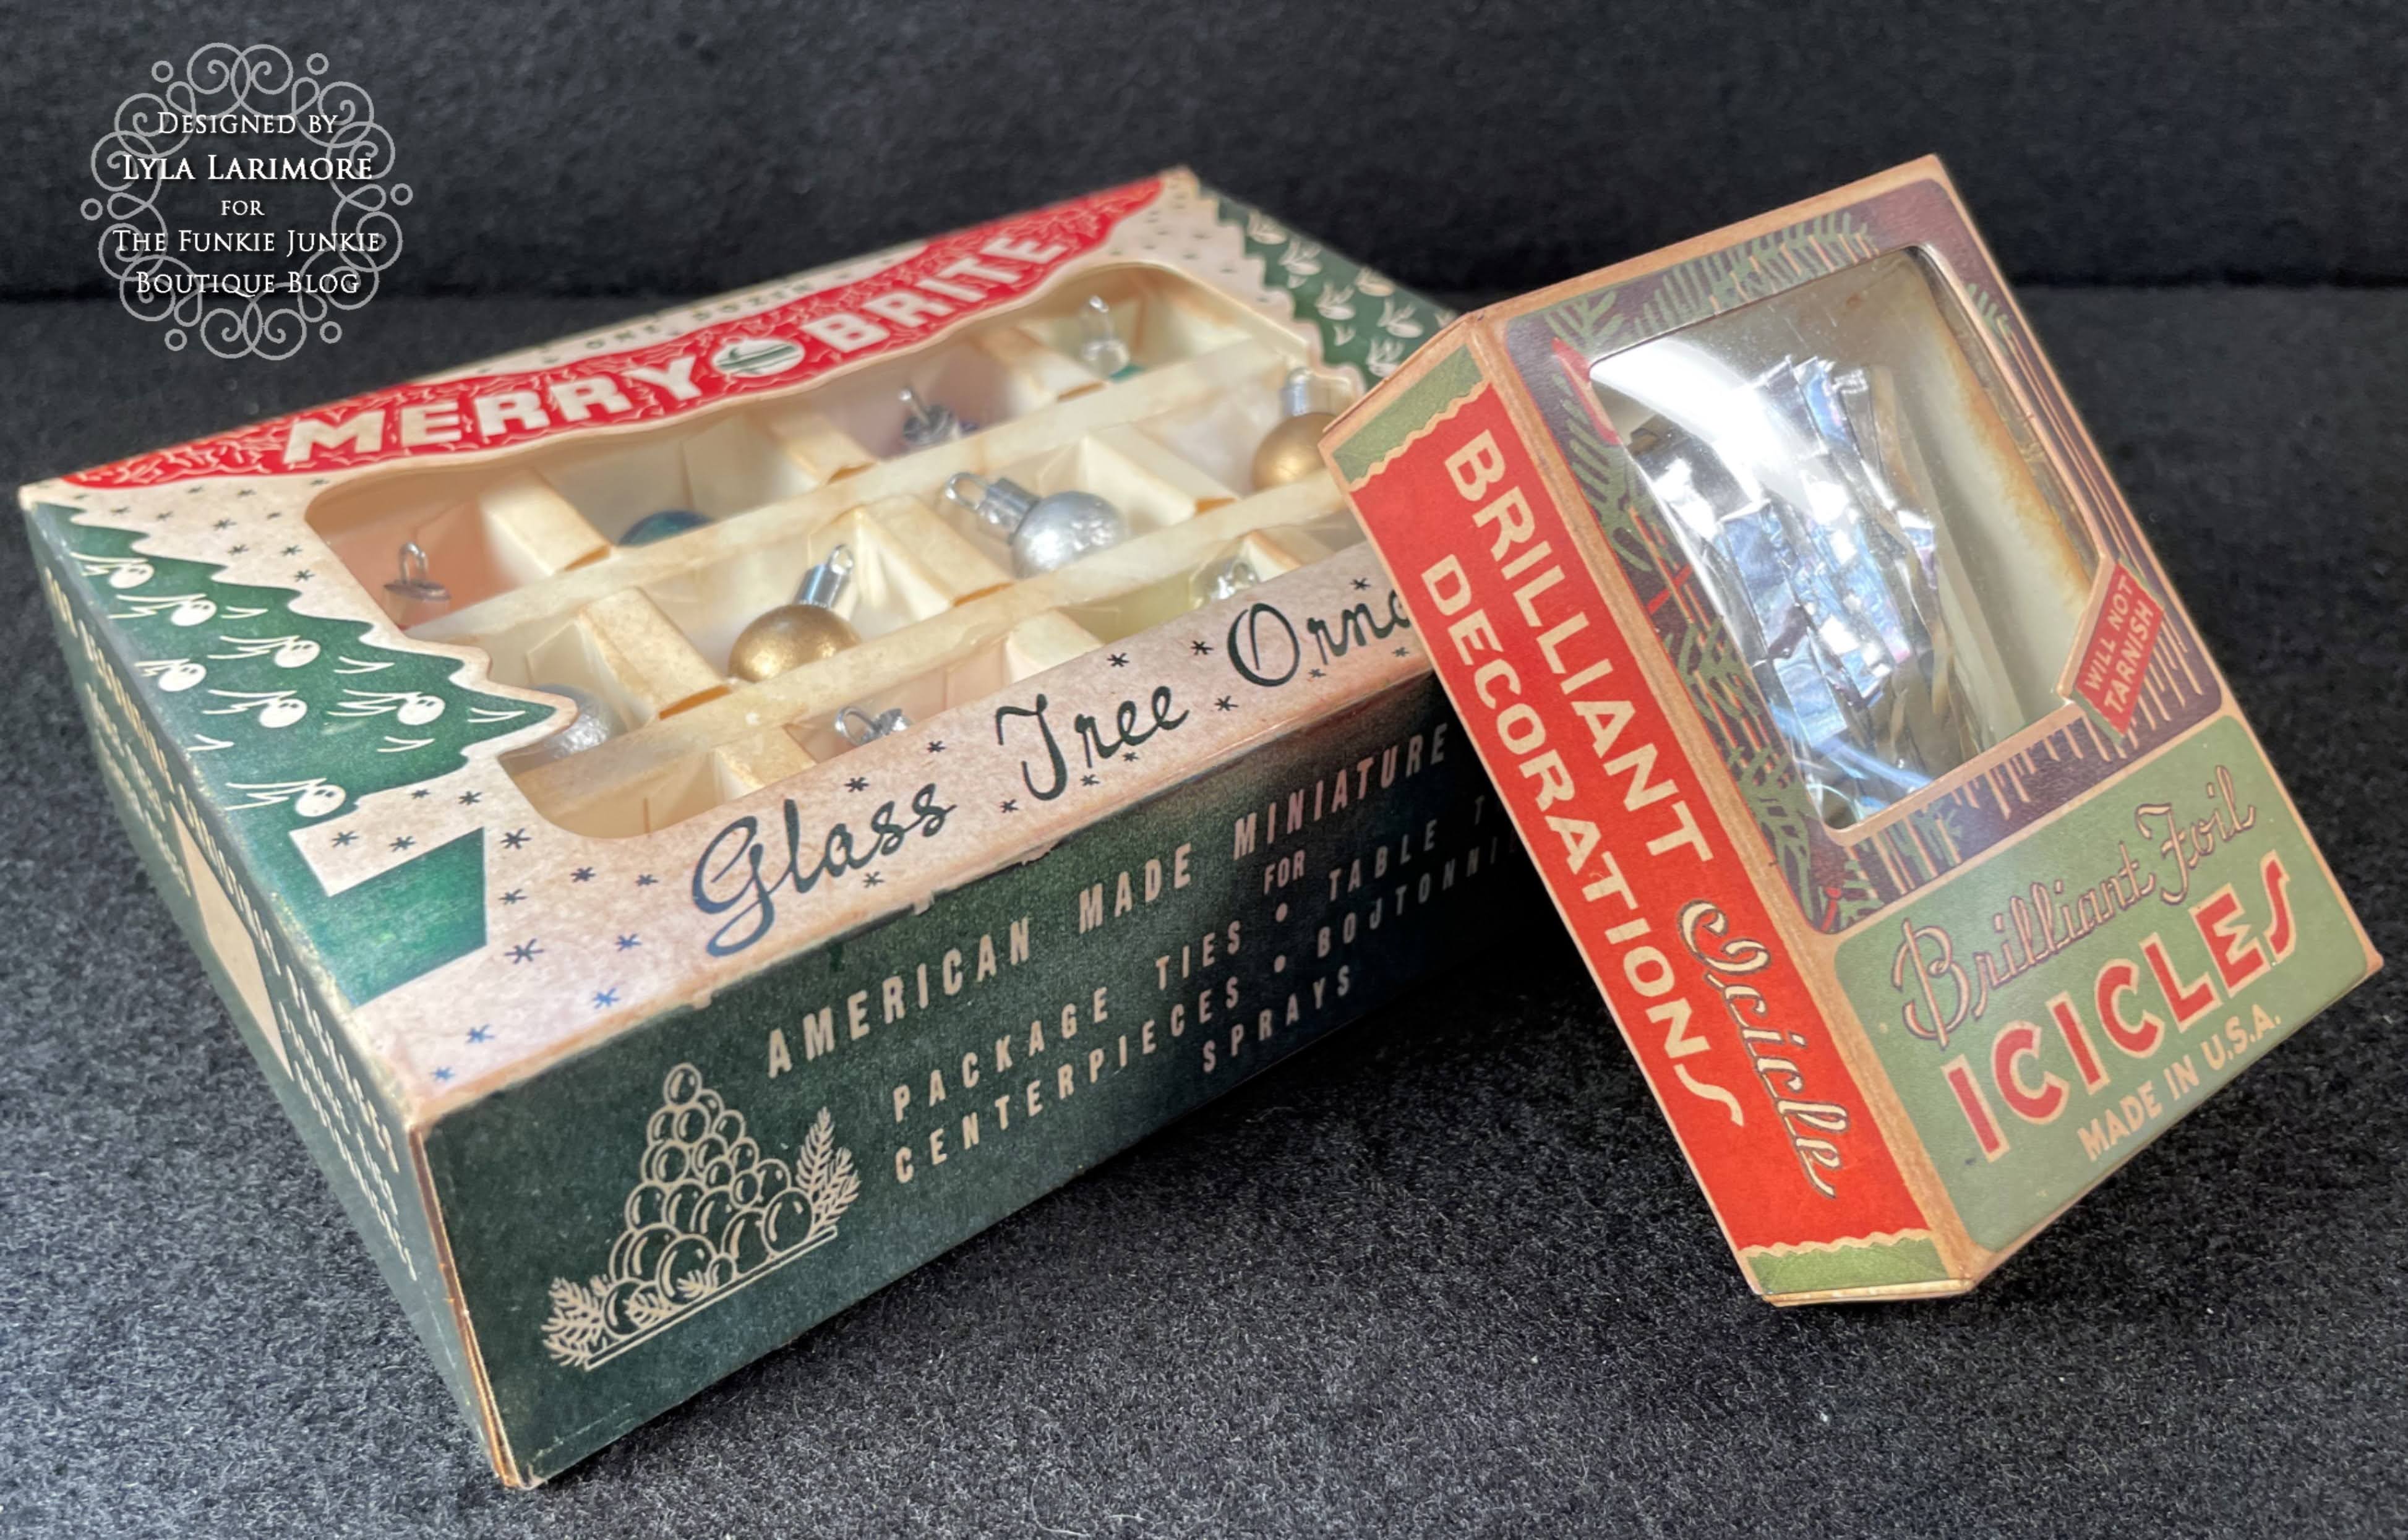
Before I packaged the ornaments up,
I added cotton to the bottoms of each
compartment. The smaller ornaments needed more
cotton to put them up than the larger needed.

And this is what came from all that tiny work...

Unsealed to show you the detail...

... and sealed up for handling to "see with your hands" from here on out!
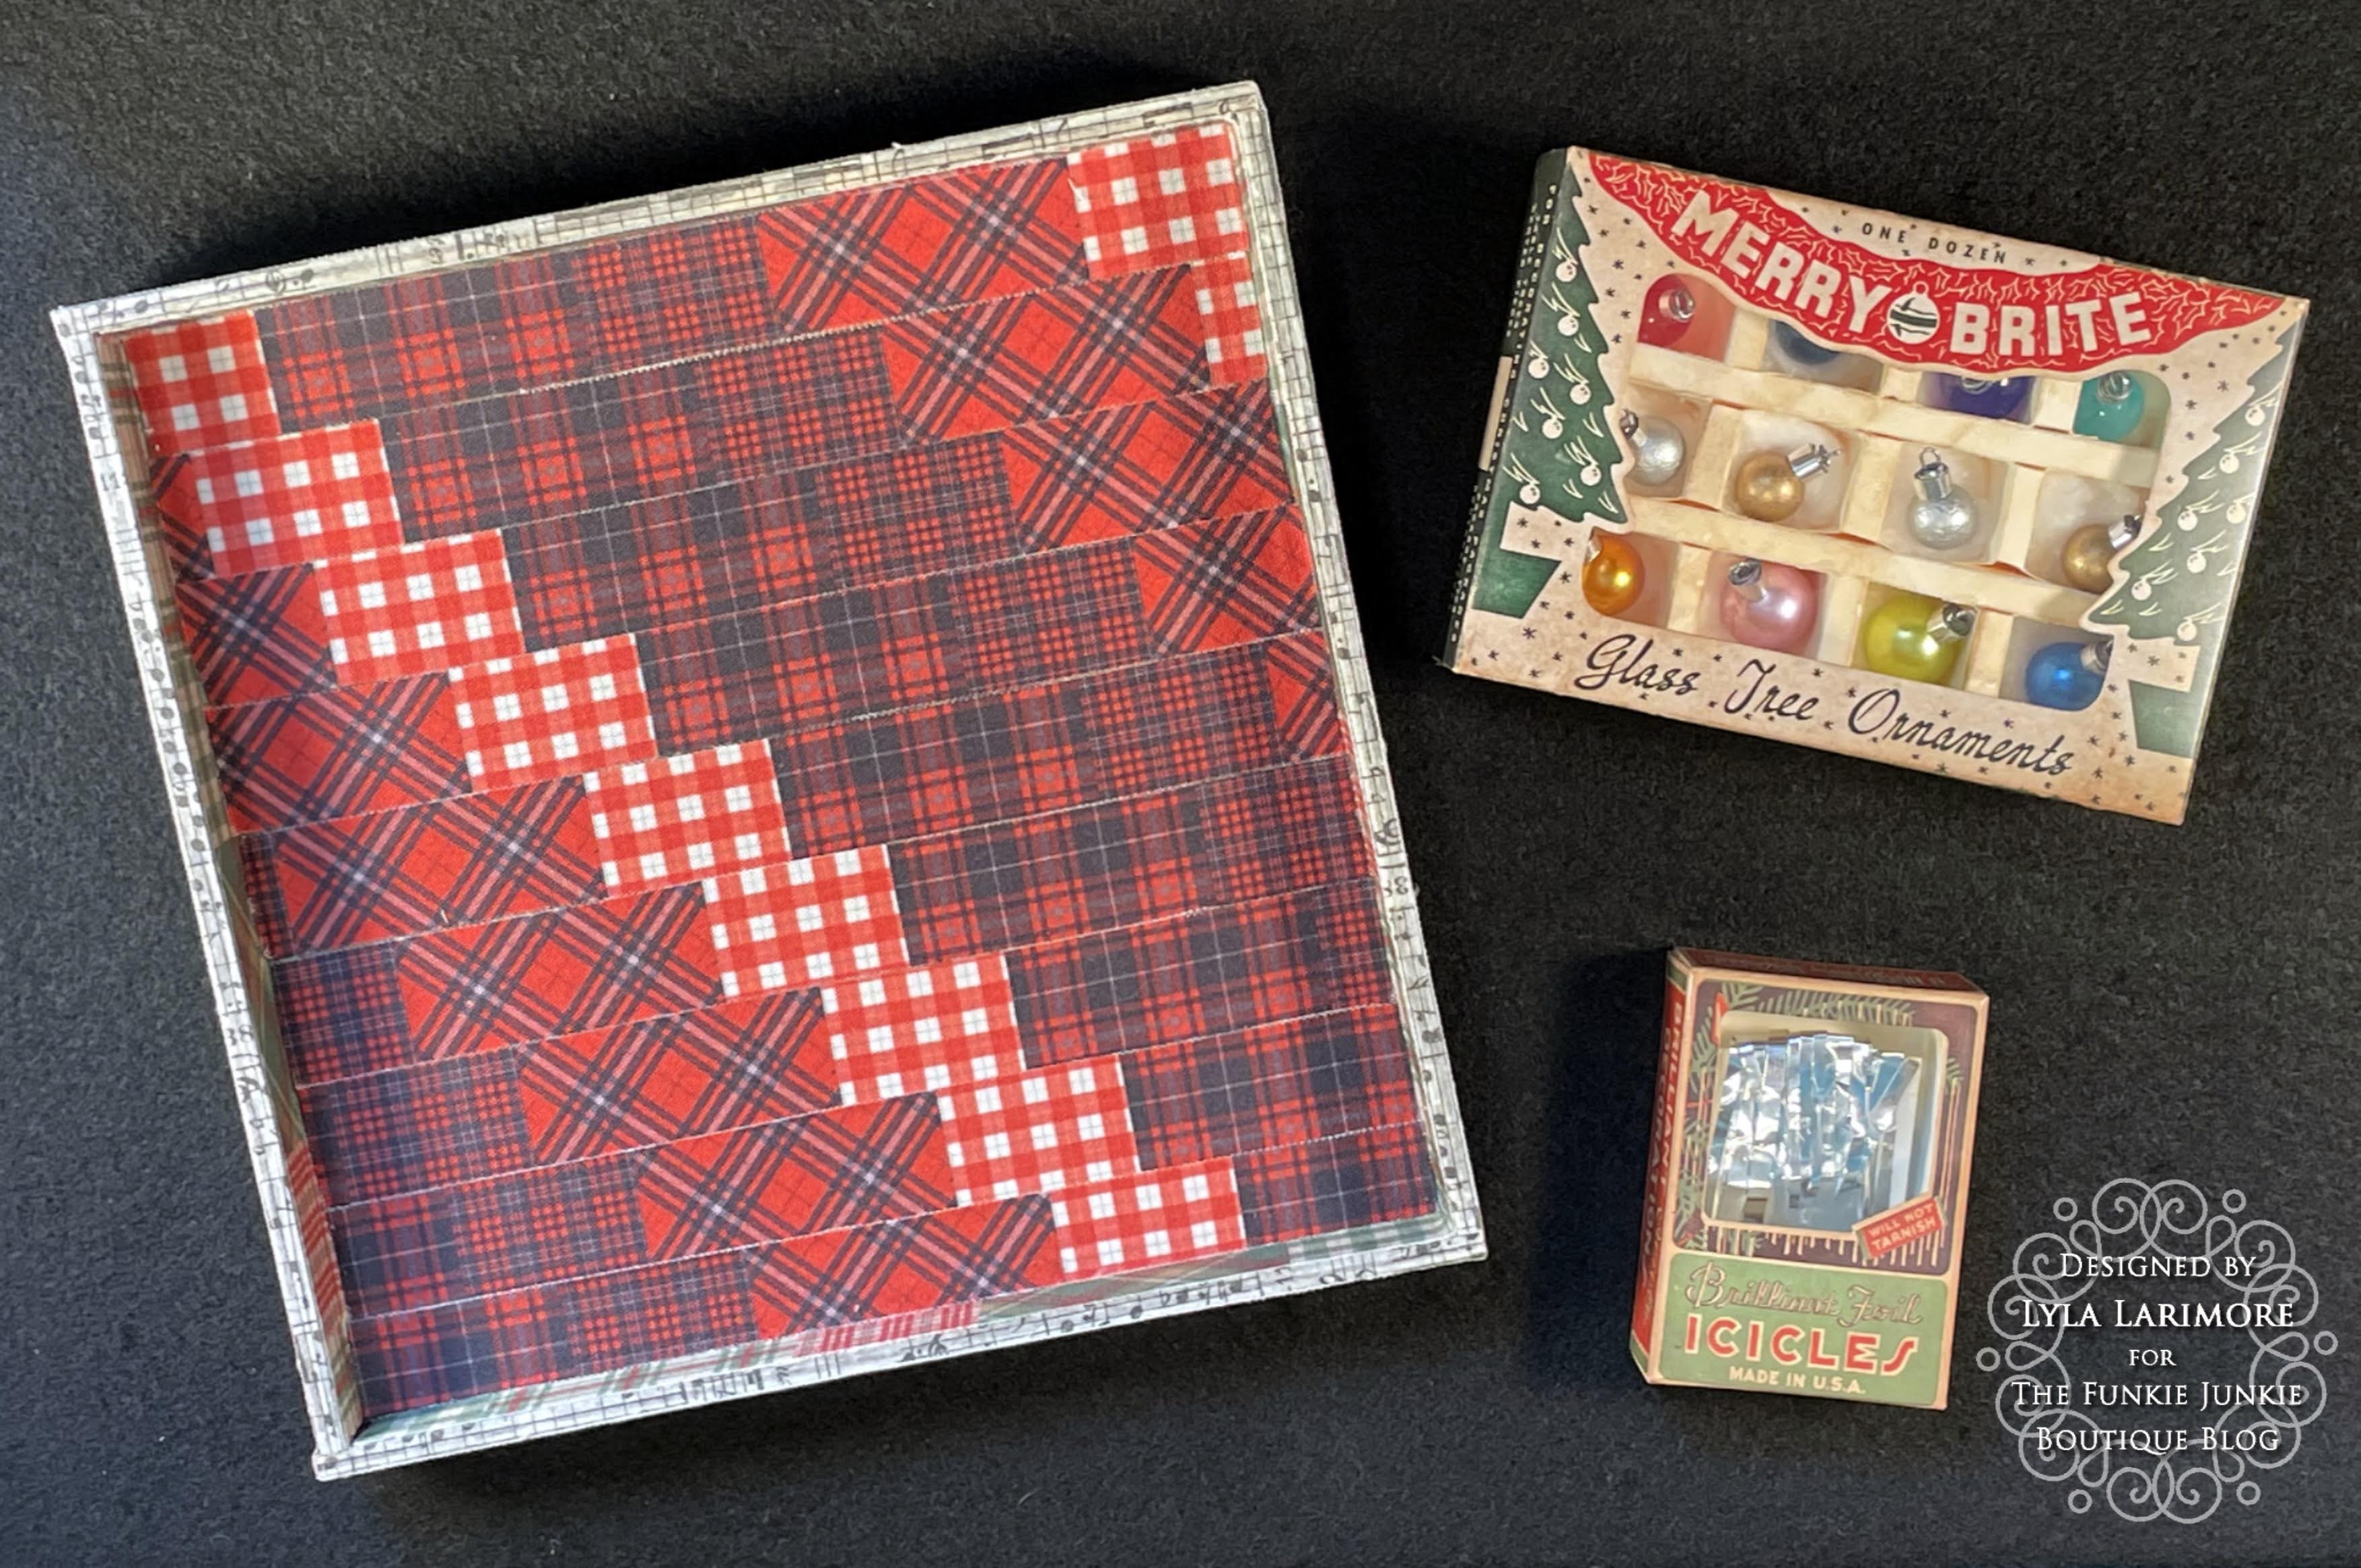
Time for the last make...

I'm using the SMALLEST of the Vignette Box Set
for this retired Box Top.
And I simply went through all the same steps
to make the inside and outside bottoms.

Since this mini was tinsel...
tin foil came in handy again.
Don't cut all the way up and down-
just halfway is easier to wrap it on the cardstock piece.

A certain Princess's hair tiny hairband helped
keep it neat in the box- hidden by the lid cover!
This is what it looked like when finished:


Tool reveal time!

Click on the links to help you find what you'll need to make some decorations like these:

Be sure to check for all the MEGA SALES
going on right now at TFJB right now!
Thanks so much for joining me for this set of projects!
Please be sure to check back in over
the next two weeks for more INSPIRATION AVE
from the rest of our awesome Design Team!
Have a great Holiday & a very Merry Christmas!
Until next time...
Stay Safe &
HAPPY BLOGGING!!
No comments:
Post a Comment