Wednesday, July 31, 2019

Marvellous Metallics

Welcome back to another Funkie Junkie Boutique challenge! Jenny here hosting our new challenge called 'Marvellous Metallics'. There are so many ways to add metallics to your projects, from embossing powders and pastes, metallic finish cards and foils, metallic inks and paints to metal embellishments. And you can leave them untreated for a touch of glamour or alter them for an aged or more grungy look. Show us how you like to use metals on your vintage or shabby chic projects.

The winner will earn a chance to be a Guest Designer at a future date here at The Funkie Junkie Boutique blog, and everyone who enters and follows the rules will go into the draw for the chance to win a $25 spending spree at The Funkie Junkie Boutique. There are also Top 3 Badges for three additional outstanding entries, chosen by the Design Team.

The guidelines for entering are simple; create a new vintage or shabby chic project following the challenge theme, link it below to your post (not just your blog) and also include a link back to this challenge in your post. You can combine our challenge with up to 10 challenges (including this one) to be in with a chance of winning. If you are entering through a public forum (such as Instagram) you'll need to include the words 'Funkie Junkie Boutique Challenge'. Also, please be sure to turn off your Word Verification so our Design Team can leave comments on your blogs. Make sure you follow these rules as unfortunately, we have had to eliminate entrants from the prize draws in the past.

To get you started the Design Team has created some beautiful metallic inspiration:

Sara Emily - sarascloset


Cec Wintonyk - CW Card Creations


Suzanne Czosek - Suzz's Stamping Spot 

Sizzix Geo Insects Stamperia Wonderland Prima Marketing Metallique For The Funkie Junkie Boutique

Jenny Marples - Pushing The Right Buttons


Ginny Nemchak - Polly's Paper Studio


Once you have checked out these wonderful projects, come on back and share your Marvellous Metallics with us using the link below. We can't wait to see what you make!

Saturday, July 27, 2019

Saturday Showcase - Tim Holtz Metallic Confections 3D Impresslits Leaf Cards

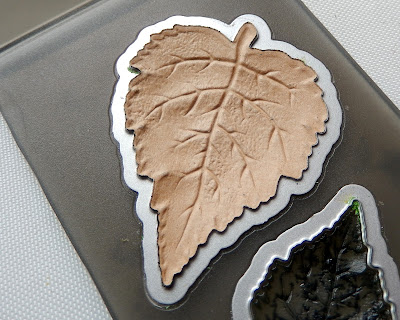
Hi everyone and welcome to another Saturday Showcase, the Design Team's chance to share tutorials and products available from The Funkie Junkie Boutique with you and kick start your creative weekend. This time the focus falls on Tim Holtz 3D Impresslits 'Leaf' Embossing Folder which embosses and cuts the most beautiful leaves. By teaming it with his Kraft Stock 'Metallic Confections' and adding a little painterly magic they make beautiful aged leaves that are perfect for adorning cards and more. Here's an example of the finish you can achieve (before and after);

(click on any of the images to get a closer look)

To start grab a sheet of each colour Kraft Stock in the Metallic Confections pack - they come in all of these delicious shades;


Cut a piece of Kraft Stock large enough to fit over the leaves in the 3D Impresslits Embossing Folder and place it shiny side down on the cutting side.


Run through your embossing machine following the layering instructions on the 3D Impresslits packaging. Release your leaves from the folder and marvel at the incredible intricacy of the embossed design and die cutting.


Now cover the leaves in a thin layer of Dina Wakley Media 'Black' Acrylic Paint using a small paint brush.


When the paint is partially dry rub with a soft cloth to remove the excess. The longer you leave the paint the less you will remove so try experimenting to get the look you are happy with.


Once the paint has been removed you may find you have slightly flattened your leaves. This is easily rectified by replacing them in the Embossing Folder and pressing down gently on the reverse side with your thumbs to re-emboss them.


You will now have beautiful aged leaves ready to use on your projects. Here's how the other colours look when you use the same process on them.


Now to add them to a project (or two). For this first card I added some of the leaves to a plain white background embossed with the 3D Embossing Folder 'Elegant'. It's a good idea to add dimensional foam tape to the underside of the leaves to support them and prevent flattening the design when posting. You'll see below that I also added some twisted wire tendrils, a few self adhesive gems, two Tim Holtz Ideaology Adornments Butterflies (altered with white paint in the same way as the leaves were done) and a sentiment from Tim's 'Life Quotes' stamp set.


Here are a couple of close ups;


The second card picks up on the current challenge theme 'It's Heating Up!' incorporating leaves with warmer colours over a background smooshed with Dina Wakley Media Acrylic Paint (Buff and Sand) Tim Holtz 'Architecture' stamp and a 'Tattered Butterfly' die cut. There is an Ideaology Clockhand in the centre of the butterfly and a Small Talk sentiment, and to finish the card I mounted it on more Metallic Kraft Stock (this time in Copper).


Here are a couple of close ups of this one;


Thanks for visiting to catch today's Saturday Showcase tutorial. Don't forget there's still time to enter the current Funkie Junkie Boutique Blog challenge 'It's Heating Up!'

Jenny xxx

Links to the products used from The Funkie Junkie Boutique;

Sizzix 3-D Impresslits Chapter 2 Embossing Folder - Leaf 663293
Tim Holtz Idea-ology Adornments Butterflies
Tim Holtz Idea-ology 8 x 8 Metallic 2 Kraft Stock - Rose Gold & Copper TH93780

Monday, July 22, 2019

Challenge Winners - Water, Water, Everywhere

Today we are excited to announce our winners from the 'Water, Water, Everywhere' challenge. Thank you to everyone who shared their gorgeous creations with us. We loved seeing them all.


The standard of entries was so high that it was difficult to pick just one winner but in the end we chose #16 Lisa Hoel (Creative Juice). This incredible Finding Atlantis steampunk compendium took our breath away, with the time and care taken to complete each and every detail shining through. Make sure to check it out HERE. Congratulations to Lisa on being our favorite and winning the opportunity to be a Guest Designer here at The Funkie Junkie Boutique Blog for a future challenge. You will be contacted with all the details.

And now our picks for the three winners of The Funkie Junkie Boutique Blog Top 3 Badges for this challenge. As already mentioned it was so difficult to choose between these entries and we recommend you hop on over to take a look at them all. In numerical order they are; #8 Maria Vachkova #12 Elly (Elly's Creaties) and #15 Lynn (Experiments in Paper). Please email Linda at thefunkiejunkie@gmail.com for the codes for the Top 3 badges so that you can display them proudly on your blog.


And finally we have a randomly chosen lucky winner for the $25 gift certificate to The Funkie Junkie Boutique. Our congratulations this time go to #14 Lagene! Again, please do make sure you check out her amazing project for this challenge. Please email Linda at thefunkiejunkie@gmail.com for the gift certificate details.

Thank you again from all of us here at Frilly and Funkie to everyone who took part in this challenge and congratulations to all our winners. The current challenge, 'It's Heating Up!' runs through Tuesday, July 30th and we look forward to seeing your entries!

Have a great week everyone.

Wednesday, July 17, 2019

It's Heating Up!

Editor's Note: Before we kick off the latest challenge we have more fantastic news to share with you! Today we are so excited to unveil the newest member of The Funkie Junkie Boutique challenge Design Team - Ginny Nemchak of Polly's Paper Studio!!! We are sure you will all join us in giving her the warmest of welcomes as she shares her creative magic with us for our upcoming challenges. Now, talking of new challenges...

***

Welcome back to another Funkie Junkie Boutique challenge! Suzz here hosting our new challenge called 'It's Heating Up!'  Here is how I described the current challenge:

July is when the weather here in the Midwest really starts to turn warm and muggy. This is the inspiration for our challenge to interpret the heat with using one or more of the following colors: Yellow, Red or Orange. Your challenge is to create a vintage or shabby chic project where the main color is yellow, orange or red. I can't wait to see how you turn up the heat in your art!

The winner will earn a chance to be a Guest Designer at a future date here at The Funkie Junkie Boutique blog, and everyone who enters and follows the rules will go into the draw for the chance to win a $25 spending spree at The Funkie Junkie Boutique. There are also Top 3 Badges for three additional outstanding entries, chosen by the Design Team.

The guidelines for entering are simple; create a new vintage or shabby chic project following the challenge theme, link it below to your post (not just your blog) and also include a link back to this challenge in your post. You can combine our challenge with up to 10 challenges (including this one) to be in with a chance of winning. If you are entering through a public forum (such as Instagram) you'll need to include the words 'Funkie Junkie Boutique Challenge'. Also, please be sure to turn off your Word Verification so our Design Team can leave comments on your blogs. Make sure you follow these rules as unfortunately, we have had to eliminate entrants from the prize draws in the past.

To get you started in feeling the heat the team has provided some beautiful inspiration:

Sara Emily - sarascloset


Cec Wintonyk - CW Creations


Suzanne Czosek - Suzz's Stamping Spot

Stampers Anonymous Entomology Ranger Tim Holtz Layering Stencil Honeycomb For The Funkie Junkie Boutique

Ginny Nemchak - Polly's Paper Studio


Jenny Marples - Pushing The Right Buttons


I hope this has your creative juices warming up and you are ready to join us in the challenge!

Suzz

Saturday, July 13, 2019

Saturday Showcase - Stampers Anonymous Fragments

Hello! Suzz here with a Saturday Showcase featuring the wonderful Stampers Anonymous Fragments Stamps!

My favorite thing about crafting is stamping. I always try to include stamping on any project I create. I decided to dig into my scraps piles to look for backgrounds and bits created previously. The fragments stamps are perfect for adding the next layer of texture and detail on any these type of scraps.

Stampers Anonymous Fragments Stampers Anonymous Stuff to Say Idea-Ology Paper Dolls Ranger Tim Holtz Layering Stencil Nordic For the Funkie Junkie Boutique

For my first card I pulled a beautiful background from my stash. I adored the art I created with this background previously and was happy to pull it out and use up the rest of the pieces. I found enough pieces to cut out the butterfly to coordinate.

The fragment stamp added the perfect details in the corners. I stamped them using a brown archival ink and then to make it pop I heat embossed with embossing powder.

The Paper Doll was colored with a little gold and brown highlights and the wings got a touch of stamping over the embossed gold shapes.

The background is a mix of painted surfaces splattered with gold over gold embossed pattern.

Stampers Anonymous Fragments  Sizzix Bumblebee Idea-Ology Quote Chip Ranger Tim Holtz Layering Stencil  For the Funkie Junkie Boutique

I think I must work in gold and browns quite a bit because I found lots of gold scraps in my pile of goodies. This piece was already cut into a tag and I decided to use the shape already cut.

I die cut a bumblebee from another scrap but only had enough to get part of the bee. I decided to go with it and attach the bee to the side of the tag. I used alcohol inks to color a glass cut button and added a wildflower to the tag.

I also stamped the fragments onto the seam binding before I died it to coordinate. I forget sometimes that you can stamp on the ribbon too!

I added the fragment touches by stamping onto tissue paper with brown archival ink and then decoupaging the pieces to the tag.

Stampers Anonymous Fragments  Idea-Ology Gears Sizzix Bumblebee For the Funkie Junkie Boutique

For my next card I had an ATC started with an embossed bee and I decided to stamp the fragments on the corners and over the top of the embossed bee. I used embossing ink and then sprinkled with gold embossing powder to add a glitz to the background.

I found a gold background panel and stamped another fragment in the corners with brown ink and then layered everything with gears, old watch faces along with the quote chip.

Stampers Anonymous Fragments Idea-Ology Paper Dolls Stampers Anonymous Architecture For the Funkie Junkie Boutique

I finally found a beautiful pink background with hints of gold and decided to add golden bits of fragments stamped over the background.

I found a die cut arch and it fit perfectly with the architecture arch and stamped that into the arch. I heat embossed with the gold embossing powder.

The pink was the distress oxide smeared on the craft mat and spritzed with water. This background seemed perfect for the little flower girl paper doll.

I finished her with some flower accents to soften all the gold embossing.
Have a happy Saturday and remember you still have time to play along in the 'Water, Water, Everywhere' challenge until 11:55 pm Eastern Time on Tuesday, July 16th, 2019.

Suzz

Products: 
Stampers Anonymous Fragments
Stampers Anonymous Architecture
Stampers Anonymous Stuff to Say 
Idea-Ology Tim Holtz Quote Chips
Idea-Ology Tim Holtz  Paper Dolls 
Idea-Ology Bouquet Findings 
Idea-Ology Quotations Metallic Stickers
Idea-Ology Tim Holtz Mini Gears 
Idea-Ology Tim Holtz Gadget Gears 
Idea-Ology Tim Holtz Date Dials
Idea-Ology Long Fasteners
Idea-Ology Tim Holtz Game Spinners
Buttons - Floral Wooden ButtonsRhinestone Style Button Set
Ranger Alcohol Inks - Rust, Espresso
Seam Binding 
Prima Metallique Gold Rush Paint 
Eileen Hull Molten Dimension Golden Rod 
Ranger Gold Embossing Powder
Versamark Watermark Ink Stamp Pad 
Wendy Vecchi Gold Embossing Paste 


Prima Art Extravaganza Texture Paste Gold Crackle 
Sizzix Tim Holtz Large Stems Die
Ranger Archival Ink - Potting Soil 
Ranger Embossing Powders - Brown
Ranger Distress Oxide Ink - Picked RaspberryWalnut Stain 
Ranger Layering Stencil - NordicCrossed 
Wendy Vecchi White Embossing Paste 
Prima Say It In Crystals

Tuesday, July 9, 2019

July Give-Away at The Funkie Junkie Boutique

We have another goodie box up for grabs and you can enter the give-away through July 31st but first we want to announce that Tina-Mari Dalsrud is the winner of our July prize package.  Congratulations Tina-Mari!  We hope you will enjoy your new crafting supplies compliments of The Funkie Junkie Boutique.

Here is a quick glimpse of our July give-away as well as all the ways you can enter.  Wishing you all good luck in the drawing!


Monday, July 8, 2019

Challenge Winners - Home, Sweet Home

Today we are excited to announce our winners from the 'Home, Sweet Home' challenge. Thank you to everyone who shared their gorgeous creations with us. We loved seeing them all.


To pick just one winner was incredibly hard but in the end we chose #6 Alison (Butterfly). We were all convinced that this was a photo of her home, not a miniature masterpiece lovingly handcrafted to the finest detail! Make sure to check it out HERE. Congratulations to Alison on being our favorite and winning the opportunity to be a Guest Designer here at The Funkie Junkie Boutique blog for a future challenge. You will be contacted with all the details.

And now our picks for the three winners of the Frilly and Funkie Top 3 Badges for this challenge. As already mentioned it was so difficult to choose between these entries and we recommend you hop on over to take a look at them all. In numerical order they are; #4 Elly (Elly's Creaties) #5 Katy D (I like to cut and paste) and #8 Lynn (Experiments in Paper). Please email Linda at thefunkiejunkie@gmail.com for the codes for the Top 3 badges so that you can display them proudly on your blog.


And finally we have a randomly chosen lucky winner for the $25 gift certificate to The Funkie Junkie Boutique. Our congratulations this time go to #8 Lynn (Experiments in Paper)! Again, please do make sure you check out her amazing project for this challenge. Please email Linda at thefunkiejunkie@gmail.com for the gift certificate details.

Thank you again from all of us here at Frilly and Funkie to everyone who took part in this challenge and congratulations to all our winners. The current challenge, 'Water, Water, Everywhere' runs through Tuesday, July 16th and we look forward to seeing your entries!

Have a great week everyone.

Thursday, July 4, 2019

Guest Designer - Esther Asbury

Please say hello and give a warm welcome to our Guest Designer for the Water, Water, Everywhere challenge.  This is Esther Asbury of Shoregirl's Creations, who was the Design Team's Top Pick from the Mother, May I challenge.


Hello, my name is Esther Asbury and I'm honored and excited that I get to be a guest designer here on the Frilly and Funkie blog today! I live in the beautiful state of Virginia, USA. I've been happily married to my husband for 20 years and we have one beautiful daughter and two spoiled rotten dogs.

I've enjoyed many different hobbies over the years (cross-stitch, crocheting, knitting, gardening to name a few), but I've recently narrowed my interest to mainly card-making/paper-crafts. I don't really have one definable style but instead enjoy trying new techniques and experimenting with different products.(I think it's because I really like variety, and am easily bored with the same old, same old. SMILE!) I'm honored and excited to be a guest design on the Frilly and Funkie blog this week, and I hope my work will inspire you to create in your own unique style!


I decided to go with a shabby chic sea themed card today, so let's get started...


To create those board in the background I: 

• embossed a piece of light blue card stock with the 3D Lumber Embossing Folder 
• cut my boards apart, tore the ends, and distressed the sides by running an open pair of scissors along them 
• swiped some Picket Fence Distress Stain down each board 
• stamped my Versamark Watermark ink pad over the entire board and added Seth Apter Baked Texture (I rubbed some off before heat setting so that only part of the board would retain the texture)
• lightly applied some dry Parthenay Umber Artisan Powder to the centers of each board 

After adhering my boards to my square card front, I added a piece of cheesecloth and some crochet paper lace.

Next I die cut three feathered lace ovals and cut the centers out to form a frame. I glued the three frames together for more dimension and stamped the plaid background stamp from Wendy Vecchi over the top in salty ocean ink. I added a bit of picket fence distress stain over my ink to tone down the brightness.


I accented all my nautical die cuts with distress ink ink and picket fence distress stain. The anchor has a layer of blizzard baked texture over top for added interest.

I added some homemade flowers to the bottom corner with a bit of burlap string tucked in behind.


Here's how I created the flowers:

• die cut 2 each of the smallest and next to smallest flowers from the tattered florals die
• stamped two colors of distress oxide on my craft surface, added water, and smashed the flowers in the diluted ink till I achieved a color I was happy with - Note: I made sure to ink the reverse side of my flowers as well as the fronts
• crumpled my flowers into a ball to create wrinkles and texture
• unfolded my flowers, heat set, and glued together


The final touch was a sentiment from the True North stamp set in broken china distress oxide.

I hope you've enjoyed following along in my creative process, and will stop by the current challenge and link up your "water" projects!

Supplies and tools with links to The Funkie Junkie Boutique for products from the store: 

3D Lumber Embossing Folder (Sizzix - Tim Holtz)
Picket Fence Distress Stain (Ranger)
Versamark Watermark Ink
Blizzard Baked Texture (Seth Apter)
Parthenay Umber Artisan Powder (Prima)
Plaid Flannel Background Stamp (Wendy Vecchi)
• True North Stamp Set (Stamplorations)
Crochet Thinlits (Sizzix - Tim Holtz)
• Feathered Lace Ovals (Gina Marie Designs)
Tattered Florals Die (Sizzix - Tim Holtz)
• Small Sea Shell Dies (Impression Obsession)
• Paddles and Rope Ladder (Cottage Cutz)
• Sailboat (Cottage Cutz)
• Anchor (Cottage Cutz)
• Crab (Cottage Cutz)
• These colors of Distress Oxide (Ranger) - Salty Ocean, Broken China, Peeled Paint, Walnut Stain, Wild Honey
Peacock Feathers Distress Ink (Ranger)
• Burlap String
• Cheesecloth


* * *

To see all the details of Esther's fabulous card and more of her lovely work, check out her blog and then come on back and share your water-themed project with us.  The Water, Water, Everywhere challenge can be found HERE and runs through 11:55 pm EST on Tuesday, July 16th.

There will be a new Saturday Showcase on July 13th, so be sure to save the date and visit us so you don't miss the inspiration our designer will be sharing.

Wednesday, July 3, 2019

Water, Water, Everywhere

Editor's Note: Before we get into the new challenge theme there are lots of changes to let you know about. The most obvious is the new look and our name change! We will now be known as The Funkie Junkie Boutique Blog to reflect our association to The Funkie Junkie Boutique online store, and will continue to feature those Frilly and Funkie style projects you love to see.

There are also a couple of team changes; sadly Kathy Wright Clement has stepped down as she has new and exciting opportunities taking more of her time now. We will all miss her so much, and as well as thanking her for her for everything she did for the team we wish her every success with her new creative adventures. And you'll see that Maggi Harding is missing from our line up this week - Maggi is taking a much needed break for the summer but she'll be back with us in September. Talking of changes, in future we will be combining the projects from both the Frilly and Funkie sides of the Design Team at the beginning of each challenge. Don't worry though, you will still have the usual two weeks in which to enter your projects - we look forward to seeing them! And now for the new challenge...

***

It is Cec here and I am your hostess for this new challenge here at The Funkie Junkie Boutique blog. I am calling it Water, Water, Everywhere and this is how I describe it:
Often when people go on vacation there is water involved – fishing, cruising, checking out the aquarium, enjoying water sports or playing in the sand at the beach. For this challenge I want you to create a vintage or shabby chic project that reminds you of one or more of these past times.

The winner will earn a chance to be a Guest Designer at a future date here at The Funkie Junkie Boutique blog, and everyone who enters and follows the rules will go into the draw for the chance to win a $25 spending spree at The Funkie Junkie Boutique. There are also Top 3 Badges for three additional outstanding entries, chosen by the Design Team.

The guidelines for entering are simple; create a new vintage or shabby chic project following the challenge theme, link it below to your post (not just your blog) and also include a link back to this challenge in your post. You can combine our challenge with up to 10 challenges (including this one) to be in with a chance of winning. If you are entering through a public forum (such as Instagram) you'll need to include the words 'Funkie Junkie Boutique Challenge'. Also, please be sure to turn off your Word Verification so our Design Team can leave comments on your blogs. Make sure you follow these rules as unfortunately, we have had to eliminate entrants from the prize draws in the past.

The gals on the Design Team have created some fabulous inspiration for you.  To get all the details of their projects, simply click on their blog URL and you will be taken directly to their blogs;

Cec Wintonyk - CW Creations


Sara Emily - sarascloset


Suzanne Czosek - Suzz's Stamping Spot

Ranger Alcohol Inks Stampers Anonymous Stuff to Say Seaside Charms Set For the Funkie Junkie Boutique

Jenny Marples - Pushing The Right Buttons


Once you have checked out these wonderful projects, come on back and share your water-themed creation with us using the link below. We can't wait to see what you make! And do make sure you join us again tomorrow for some more inspiration from a new Guest Designer.