Wednesday, May 29, 2024

Lyla's Photographically Idea-ology Booklet


Welcome to another 2 week new theme! Lyla here, and I'm absolutely thrilled to lead off this newest, most fun, and most looked forward to, of all the Tim Holtz releases: Idea-ology 2024! Of course, DT Leader and Owner of The Funkie Junkie Boutique, Linda Coughlin, came up with the cutest title; "It's Ideal!" and I'm all in! I've gotten my goodies and I'm running late (as usual) but I just couldn't help myself: I was still adding to my make on Memorial Day, when I should have been blogging it by then. There were too many ideas coming to me- and it was too exciting!  I've even made up a set of videos, so grab some popcorn and join me for a picturesque scroll!


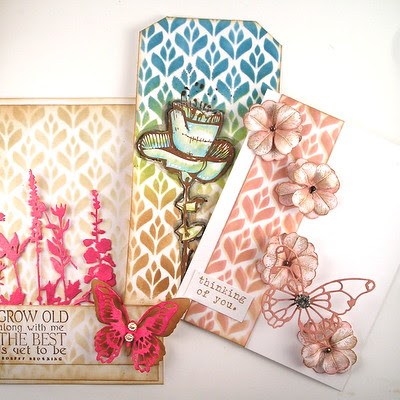
Here's my Happy Mail from The Funkie Junkie Boutique!
I had to add a second package of the Salavaged Hearts... these are SOOO overdue from Tim!!

Here's a List of LINKS:


It was a tough choice: I went with the Pocket Folio (at the top and right).


Distress inking all the front and back along all the creases and edges. It was much easier when I discovered the covers can be removed: they fell off on me, lol! I wanted the edges to match somewhat in tone/shades to the other IdeaOlogy paperie,  so I chose Scorched Timber Oxide for the edges into the middle area and then went over all the creased edges again with Ground Espresso Oxide. 


I am SO loving that Scorched Timber!!!


Here's where it fell apart and that made it easier to do the covers. In the video (below), you'll note how I mentioned you can rearrange these Folios.


I cut some of the Backdrops (from Vol 1,  Vol 4,  and Vol 5) scraps for making pockets out of 2 of the fold-out bottoms. The third would still fold downward.


Some of the Idea-ology (older versions) and other stash items. Some I colored... and some I left plain.
I love the metal Idea-ology Findings and Fasteners just as they are!!


Here, I probably had the worst time: choosing from all the new things to go into the Folio! You can see I started making photographs- "the Grandbabies" were the first to grace one! There always seem to be perfect little look-alikes in every Paper Dolls package- or maybe it's just me?


Oh my: HOUSES and CARS in the newest of the Paper Dolls!! Here, I am covering the new File Cards 2 with last year's (hardly used but once) Collage Paper just because it matched my photographic theme here!


You'll see more of this explained in the video(s). I'm adding some older Remnant Rubs to make my own "ViewMaster"  from the (retired) TH Picture Wheel Bigz Die- one of my fave dies!


All the "pages" are done, and the surprises all tucked inside. Time to do the outside covers...


... first; making use of a rarely-used TH older Stamp Set that I absolutely ADORE!! If you want to see one of the only other times I've used it: (CLICK HERE to see "TFJB Challenge: Documented"). 


Old and new Idea-0logy- for the mix to a great looking cover!


I scratched the Salvaged Heart with my very old TH Scratcher (wire scratcher) that I still use now and then. To get the hemp tied around the heart: I used a bit of Score Tape on the back and it held onto the string while I wrap and tied it, then adhered it to the cover top Backdrop page with Glossy Accents
and a tiny bit of hot glue from the hot glue gun- just for good measure.

Here's the picture-perfect Photographically Ideal Booklet...


FRONT- with some of my collection of old cameras. *NOTE* In order to view any of the foldout pages and surprise tucked items, you'll need to watch the 2 videos! ;)


Closeup FRONT


PAGES 1 & 2


PAGES 3 & 4


PAGES 5 & 6


PAGES 7 & 8


BACK

VIDEOS!!


Part 1 of 2: "It's Ideal; Photographically Ideal!"


Part 2 of 2: "It's Ideal... Photographically Ideal!"

Thanks so very much for joining me on this photographic journey! I hope you've not only enjoyed the views, but I also hope you're inspired to create your own! If you're looking for help to get started- there's no better deals to be found than at The Funkie Junkie Boutique!

Make sure you check back in here at Inspiration Ave every few days as you won't want to miss
more inspirational makes as the rest of TFJB Design team shares their take on our latest theme;
"It's Ideal!"

Until next time...

Stay Safe &
HAPPY BLOGGING!!

Friday, May 24, 2024

Suzz's Stencil Sensation

 Hi!  Suzz here.   I played around with the Stampers Anonymous floral deco stencil and tried to show how versatile it is for my sensational stencil! 

The stencil was beautiful with distress oxide inks, distress inks, and inky sprays!  I started with just a soft background with distress oxide vintage photo ink.


I accented the background with a shimmery pink spray from the mica stain spray.  A few different die cut flower and butterflies sprayed and sponged along with a beautiful quote from Robert Browning.


Then I used the stencil to sponge on a soft blush pink and then shifted the stencil slightly and sponged again with a brown oxide distress ink. 

I stamped the four leaf clover multiple times and fussy cut them to create flowers to attach on the front of the card.

I layered the flowers and used a few pop dots to make the butterfly float above the flowers.
Finally I finished with a blend of die inks sponged on the stencil.

I sponged the bottom with a brown and blended into green and then blue.  I then stamped and colored a flower to place over the pattern.  

I hope this has you pulling out your stencils!

Thanks for stopping by! 

Suzz

Products: 

Wednesday, May 22, 2024

Lisa's Stencil Sensation

Hello Funkie Junkie fans, Lisa Hoel here! Our theme this time is "Stencil Sensation"! I definitely have a love for stencils. They are a handy tool to have in your creative arsenal and you can do so much with them. I created a practical and pretty journal to keep track of my extensive *ahem* bearded iris collection. Using the Eileen Hull Field Notes & Specimen Card Die to create a flip style journal on rings means I can add pages easily. There are several of my iris varieties that I need to get photos of this spring so I can add them to the journal.

Lisa Hoel for The Funkie Junkie Boutique  #creativejuicefreshsqueezed   #tim_holtz #thefunkiejunkieboutique

Of course I used many stencils to decorate the covers and pages! Take a look:


Lisa Hoel for The Funkie Junkie Boutique  #creativejuicefreshsqueezed   #tim_holtz #thefunkiejunkieboutique

I used Gel Press prints on the inside covers.

Lisa Hoel for The Funkie Junkie Boutique  #creativejuicefreshsqueezed   #tim_holtz #thefunkiejunkieboutique


Lisa Hoel for The Funkie Junkie Boutique  #creativejuicefreshsqueezed   #tim_holtz #thefunkiejunkieboutique


Lisa Hoel for The Funkie Junkie Boutique  #creativejuicefreshsqueezed   #tim_holtz #thefunkiejunkieboutique


Lisa Hoel for The Funkie Junkie Boutique  #creativejuicefreshsqueezed   #tim_holtz #thefunkiejunkieboutique


I have some process photos to share:


I used a couple of methods to make it easy to do a lot of pages in a short time. First, two pages fit under one of the big stencils. I spritzed through the stencil, set those pages off to dry, and then used the spray left on the stencil to make a monoprint onto two new pages. I could actually get two sets of monoprint pages done with the residual ink from the initial spritz. That saved a lot of time.


Monoprint with stencil - I spritzed the residual ink with water
and then squished onto the pages.


2) More stencils! Over the top of the Distress Spray I used more stencils to add accent layers with acrylic paint. I knew the centers of the pages would be covered by a photo so I concentrated on the edges. I followed up with a bit of stamping with Archival ink.


3) Covers: I forgot to take photos while I was making them, oops! For a first layer, I did the same thing with Antique Linen Distress Oxide Spray as I did with the pages. Over that, I used the Tim Holtz Deco Leaf Layering Stencil to add Translucent Distress Crackle Paste in parts. Once it was dry, I spritzed with various colors of Distress Spray and water to get it to bleed into the crackle and pool around the paste shape edges. It's a great effect!

1) base background - I cut the pages out of heavy mixed media paper and used Antique Linen Distress Oxide Spray plus stencils to create a base texture.


Thanks for stopping by. Keep an eye here on the Funkie Junkie Boutique Blog, Inspiration Ave. to see all the inspiring content each week. Don't miss it…

Supplies used:

Eileen Hull Die - Field Notes & Specimen Card
Tim Holtz Stamp Sets - Halftone & Rings

Stencils:
Tim Holtz Layering Stencils: SticksBerry LeavesDeco Leaf
Dina Wakley Stencils: PiecesVaried
Dylusions Stencils: HexicombDot Grid

Sizzix Mat Board
Distress Oxide Spray - Antique Linen
Distress Spray - Twisted Citron, Saltwater Taffy, Speckled Egg
Ranger Archival Ink - Frayed Burlap, Spiced Marmalade, Peeled Paint, Mermaid Lagoon, Picked Raspberry
Acrylic paint (Distress Paint is perfect!)


Monday, May 20, 2024

Teri's Stencil Sensation

 Teri Wilson - Teris Mailbox

Hello Crafty Friends. I have more Ink Brayered Backgrounds for you! It is Teri with TerisMailbox posting for The Funkie Junkie. You may recall other posts where I created full page using Distress Oxide inks and a brayer. I am having too much fun using those backgrounds creatively. Today I am sharing three cards all using texture pastes with stencils.


Tim Holtz has a wonderful LONG video on his channel talking all about texture paste. I learned so much watching the video before I started playing. I do have a video HERE if you prefer to watch techniques.


Here are some of the original backgrounds created earlier.


Here is the first card I created. Start with a rainbow-colored base. Use THS 179 and a selection of distress inks to add even more color to the base. Distress Inks used include Carved Pumpkin, Picked Raspberry, Peacock Feathers, Twisted Citron, Wilted Violet and Mustard Seed. 

Using a Palette knife, add Texture Paste Crackle over the stencil and set aside to dry.

Black Heat Emboss one of the flowers from CMS479 Abstract Florals and fussy cut. I embossed two of the larger floral blooms at once.

Use Wilted Violet and Picked Raspberry Distress Watercolor Pencils to color the larger bloom. Use a watercolor brush to blend the colors.


Trim the base panel to 4.0 x 5.25 inches. Attach to a black cardstock panel 4.25 x 5.25 inches and an A2 card base. I did die cut a Scribbly Butterfly from the center of the back panel prior to attaching.


Stamp one of the sentiments on the lower left section of the panel. If the words are not completely stamped due to the paste, grab a black Micron pen and fill in the blanks!

Use foam tape to pop the bloom up and attach to the left side of the panel. Add a drop of glue to the center of the butterfly and attach on the right.


Next up is this very dramatic pink and black card.

The background is brayered with Picked Raspberry, Spun Sugar and Saltwater Taffy Distress Oxide Inks.  I found that Oxide Ink was preferred. Ledger Script Stamp and Hickory Smoke Archival Inks add texture and interest to the background.

Use THS 181 and Black Opaque Texture Paste. Spread the paste in a curved area on the right and a vertical row on the left. Set aside to dry.


Check out the drama from the black paste on the bright card panel! Emboss and fussy cut the smaller of the blooms on white cardstock.


Once dry, trim the colored panel to 4 x 5.25 inches and mount on a piece of black cardstock 4.25 x 5.5 inches and add to an A2 card base.

Select a sentiment from the Abstract Floral Stamp set and stamp and emboss on the lower right. Glue to floral Bloom on the left side!


Last up is this fun manly birthday card! The base is brayered with Cracker Pistachio and Salvaged Patina Distress Oxide Ink. Use THS178 Labels to apply Texture Paste Transparent on a few areas of the panel. Sprinkle Cracked Pistachio and Salved Patina Embossing powder over the color coordinated areas. Set aside to dry. Heat set when dry.

Trim to 4.0 x 5.25 and attach to a black panel 4.25 x 5.5. Add to an A2 card base.


Use Hickory Smoke Archival Ink to stamp the typewriter, letter with sentiment and the pointing finger from the Curiosity Shop Stamp set. I stamp twice so I can layer the cut outs. Fussy cut all and glue two layers together. Use foam tape to pop up the typewriter and the pointing finger.


Love the bright and cheery results.

Thanks so much for stopping by today!  Be sure to check out The Funkie Junkie Boutique. They have an amazing selection of not only Tim Holtz products, but many other lines.

All of my channel and affiliate links are listed in the Profile on Instagram. I would love to count you as a subbie friend. I appreciate your support. By using my links, I earn a small commission at no cost to you.

I'd love to have you follow/subscribe on my social media sites InstagramFacebookBlogger and YouTube all named TerisMailbox. Be well. Be creative!

Products used: