Monday, November 30, 2020

Challenge Winners - Celebrate

Thanks for joining us today as we announce the winners for our 'Celebrate' challenge and a big thank you to everyone who played along with your wonderful celebratory projects.


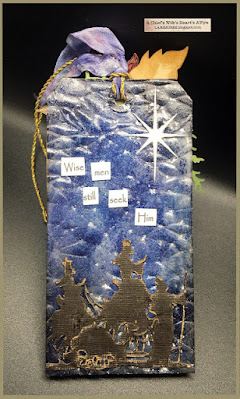
We had lots of beautiful entries and in the end the Design Team picked #22 Lyla Larimore as our overall winner. The team loved this fabulous double-sided festive tag the incredibly clever way of creating a starry night sky and wonderful inky 'stained glass' for the window. A trip to Lyla's blog 'A Chief's Wife's Heart's 'aFire' is highly recommended so you can see how each side was created.

Congratulations to Lyla on winning an opportunity to be a Guest Designer at a future date here at The Funkie Junkie Boutique Blog. You will be contacted shortly with all the details.

And now our picks of three additional outstanding entries for the The Funkie Junkie Boutique Blog Top 3 Badges. In numerical order they are #11 Repolainen with her wonderful illuminating festive easel card, #14 Esther Asbury (Shoregirl's Creations) for her beautiful layered Christmas card and #15 Carol (Carol Stamps) with her sparkling rainbow celebration card. Please email Linda at thefunkiejunkie@gmail.com for the codes for the Top 3 badges so that you can display them proudly on your blog.

And finally for the lucky randomly drawn winner for the $25 gift certificate to The Funkie Junkie Boutique; our congratulations go to #2 Bonnie in Kersey with a gorgeous Thanksgiving card. Please email Linda at thefunkiejunkie@gmail.com for the gift certificate details.

Thank you again to everyone who took part in this challenge from all of us here at The Funkie Junkie Boutique Blog and congratulations to all our winners. The current challenge 'A Time to be Grateful' can be found HERE and runs through Tuesday, December 8th at 11:55 pm EST so there's still plenty of time to link those projects which remind you of home or bring you comfort.

Saturday, November 28, 2020

Saturday Showcase - Eileen Hull Designs 'Box, Snowman' and Pam Bray Rock Candy Embossing Powder

Hi everyone and welcome to another Saturday Showcase, the Design Team's chance to share tutorials and products available from The Funkie Junkie Boutique with you. With the run up to Christmas now in full flow today's tutorial brings an idea for creating a set of festive cards using Eileen Hull's 'Box, Snowman' Sizzix Scoreboards Die and Pam Bray's Rock Candy Embossing Powders available now from The Funkie Junkie Boutique. There's plenty of mixed texture and yet it lays flat to make posting easier, with the Rock Candy Embossing Powder adding that special touch of sparkle that will reflect beautifully in Christmas lighting.

(click on the photos to see them closer)

Let's start with creating the sparkly snowman beginning with the body; from a sheet of A4 white card (you can use a standard 8 1/2x11 US size) cut a couple of strips 3 1/4 tall (8.5cm) across the width of the card - you should be able to get three snowman bodies from each strip with a little left over. Cover the card in 'Marshmallow' Rock Candy Embossing Powder and heat set. You'll find there are much larger 'rocks' in the powder which are fabulous for adding dimension but since we'll be die cutting this card those can be allowed to fall away when you remove the excess powder before heating. If preferred you can give the card a second coat of embossing powder depending on how well the first has covered. It's hard to capture here but there are sparkly bits (not glitter) and mixed grain sizes in the powder which give the heated results a beautiful shimmery textured finish. 


Allow the powder to cool properly before picking it up and die cutting the snowman figures from chunks of card that are 2 1/4 inches (6cm) wide. Since Eileen's 'Box, Snowman' Die is a big one it will cut through the embossed surface easily. You'll see below how you'll also cut the triangular 'nose' section at the same time. Save these for the next step.


To give the nose bits a more traditional 'carrot' colour use a drop of 'Butterscotch' Alcohol Ink on each - this will keep the embossed shine evident in the finish.


Cut a strip of black card 1 1/2 inches (6cm) tall and cover with a single coat of 'Licorice' Embossing Powder. Use this to cut the 'hands' and eyes for the snowman - I find it's easier to cut an initial sample of the hands from scrap paper and use this as a guide to cut appropriately sized chunks from the card which can be placed over the relevant sections on the die.


Back to the white card and you'll need to cut a strip and a half across the card that are 1 1/4 inches (3.5cm) tall. Cover the strip fully with embossing ink - you'll need to ensure there's plenty of ink on the card to capture the textured embossing crystals. Sprinkle 'Peppermint' Embossing Powder across two thirds of the card, tap off the excess, then cover the remaining one third with 'Butterscotch' Embossing Powder. It's ok if the two powders blend a bit where they meet. Heat set before cutting the strips into 1 1/2 inch (4cm) sections, then cut the bobble hats using Eileen's die.


With another full strip of white card, this time 1 1/2 inches (4cm) tall, repeat the process of covering it in embossing ink before covering with two colours of the Rock Candy Embossing Powder. For the scarf I used 'Cotton Candy' with 'Butterscotch' as seen below. This time cut the heat set strip into 1 1/4 inches (3.5cm) wide and cut the scarves using Eileen's die. You can now 'build' the snowman by adding the scarf, bobble hat, hands and eyes to the main body piece using strong wet glue. I found it helpful to place the snowmen under a heavy box to flatten them until dry.


Moving on to the background I took some of the tissue Gel Print pulls from my latest journal project and tore them into strips. To recreate the look use a mix of 'Rosy', 'White', 'Buff' and 'Heather' Dina Wakley Media Acrylic Paints.


One piece was stamped with Wendy Vecchi's 'Register' Background Stamp using some pale grey Archival Ink.


Another piece was stamped with Wendy Vecchi's 'Tiled' Background Stamp using a deeper pink shade of Archival Ink.


I stamped one of the decorative strips from Tim Holtz 'Ornate Trims' Stamp set on one side of pieces of tea stained copier paper and blended brown ink around the edges.


Finally cut pieces of kraft card slightly smaller than your card blanks (A6 UK, 4 1/4 x 5 1/2 inches US) and run through with the Kath Breen 'Jeweled Snowflakes' 3D Embossing Folder - I find lightly misting the card with water before embossing gives a deeper impression. Dry brush the surface with a little White Gesso.


To finish the card I stuck the various torn strips of tissue and pieces of tea stained paper onto the background, drawing stitch lines around some with a white gel pen. Machine stitching with black cotton around the edge of the kraft card creates a border for the card and the sentiment came from Tim Holtz 'Yuletide' Stamp set. Finally the snowman can be mounted on top of the background using more wet glue.


Thanks for visiting to catch today's Saturday Showcase tutorial featuring Eileen Hull's 'Box, Snowman' Die and Pam Bray's Rock Candy Embossing Powder.

There's still plenty of time to enter the current Funkie Junkie Boutique Blog challenge 'A Time to be Grateful' which runs through Tuesday, December 8th at 11.55pm. We look forward to seeing your amazing creations.

Jenny

Products used to create this junk journal are available from The Funkie Junkie Boutique and are listed/linked below.

Kath Breen 3D Textured Impressions Embossing Folder - 'Jeweled Snowflakes'Wendy Vecchi 490 Background Stamp - Tiled
Wendy Vecchi 490 Background Stamp - Register

Wednesday, November 25, 2020

A Time to be Grateful

Hi! Suzz here. I am back to share our latest challenge for you. This year has definitely been a difficult one I wanted to have a challenge where I reflected on what I am grateful for. Here is my challenge to you:

"Around this time of the year when we start to get into the holidays and the rush of everything it is a good time to reflect on what we are grateful for. My challenge to you is to capture that in your art. Show what you are grateful for in any type of project, it could be a journal page,  a card, or anything else that expresses your gratitude. You choose how to show your thankfulness and share it with us."

The winner will earn a chance to be a Guest Designer at a future date here at The Funkie Junkie Boutique blog, and everyone who enters and follows the rules will go into the draw for the chance to win a $25 spending spree at The Funkie Junkie Boutique. There are also Top 3 Badges for three additional outstanding entries, chosen by the Design Team.

The guidelines for entering are simple; create a new vintage or shabby chic project following the challenge theme, link it below to your post (not just your blog) and also include a link back to this challenge in your post. You can combine our challenge with up to 10 challenges (including this one) to be in with a chance of winning. If you are entering through a public forum (such as Instagram) you'll need to include the words 'Funkie Junkie Boutique Challenge'. Also, please be sure to turn off your Word Verification so our Design Team can leave comments on your blogs. Make sure you follow these rules as unfortunately, we have had to eliminate entrants from the prize draws in the past.

The design team as always has knocked it out of the park!

 Cec Wintonyk - CW Creations

Sara Emily Barker - sarascloset


Suzanne Czosek - Suzz's Stamping Spot


Hopefully this gives you a chance to get into your crafty space and create something inspired by what you are grateful for.

Suzz


Thursday, November 19, 2020

Guest Designer - Alison Bomber

Say hello to our Guest Designer for the Celebrate challenge.  Alison Bomber of Words and Pictures was the Top Pick from the Fall Foliage challenge.


I'm so happy and honoured to be guest designing here at The Funkie Junkie Boutique Blog again. My crafting journey began in 2012, and I've been a follower here from my very earliest days of exploring ink, stamps and paint. I'm an obsessive crafter, and I love mixed media layers and textures and grunginess, as well as the most delicate of watercolours.

These days creating is a little tricky as I'm in the process of packing up my life (including the craft room) to move to a new country, but I couldn't resist saying yes to joining in to Celebrate this huge adventure, this new life, and the ongoing creative journey I'm on. I hope you've got plenty to celebrate too and that these bold bright colours and words will strike a chord for you.


These tags started with smooshing Distress Inks and Oxides, including Crackling Campfire (it doesn't get brighter than that!).


Then I embossed my favourite PaperArtsy wild grasses in gleaming white, full of light and hope, as are the Quote Chip words.


You can see more over at my blog, Words and Pictures. I hope you've got plenty to celebrate too and that these bold bright colours and words will strike a chord for you.

* * * 
After you have popped over to Alison's blog to get more details on her fabulous tags, come on back and share your Celebrate project with us. Even in these tough times, we can find something to Celebrate. The challenge can be found HERE and runs through 11:55pm EST on Tuesday, November 24th.

Monday, November 16, 2020

Challenge Winners - Home is Where the Heart is

Thanks for joining us today as we announce the winners for our 'Home is Where the Heart is' challenge. Thank you to everyone who played along with your beautiful projects.


We had lots of wonderful entries and in the end the Design Team picked #14 Cathy Frailey (It's Oddly Appealing) as our overall winner. The team loved how Cathy transformed her thrift store find to represent her love of home.

Congratulations to Cathy on winning an opportunity to be a Guest Designer at a future date here at The Funkie Junkie Boutique Blog. You will be contacted shortly with all the details.

And now our picks of three additional outstanding entries for the The Funkie Junkie Boutique Blog Top 3 Badges. In numerical order they are #2 Monika Gulyas (Mistletoe Home) for her adorable little houses, #12 Corrine Rollet (Artcocofolies) with her fabulous artwork and #17 Drea Slee (Drea's Scraps of Inspiration) with her wonderful milk carton houses. Please email Linda at thefunkiejunkie@gmail.com for the codes for the Top 3 badges so that you can display them proudly on your blog.

And finally for the lucky randomly drawn winner for the $25 gift certificate to The Funkie Junkie Boutique; our congratulations go to #9 Lisa Hoel (Creative Juice) with another of her stunning seasonal wreaths! Please email Linda at thefunkiejunkie@gmail.com for the gift certificate details.

Thank you again to everyone who took part in this challenge from all of us here at The Funkie Junkie Boutique Blog and congratulations to all our winners. The current challenge 'Celebrate' can be found HERE and runs through Tuesday, November 24th at 11:55 pm EST so there's still plenty of time to link those projects which remind you of home or bring you comfort.

Saturday, November 14, 2020

Saturday Showcase - Tim Holtz Distress Inks, Leaf Stamps and Leaf Dies

It is Cec here and I am presenting the Saturday Showcase this time. In keeping with the current challenge theme of Celebrate, I have used a variety of Tim Holtz products to create a fall themed birthday card to send to my Brother.


This time I wanted to show that even a very simply made card can be very effective and here is how I did it:

I started by making a 5" x 7" card blank from some cream card stock and then added a panel of white card stock that I cut 1/8" smaller on each side, distressed and then inked with some Gathered Twigs Distress Ink.


I cut another piece of white card stock 1/4" smaller on each side than the previous panel and used Versamark to stamp a number of leaves from the Nature's Wonder set randomly over the panel. Clear embossing powder was added and melted to create a resist where the leaves are.


The next step was to randomly ink over the panel with Crackling Campfire Distress Oxide, dry that layer and then ink over the remaining panel with Crackling Campfire Distress Ink. I used a dry rag to rub any ink off the leaves. The panel was distressed and added to the card


I used an old chicken wire stencil and some Crackling Campfire DI to stamp some random marks. I have a jar of Clear Rock Candy Distress Crackle that I have been hording so I dug that out and used a palette knife to add some randomly and then once the whole panel was dry, I distressed and inked the edges.


Next I cut a piece of card stock to make the narrow strip. I used some Texture Paste through as Woodgrain Stencil to cover the card stock and then painted it with Sand Acrylic Paint (Dina Wakley). Next I sprayed it with Gathered Twigs Distress Spray Stain and then inked the highlights with Gathered Twigs DI.


Now it was time make a pile of leaves using the Skeleton Leaves and Fall Foliage dies along with a die set called Hidden Leaves (Sophie Guilar). I cut the leaves from white card stock and then inked them with a variety of Distress Inks and Oxides - Gathered Twigs, Aged Mahogany, Crackling Campfire, Forest Moss, Frayed Burlap and Fired Brick Distress Ink and Scattered Straw and Crackling Campfire Distress Oxide. The two skeleton leaves were also coated with Chunky Rust Embossing Powder (Seth Apter) but I forgot to photo that step.

To assemble the card I added the woodgrain strip and then all the leaves. I cut a butterfly from some patterned paper and used a water brush to paint it with Crackling Campfire DI. Finally I created the word Celebrate on the computer and inked it with Gathered Twigs DI.

I hope you are inspired to dig out your ink pads, stamps and dies and create a simple card too.

Supplies list:

Ranger Tim Holtz Distress Inks - Gathered Twigs, Aged Mahogany, Crackling Campfire, Forest Moss, Frayed Burlap and Fired Brick
Ranger Tim Holtz Distress Oxides - Scattered Straw and Crackling Campfire
Ranger Tim Holtz Distress Spray Stain - Gathered Twig TSS42310
VersaMark Watermark Ink Stamp Pad
Sizzix Thinlits Die Set 14PK - Fall Foliage by Tim Holtz 660955
Sizzix Chapter 3 Thinlits Dies - Hidden Leaves 664581
Tim Holtz Skeleton Leaves Thinlet Die Set
Stampers Anonymous Tim Holtz Rubber Stamps - Nature's Wonder
Seth Apter Baked Texture - Chunky Rust 15g
Dina Wakley Heavy Body Acrylic Paint - Sand - 1oz Bottle
Stampers Anonymous Tim Holtz Layering Stencils - Woodgrain THS023
Texture Paste
Ranger Distress Crackle Paint - Clear Rock Candy 4 oz - TDC31888
Tim Holtz Tonic Studios Paper Distresser 370E
Scor Tape
Tim Holtz Water Brush, Detailer Brush Tip TIP33080
Ranger Embossing Powder - Clear EPJ37330
TCW Mini Chickenwire Stencil

Wednesday, November 11, 2020

Celebrate

Hi there, Cec here to bring you the new challenge. I am calling this one Celebrate and here is how I describe it: "Your challenge is to create a shabby chic or vintage project to celebrate someone or something special. Since celebrations are happy occasions, your project should be made with lots of happy, bright colours. Keep your dull or neutral colours to a minimum please because as winter approaches we will have lots of that naturally so your bright colours must be predominant."

The winner will earn a chance to be a Guest Designer at a future date here at The Funkie Junkie Boutique blog, and everyone who enters and follows the rules will go into the draw for the chance to win a $25 spending spree at The Funkie Junkie Boutique. There are also Top 3 Badges for three additional outstanding entries, chosen by the Design Team.

The guidelines for entering are simple; create a new vintage or shabby chic project following the challenge theme, link it below to your post (not just your blog) and also include a link back to this challenge in your post. You can combine our challenge with up to 10 challenges (including this one) to be in with a chance of winning. If you are entering through a public forum (such as Instagram) you'll need to include the words 'Funkie Junkie Boutique Challenge'. Also, please be sure to turn off your Word Verification so our Design Team can leave comments on your blogs. Make sure you follow these rules as unfortunately, we have had to eliminate entrants from the prize draws in the past.

The Design Team have created their own projects to start you off with this one;

 Sara Emily Barker - sarascloset


Cec Wintonyk - CW Creations


Suzanne Czosek - Suzz's Stamping Spot


Once you have checked out their creations, come on back and share your projects with bright colors and a celebratory theme. The challenge runs through 11:55 pm EDT on Tuesday, November 24th.

Thursday, November 5, 2020

Guest Designer - Zoe Sanderson

Please welcome our Guest Designer for the Home is Where the Heart is challenge. Zoe Henderson of This Little Place was the top pick from the Staying in the Background challenge.


Hi thank you for inviting me to join you this month as your Guest Designer it is something that has left me feeling somewhat overawed. Art and Craft has always been some part of my life. My Grandmother used to crochet yellow drivers gloves in the ‘60s I was fascinated watching her and seeing the balls of yarn turn into useful objects but I never did master the art of crochet myself. I did learn to knit! In the lead up to Christmas when I was about 7 my Mother brought me a little kit to make Christmas Cards with colouring pencils, glue and glitter.

As a “groan up” many different creative forms have attracted my attention, about 30 years ago I became more seriously interested in paper craft. The hobby now covers a wide spectrum from drawing and painting, to mixed media, to CAS cards and even Jewellery making. With cats it is neigh on impossible to knit or do intricate wire work but I’ll try my hand at just about anything.

The greatest satisfaction comes from experimenting and learning something new.

With Covid_19 effecting us all my sign off has become; Stay Safe, Keep Well, Follow the rules


Home for me is behind my front door! For this project finding a “fairy door” at a British chain called “The Works” became the obvious place to start.


The actual door was given a couple of coats of bright red paint. The surround was then painted brown, laid thickly to give the effect of tree bark. The bank painted green and the sides or river painted blue.


The Americana crackle paint had sealed it’s self so an alternative was used. This paste has to be left for a couple of days to dry and crack, it also dries white. The positive being that if it does not work you can always paint over it. Looking at the surface the idea of using Distress Inks came to me.

Now came the easy part the finishing touches. Florist’s Moss and some die cuts as well as a little metal charm for the door knocker.

It was an enormous amount of fun making this plain wood child’s toy into a delightful ornament. I hope you will enjoy seeing as well as the fantastic work the Funkie Junkie team have made. Will you be having a go yourself?
* * * 
Check out all the details for Zoe's sweet door and then come on back and share your Home project with us. The challenge can be found HERE and runs through 11:55 pm EST on Tuesday, November 10th.

Monday, November 2, 2020

Challenge Winners - Purple, Orange, Green! Eek! It's Halloween!

Thanks for joining us today as we announce the winners for our 'Purple, Orange, Green! Eek! It's Halloween!' challenge. Thank you to everyone who played along with your fantastic Halloween/purple, orange and green projects.


Wish so many fantastic entries the Design Team really had a hard choice picking just one as overall winner. In the end we went with this Halloween themed wreath by #13 Lisa Hoel (Creative Juice) - isn't it spooky! You can see Lisa's wreath in more detail and find out how she created it on her blog here.

Congratulations to Lisa on winning an opportunity to be a Guest Designer at a future date here at The Funkie Junkie Boutique Blog. You will be contacted shortly with all the details.

And now our picks of three additional outstanding entries for the The Funkie Junkie Boutique Blog Top 3 Badges. In numerical order they are #3 Samra (Paper Talk With Samra) for her wonderful Halloween boot card, #4 Lyla Larimore (A Chief's Wife's Heart's 'aFire) with her incredible double-sided Halloween tag and #7 Bonnie (Paper Crafter at large) with her gorgeous witch in the woods card . Please email Linda at thefunkiejunkie@gmail.com for the codes for the Top 3 badges so that you can display them proudly on your blog.

And finally for the lucky randomly drawn winner for the $25 gift certificate to The Funkie Junkie Boutique; our congratulations go to #29 Lyla Larimore with her second amazing entry! Please email Linda at thefunkiejunkie@gmail.com for the gift certificate details.

Thank you again to everyone who took part in this challenge from all of us here at The Funkie Junkie Boutique Blog and congratulations to all our winners. The current challenge 'Home is Where the Heart is' can be found HERE and runs through Tuesday, November 10th at 11:55 pm EST so there's still plenty of time to link those projects which remind you of home or bring you comfort.