

To showcase the embellishments I created a series of vellum bags. The bags all had touches of white acrylic paint to give a soft effect to the background. I then cut sheets of paper from the Graphic 45 paper collections (Floral Shoppe, Sun Kissed). I distressed the edges of the cut pieces. I then white washed them to soften the colors and taped them to the front of the bags.
Then I went through my collection of embellishments and pulled out a variety of charms, buttons, and metal bits to show a few different techniques.
Let's start with the beautiful buttons:
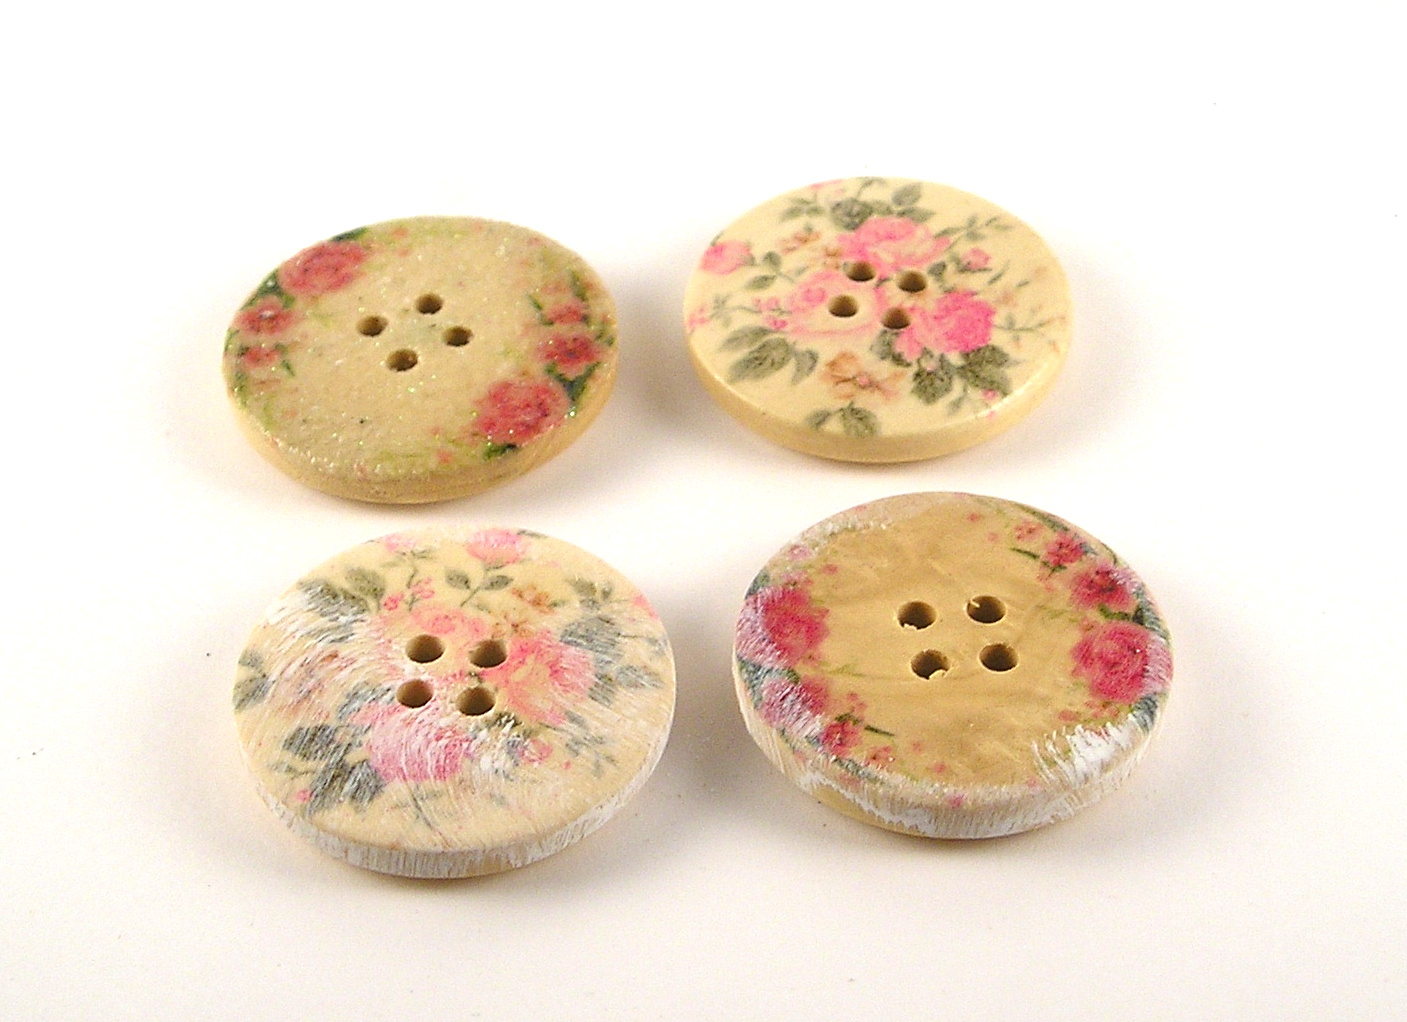
These beautiful buttons are lovely and come in different sizes. You will see I used another smaller flowery button on one of my gift tag/bag. The buttons are beautiful without any alteration and have been used as such on many of my projects. But for when I want them to blend into a shabby chic project I have given them a white wash (thin coat of white acrylic paint) or just sponged the edges with a dab of white acrylic paint.
I also have splattered the buttons with white paint:

I also decided to create a shimmer on the button by doing the following:
First step is to ink up the face of the button using a watermark ink. After the surface is tacky and ready then you cover the button with clear embossing powder. Heat up the button until the embossing powder melts. While the button is still warm pour crystal glitter over the button.

Shake of the excess of the glitter:


If you want more glitter or more shine add another coat of clear embossing powder and then more glitter.
While we are on the topic of buttons... I received these beautiful shimmery clear buttons from the shop and thought why not alter them to a color that goes with my project? Easy enough to do with alcohol inks. Just dab on the alcohol inks onto the buttons directly and then get a beautiful faceted colorful button.

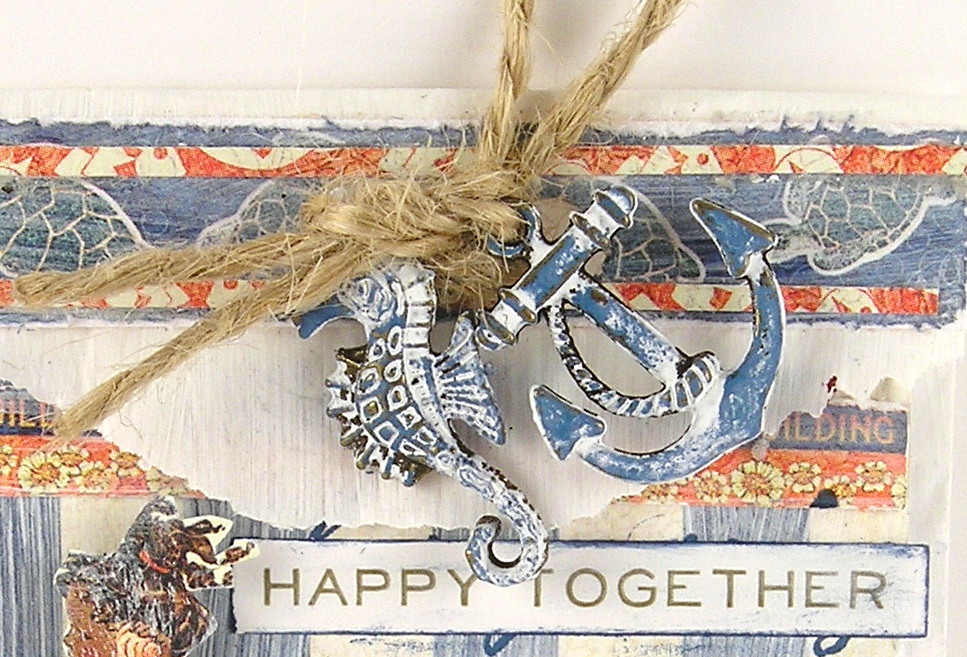
Now onto the charms:
I started with painting a variety of metal embellishments with white acrylic paints.

The painted charms add a soft vintage effect on any project:

For the nautical charms, I decided to add a layer of detail by smearing archival ink over the surface of the painted charm:


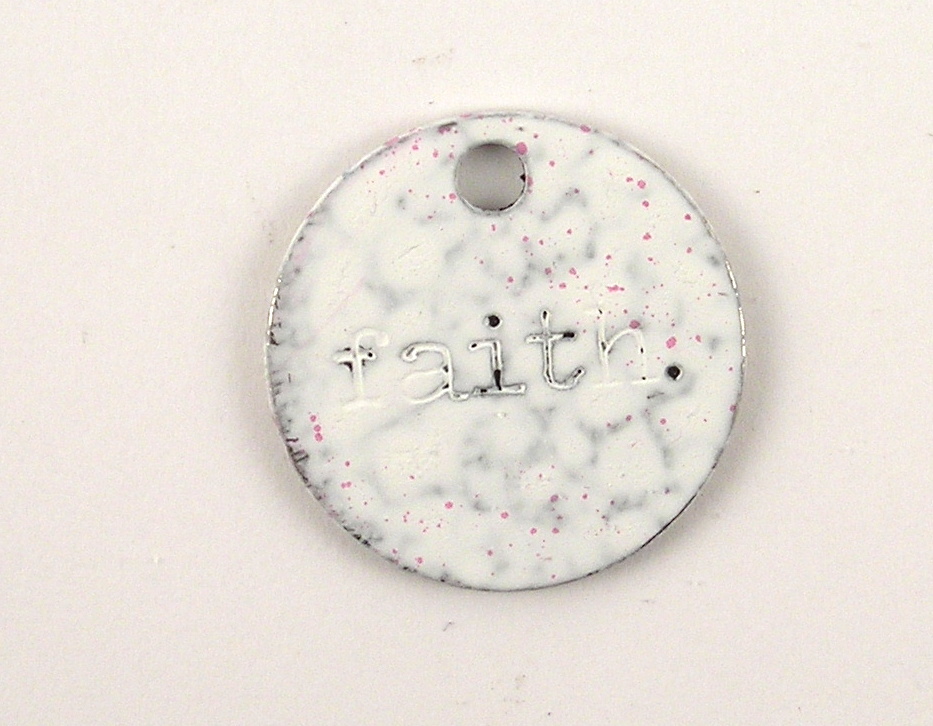
I took the faith token and covered it in the white acrylic paint. The acrylic paint becomes very easy to wipe off and leaves the letters painted.

For my next adventure I decided to take a metal filigree butterfly and add some texture by adding embossing powder. I first painted the butterfly and then sprayed it with distress stain spray. I heat set the ink. I then inked it up with clear embossing ink. I sprinkled it with chunky embossing powder.


When I finished with the butterfly I wanted to put it on my first tag but needed a softer color so I white-washed it again with a light layer of white paint. The embossing powder naturally resists the paint so the white popped through the paint and left it with a lovely soft effect.
My final favorite thing to do is emboss metal charms to whatever color, metallic finish I need. If I am working with gold accents and I have a silver heart I ink it up and emboss it with the gold embossing powder.
For this heart I used a silver heart and embossed it with Wendy Vecchi's Watering Can Embossing Powder. I love how it crackled a bit and gave it a lovely textured effect. You can even come back over the embossed surface and add a hint of paint to soften the texture.

I hope you enjoyed seeing how charming altering embellishments can be.
Don't forget to come play along in our new Bloomin' Marvellous challenge!
Suzz
 |  |  |  |  |
 |  |  |  |  |
 |  |  |  |  |
 |  |  |  |  |
 |  |  |  |  |
 |  |  |  |  |
 |  |  |  |  |
 |
