Wednesday, December 29, 2021

Mini Memories Tin

Hello crafty friends! It's me Tera, here to share one last piece of inspiration before the New Year.

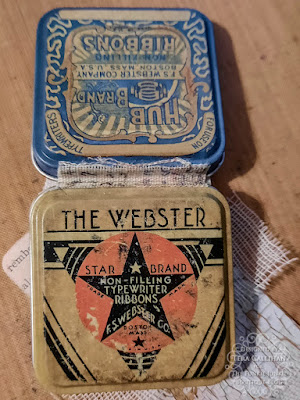
I have been loving the mini tins and journals by "Suzy ShabbySoul". She has some great tutorials on Youtube; one of them can be found HERE,

I also took some step by step photos below.

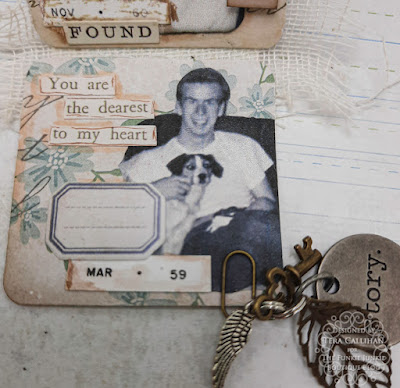
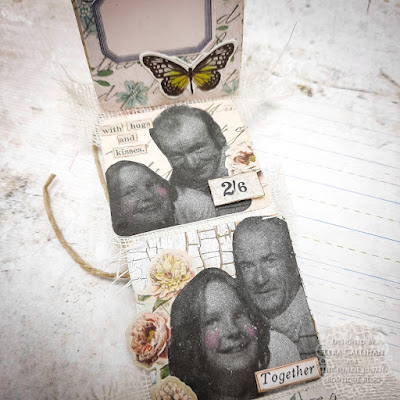
My little mini journal was a gift for my mom. It features photos of her and her dad. He passed away when she was young so I thought this would make a good memory keepsake.

The outside of the tin I added eyelets to for the ribbon, as well as an extra for charms

(Ok, yes...Originally I just punched the hole in the wrong spot...haha. However, it worked out perfectly for the charms!)


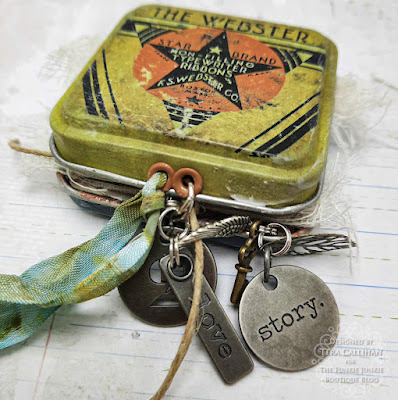
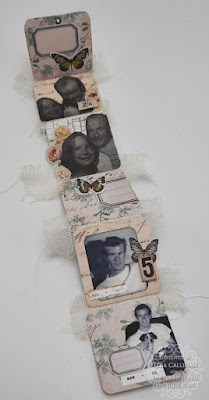
I chose to make the tiny journal so that it could come out to be easily looked at. The charms attached to the journal are hanging from one of the Tim Holtz tiny paper clips. (I thought it could be a fun decorative piece as well as a pull tab).

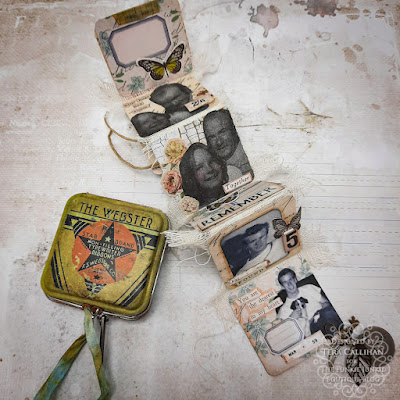
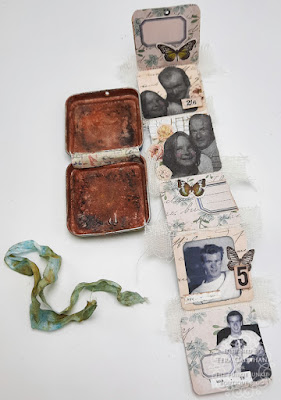
Here you can see the full layout with it opened.

Ok, on to the details...

This project is a little photo heavy, so you may want to grab a drink before you dig in.


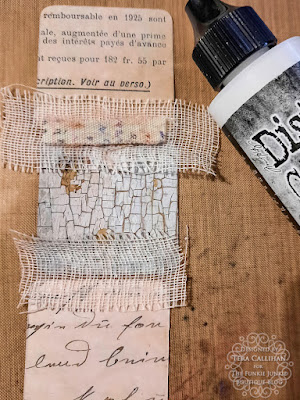
I started by cutting my chosen papers to 1.75in x1.75in. I then rounded the corners with my corner punch. After I laid out my 6 papers, I then flipped them over to start gluing them together. I put a little collage medium down, then used strips of mummy cloth to bind everything. (leaving about 1/8in between each piece) I added a little more collage medium over the tops of the mummy cloth to really make sure it would stay and be sealed. 


I also decided to add some fabric tape over the mummy cloth for extra strength and visual interest.


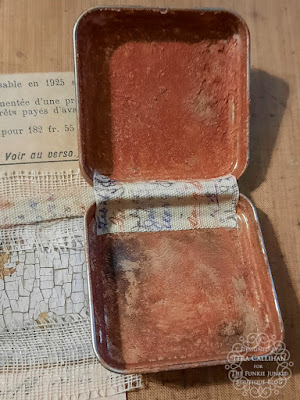
For the tin I used clear gesso, translucent grit paste, and distress crayons to get a rusty look. (rusty hinge, walnut stain, and black soot by the time it was all done).

I also used fabric tape as the hinge on here too (I did glue it down with collage medium and set aside to dry).


As you can see I added the tape to both sides :) 


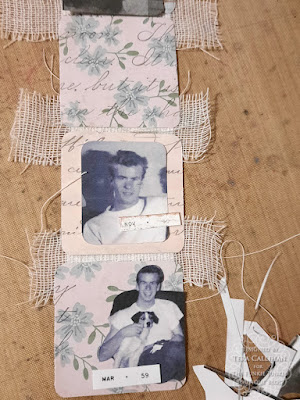
Now that the fabric binding was dry I went back to playing with the mini journal strip.
(the blue flowers remind me of forget me nots, so that's why I picked that one).

I copied and printed the photos since my mom have very few photos of her dad. This kept me from feeling guilty about cutting them up. 


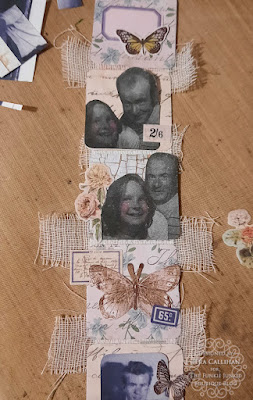
You can see I started by laying out all of my main elements before gluing everything down. 
(I even changed my mind completely on the one square). 


Once I had everything how I liked it, I glued things down and added pop dots under the 2/6 and the 5.


I also added more crayon to the tin. 


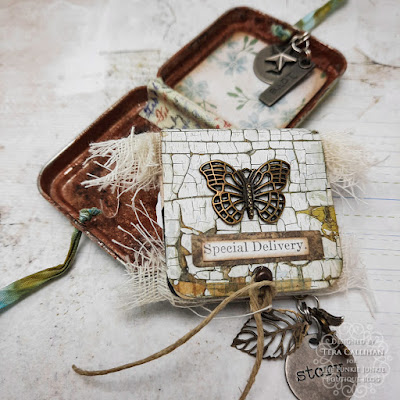
To truly finish everything I added some Tim Holtz stickers and a quote chip I peeled thinner.


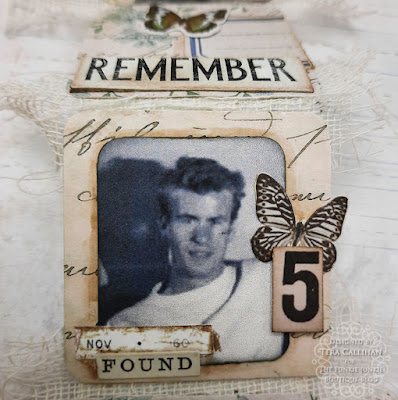
I used my water brush with vintage photo distress ink to lightly shade around the quotes, and some of the pictures. 


(you can kind of see that the 2/6 is elevated here).


I of course also added the charms, eyelets and ribbons. 


I did end up making a wrap around cover with a brad to tie the cord around. This helped to give it that mini book feel for me. 


Thank you for visiting! I hope you all like my mini memory tin!!

Supplies Used:

Tim Holtz tin tops (there are also some cute Christmas ones out right now too!)
Tim Holtz Idea-ology sticker book (older one)
Tim Holtz Quote Chips
Tim Holtz water brush (These ones don't leak! I love them!!!)
Distress crayons: Rusty Hinge, Black soot, Walnut Stain
Distress Stains- Antique linen and speckled egg (for the ribbon)
Eyelets
Random charms I had find other charms HERE

Wednesday, December 22, 2021

Guest Designer - Elle (Empire of the Cat)

There is just time before Christmas to welcome our final Guest Designer of 2021. Say hi to Elle (Empire of the Cat) who was the Design Team's top pick from the 'Tag It' challenge.


Hi there! It's Elle from Empire of the Cat. I'm so excited to be Guest Designer at Funkie Junkie Boutique blog for the first time! I really enjoy the FJ challenges and great DT inspiration so it's very exciting to win a challenge and get a chance to be the featured GD. I have always loved making things, whether it is sewing, crochet, painting, DIY or baking... you get the idea. Yes, I'm a multi-crafter - I just like to make things! I really love mixed media art and especially love art journalling and try to work every day in my journal if possible. I love to try out new ideas, and my journal is a good place to experiment - I also don't have to show anyone the failed experiments! LOL As you can probably tell from the name of my website, I love cats! My blog is where I share my arty experiments and feature my little cat family. I hope that you will feel inspired to drop by and say hello!


Since it is so close to Christmas, my project today is some last minute Christmas cards! If you find yourself in the same situation and need more cards, perhaps you might take some inspiration from this set. I love Distress Oxide on dark card, so for these cards I started with a black background. There's a few steps to making these cards but none of them are complicated and it took no time at all to make them.


I used two of my favourite Distress colours - Cracked Pistachio and Evergreen Bough - over white acrylic paint and some Kay Carley Christmas stamps from Paperartsy for my gold heat embossed trees, sentiment and snowflakes. There are more photos and details on my blog.

* * *
Elle's cards are so beautiful aren't they! Making use of Distress Oxide Inks to create those snowy backgrounds is such a fantastic idea and when teamed with gold embossing they become so magical . Thank you Elle for your amazing inspiration and for being our latest Guest Designer. Make sure you check out Elle's blog to see and find out more.

Monday, December 20, 2021

Challenge Winners - Yuletide Delights

Thanks for joining us today as we announce the winners for our 'Yuletide Delights' challenge and thank you to everyone who played along.


We loved seeing all of your festive makes and in the end picked this fabulous vignette created by #24 Carole J (Craftilicious Creations) as our overall winner. We loved how Carole had taken so much trouble to build the layers of this winter scene and embellish it with the stone effect on the sides and seasonal foliage at the top. Make sure to take a look at all the details on her blog post.

Congratulations to Carole on winning an opportunity to be a Guest Designer at a future date here at The Funkie Junkie Boutique Blog. You will be contacted with all the details.

And now our picks of three additional outstanding entries for the The Funkie Junkie Boutique Blog Top 3 Badges. In numerical order they are #6 Tracey (hotchpotchcreations), #13 Tone (Tones scrapperom) and #17 Alison (Words and Pictures). Please email Linda at thefunkiejunkie@gmail.com for the codes for the Top 3 badges so that you can display them proudly on your blog.

And finally for the lucky randomly drawn winner for the $25 gift certificate to The Funkie Junkie Boutique; our congratulations go to #11 Karen D (Tap Thump Art). Please email Linda at thefunkiejunkie@gmail.com for the gift certificate details.

Thank you again to everyone who took part in this challenge and congratulations to all our winners. Make sure to be back on Wednesday for a wonderful festive post from our Guest Designer.

Wednesday, December 15, 2021

Festive Fun

Hi everyone and welcome. As it gets so busy this time of year we will not be setting a challenge theme or requesting submissions for the final challenge post of the year - in it's place the Design Team are sharing some fun festive makes with you. As ever just click on the links above each photo to check out the projects in more detail. Enjoy!


Suzanne Czosek - Suzz's Stamping Spot 


Tera Callihan - The Crafty Sugar Addict


Janna Ketchum - treasuresofthesea_jannak


Laura Gilhuly - AngelScraps


Jenny Marples - Pushing The Right Buttons


Thanks for joining us!

Wednesday, December 8, 2021

Guest Designer - Lisa Hoel

It is time to welcome our Guest Designer for the 'Yuletide Delights' challenge. Say hi to Lisa Hoel who was the Design Team's top pick from the 'Living Things' challenge.


Hello, my name is Lisa Hoel and I’m a lifelong craft lover. I’ve been ‘arting’ ever since I first picked up a crayon! Paper crafts have been my main focus for the past twenty years or so and I love to make detailed, layered, textured, mixed-media type projects. I am not usually a clean and simple type artist. ;-) My background is in graphic design and I'm blessed to be married to the greatest guy in the world and have two dynamic boys. You can find me here: creativejuicefreshsqueezed.blogspot.com


I love all things vintage Christmas and when my Mom mentioned her fond memories and childhood fascination with their Christmas tree bubble lights, an idea was sparked! I happened to have a stash of old bubble light bulbs and vintage candoliers in my stash that I knew would be perfect to craft-ify.


I mixed truly vintage holiday bits with Tim Holtz Idea-ology and die cuts. I love how his products mix so well with the actual vintage! I hope my Mom enjoys this merry Kitschmas decoration as much as I do.

* * *
How special is this vintage Christmas vignette and so perfect for the current challenge! Mixing some modern makes with your vintage stash is such a great idea and so special. Thank you Lisa for your amazing inspiration and for being our latest Guest Designer. Make sure you check out Lisa's blog to see more. Then come on back and share your 'Yuletide Delights' projects with us.

The challenge can be found HERE and runs through 11:55 pm EST on Tuesday, December 14th.

Monday, December 6, 2021

Challenge Winners - Tag It

Thanks for joining us today as we announce the winners for our 'Tag It' challenge and a big thank you to everyone who played along.


The Design Team really enjoyed seeing all those lovely tags and in the end picked #6 Elle (Empire of the Cat) as our overall winner. We loved these bold and beautiful ATC Tags and the clever way she elevated the backgrounds with her penmanship. Congratulations Elle on winning an opportunity to be a Guest Designer at a future date here at The Funkie Junkie Boutique Blog. You will be contacted shortly with all the details.

And now our picks of three additional outstanding entries for the The Funkie Junkie Boutique Blog Top 3 Badges. In numerical order they are #5, #7 and #8. Please email Linda at thefunkiejunkie@gmail.com for the codes for the Top 3 badges so that you can display them proudly on your blog.


And finally for the lucky randomly drawn winner for the $25 gift certificate to The Funkie Junkie Boutique; our congratulations go to #4 Roberta (@bouvierroberta). Please email Linda at thefunkiejunkie@gmail.com for the gift certificate details.


Thank you again to everyone who took part in this challenge and congratulations to all our winners. The current challenge 'Yuletide Delights' can be found HERE and runs through Tuesday, December 14th at 11:55 pm EST so there's still plenty of time to link your projects. 

Saturday, December 4, 2021

Saturday Showcase - Stamperia Romantic Christmas

Good morning! Welcome to another Saturday Showcase! Today I am sharing a layout I created using a fabulously festive line - Romantic Christmas from Stamperia!


To create this layout;


Step 1 - you need 1 12x12 sheet, then tear 2 more pieces one at approximately 4" wide and one at approximately 2" wide and distress the edges.


Step 2 - cut some cardstock for 3 photo mats. Distress the edges of the two smallest and add snow like Prima Art Snowflake Paste. Adhere together like shown.


Step 3 - Add a piece of lace and gold mist like this one to a zippered sandwich bag and smoosh around. I do this because it saves the mess and I use less mist. Dry with your heat gun then snip into 3 pieces.


Step 4 - adhere all the papers and mats using foam tape or cardboard to add dimension. Pleat the lace and adhere to under the torn papers.


Step 5 - Cut your tag from the paper pack, add snowflake paste to some flowers, add some snowflake die cuts, a Christmas stocking, and some seed beads/pearls.

Earlier this week I also created this layout using this awesome line!


Thank you for stopping by and I hope I have inspired you to create a Christmas layout!
~Laura

Wednesday, December 1, 2021

Yuletide Delights

Welcome back to a new challenge here at the Funkie Junkie Challenge Blog. Hi I’m Janna your host for this weeks challenge. Let's get festive and create some Vintage Yuletide magic. Perhaps use some holiday distress colors or go full glitz with sparkles and falling snow. It is getting cold and we are thinking of sugarplums, candy canes, and holiday cheer. Create holiday cards, décor, or ornaments to show your Yuletide Delights. Have fun with your make and create some holiday magic! Happy crafting!

The overall winner will be offered the chance to be a Guest Designer at a future date here at The Funkie Junkie Boutique Blog, and everyone who enters and follows the rules will go into the drawing for the chance to win a $25.00 spending spree at The Funkie Junkie Boutique. There are also Top 3 Badges for three additional outstanding entries, chosen by the Design Team.

The guidelines for entering are simple; create a new vintage or shabby chic project following the challenge theme, link it to your post (not just your blog) and also include a link to this challenge in your post. You can combine our challenge with up to 10 challenges (including this one) to be in with a chance for winning. If you are entering through a public forum (such as Instagram) you'll need to include the words 'Funkie Junkie Boutique Challenge'. Also, please turn off your Word Verification so our Design Team can leave comments on your blogs. Make sure you follow these rules as unfortunately, we have had to eliminate entrants from the prize drawing in the past.

Check out all the Designers' Inspiration:


 Teri Wilson - TerisMailbox


Suzanne Czosek - Suzz's Stamping Spot


Laura Gillhuly - AngelScraps


Thanks for joining us. We cannot wait to see your holiday creations!