
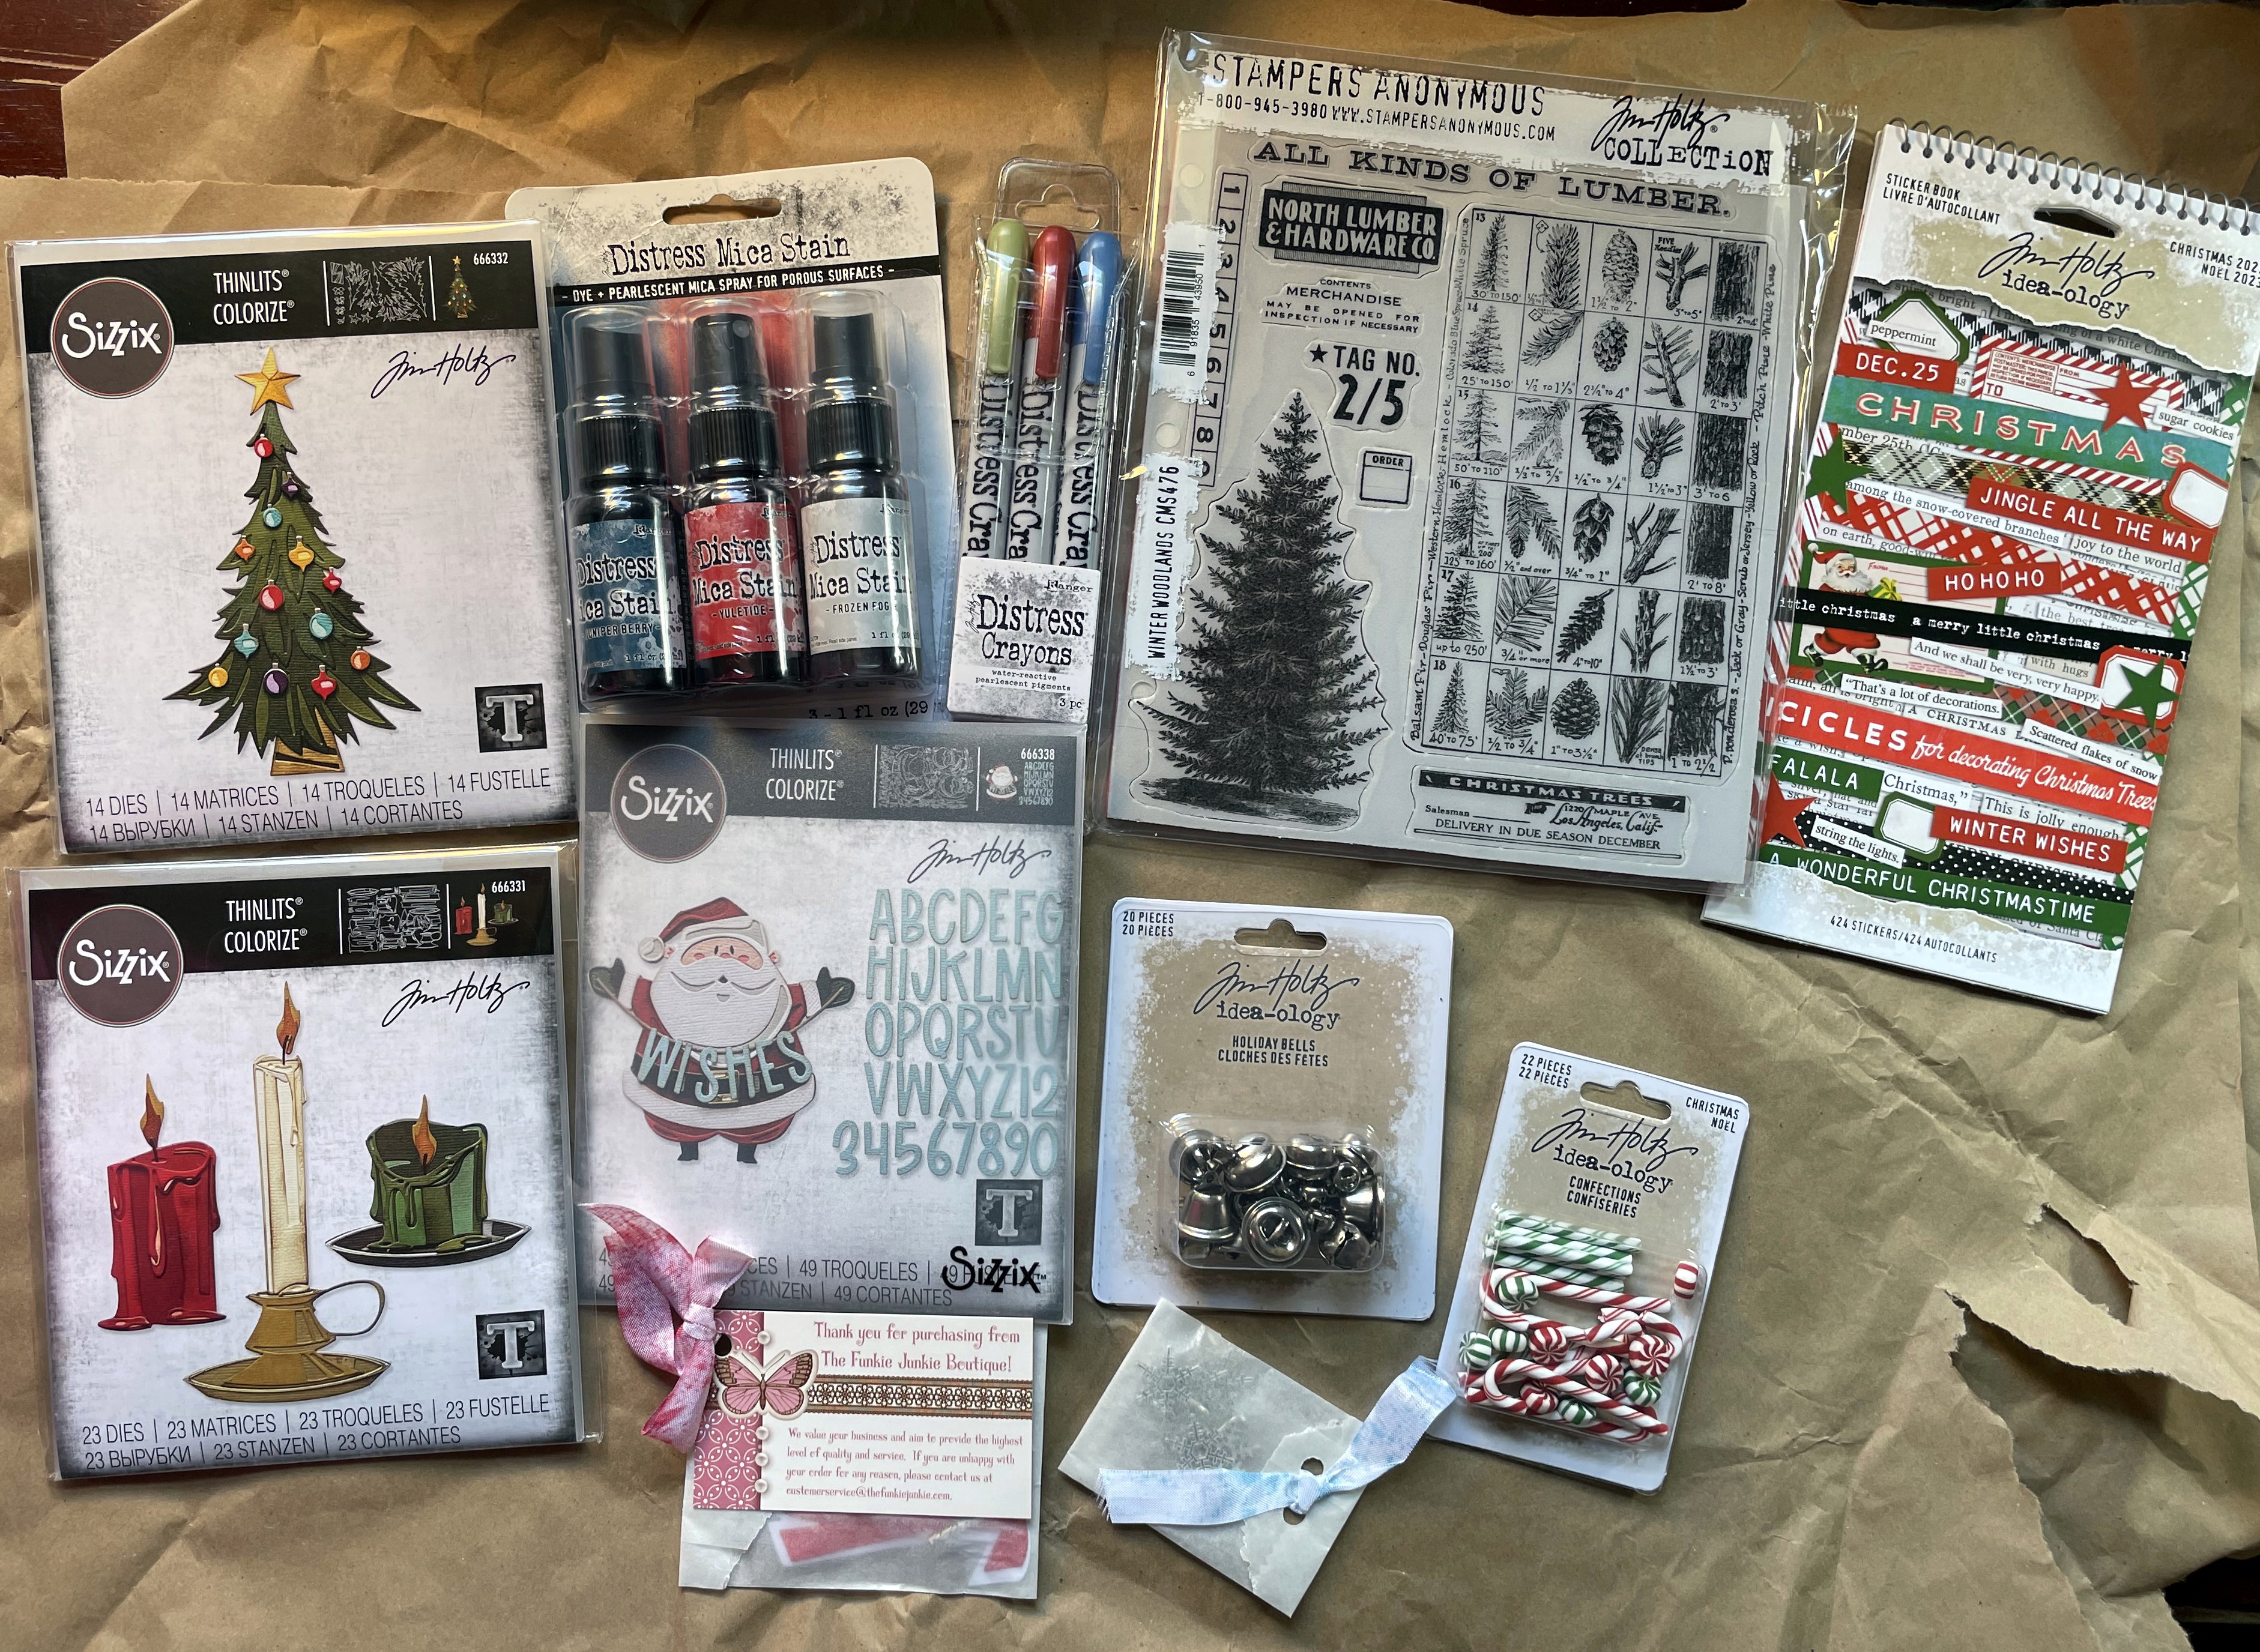


Now, this Seasonal Kraft-Core that you see here, is a very long time, now retired item. It was gifted to me by a Bestie earlier in the year, so I've tried to make use of it. I used 2 sheets of the Christmas in reds for the main bodies of my ornaments. But if you're looking for something similar to it, nothing comes closer than Tim Holtz's Kraft-Stock paperie. It's very solid, won't tear, and holds its structure extremely well on its own. I've included all four packages in my list, since I did use these as well:
Tim Holtz Idea-ology Christmas 2023 Holdiay Bells
Ranger Inkssentials Glossy Accents
Tim Holtz Tonic Studios Kushgrip Snip w/Non-Stick Blade & Cap 7"-Small
Tim Holtz Tonic Studios Kushgrip Snip w/Non-Stick Blade & Cap 7"-Small


The first thing I did was open up my die package and make sure all the pieces were there. Then I found the video Tim Holtz Santa Greetings Colorize and took 2 screen shots to keep quick reference in my files. Taking screen shots helps me match colors of papers, too.


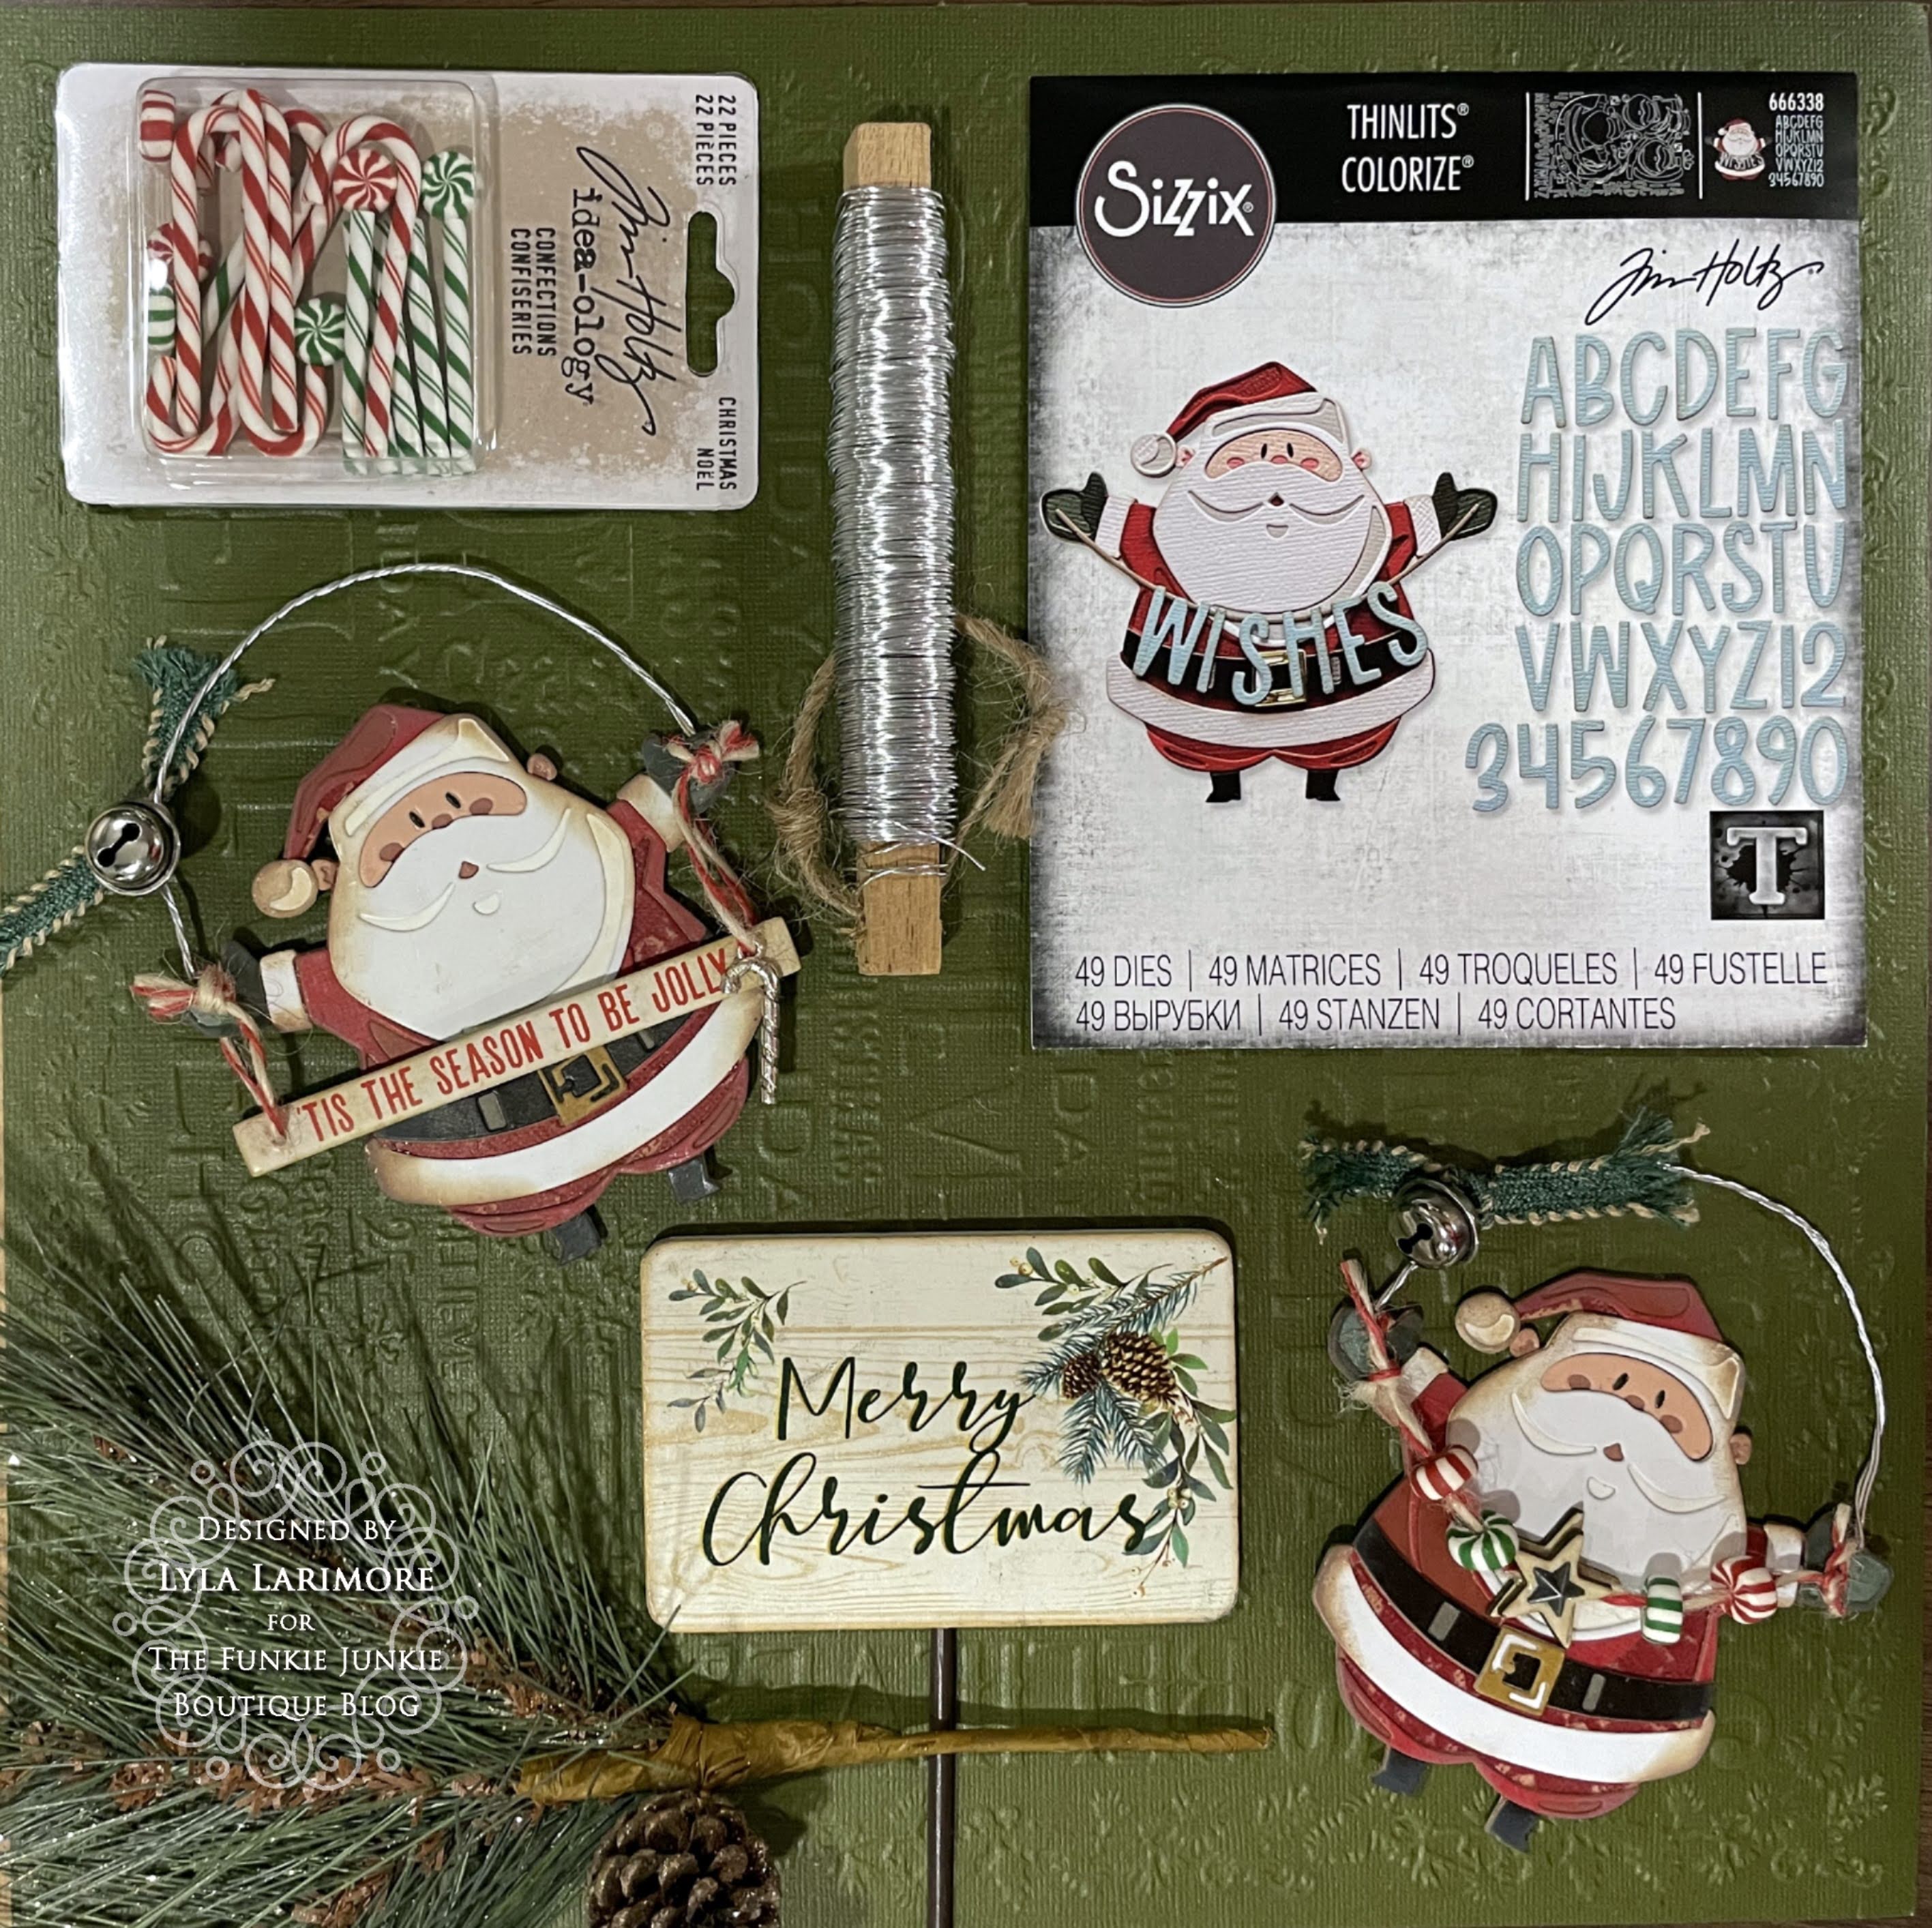
This is one of THE most detailed dies of the TH Colorized line that I've done yet.

I LOVE the stiffness of the Tim Holtz Kraft Stock paperie! It's so easy to work with- especially die cutting small pieces.

Just follow the backsides of the die set: they're all numbered and color-coded.

To make a front side AND back side; remember to use both sides of the paper/stock.


If I were to turn those brown/tan die cuts over to their red sides...Each would fit snugly right into the red top cuts to make a front and back match up perfectly. I started out only needing 4 Santas, but added a 5th for a very special teen, another for the Dixon Family exchange, and then 2 more just to do them differently. Four soon doubled into 8!

Finishing the rest of the cuts...

...took me a loooooong time!


I keep some aluminum wire in my stash, and used it by threading 3 strips together and twisting before clipping to the sizes I wanted. I used pliers to curl the two ends before tucking them between the main 2 cuts. TIP: I found it much easier to glue only the middle, head and legs of the two Santa sides together first. Then it was easy to hold the wire end between the 2 sides of the arm/hand and glue those together. Otherwise, the wire just kept slipping out while Santa flew apart.

I'm learning to put a gob of the Glossy Accents onto a baggie, then dip my cuts into it, and tap off any excess glue. This has been helping my "heavy handedness" with the Glossy Accents.

The hardest part of this Thinlits Set (INMO) would be the face; tiny pieces, but the resulting look is well worth the effort!

You can see the difference it made to sand down the two "vintage looking" Santas.

Ready to add the names to each of these. I chose 2 colors- purplish for girls and bluish for boys.

This die set is cool: I can think of tons of things Santa can hold across that string!

The last 2 get some vintage treatment with Idea-ology! The Christmas Confections, new 2023 Holiday Bells and the 2023 Baseboards and Transparencies were also my very faves of the year! I also added some Distress in my always-favorite Vintage Photo Oxide.

Using a handheld hole puncher on the IdeaOlogy Christmas Confections- EASY PEASY! They simply squish without tearing or breaking! Who knew?!? With that hole made, it was simply threading some aged twine ribbon through on a large bore needle. I added a tiny Candy Cane Charm that Linda sent as a FREEBIE with my last TFJB Happy Mail!
The Final Results...

All of the Ornaments together


The 2 for keeping with some Closeups following...


Backsides

These gifts fit easily into smaller manilla envelopes- with postcards- mailed (for just a couple of dollars each) from our house in Florida to our Grandbabies in Indiana and Kylie in Alabama!
That's it for me for the 2023 year!
THANKS SO MUCH for joining me on my crafting journeys throughout this past year,
and I look forward to bringing you morefTFJB Inspiration Ave as a Design Team Member for Linda Coughlin's The Funkie Junkie Boutique in 2024!
Meanwhile, be sure to pop back in for the next two weeks as the rest of the Design Team posts their favorites for 2023!
Don't forget to head over to The Funkie Junkie Boutique for AWESOME CLEARANCE PRICES on all of these items !!!
For me...until next year, 2024...
Stay Safe &
HAPPY BLOGGING!!
No comments:
Post a Comment