Friday, January 12, 2024

Janna's Winter Day Reading Nook

Hello and welcome to TFJB Inspiration Ave Blog and Happy New Year! This week we are creating to the theme of  “It’s Cold Outside”. We were also asked what do we do on a cold day in winter. That is an easy one for me to answer. The obvious answer is craft, however with the cold comes colds. So more often then not, I find myself reading a good book and drinking a cup of hot chocolate.

For my project today I have created a mixed media card featuring a Victorian girl who is reading by the window on a cold winter day. For full video tutorial click here.

For supplies I used: Idea-ology Christmas Baseboard Windows, Christmas Ephemera, Alcohol Ink Brushed Silver cardstock, Deco Paper, kraft paper, Distress Oxide ink Mermaid Lagoon, Speckled Egg, and Blueprint Sketch, Distress Mica Crayon Juniper Berry, Halloween Layers, Distress Reinkers Mustard Seed, Rustic Wilderness, Barn Door, Dusty Concord, and Vintage Photo, Distress Texture Paste Snowfall, Sizzix die set Layered Stripes, Distress White Heavy Stock.


For the first step of the project I cut down some brushed silver Alcohol Ink cardstock to a 5.5x4.25 base. Here I am using the Mini Tonic trimmer.


Then using the Sizzix die set Layered Stripes I cut out two layers of stripes to go over the base layer of brushed silver AI cardstock. For the blue layer I used Deco Paper over some kraftstock. The second layer I cut was from Distress White Heavy Stock. First I placed down the white layer and then added the sparkling blue layer over the top.


Below is the completed background. On the white layer I used double sided tape. For the blue layer I used Collage Medium to stick it to the previous layer.


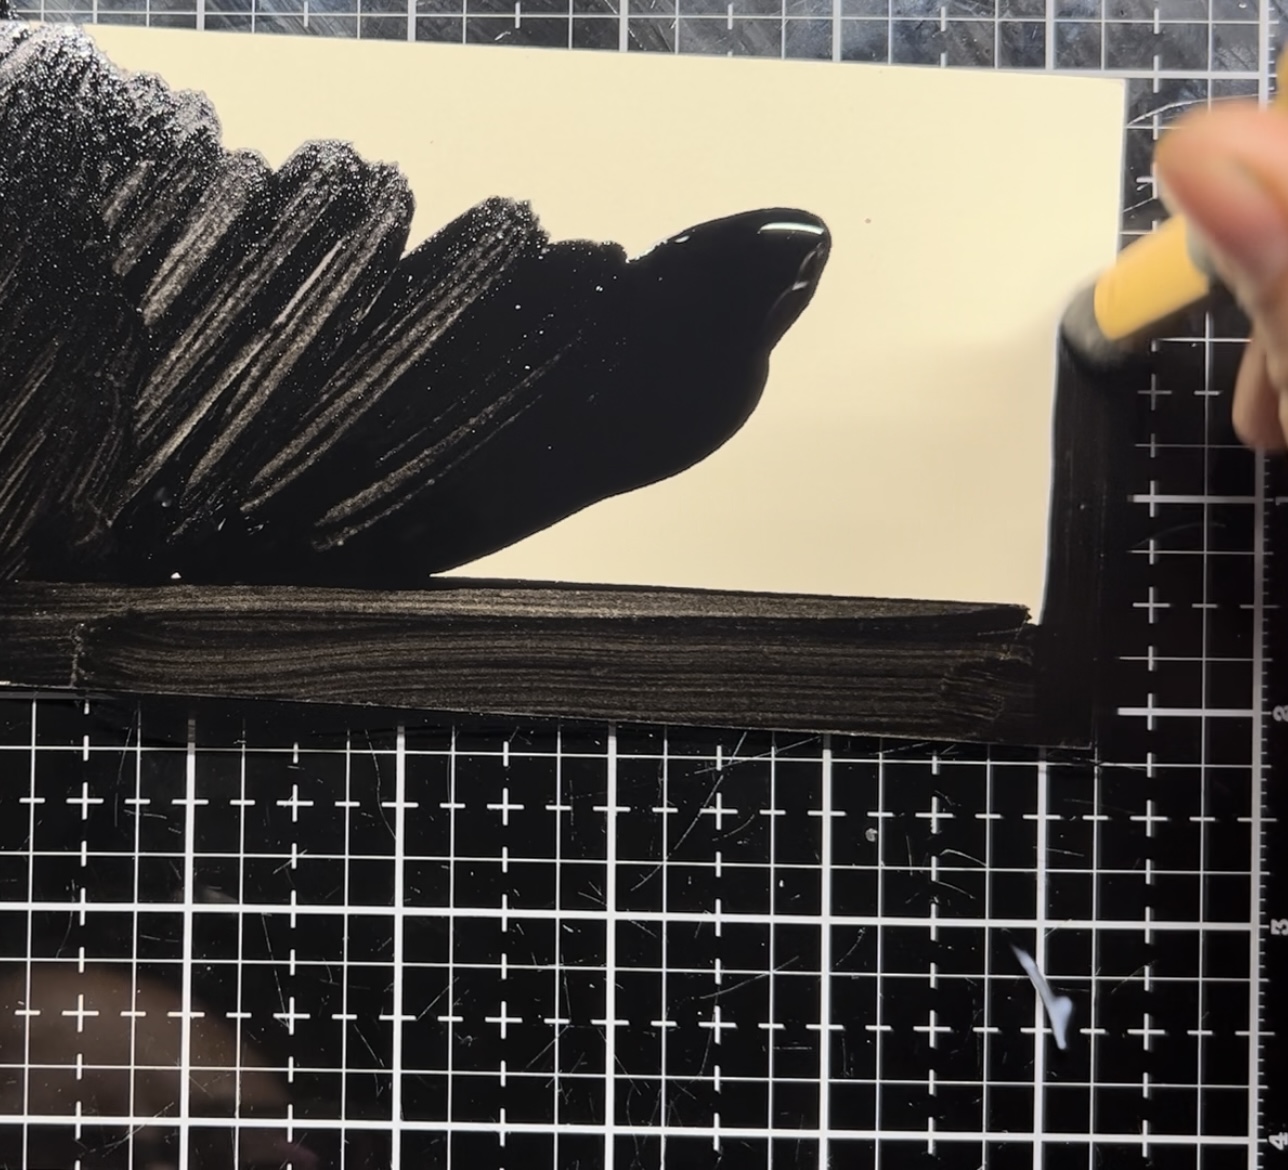
Next I painted a Mixed Media Tag Black using some Distress Paint Black Soot. This will act as a background for the scene we will build outside of a window.


While waiting for the main to dry I took a Baseboard Window Frame and added some clear plastic to the back of it to make a window pane. This glued in with some Collage Medium.


Here I have altered a photo element from the 2023 Halloween Idea-ology set layers. I found this pretty Victorian girl and colored her dress blue with some Juniper Berry Distress Mica Crayon. Then I cut around the girl to make her a stand alone element. For cutting I used Tonic snips.


Now for the outdoor background. Here I have pulled in the stamp set CMS455 Bottle Brush Trees and the Distress Oxide Inks Blueprint Sketch, Speckled Egg, and Mermaid Lagoon. I used different sized tree stamps to stamp out this icy blue forest. After stamping I trimmed down the tag to fit the baseboard windows and glued it in place with some collage medium.


While waiting for elements to dry I then stamped out some books. I found these books in the stamp set THMB024 school house. I then added some color to the books by using Distress Reinkers Mustard Seed, Rustic Wilderness, Barn Door, Dusty Concord, and Vintage Photo. Then I cut out the book stacks with the Tonic snips.


Now it is time to build our scene. First I glued the baseboard windows to the card base. Then I added in the file in blue with her book stack. Then I decided to decorate around the windows with some holly pieces salved from some Christmas Idea-ology elements. These I glued in place with collage medium.


Once I was happy with the placement of the holly I decided it add a frosty touch to the windows. Here I pulled in some Distress Snowfall Texture Paste and applied it with a small pallet knife.


For finishing touches I added a sticker from the 2023 Christmas Idea-ology Sticker Book “baby it’s cold outside”. Below is the completed card created to the theme of “it’s cold outside”. 

 
Thank you so much for joining me here today for TFJB Inspiration Ave. Until next time, happy crafting!

Janna~ 💕🎨💕

I can also be found on :
Instagram: dunhamtreasuresofthesea_jannak

YouTube: The Crafty Corner with Janna

Used: 


Wednesday, January 10, 2024

Lyla's Snow Day

 I'm excited to join The Funkie Junkie Boutique's Design Team for the first of 2024, once again! I'm leading off for our first TFJB Inspiration Ave theme of the year, "It's Cold Outside" and it's definitely a fitting theme for the entire USA this week! Most of the northern half will be getting covered by at least a couple of inches of snow, and the lower half (including my area) is going to see cold rain and storms blow through. What better idea than to cozy up in your craft space and join along with us for this?! I've got a really simple make to share with you, and after my post, my fellow Design Teammates will follow with theirs, so don't miss any of the next two weeks: pop back in OFTEN!

Let's get started!


I had a bunch of things still out from all the Christmas crafting, so I got to thinking about using up this Tim Holtz Dome I had picked up some time back.  I just never seemed to have an ideal use for it, but it came to my mind after seeing one of my DT mates use a similar one.

Let's get started with a List of LINKS to help you find what I used:

(I used an old set of Tiny Lights that were just plain lights- not colors.)


I wanted the base to be larger, as well as have the lights inside. I cut out matboard tracings for the bottom of the cork, layering some double-sticky foam inside for the light's switch to sit inside.


I poked a hole through the cork's new layers and covered all in a white cardstock. I then gave the Woodlands Tree a good cut-down and Distress Mica Spray in Juniper.


I strung the lights through and finished up sealing the bottom of the cork/layers, then wound the lights around and stuck the tree down into the hole with the lights. I then started to coat the base around the tree with some Snowfall Grit Paste.


I heat-dried as needed to keep the tree's color from getting onto the Snowfall Grit. You can see my hands got some of the tree's coloring onto the base, but this was going to get covered with a title later on, so I wasn't worried.


It was time to work on the SMALL Snowman. I chose the smaller because the larger was too large. Gave it some Foundry Wax...


...Distressed it with a few various Crayons, and then...


...changed my mind again and redid the Foundry Wax coat. After cooling the snowman (and finding his nose got too hot and bent it, lol), I gave him some blues in Distress Crayons (Chipped Saphire and Prize Ribbon). I figured he could keep the cute, little snubbed nose, too. I was finally satisfied!


I needed a sled... Confections worked for the sled's rails and a Foundry Adornment piece worked for the seat of the sled. Alcohol Ink shaded the Confections to a bluish for me.


What's sledding without snowballs??  Some Christmas Baubles worked for these. I added more Grit Paste where needed to build up the snow. Glossy Accents made great ice!!


The sign was made simply by cutting up a Baseboard piece and giving it some Distress Crayon (Vintage Photo) and then adding a pole from the Confections.


Wording pieced together from the Christmas Stickers made the Snow Day happen!

And here's what came from my crafting...


Tim's Christmas products were AWESOME in 2023 and perfect for Winter 2024!


Closeups following...


I added some Mica Flakes as well- it's a real SHAKER Snowglobe!


I'm overjoyed that you've stopped in to join me, once again, in this New Year!

Please, don't forget to come back in every couple of days for more TFJB Inspiration Ave

And be sure to get over to The Funkie Junkie Boutique because there's more Tim Holtz and great deals to come for 2024!

Until next time...

Stay Safe &
HAPPY BLOGGING!!

Friday, January 5, 2024

Suzz's 2023 Favorite

Hi,  Suzz here!  I am sharing my favorite from 2023!  I loved the Floral Trims from Stampers Anonymous Tim Holtz and did a series of tags with it earlier this year but wanted to bring it back out and play with it one more time! 

This is a multi-layered card using the floral trims stamps.  First the stamp was stamped on white cardstock with black ink.

The background was sponged with black dye ink around the images.  Then splatter the background with white paint.  

Stamp the flowers again on tissue paper and white cardstock using black archival ink.

Color the images with watercolor pencils and blend with a water brush on both the white cardstock and tissue paper.  Heat set the colors on the images.


Cover the entire  colored image with versamark watermark ink.  Apply clear embossing powder over the tissue paper and  heat emboss until the embossing powder completely melts.
 

Cut out the flowers as a complete image from the white cardstock and apply to the black sponged inky background.  Cut out the flower petals and leaves from the transparent colored image to apply over the images on the card base.

This will give the card a layered 3 dimensional effect. 

 Suzz

Products: 

Wednesday, January 3, 2024

Lisa's Favorite Products From 2023

Hello there Funkie Junkie fans, Lisa Hoel here. Happy New Year's! For this focus, we were given the difficult task of choosing our favorite products that were introduced in 2023. So hard!! I've incorporated a few of them into my project; I really couldn't choose just one.

Lisa Hoel for The Funkie Junkie Boutique  #creativejuicefreshsqueezed  #mymakingstory #tim_holtz #thefunkiejunkieboutique #sizzix

The Idea-ology Reliquary Dome introduced this year is definitely a favorite! I love the size and shape of the glass dome. There is so much you can do with it. Another new favorite is the Tim Holtz Die Set Holiday Blocks. I'm looking forward to playing more with it. It's like a set of puzzle pieces you can combine in so many different ways! 

Lisa Hoel for The Funkie Junkie Boutique  #creativejuicefreshsqueezed  #mymakingstory #tim_holtz #thefunkiejunkieboutique #sizzix

I am also quite fond of the Idea-ology Salvaged Deer and Alpine Trees (love that thinner profile!)

Let's take a peek at how I put this all together:

Step 1 – I wanted to build the die cut panel out of distressed metal pieces. You can get a great look by using copper or aluminum tape placed on cardstock and then cut. I also like to add a layer of paint which I then distress.


Step 2 – After cutting out the shapes, I sanded the edges and grunged it up with Archival Ink.


Step 3 – Foundry Wax is another product I need to play more with. It's so cool! I gilded the Salvaged Deer to make them look metallic to match the die cut panel. It's easy to use. You apply it with a brush and when it dries (which is quick!) you hit it with a heat gun and watch the magic happen. Tim Holtz has an extensive video demo about it.


Here's a look at the scene before I add the glass dome:


Thanks for stopping by. Keep an eye here on the Funkie Junkie Boutique Blog
 TFJB Inspiration Ave because you are now getting regular doses of expanded (and inspiring) content each week. Don't miss it…

Supplies used:  

Tim Holtz Die Set - Holiday Blocks

Distress Crayons - Salvaged Patina
Distress Paint - variety
Distress Archival Ink - Ground Espresso
Ranger Alcohol Ink

Idea-ology Christmas '23 - Salvaged Reindeer
Idea-ology Christmas '23 - Alpine Trees
Idea-ology Christmas Baubles
Idea-ology Reliquary Dome
Idea-ology Mini Fasteners
Copper Tape

Monday, January 1, 2024

Teri's 2023 Favorites

 Teri Wilson - TerisMailbox

Greetings Friends. Its Teri with TerisMailbox posting for The Funkie Junkie Boutique. Our Challenge for TFJB Inspiration Blog is 2023 Favorite. I have many favorites from this year, but nothing compares to Stamper Anonymous's Floral Trims Stamp!  I am presenting the gold embossed stamps with three watercolor techniques.

So many options for coloring this set! I have a YouTube Video Here if you prefer to watch.

Stamp the images on Distress Watercolor Cardstock using Embossing Ink plus Rangers Gold Embossing Powder and Heat set.

Use your choice of Distress Watercolor Pencils to color the embossed images. I used Peeled Paint, Picked Raspberry and Spiced Marmalade to color the images. There are a few different techniques for using the pencils, better described in the video above.

Add gold splatters using gold acrylic paint. The sentiment is from the Observations Stamp Set, heat embossed in gold on Vellum. Trim the velum to a strip and fold around the panel before attaching to an A2 card base.

I got a little bolder with card #2 and used Distress Re-inkers to color the blooms. I have a Distress Ink Palette with a variety of Distress Inks.

I used Ranger labels and glued to the inside of the top, coordinating with the opening for the inks on the left.

I sprayed water on my craft mat and used a brush to pick up small amounts of color to paint with. Re-inkers are very rich in pigment so a little goes a long way!


I wanted this to have a loose watercolor look, so I started by wetting the entire panel prior to coloring. I used a larger brush and add inks very loosely, adding more intense color to the centers.

I heat embossed a quote from the Noteworthy Stamp set using the same gold embossing powder. Using a stamp positioner allowed me to emboss twice for a bold look.

After the panel was dry, I glued it to an A2 card base.

The third card also uses my Re-inker Palette. I always start with yellow in the center when doing a rainbow card so I can judge the placement of colors. I used lots of water to achieve this look, followed by a few spritzes of water to help the inks wick a little.


The sentiment is from the Note Quote Stamp set, embossed in gold with the circle to set it off. I die cut the sentiment plus a circle from fun foam to pop it up. 


Trim the panel to 4 x 5.5 inches allowing for a 1/4 strip of gold glitter cardstock on the left side. Glue the panel plus the sentiment and fun foam to the card front.

The Quote Sentiment Stamp sets are two of my Go-To Sentiment sets!

What is your favorite 2023 product? Thanks so much for stopping by today! I'd love to have you follow/subscribe on my social media sites InstagramFacebookBlogger and YouTube all named TerisMailbox. Be well. Be creative!