Friday, January 19, 2024

Suzz's Frosty Pane

Hi!  Suzz here!  The theme being cold outside is so true for me!  We are sitting at -31 degrees with the windchill. Perfect time to sit inside and craft a bit!   I was inspired by frosted windows that had such beautiful crystalized designs.  I wondered if I could emulate that with the Frosted Crystal Embossing Medium from Tim Holtz/Ranger. I think the flourish stencil paired with the frosted crystal gave me a similar effect!

To create a frosted pane: 

  1. Start with a heat resistant acetate sheet. 
  2. Sponge over the stencil with Versamark ink. To get your pattern onto the acetate. 
  3. Sprinkle with the Frosted Crystal. 
  4. Heat up the embossing powder until the crystal shows.  (Don't overheat as eventually the crystal will melt and you will just have a clear embossed image) 

The frame on the cardstock was created with the same process. 

  1.  Lay the stencil over the front of the card. 
  2. Sponge on the Versamark ink. 
  3. Repeat pattern until front of the card is covered with inky pattern. 
  4. Sprinkle with Frosted Crystal. Shake off excess. 
  5. Heat up the embossing powder. 
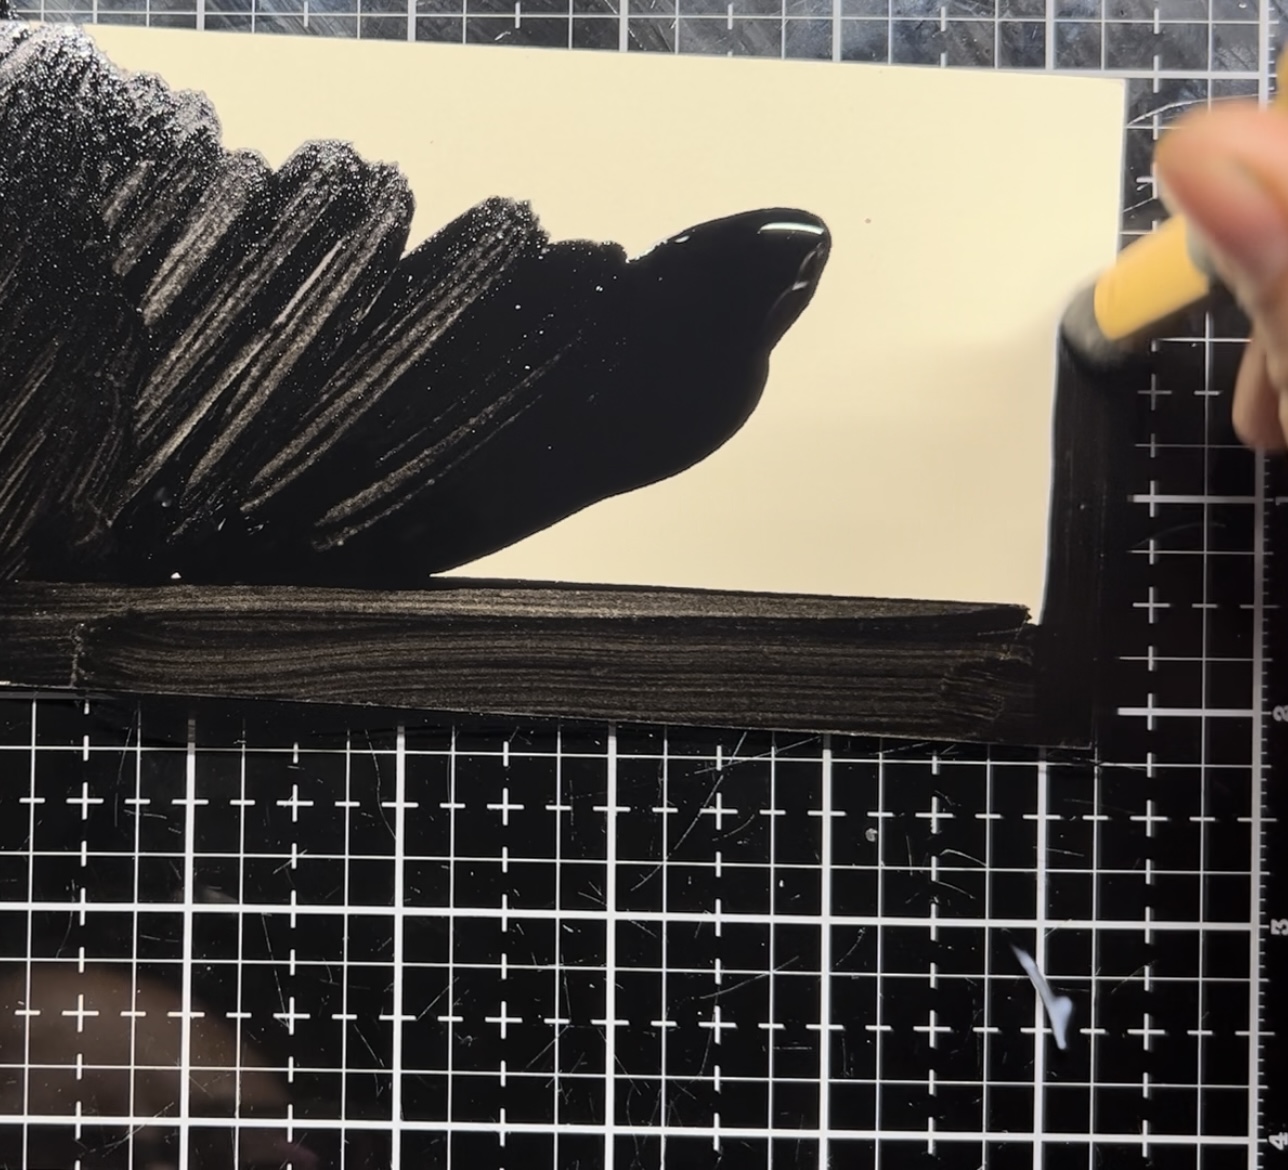
  6. Smear gold wax over surface to create highlights.

Then cut out the inside of the card base and use for the additional layering on top.  I also used a bit of the excess from the middle to die cut the bird to place on the front of the card. 

I loved the effect of the Frosted Crystal and decided to try the same process on white cardstock. 


The tag was created by: 

  1. Sponge versamark ink through the stencil onto the white cardstock. 
  2. Repeat until surface area is covered. 
  3. Sprinkle Crystal Frost Embossing powder over surface.  Shake off excess. 
  4. Heat until the frosty effect occurs. 
  5. Spray with a mix of distress oxide and micas stain sprays. 
  6. Spritz with water to lighten the effect and dab with paper towels to take off excess ink.
 The next panel was made with translucent embossing paste.


To create the snowy effect: 

  1. Lay stencil over heat resistant acetate. 
  2. Use spatula with translucent embossing paste and apply to acetate. 
  3. Repeat until covered with snowflakes. 
  4. Sprinkle Frosted Crystal Embossing medium over surface and tap off excess. 
  5. Some will cling to the acetate.  (I used a fine tip brush to brush off the excess) 
  6. Heat emboss the snowflakes and the embossing paste.  The embossing paste will puff up which gives it an additional layer of texture. 
  7. I wanted a full frosty panel so I took one more step of inking up the complete reverse side with Versamark and applying the Frosted Crystal Embossing Medium over the entire surface and then heated it up. 

This panel looked like a frosted pane of glass and was very cool!  

Keep warm! 

Suzz

Products: 

Wednesday, January 17, 2024

Lisa's Favorite Winter Day Activity

Hello, Lisa Hoel here. Our current Funkie Junkie Focus is "It's Cold Outside". Our projects need to show what we love (or hate) about the wintertime. One of my favorite winter activities is skiing! I learned when I was a little kid and have very fond memories of yearly family ski vacations in Lake Tahoe. I created a Vignette Divided Box project to celebrate skiing:

Lisa Hoel for The Funkie Junkie Boutique  #creativejuicefreshsqueezed  #mymakingstory #tim_holtz #thefunkiejunkieboutique #sizzix

I removed one of the dividers to create a large compartment in the top half of the box.

Lisa Hoel for The Funkie Junkie Boutique  #creativejuicefreshsqueezed  #mymakingstory #tim_holtz #thefunkiejunkieboutique #sizzix

I used one of the new Tim Holtz Vault series die sets, Vault Rosettes to create background elements.

Lisa Hoel for The Funkie Junkie Boutique  #creativejuicefreshsqueezed  #mymakingstory #tim_holtz #thefunkiejunkieboutique #sizzix

The little snow bunny is cut using the original Bunny Games Die Set. This cute bunny is in the new Vault Bunny + Chick Die Set as well although in a larger size. It does pay to have both so you can choose what works best in your project! If you missed the Tim Holtz Live go check it out on replay. Tim goes through all the new Vault dies and shows the size comparisons between old and new. It's very helpful.

Lisa Hoel for The Funkie Junkie Boutique  #creativejuicefreshsqueezed  #mymakingstory #tim_holtz #thefunkiejunkieboutique #sizzix

Here's a look at some of the "in process" steps.

1) Little snow bunny. Don't forget to search through your old dies to mix and match! The hat from the Winter Critters Die Set fit the bunny perfectly.

2) I cut rosette pieces out of vellum and layered with snowflakes. Vellum is trickier to work with than paper as far as scoring and folding but it works with a bit of care.


The half rosettes are made from two of the pieces. I found  it helpful to have the base circle folded at a 90 degree angle to make a little "shelf" on which to glue the rosette parts.


3) Elements in the box before I glued in all the top layer parts:


All the snow was created with Snowfall Grit Paste. Love that icy look!

Thanks for stopping by. Keep an eye here on the Funkie Junkie Boutique Blog because you are now getting regular doses of expanded (and inspiring) content each week. Don't miss it…

Supplies used:  

Tim Holtz Die Set - Forest Shadows
Tim Holtz Die Set - Vault Rosettes
Tim Holtz Die Set - Festive Gatherings
Tim Holtz Die Set - Bunny Games
Tim Holtz Die Set - Winter Critters
Tim Holtz Die Set - Paper Snowflakes, Mini
Tim Holtz Die Set - Paper Snowflakes
Tim Holtz Die Set - Tree Line
Tim Holtz Die Set - Vintage Labels
Tim Hotz Stamp Sets - Reindeer Flight, Grunge Flakes


Distress Spray Stain - variety of greens
Distress Paint - Tumbled Glass
Distress Texture Paste - Sparkle
Distress Grit Paste - Snowfall
Distress Rock Candy Glitter
Glitter Duster

Idea-ology Vignette Divided Box
Idea-ology Christmas '23 - Pinecones
Idea-ology Christmas '23 - Layer Frames
Idea-ology Christmas '23 - Alpine Trees
Idea-ology Design Tape - Trims

Monday, January 15, 2024

Teri Makes a Winter Scene

 Teri Wilson - TerisMailbox

Hello friends! It's Teri with TerisMailbox sharing for The Funkie Junkie Boutique. The theme for the Inspiration Blog is It's Cold Outside. I decided to make this fun panel focusing on my collection of Tim's Pastes that I have collected over the years! The background was inspired by Anna-Karin of the Layers of Ink Blog.


I love how the Translucent Crackle Paste and Sparkle Paste shine when painted with Distress Paints!

I have a video here if you prefer to watch!


Make the Background


Start with a 6x8 inch canvas panel. Coat with a layer of White Gesso to help the pastes attaching to the panel. Set aside to dry. Add a layer of Translucent Crackle Paste with a pallet knife. The thicker the paste, the larger the cracks are. I may have gone a little overboard, but I was happy with the outcome. Set aside to dry.

Use Distress Paints in Salvaged Patina, Blueprint Sketch and Stormy Sky to add color. Add a drop of each on your craft mat along with water. Use a brush to add color randomly. Spritz with water and be sure the paints go into the cracks. Set aside to dry.

When dry, add a layer of Sparkle Paste and allow to Dry.

The last step is to add Snowfall Grit paste to the bottom of the panel to look like snow.

Create the Embellishments


Use the Trim the Tree Colorize to create the trees using white Cougar Cardstock. See how you can make smaller trees using the dies in the video linked above.

Cut the houses using the Christmas Cutouts Die using scrap paper. I used scraps from my spray box with Mica Sprays on Black Cardstock (Love the shine)! Attach the houses to white cardstock and fussycut for depth.

Create a snowman using the Twig and Stump Die. I used Stump for mine with woodgrain cardstock.

Choose your sentiment and cut using Sizzix 1 inch alphabet dies. I used Navy cardstock and cut two of each letter for depth.


Add Snowfall grit paste to the house tops using a pallet knife. Add the paste to the tree branches and dip in Rock Candy Glitter for additional sparkle. Set aside to dry.

Spread a thin layer of Texture Paste Sparkle paste and allow to dry. Once dry, use the snowflake dies from Twig and Stump to cut multiple sparkle snowflakes.

Assemble the Scene

Use Collage Medium and start by attaching the trees with a slight side overhang. Add the houses. Use foam tape and collage medium to pop Stump up in front of the trees. 

Arrange the letters in an arch and attach in the upper center of the scene.

Last step is to distribute the snowflakes in the background using Collage Medium.

Thanks so much for stopping by today! I'd love to have you follow/subscribe on my social media sites InstagramFacebookBlogger and YouTube all named TerisMailbox. I am a big Tim Holtz fan! Be well. Be creative!


Friday, January 12, 2024

Janna's Winter Day Reading Nook

Hello and welcome to TFJB Inspiration Ave Blog and Happy New Year! This week we are creating to the theme of  “It’s Cold Outside”. We were also asked what do we do on a cold day in winter. That is an easy one for me to answer. The obvious answer is craft, however with the cold comes colds. So more often then not, I find myself reading a good book and drinking a cup of hot chocolate.

For my project today I have created a mixed media card featuring a Victorian girl who is reading by the window on a cold winter day. For full video tutorial click here.

For supplies I used: Idea-ology Christmas Baseboard Windows, Christmas Ephemera, Alcohol Ink Brushed Silver cardstock, Deco Paper, kraft paper, Distress Oxide ink Mermaid Lagoon, Speckled Egg, and Blueprint Sketch, Distress Mica Crayon Juniper Berry, Halloween Layers, Distress Reinkers Mustard Seed, Rustic Wilderness, Barn Door, Dusty Concord, and Vintage Photo, Distress Texture Paste Snowfall, Sizzix die set Layered Stripes, Distress White Heavy Stock.


For the first step of the project I cut down some brushed silver Alcohol Ink cardstock to a 5.5x4.25 base. Here I am using the Mini Tonic trimmer.


Then using the Sizzix die set Layered Stripes I cut out two layers of stripes to go over the base layer of brushed silver AI cardstock. For the blue layer I used Deco Paper over some kraftstock. The second layer I cut was from Distress White Heavy Stock. First I placed down the white layer and then added the sparkling blue layer over the top.


Below is the completed background. On the white layer I used double sided tape. For the blue layer I used Collage Medium to stick it to the previous layer.


Next I painted a Mixed Media Tag Black using some Distress Paint Black Soot. This will act as a background for the scene we will build outside of a window.


While waiting for the main to dry I took a Baseboard Window Frame and added some clear plastic to the back of it to make a window pane. This glued in with some Collage Medium.


Here I have altered a photo element from the 2023 Halloween Idea-ology set layers. I found this pretty Victorian girl and colored her dress blue with some Juniper Berry Distress Mica Crayon. Then I cut around the girl to make her a stand alone element. For cutting I used Tonic snips.


Now for the outdoor background. Here I have pulled in the stamp set CMS455 Bottle Brush Trees and the Distress Oxide Inks Blueprint Sketch, Speckled Egg, and Mermaid Lagoon. I used different sized tree stamps to stamp out this icy blue forest. After stamping I trimmed down the tag to fit the baseboard windows and glued it in place with some collage medium.


While waiting for elements to dry I then stamped out some books. I found these books in the stamp set THMB024 school house. I then added some color to the books by using Distress Reinkers Mustard Seed, Rustic Wilderness, Barn Door, Dusty Concord, and Vintage Photo. Then I cut out the book stacks with the Tonic snips.


Now it is time to build our scene. First I glued the baseboard windows to the card base. Then I added in the file in blue with her book stack. Then I decided to decorate around the windows with some holly pieces salved from some Christmas Idea-ology elements. These I glued in place with collage medium.


Once I was happy with the placement of the holly I decided it add a frosty touch to the windows. Here I pulled in some Distress Snowfall Texture Paste and applied it with a small pallet knife.


For finishing touches I added a sticker from the 2023 Christmas Idea-ology Sticker Book “baby it’s cold outside”. Below is the completed card created to the theme of “it’s cold outside”. 

 
Thank you so much for joining me here today for TFJB Inspiration Ave. Until next time, happy crafting!

Janna~ 💕🎨💕

I can also be found on :
Instagram: dunhamtreasuresofthesea_jannak

YouTube: The Crafty Corner with Janna

Used: 


Wednesday, January 10, 2024

Lyla's Snow Day

 I'm excited to join The Funkie Junkie Boutique's Design Team for the first of 2024, once again! I'm leading off for our first TFJB Inspiration Ave theme of the year, "It's Cold Outside" and it's definitely a fitting theme for the entire USA this week! Most of the northern half will be getting covered by at least a couple of inches of snow, and the lower half (including my area) is going to see cold rain and storms blow through. What better idea than to cozy up in your craft space and join along with us for this?! I've got a really simple make to share with you, and after my post, my fellow Design Teammates will follow with theirs, so don't miss any of the next two weeks: pop back in OFTEN!

Let's get started!


I had a bunch of things still out from all the Christmas crafting, so I got to thinking about using up this Tim Holtz Dome I had picked up some time back.  I just never seemed to have an ideal use for it, but it came to my mind after seeing one of my DT mates use a similar one.

Let's get started with a List of LINKS to help you find what I used:

(I used an old set of Tiny Lights that were just plain lights- not colors.)


I wanted the base to be larger, as well as have the lights inside. I cut out matboard tracings for the bottom of the cork, layering some double-sticky foam inside for the light's switch to sit inside.


I poked a hole through the cork's new layers and covered all in a white cardstock. I then gave the Woodlands Tree a good cut-down and Distress Mica Spray in Juniper.


I strung the lights through and finished up sealing the bottom of the cork/layers, then wound the lights around and stuck the tree down into the hole with the lights. I then started to coat the base around the tree with some Snowfall Grit Paste.


I heat-dried as needed to keep the tree's color from getting onto the Snowfall Grit. You can see my hands got some of the tree's coloring onto the base, but this was going to get covered with a title later on, so I wasn't worried.


It was time to work on the SMALL Snowman. I chose the smaller because the larger was too large. Gave it some Foundry Wax...


...Distressed it with a few various Crayons, and then...


...changed my mind again and redid the Foundry Wax coat. After cooling the snowman (and finding his nose got too hot and bent it, lol), I gave him some blues in Distress Crayons (Chipped Saphire and Prize Ribbon). I figured he could keep the cute, little snubbed nose, too. I was finally satisfied!


I needed a sled... Confections worked for the sled's rails and a Foundry Adornment piece worked for the seat of the sled. Alcohol Ink shaded the Confections to a bluish for me.


What's sledding without snowballs??  Some Christmas Baubles worked for these. I added more Grit Paste where needed to build up the snow. Glossy Accents made great ice!!


The sign was made simply by cutting up a Baseboard piece and giving it some Distress Crayon (Vintage Photo) and then adding a pole from the Confections.


Wording pieced together from the Christmas Stickers made the Snow Day happen!

And here's what came from my crafting...


Tim's Christmas products were AWESOME in 2023 and perfect for Winter 2024!


Closeups following...


I added some Mica Flakes as well- it's a real SHAKER Snowglobe!


I'm overjoyed that you've stopped in to join me, once again, in this New Year!

Please, don't forget to come back in every couple of days for more TFJB Inspiration Ave

And be sure to get over to The Funkie Junkie Boutique because there's more Tim Holtz and great deals to come for 2024!

Until next time...

Stay Safe &
HAPPY BLOGGING!!