

Having already created one altered jar this week attention turned to the task of transforming this former garlic paste jar (so glad at this point you can't smell through the Internet yet!!)

Rather than apply alcohol inks immediately to the surface I began by prepping it with layers of Glue N Seal and clear Rock Candy Crackle Glaze. A second layer of glue over the glaze stops it from flaking. Then the inks were blended up the jar (Copper Mixative on the base, followed by Espresso, Rust and Red Pepper) before gilding wax was applied over the top and some of these yummy metal filligree corners were added.
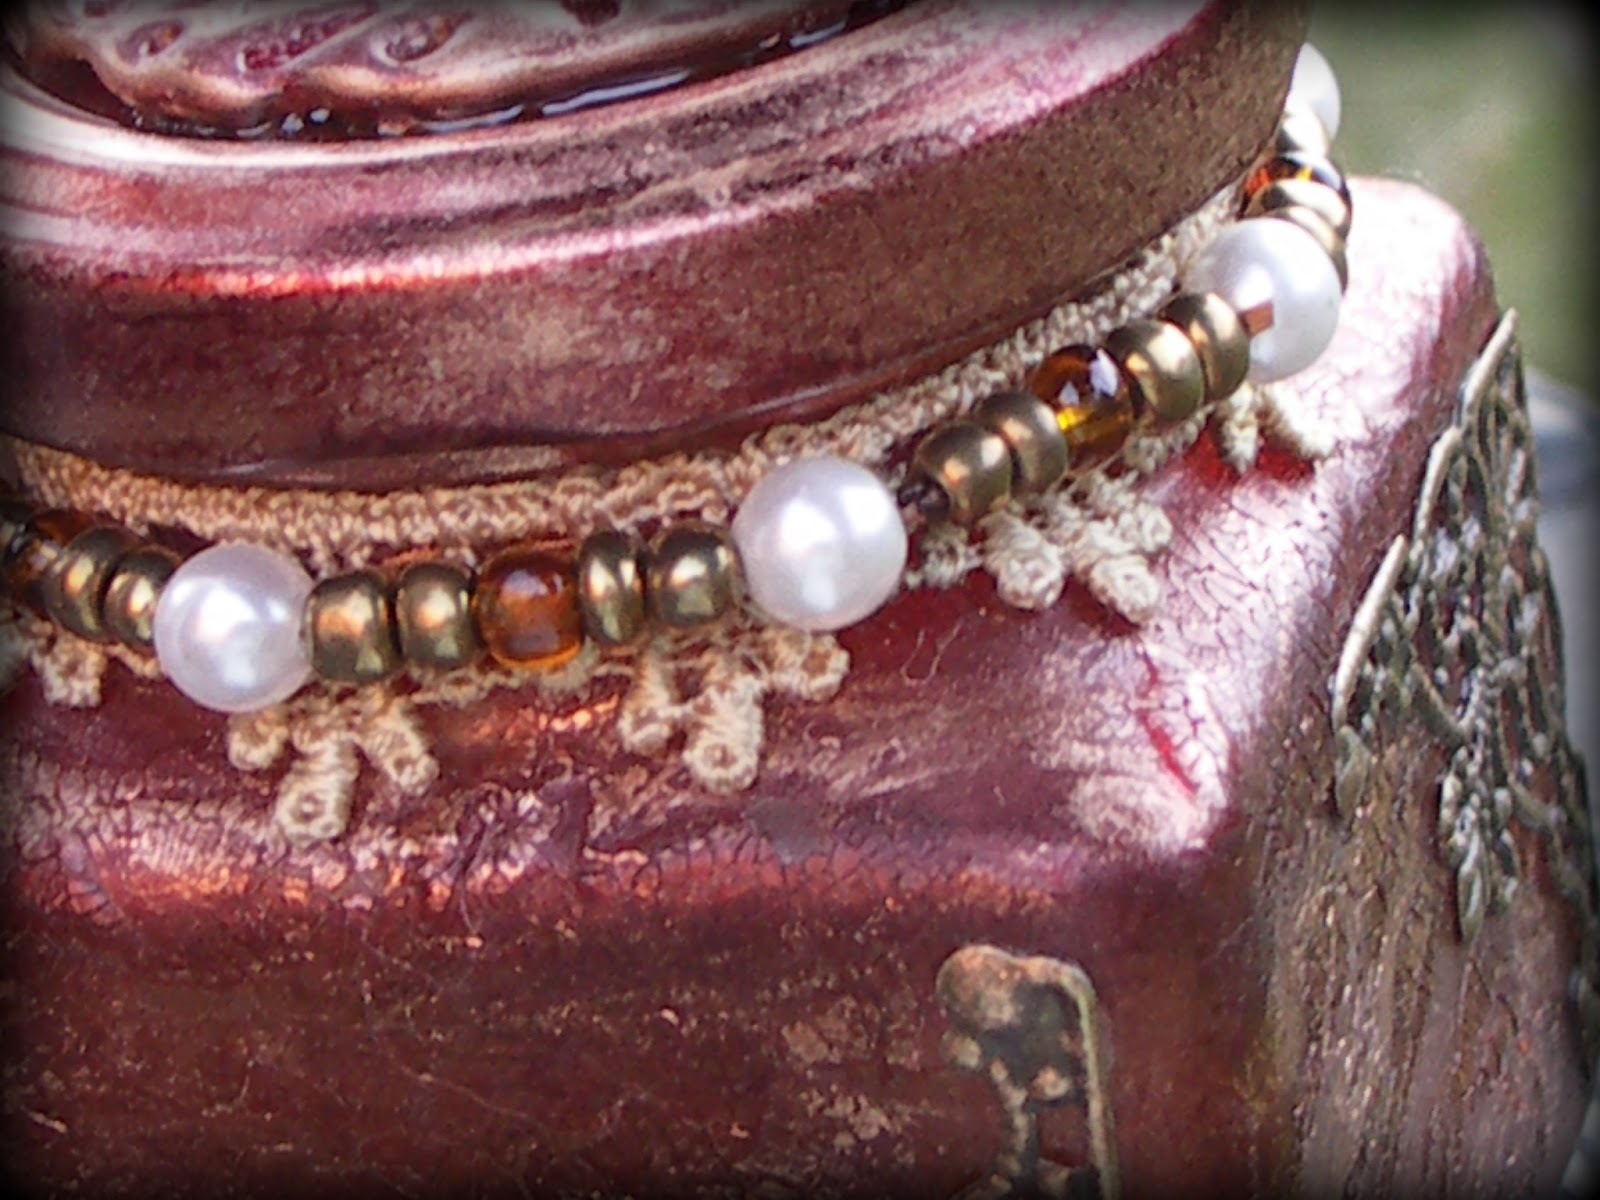
One of my all time favourite types of lace was coloured with Antique Linen Distress Stain before being strung around the neck of the jar, and then some beads (from my stash) were strung over the top. Speaking of the top, I began to play with another idea for using alcohol inks.

The lid had already been covered in the same inks/gilding wax but needed something else doing to it. I've been playing with my melt pot and a Texture Tread, and had created this UTEE disk. It needed some colour so I dribbled some Alcohol Blending Solution into the indentations and then added drops of Red Pepper and Rust inks to run/bleed. A final swipe with more gilding wax and it was done. Having worked well it got me thinking about how I could use other colours...

so here's a peek at a fragment which was coloured with White Mixative, Stonewashed and Stream alcohol inks (again with the raised parts rubbed with gilding wax)...
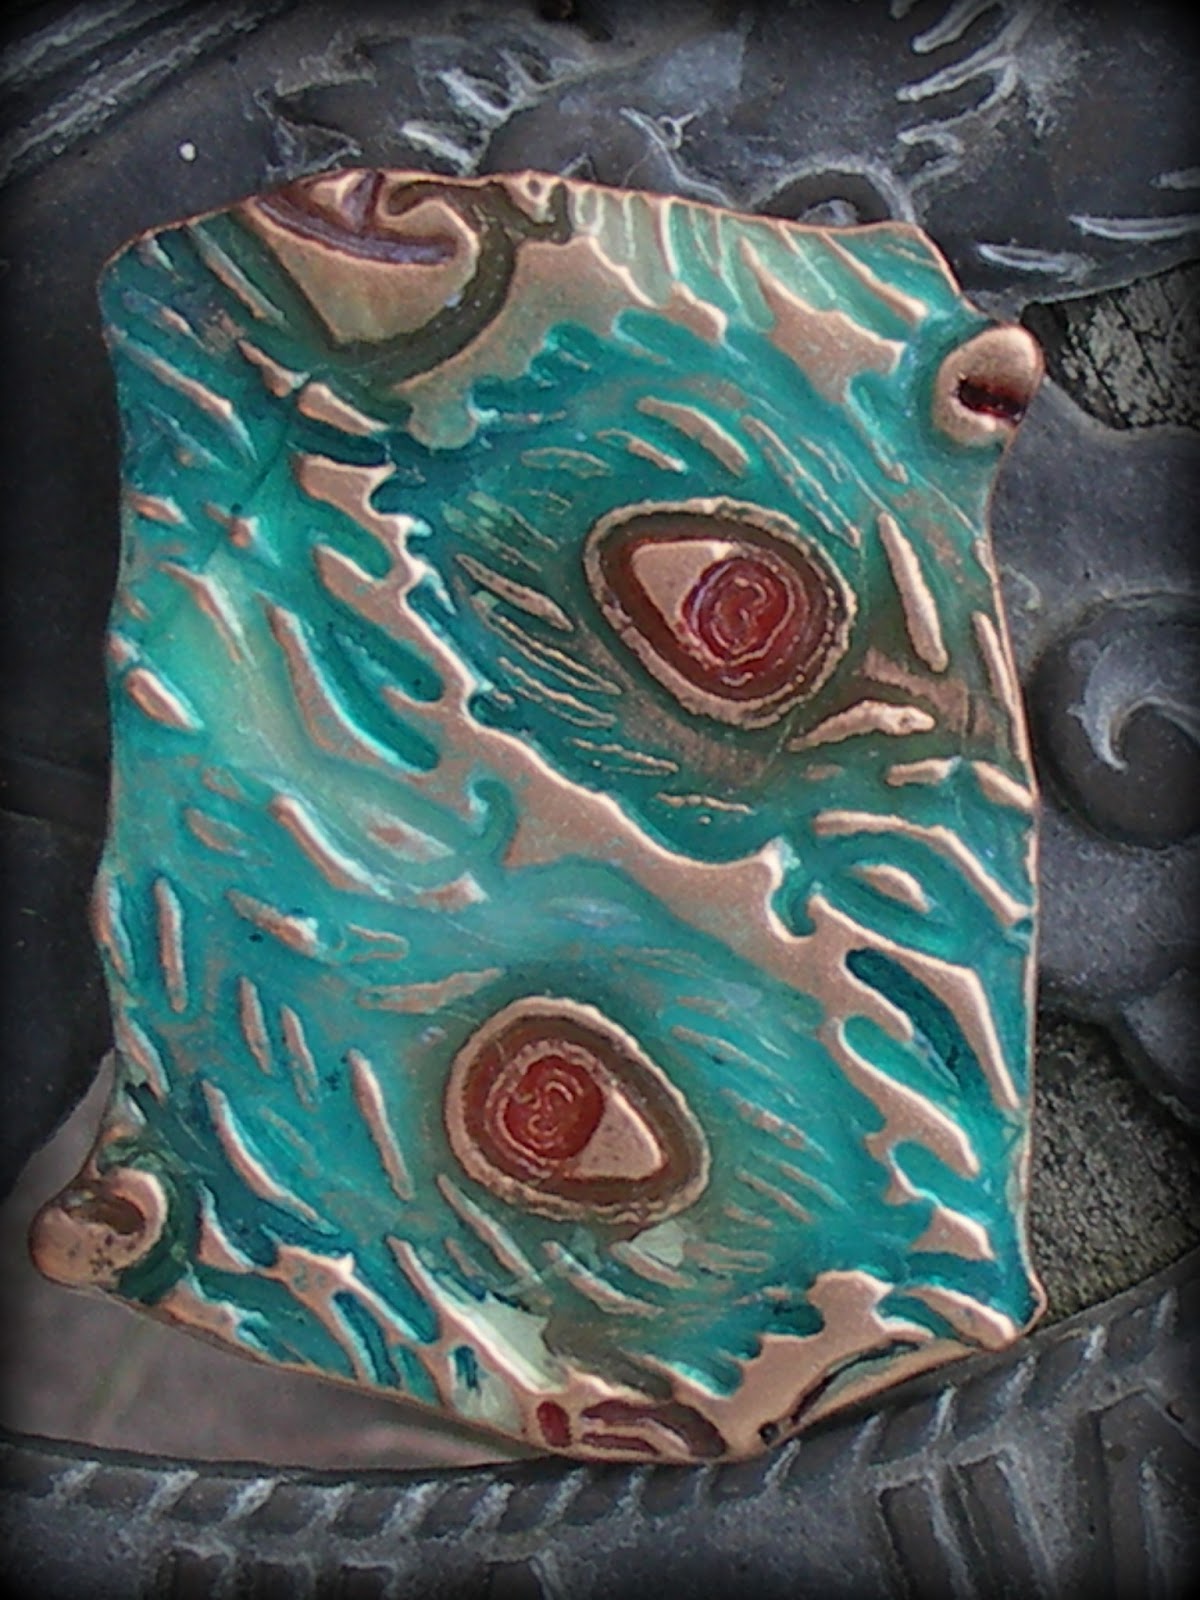
and here's a fragment which shows up the colour blending really well (sat on Pearl moulded UTEE). For this peacock look I used a few drops of Stream and Red Pepper with the Blending Solution, being careful not to use cover the whole piece. And yes, a little more gilding wax was added - now you know why my fingers have got so mucky!!
Hope that's given you some ideas for using alcohol inks. There are plenty more out there but this could turn into an epic post if I tried all of them. And now for the fantastic news - as alcohol inks are the subject of this week's Friday Focus they will have an extra 15% discount on the price at The Funkie Junkie Boutique for the whole of this coming week! Bearing in mind they are already discounted this means Linda is pretty much giving them away so now would definitely be the time to stock up and have a play too. But don't forget, Linda is on vacation this week so while you can put your order in, shipping from The Funkie Junkie Boutique won't resume again until May 8th.
Hope everyone has a wonderful weekend, hugs Jenny xxx
 |  |  |  |  |
 |  |  |  |  |
 |  |

Jenny another wonderful piece, love how you have used alcohol inks to create those stunning fragments too hugs trace x
ReplyDeleteAbsolutely stunning finish with the crackle beneath the alcohol inks - will definitely be giving that a go... thank you so much for the inspiration. And your UTEE mouldings look fantastic. Great Friday Focus, Jenny! You've conquered alcohol inks as far as I can see...
ReplyDeleteAlison x
Well you have gone from zero to hero (heroine) in no time at all. This is a masterful piece of work Jenny, it makes me want to get my AI's out and have a play. Love the glimpses of crackle and that top is fabulous. I really love this jar! Hugs, Anne x
ReplyDeleteWell worth the mucky fingers - it's another beauty! Not sure about the garlic smell though LOL
ReplyDeleteThis is fabulous Jenny. An amazingly rich effect with the inks and the embellishing is stunning.
ReplyDeleteHugs, Fliss xx
Absolutely worth the inky fingers, they look beautiful. I love your jar, such beautiful colors. The finishing touch to the lid is wonderful. Great job.
ReplyDeletexx
Love, love it Jenny...amazing results with the alcohol inks and the other details!!
ReplyDeletekind regards, Alie :-)
WOW totally gorgeous!!! This is so awesome. I'm going to have to try using alcohol inks. Haven't yet!
ReplyDeleteWow, I love to work with AAIs, your artwork with this colors is gorgeous, Jenny
ReplyDeleteThis is drop-dead amazing, Jenny! Everything about it is absolutely EXQUISITE!!! You have worked magic with those alcohol inks and what a little gem you have created! Sensational Friday Focus!
ReplyDeleteHugs,
Linda
STUNNING with a big S!!!! I complete adore both the colour you have achieved and that fantastic texture underneath the inks! Like Linda said, drop-dead amazing. This must be one of my all time favourite altered jars! I am totally in love with that colour!!! The blue bits look very cool too!
ReplyDeleteWow, this is GORGEOUS! Love all the techs you used, the color is PERFECT! Totally awesome!
ReplyDeleteWow Jenny - you are certainly doing some amazing things with alcohol inks. Love this jar and the fabulous effects you've achieved. Love Margie x
ReplyDeleteThis is realy Gorgeous.
ReplyDeleteLove it.
Greetings Janny
Jenny, this looks amazing! Love the crackle in combination with the alcohol inks! And what a great tip to put a layer of glue over the crackle to prevent it from flaking! Hugs, Sandra
ReplyDeleteI am so loving what you are doing with the Alcohol inks! What a gorgeous jar and great project to share! Hugs!
ReplyDeleteOh la la, I am sooooo loving this altered jar! It's looking good with the yummy colours over the crackle. What a 'cracking' project! :) xx
ReplyDeleteReally inspirational project and tutorial,
ReplyDeleteThanks Jenny
Rosie x