
Editor's Note; Thank you so much to Cec for providing us with a step by step for her incredible DT project - we're all really excited to find out how she put this beautiful Artist Trading Block together!
Before handing over to Cec we wanted to remind you that our 'Block Hop partners' this fortnight are The Artists on the Block. Their Design Team will be coming up with inspiration of their own for using these versatile cube shapes, and Oxana's clever idea is available HERE. We'll keep you informed of further projects from this talented team during our regular posts.
Now, over to Cec...

Hello, it's Cec here and it is my turn to present the Saturday Step X Step. Today I am going to show you how I made this Artist Trading Block for the current challenge 'Hip to be Square'.

I actually started by making the big peony first - at least I think it looks like a peony. First I cut six of the large flowers from watercolour paper using the Tim Holtz Tattered Florals die. Then I inked both sides of each flower with Milled Lavender and Spun Sugar Distress Ink.

After they were inked, I misted them on both sides with water and then using a piece of dowel, I shaped each petal by first rolling them around the dowel and then while they were still on the dowel I squeezed the sides of the petals together to ruffle them. Next I folded each flower in half between petals, then in thirds and twisted the bottom, which is the centre of the flower. Once they were dry, I carefully unfolded them and scrunched them from underneath to form a cup shape as shown above. I added more Milled Lavender DI to highlight the ruffles.

Once all the flowers were shaped and inked again, I started stacking them making sure that I scrunched the inside flowers so that the final product had a closed centre as a peony would. Finally I spritzed it with some Perfect Pearl spray to give it a bit of shimmer.

The next step was to create some butterflies. I cut three pairs in different sizes with my Cameo from some scrap card stock, embossed them with a script embossing folder and then inked the highlights with some Scattered Straw DI. The pairs were then glued together back to back with a fine piece of wire in between and I put some pearls on the front for the body. Note: In the end the wire I used was not stiff enough because after I took photos of the finished box, the two larger butterflies started to droop so I am going to find another type of wire so they will still look like they are flying - off to raid my husband's workshop because I think he has some stiff copper wire.

Next I cut some leaves from some Color Core Card Stock using my Cameo. Then I shaped the leaves a bit by taking a large embossing tool to the back of each leaf. After they were shaped I inked the edges with some Ice Spruce DI.

The sentiment was easy to make. I just printed a sentiment from Create with TLC on the computer, cut it out with a Spellbinders die and then inked the edges with some Frayed Burlap DI.
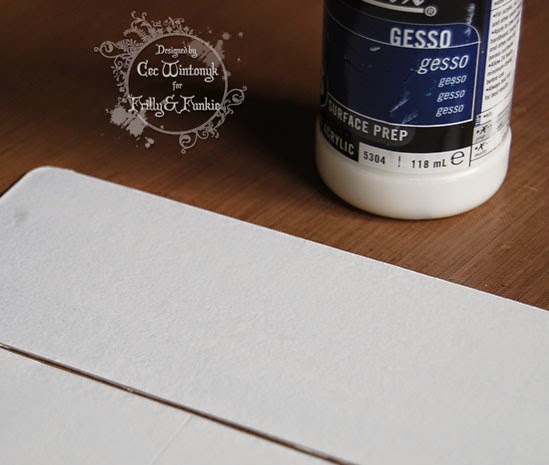
Now that all the embellishments were made, it was time to start assembling the block and the first thing I did was to cover both sides of two dies with a coat of Gesso.

Next I cut 12 pieces of patterned paper from the Coffee in the Arbor paper pack from Maja Designs.

Then I inked each edge and fold area on both sides with Frayed Burlap DI. Don't forget to ink where the folds are - my photo was taken and then I realized I hadn't done that.

The next step was to add the paper to the block and assemble it. I started by gluing the paper to the sides that would be outside and the sides on the inside that would not have any attaching pieces. Next I glued it all together and then added the paper to cover the final inside panel where it was fastened together. I used a popsicle stick to make sure everything was glued down.

Next I added a panel of Tim Holtz Melange Tissue Wrap over the patterned paper on the top and each outside panel of the block.

The next step was to decorate the sides (I forgot to take a photo at that point but did find it easier to decorate the sides before the top). I ran embroidery floss around the block twice, crossing it in the front and keeping it parallel on the sides. Then I added a big Prima button at the crossing point in the front and some filigree medallions on each side.
I created four words on the computer that reminded me of a friend, cut them into strips, inked them with Frayed Burlap DI and added one to each side in various spots.

Then I started to decorate the top. First I added the leaves to each corner and then I lightly crinkled some seam binding and added it in a circle around the top looping it as I went. The reason for the loops is that it would add some height to rest the flower against and provide a way to hide the mechanism that holds the butterflies.
I added some mesh and then the big flower. I punched a tiny butterfly to rest on the flower. The sentiment is glued to the back of the flower. I cut a tiny rectangle of hard styrofoam (the kind you get as packaging when you buy a piece of electronic equipment), inked it with some Scattered Straw DI and then nestled it inside one of the seam binding loops and then stuck the "flying" butterflies in it.
And there you have my frilly little peony block, which is just 2 1/2" on each side.
The products listed below used in the creation of this little block came from The Funkie Junkie Boutique and if you want to make an Artist Trading Block yourself and enter our 'Hip to be Square' challenge, the die set is further discounted by 15% for the remainder of the challenge.
Wonderful tutorial Cec. Your block is beautiful, gorgeous flower and love the added words on the sides.
ReplyDeleteGreat tutorial Cec, love your box.
ReplyDeleteJulie x
Seriously gorgeous block Cec! Love your beautiful flowers and the whole 'topping' piece. Nicola x
ReplyDeleteSuper tutorial! It's hard to believe that this is so small! The peony looks perfect! I'll have to pin this so I remember how to create my own.
ReplyDeleteA fabulous ATB and tutorial Cec! Beautifully done and super clear! hugs, Rebecca
ReplyDeleteCec, your block is just fabulous and I love your tutorial, it is so clear and easy to follow. As for that big peony - Wow! Amazing and very, very beautiful. Anne x
ReplyDeleteGorgeous ATB Cec ! I love your peony and the butterflies bovering above ! Sue C x
ReplyDeleteThis is gorgeous! And yes, you are spot on with the peony! I can almost smell it's perfume! The block die is being added to my wish list. Many thanks for the great tutorial.
ReplyDeleteBeautiful and so many wonderful layers and techniques. Love the soft colors and those sweet details!
ReplyDeleteBEAUTIFUL from start to finish!! Thank you so much for sharing your techniques. That shabby flower is over the top gorgeous!
ReplyDeleteHugs,
Nancy
A gorgeous flower Cec and your ATB is stunning Great step by step
ReplyDeleteTFS and hugs Annie