
I included lots of high res pictures, so feel free to click on any image for a super sized version that you can zoom right it on! I hope you enjoy!

First up is this wonderful corrugated cardboard that I've been dying to get my hands on!! I flipped a piece over and tore off the backing in some random spots. Next I dry brushed on some white paint. Not a full coverage, just in some areas because it acts as a resist for the stains I applied next.

I rubbed Iced Spruce distress stain in the middle and Gathered Twigs around the outside and then I misted it with water so the colours would blend together nicely. The moisture made the edges of the cardboard curl up, giving the panel an amazing distressed look!!
I stamped on a design with a Tim Holtz stamp from the Distressed Damask set and some Ranger Archival ink Coffee. I also stamped some snowflakes with Iced Spruce, but they are hard to see.

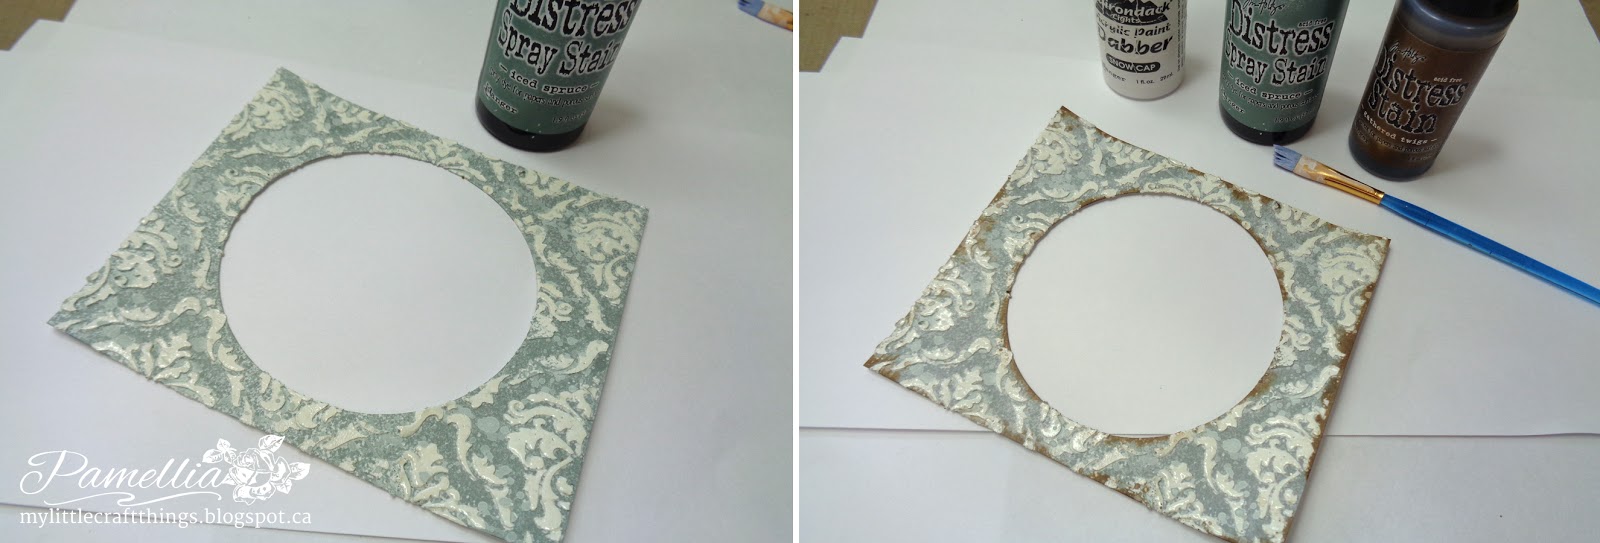
For the top panel I used Tim Holt's Gothic stencil to lay down some texture paste and while the paste was still wet, I covered the paste with clear embossing powder. After the paste is dry, heat the embossing powder to coat the pattern with a nice gloss.

I sprayed the panel with Iced Spruced distress ink spray and then rubbed Gathered Twigs stains around the edges, spritzed with water and let it dry. The colour will easily rub off of the embossing powder leaving a nice white pattern.
I cut out the jumping reindeer from Tim Holtz Reindeer Flight, but instead of using the cut out piece, I took the negative piece and very carefully fussy cut around the edges to make this hollow reindeer. I coated it with glossy accents and Tarnished Brass distress glitter.

Instead of using ink pads for my trees, I dabbed the stamps with the stain dabbers in both Gathered Twigs and Iced Spruce giving the trees a water coloured look. I splattered some white and Iced Spruce with my paintbrush to look like snow.

For the sentiment, I inked only one word at a time, so I could flush them to the left margin of the sentiment frame without having to do any masking. Some more flicking of the Snow Cap and Iced Spruce.

I ended up layering some really dark brown card stock between the painted layers, just to add a little contrast. I dyed some seam binding to wrap the corners and make a bow. I used a Tim Holtz Gumdrop that I coloured with Sunshine Alcohol ink as the center of the bow. Lots of foam bits to give the card dimension.


I hope you enjoyed my tutorial . Please feel free to let me know if you have any questions and I would love to see any creations you make! There's still time to enter our current challenge "Winter Wishes", where we are looking for your shabby or vintage creations showing us what you love about the winter season! And we'll be back next Monday, January 19th to announce the winners of our last challenge, Anything Goes so put a reminder in your diary for that.
Thanks for stopping in!
Hugs, Pamellia :)
Stunning creation, Pam! Just love the distress look. It's great to see the masterpiece created, thank you for sharing! Big hugs! Xx
ReplyDeleteOh my goodness how gorgeous Pamellia!!! Love the way you've really enhanced that layered look with the aperture and the deer in front and trees behind. So good to see how your cards come together. Jenny x
ReplyDeleteYou could make Christmas cards all year and i wouldn't get bored, another example of how you waved your magical Fairy Sparkle wand and created such beauty:-) xxx
ReplyDeleteOh wow, loved your tutorial Pamellia! Fabulous to see your creative process, the reindeer and watercolour trees, could go on and on.....look forward to the next! Ruth xx
ReplyDeleteFabulous Step x Step Pamellia ! Love the reindeer and your attending to detail is amazing ! Sue C x
ReplyDeleteGreat tutorial Pamellia! The card is gorgeous, the reindeer cutout is simply genius!
ReplyDeleteAnother gorgeous card and a great tutorial. All the techniques are wonderful but I think my favourite part of this card are the trees,
ReplyDeleteHugs!
Cec
How Lovely! You can bring on the Christmas cheer year round. I never get tired of Christmas! Thanks for the detailed tutorial.
ReplyDeleteA brilliant tutorial Pamellia, thank you so much for sharing it with us.
ReplyDeletePauline
x
Beautiful! The technique for the sentiment on two lines is brilliant!
ReplyDeleteYour tutorial is fantastic, as are your photos! I love the way you painstakingly cut out the deer so that the beauty of the card really shows through. Absolutely stunning! Hugs, Anne xx
ReplyDeleteHi Pamellia, Wow! You have done it again. Such a beautiful creation, love that Gothic mask/stencil M mm will have to loo into buying one of those lol!
ReplyDeleteLove & Hugs
Jacquie J xxx
http://jewelscardcraft.blogspot.co.uk/
Hi Pamellia this is awesome an outstanding creation, stupendous make.
ReplyDeletehugs
lorraine x
I read every single word--wonderful description of your creative process ---stunning creation!
ReplyDeletePamellia, you are such a blessing to this inspiring blog! Your work is fantastic as ever and you always teach us so clearly. :o) Gorgeous stencil work upon your stunning design, my friend! Every element is beautiful. :o)
ReplyDeleteHugs and blessings,
Karen
You are SO clever. The reindeer cut out is totally inspired. LOVE the damask embossing paste and the way you clear embossed it too. Your color palette is so delicious. A sensational piece of work, as always. Kudos on the great job you did on your first Step x Step!
ReplyDeleteHugs,
Linda
Gorgeous Pamellia , I adore your colour choice and the wonderful hollow reindeer, great way to use the die. Fantastic backdrop and design too. Loved your step by steps. Tracy x x x
ReplyDeletePersonally, I love that you are still showcasing Christmas cards. What better time now that the holidays have calmed down, we have more time, and no one should have that rush, rush feeling. Add to all those reasons the fact that all my Christmas craft, cardmaking supplies, (I mean all!) are still out and easily accessible, and it just seems like the logical time to work/play with Christmas cards. I just thought of something else. Often Christmas craft supplies are drastically reduced in price after the holidays. I find this to be the case in both brick and mortar stores, as well as my favorite internet suppliers. The reasons just keep getting better and better, so I say, "Bring Christmas On)!
ReplyDeleteAbsolutely fab, fab ...my friend. The way you create the textures and the layers and colors are perfect! Do lend me your thinking hat for a day dear. big hugs.
ReplyDeleteBeautiful card, great techniques, wonderful tutorial...home run, Pamellia! I love your work!!!!
ReplyDeleteThank you for your superb tutorial Pamellia, fabulous card, hugs Carole Z X
ReplyDeleteStupendous work
ReplyDeleteYou are so creative, Pamellia; this is lovely. And your tutorial is easy to follow along.
ReplyDeleteYou are a treasure trove of ideas and new techniques Pamellia and an absolute gem to share them with us. Can almost feel the frosty chill from this - in fact maybe this little deer is the cause of the snow heading my way!! Gorgeous wintry make! Nicola x
ReplyDeleteFantastic tutorial Pamellia, great techniques and your result is such a gorgeous layout.
ReplyDeleteJulie xx
A great step by step and beautiful finished card - lovely!
ReplyDeleteAlison xx
Absolutely beautiful! Such a great tutorial and wonderful creation.
ReplyDeleteRebecca.
x