
As promised on Wednesday I've got a step by step tutorial for this tag card today, sharing a few ideas for using IndigoBlu FlitterGlu and Mega Flakes, so let's go...

Apply some FlitterGlu to a piece of Phat Foam (a tutorial for this part is shown in THIS POST) and spread in random portions over a giant tag. Add Chariot of Fire Mega Flakes, rub down with your fingers to ensure the flakes are attached firmly to the glue, then rub off any excess with a Scoochy sponge.

Add Walnut Stain Distress Paint and a little water in patches to a craft mat. Smooch your tag into it and semi-dry with a heat tool.

Repeat the process with Vintage Photo Distress Paint, allowing some of the wet Walnut Stain paint to blend with the new layer. Dry thoroughly.

Blend a mix of Mermaid Lagoon and Peacock Feathers Distress Paints over the whole tag. Spritz and flick with water, drying with your heat too.

Blend Walnut Stain around the edges of the tag and onto some of the gilded/painted areas. Repeat the spritz and flick technique.

Use the Tim Holtz Tiles Texture Fades folder to emboss the tag.

Gently drag the Phat Foam over the raised areas on the tag and apply more Mega Flakes to them, removing all the excess.

Applying a layer of FlitterGlu to the Heart Flourish Dinkie Stamp, stamp it onto coordinating card.

Add Mega Flakes to the stamped areas, rub with your fingers to bond the flake and glue, and remove any excess with a Scoochy. Cut out the heart shape, leaving a border.

Add a band of Venise Lace and Antique Gold Mesh Ribbon.

Add a layer of FlitterGlu to an antique bronze filigree flower and when tacky, add Mega Flakes.

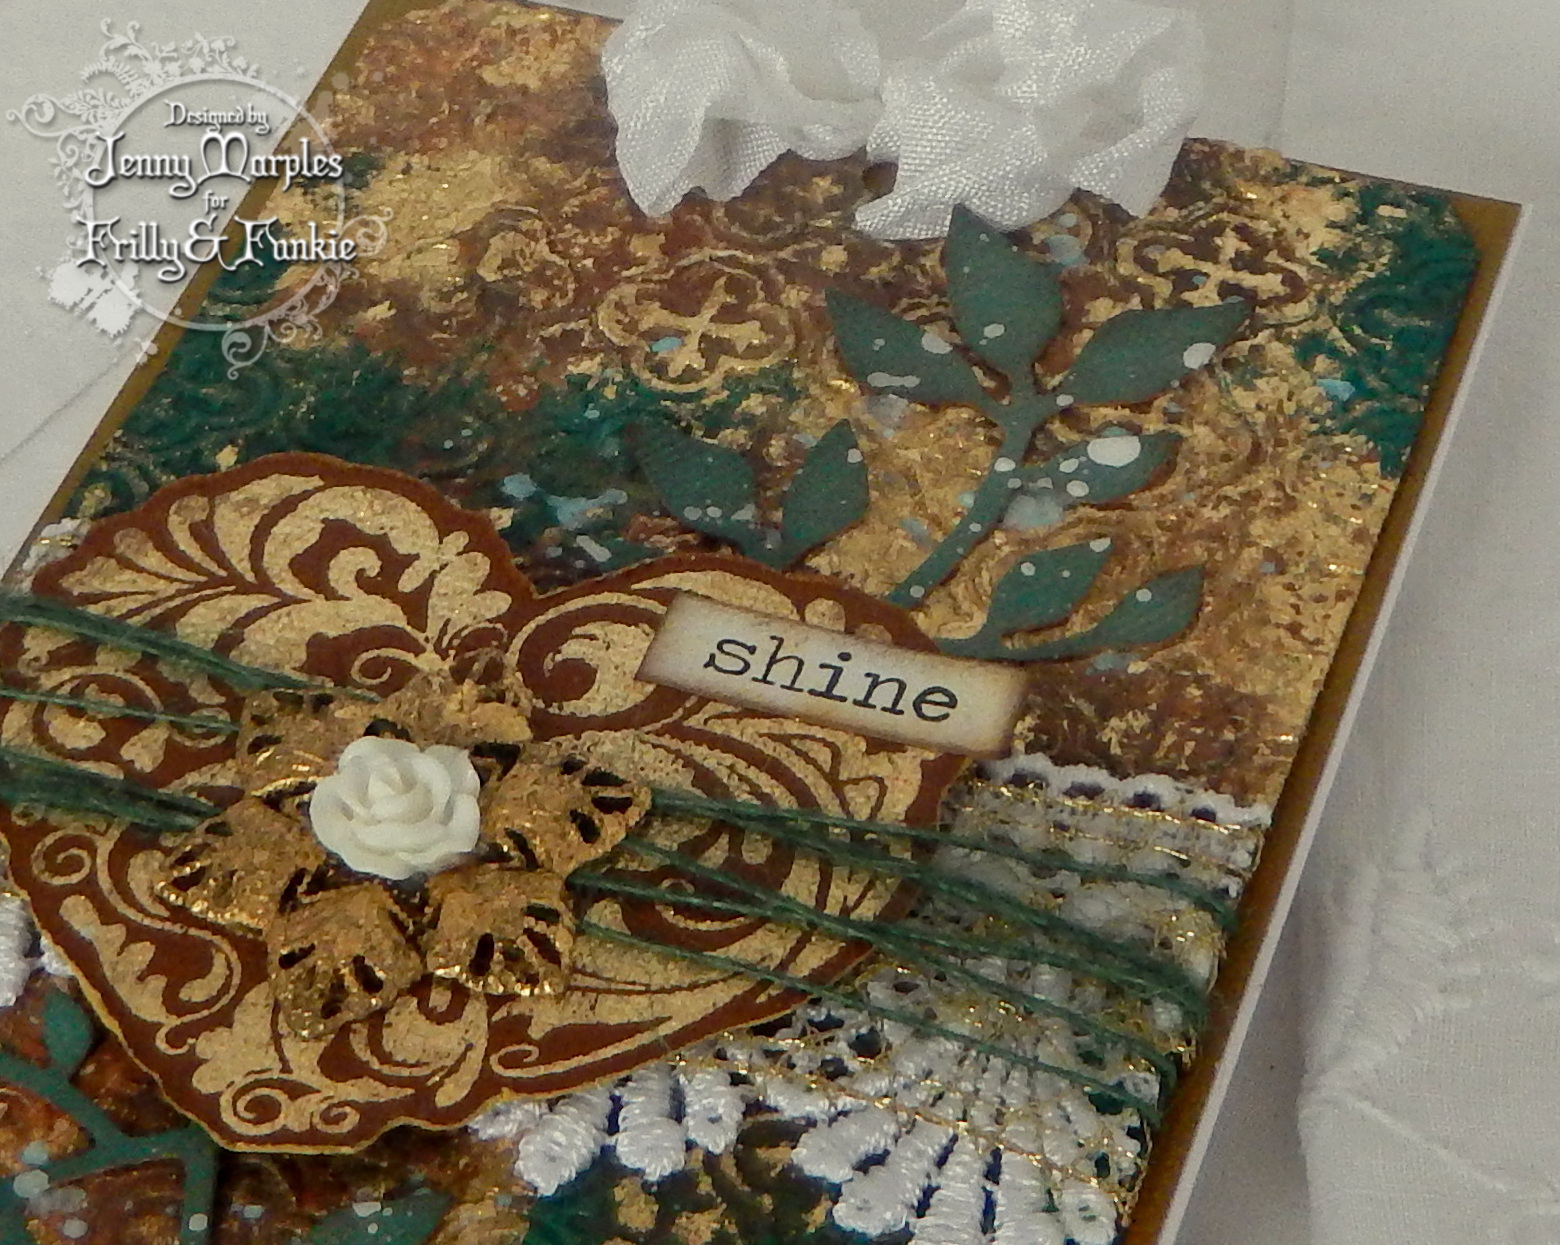
Assemble as shown on the finished card above; with the heart layered over the ribbon band, tie burlap string over the top; add an Heirloom Rose to the centre of the filigree flower and adhere to the centre of the heart; die cut leaf stems and attach from underneath the heart; splatter a little watered down white gesso over the leaves; finally add an appropriate Big Chat sticker and a seam binding bow at the top.
Here are a couple of close ups of the finished card...

I hope you've enjoyed today's tutorial and feel ready to give FlitterGlu and Mega Flakes a go (if you haven't done already) to add a touch of elegance to your cards and other projects. If you have any questions please ask and I'll do my best to help.
And don't forget, there's that special Friday Focus 15% discount applied to all things IndigoBlu at The Funkie Junkie Boutique through the next two weeks.
And don't forget, there's that special Friday Focus 15% discount applied to all things IndigoBlu at The Funkie Junkie Boutique through the next two weeks.
Gorgeous!
ReplyDeleteThank you Ksenija! Jenny x
DeleteBeautiful!
ReplyDeleteThank you Patty! Jenny x
DeleteThank you Jenny! Love this, so beautiful and now there's another technique I want to try. Thanks for sharing exactly how you created it and for this beautiful inspiration Karen
ReplyDeleteThank you Karen! Jenny x
DeleteThe background of gilding and Distress Paint is absolutely stunning - lovely to see how it was done. Fabulous Indigoblu Focus, Jenny.
ReplyDeleteAlison xx
Thank you Alison! Jenny x
DeleteGORGEOUS!!!
ReplyDeleteThank you Anita! Jenny x
DeleteBrilliant! Great Step by step
ReplyDeleteThank you Lys! Jenny x
DeleteThanks so much Jenny for this wonderful tutorial, I've 3 boxes of mega flakes and never know how to use them....have to get started. Love this tag with all layers!!
ReplyDeleteThank you Shilpa! Jenny x
Deletebeautiful tag and wonderful techniques!
ReplyDeleteThank you so much! Jenny x
DeleteWow, Jenny - this is absolutely divine!! Thanks for a great step-out - can't wait to try this out! I love the flakes, and am delighted to have another way to use them! xx Lynn
ReplyDeleteThank you Lynn! Jenny x
DeleteAbsolutely GORGEOUS! What a stunning effect you've created. Thanks for the tutorial and inspiration!
ReplyDeleteThank you Anya! Jenny x
DeleteGreat techniques. Thanks for the tutorial. The tag is wonderful
ReplyDeleteThank you Linda! Jenny x
DeleteStunning Jenny
ReplyDeletexxx
Thank you Lisa! Jenny x
DeleteStunning Jenny
ReplyDeletexxx
Super tutorial Jenny and I LOVE what you did with the gilding flakes, must give this a go as your results are fantastic and very effective.
ReplyDeleteJulie x
Thank you Julie! Jenny x
DeleteI love seeing your creative genius at work, Jenny! This is a fabulous tag and your tutorial makes me feel like I can actually DO this!! I can't wait to give this technique a try.
ReplyDeleteHugs,
Nancy
Thank you Nancy! Jenny x
DeleteThank you for sharing your easy to follow tutorial. Absolutely beautiful.x
ReplyDeleteThank you Sandy! Jenny x
DeleteThank you for your amazing tutorial using the gilding flakes and the even more amazing tag! This is truly lovely, and you really had me at your 6th photo!
ReplyDeleteThank you Sara! Jenny x
DeleteJust gorgeous Jenny, so many amazing layers and textures and all of that lovely gold, this is stunning! Thanks so much for sharing your techniques and steps, Deb xo
ReplyDeleteThank you Deb! Jenny x
Deletewhat a gorgeous tag Jenny! thanks for showing how to use that gold flake! Julia xx
ReplyDeleteI'm a big fan of IndigoBlu and just love your piece of art. The colours and layout is gorgeous! Loving those mica flakes and the flitterglu effect. A beautiful piece of art x.
ReplyDeleteSuch a luxurious tag! Jenny Loved seeing how your background developed to create such a lush result . Thank you for sharing . x
ReplyDelete