
I originally made this journal for the Stitch in Time challenge and promised to come back to share how it all came together.
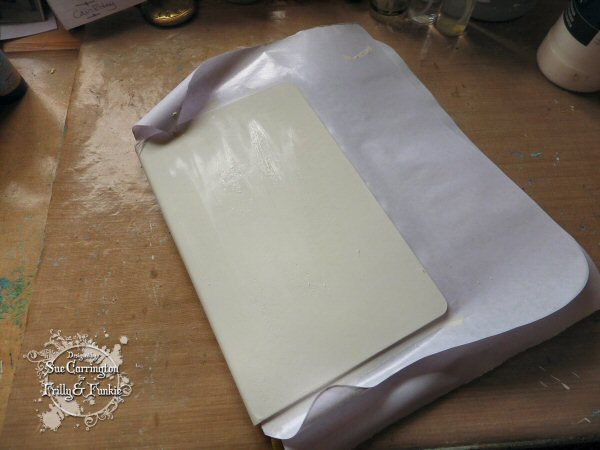
I started with a note book and my original thought was to stencil directly onto the cover so my first step was to coat it with Gesso. However, I changed my mind !

I then grabbed a piece of Claudine Hellmuth's natural sticky back canvas and covered the whole book with it, much better ! I spritzed the canvas with water before brushing a light layer of chalk arcylic paint over it. The water is needed otherwise when you try to brush paint over the material is just sucks it straight in and you're left with a blotchy mess. I stencilled the numbers using the 'Bumping' technique, I always like to start with the larger stencilled images first then move to the smaller ones.

I used Wendy Vecchi's Quilt stencil and went over the whole of the cover using chalk acrylic paint, really love this stencil !

Next up is Wendy's Add a Stencil and I've started to group where I'm stencilling.

One of the things I love about using stencils is that you can pick out just little bits to use, so when I used Wendy's Old Ledger stencil I've only used the grid part of it and I've used a shade of brown to start to add some contrast. Wendy's Alphabets stencil is perfect for adding the lettering and moved to a shade of grey, still grouping the stencilling.

At this point I decided it was way to clean and bright looking so I used my finger and with some Gesso rubbed it over the canvas. This knocks back the stencilling and gives a much more muted, shabby look.

To bring some detail to the forefront I've used heavy Gesso through a TCW stecnil to add more interest and as the Gesso has some body to it, it creates some subtle texture.

I then used an old plastic card and dipped it into some Gesso and rubbed it over the canvas to create the white lines.

One of the things I love to do is use the lids from various bottles as stamps, the one I'm using here is from a hair mousse can ! It's dipped into Gesso again and pressed onto the canvas.

For the clock I used the Tim Holtz Weatherd Clock die and cut it from card that I'd covered with the sticky back canvas. I zipped around the edges with my sewing machine then using my finger I rubbed chalk acrylic paint and Gesso over it.

Before I glue anything into place I always lay out what I want the design to look like, and quite often I'll leave it overnight and come back the next day to see if I still like it !

Happy with the layout I glued everything into position and then painted over the arrangement.

I wanted to add a shadow around the clock so I lightly drew around it using a Stabilo pencil then using a water brush blended it out a little.

I unwrapped the elastic pieces from the masking tape and it was only then that I realised that it was grey which blends in beautifully with the colour palette I'd chosen !

This is the reverse of the journal and I've just followed the same design through to it.

Whenever I'm looking for a meaningful sentiment I always look to Wendy Vecchi and she rarely disappoints !The sentiment is stamped onto white card painted with chalk acrylic paint then cut up and all the pieces are edged with grey chalk acrylic point.
I took this journal away on holiday with me and so it has already captured it's first set of memories !
I hope you enjoyed today's step x step.
Sue
x
Fabulous cover and a great step by step!! Loved to see the transformations along the way! Hope you had a great holiday!
ReplyDeleteIt's beautiful...and I loved seeing how it came together. I'm not much of a stenciler...but you make me want to work at it! Thanks for all the hard work that went into this lovely tutorial.
ReplyDeleteGorgeous cover Sue! Brilliant step by step and I love all the stencil layering and the colours. Pretty collaging of the flowers on the front too.
ReplyDeleteHugs
Lesley Xx
I really like your journal, the stenciling is beautiful! Thanks for the instructions.
ReplyDeleteI really like your journal, the stenciling is beautiful! Thanks for the instructions.
ReplyDeleteI really like your journal, the stenciling is beautiful! Thanks for the instructions.
ReplyDeleteGreat to see all those lovely layers building up - what a fabulous step-by-step, thank you.
ReplyDeleteAlison x
Amazing one, Sue..love it. I love purple and never saw such a beautiful creation with it!! Thanks for inspiration!
ReplyDeleteThank you so much for sharing this fabulous tutorial Sue! LOVE how you've created it. Jenny x
ReplyDeleteGorgeous transformations Sue, I love the layers of stencilling and how,you softened the colour with a touch of Gesso. Love the stitching and shadow you added. Lovely. Tracy x
ReplyDeleteLovely journal cover, Sue and a fabulous tutorial! I love how you gave this it's shabby look and the clock with the flower arrangement in the foreground really caught my eye! Love it! Thank you for all your hard work and for sharing this beauty with us!
ReplyDeleteJust beautiful! These colors are so perfect and your layering is amazing!
ReplyDeleteStunning journal cover and fabulous step by step. Loved seeing it all come together. The subtle colour and lovely textures are simply beautiful!!
ReplyDeleteFabulous tutorial Sue and a lovely journal, thanks so much for sharing your techniques with us! Deb xo
ReplyDeletesuch a gorgeous creation Sue and a great step by step, sharing wonderful techniques and details...............love it
ReplyDeleteTFS ANNie x
Sue... Sorry for a delayed response to your posting. But even though late I wanted to tell you that your journal is looking fabulous. Live that you used canvas. I adore the way you decorated it. And the Weathered Clock die is always a winner. Here as well.
ReplyDeleteThank you for an awesome step-by-step.
Thank you for sharing and to keep on inspiring us with your lovely art.
Hugs from Monica... Spain