Hello and welcome to Frilly and Funkie's Saturday Showcase feature. It's Sara Emily here shining the spotlight on five dies from
Tim Holtz' 2019 Sizzix Chapter 1 Collection. I don't think I've ever been so excited about ALL of his new dies like I am with this release. The ones I'm focusing on in this post are just five of my favorites. They are so detailed, and the designs pair up so easily with one another.
I decided to make cards, each featuring one of the three dies included in the Geo Springtime Thinlits set with supporting roles from four other newly released Thinlits sets. Wow! The possibilities are endless, and my head was spinning with ideas. In fact, at the same time I made a couple or so more projects using these dies, but this post would be way too long to include them all.
Butterfly Mosaic Card
I do love butterflies, and this one is so unique that I just had to add it to my collection. (It didn't hurt that the set has a hummer and a bunny, too!) When I first saw this die, I thought 'inlay', but I had no idea where it would end up. This is just a card, but I could picture these die cuts used on a canvas (Well, the butterfly already IS on a canvas, but that's for another day.) or even on an assemblage project. I love it when a product can be this inspiring! Let's get started!
**Remember to click on any photo to zoom in.**
Cut the largest of the circles from Tim Holtz Stitched Circles Thinlits and sand it lightly. Using the Geo Springtime butterfly, cut one from the circle. Adhere Stitched Circle to black card panel. Cut a second butterfly from black card.
I saved all the bits from the metallic butterfly in a plastic bag, thinking I would use them as the inlay with the black butterfly being the outline. Then it occurred to me how beautiful it would be if it were two toned (or even three!).
I found these two panels in my stash. The one on the left is a failed alcohol lift technique (done on the old alcohol ink card), but I knew it would be great for die cuts eventually. I've already cut something from the panel for another upcoming project, but I had just enough left to cut a left and a right wing. The masterboard on the right started out as a mop up from other projects, and it's a combination of Distress Oxides and inks.
Cut a right wing and a left wing from each panel. I did this out of necessity, because my scraps were small. But it also serves to keep track of which pieces go in the right or left wing when it comes time to inlay. Place all pieces including the actual die cut into a baggie and set aside. By including the die cut, it helps identify if the bits go in the right or left wing.
Turn the black die cut face down and apply Distress Collage Medium Matte with a brush. Adhere the butterfly in the aperture left in the Stitched Circle, taking care to make sure all surfaces come in contact with the back panel. Blot away excess glue with a paper towel.
I don't have any photos of the last step, which is inlaying all those little pieces, but I did snap one at the half way point. It was a much needed break from all that concentration!
I added an Ideaology Quotations Metallic Sticker and backed the panel with more of the masterboard and called it done.
The alcohol ink paper is a bit thicker than the masterboard on mixed media paper making for an interesting texture when you run your hand over this mosaic.
Here Comes Peter Cottontail
Cut a rabbit from the Geo Springtime set from a panel inked with Distress Oxides and one from a scrap of metallic card. Set the pink die cut aside for another use. I decided later to ink the card with Frayed Burlap to give it a vintage look.
Flip the die cut panel over and adhere a small panel of yellow vellum with collage medium. Flip the card face up and adhere the bunny die cut in accordance with the butterfly above. Blot away any excess collage medium with a paper towel.
Cut one of the flowers from Wildflower Stems #2 Thinlits set from watercolor paper. Cut off the flower, so that you are left with what looks like a tuft of grass.
Cut another flower from the same set (there are 5 in the set!) from watercolor paper. Cut two flowers from a scrap of the yellow vellum. Vellum can be a little tricky to cut, but the intricate stamens just needed a little prodding from my pokey tool. The details these dies cut are amazing!
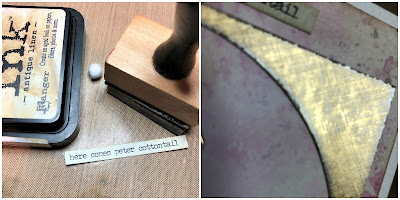
Blend a Small Talk Sticker with Frayed Burlap ink. The little ball was going to be Peter's tail, but I ended up using a flower cut from the new Organic Thinlits die cut instead, inking it with Antique Linen Oxide and popping it with a foam dot. Use the leftover negative panel of metallic card from Butterfly Mosaic card to make a frame. Sand in a crisscross fashion.
Layer the frame over the pink panel, and layer that over a card blank cut from watercolor paper .
I was inspired by Autumn's
layered leaf card and layered the lily. I got a little too vigorous with my sanding and wrinkled the frame. LOL.
For those wondering why my sentiment is at the top, I initially was planning to make a square card, and cut the aperture according to that plan. Then, I got the idea to add the tail, and had to use the sticker to go with it. In spite of my poor planning and lack of time for a do-over, I still think it works, don't you?
Hello There
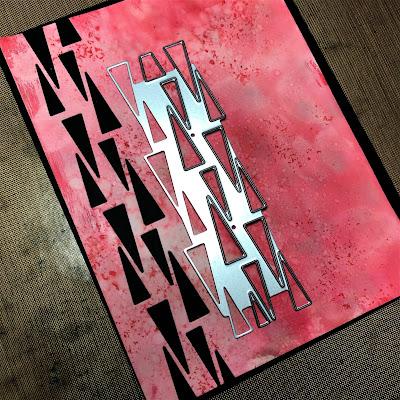
I didn't take many process shots for this one, but I started off with another panel from my stash. This one is painted with gesso, and then I inked either with Distress Spray Stains or oxide inks. I really wasn't planning on making a card with this, just trying out Tim's new Retro Repeat Thinlits die. You can see that the die is shorter than the border I cut into the panel. Tim explains how this works in
his video. The innovative die design makes it quite simple to repeat the pattern either vertically, like I did, or horizontally. It's so easy, I got it right on the first try, and I just had to make this into a card.
Die cut just the head of one of the flowers from Wildflower Stems #1 from a scrap of Metallic Kraft Stock. Cut a second flower head and a hummingbird from black card. Cut just the wingtip from a scrap of metallic card . Not shown, cut 'hello' (Friendship Words, Script) from black and metallic card.
Layer the metallic and black flower, offsetting just a bit for a shadow. Do the same with 'hello' but reverse the order. Adhere the hummingbird die cut and inset the wingtip pieces. Add a metallic sticker to complete the sentiment. Layer over a black panel, a metallic panel, sanded and edged with Black Soot crayon, and another black panel.
I hope you've enjoyed seeing these simple ideas on how you can use these wonderful new dies. I've also enjoyed playing with
Faceted Heart along with
Organic Thinlits dies
HERE.
A list of the products I've used on these cards is listed below, all available from
The Funkie Junkie Boutique. The new Tim Holtz dies are in stock in the shop and ready to ship. And you can get them for 20% off MSRP by using the coupon code 'diediscount'. I can't wait to see what YOU will create using these great new dies! And remember you still have a few more days to enter our current Frilly and Funkie challenge
HERE.
Happy crafting!
Sara Emily
Tim Holtz Sizzix Thinlits Die Set - Geo Springtime
Tim Holtz Sizzix Thinlits Die Set - Retro Repeat
Tim Holtz Sizzix Thinlits Die Set- Wildflower Stems #1
Tim Holtz Sizzix Thinlits Die Set- Wildflower Stems #2
Tim Holtz Sizzix Thinlits Die - Organic


Love all the variations of inlay that you did...a bit of work, but soooo worth it...the effect is stunning!
ReplyDeleteReally sensational samples, Sara Emily! The butterfly is absolutely stunning and I love the Retro Repeat card. Very cool suggestions for using these dies.
ReplyDeleteWOWZERS! Absolutely GORGEOUS cards, wonderful designs!
ReplyDeleteFabulous!
ReplyDeleteSo many fantastic ways of using these fabulous dies Sara! Love the drama of the mosaic butterfly and the delicate layering of the flower.
ReplyDeleteWhat fantastic cards Sara x You have really showcased Tim's new dies/products...Love them !!
ReplyDeleteBest Wishes
Annie x
What a great showcase post, Sara Emily - those dies really are beautiful. Of course, it's the wildflower stems I love most, but you've made the geometric butterfly look very tempting with that incredibly beautiful stained glass mosaic look.
ReplyDeleteAlison x
Beautiful! Love the geometric shapes and how you used them to show off the wonderful effect!
ReplyDelete