
Hello friends, Maggi here to welcome you to another Saturday Showcase. Whew, I am still full from all the goodness that appeared on the table for Thanksgiving. Which is better, Thanksgiving dinner or all the leftovers? Ha! Now that's a question to ponder.
Seriously though, it's the season where we like to honor our friends with handmade cards and gifts so I want to show you how to make a slider easel card. There are so many great Christmas products in The Funkie Junkie Boutique to choose from that would make beautiful slider cards, so let's get started!
Seriously though, it's the season where we like to honor our friends with handmade cards and gifts so I want to show you how to make a slider easel card. There are so many great Christmas products in The Funkie Junkie Boutique to choose from that would make beautiful slider cards, so let's get started!
Slider Easel Cards
We're going to make a slider card that is also an easel card. Below is a YouTube link to a short video showing you how to cut and assemble the basic card using measurements of your choice.
Here are two cards I made to show you and they are different sizes and that's the great thing. You can easily make the card whatever size you like.
This one is 4 1/2" x 6" and is made from Stamperia Winter Boutique papers.

This one measures 6" x 5 1/4" and is made with Tim Holtz Worn Wallpaper.
Here are two cards I made to show you and they are different sizes and that's the great thing. You can easily make the card whatever size you like.
This one is 4 1/2" x 6" and is made from Stamperia Winter Boutique papers.


The Video
Easy enough right?
The Finished Card - Details
This is a view of the card folded down. Even with the flowers, this card is not too bulky and it could be mailed in a padded envelope . Leave the flowers off or chose a flatter flower and it would easily fit into an envelope.
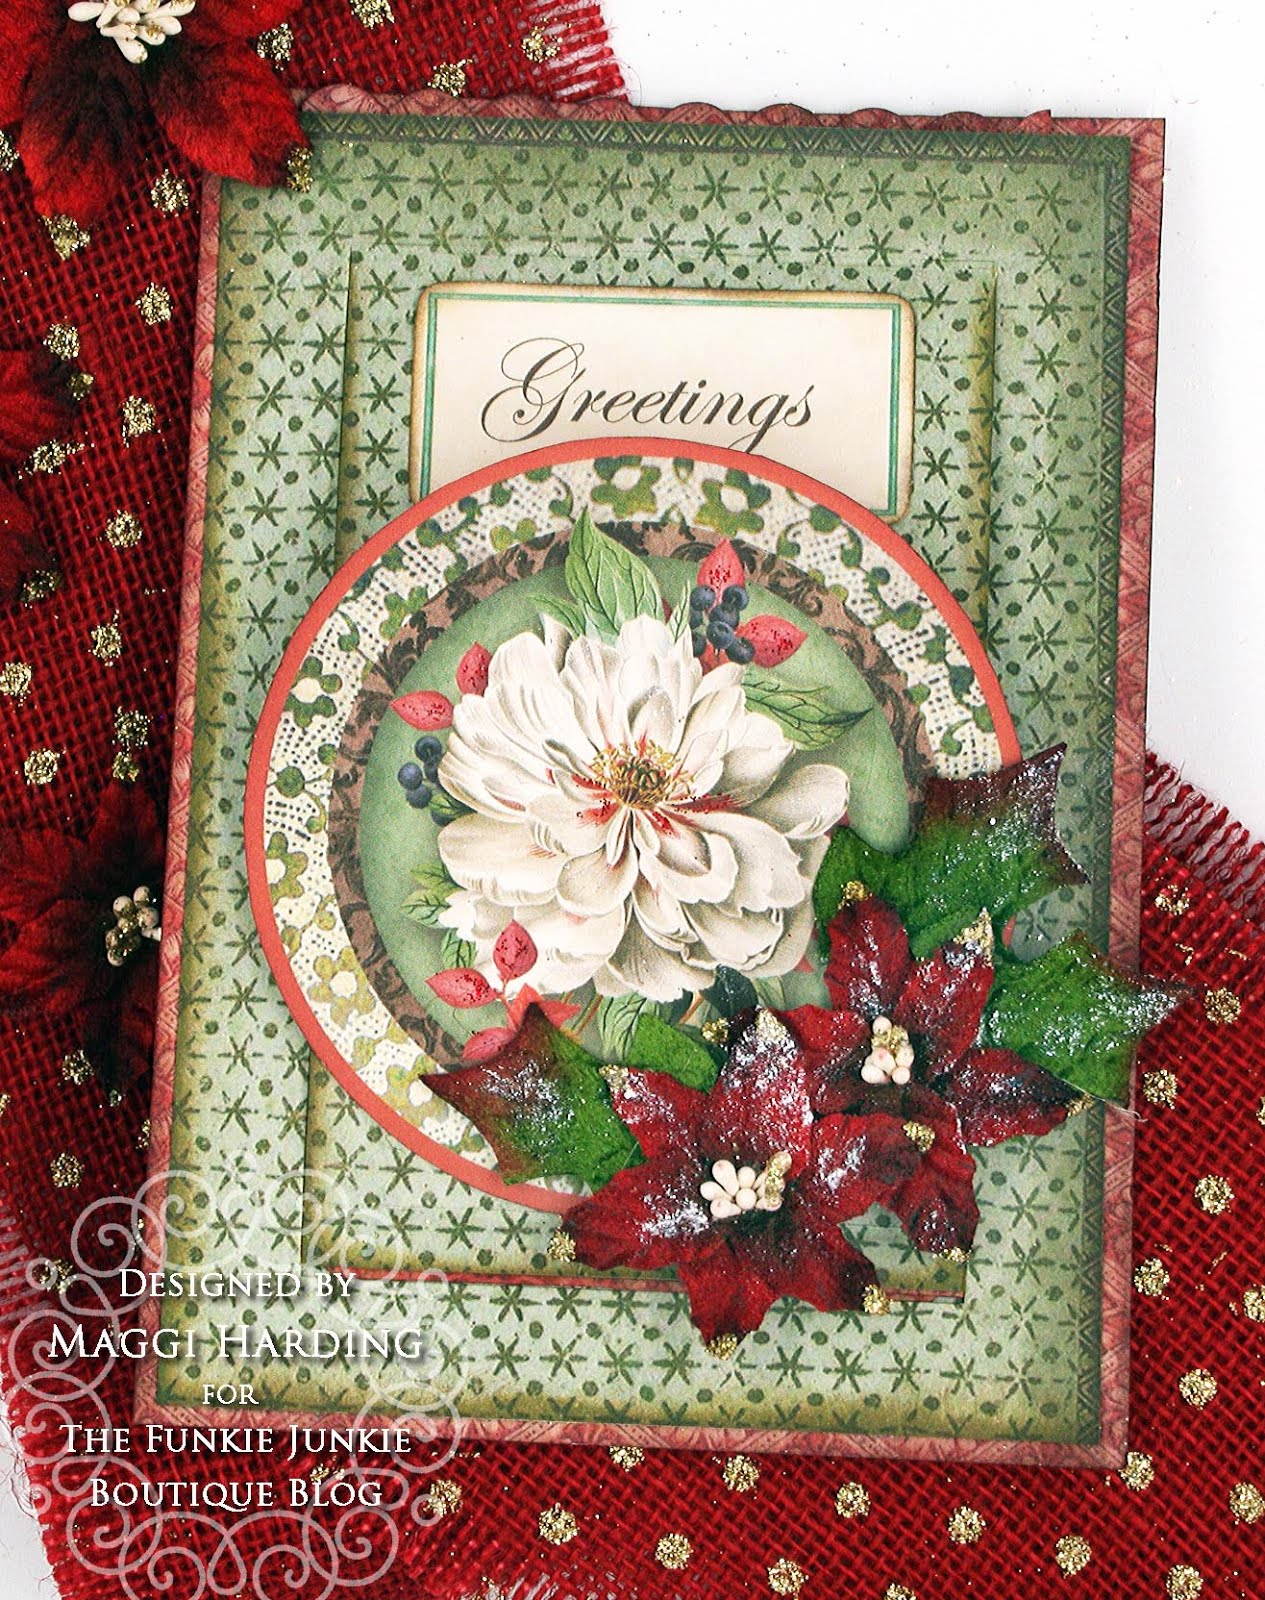
Many of Stamperia paper collections include circular elements and sentiments. I've cut out one of each to embellish my card. They make pretty but quick work out of embellishing!
The flowers I used are some older Petaloo poinsettias that I brushed with Stamperia's Glamour Gel to add a touch of snow and sparkle. There are some beautiful Prima poinsettias in the Boutique that would work quite nicely!
In this view, you can really see the slide mechanism pulled out so that the easel stands up.


Supplies from The Funkie Junkie Boutique
Stamperia Make a Wish (I used Stamperia Winter Botanic but Make a Wish has similar elements.)
A Horizontal Slider Easel Card
I made this card in the exact same manner as the one in the video, I just altered my dimensions and instead of leaving a 1/2" border around the slider mechanism, I made a 3/4" border on the sides and a 1" border top and bottom. Why did I do it that way? That's just what looked nice to me!

Inside the card I stamped a Christmas sentiment It is easiest to do this before you assemble, but you do have to take care to get your sentiment where you want it. Another way to do it, is to stamp the sentiment onto something else, cut out and adhere inside.

A Brief Tutorial
Cut 2 pieces of white cardstock 6" x 5 1/4". Cut out a flap, as show below, on one of the pieces, on 3 sides leaving a 1" border at top and bottom, and 3/4" on either side. Cut a thumb-notch on the same piece as the flap is cut from. (I have not yet cut the thumb-notch on the photo below.)
Score the flap at the top at 1", score the bottom of the flap at 1/8". Score the flap in the center at 2 1/8", measuring from the flap top crease line to the bottom of the flap. (Watch the video to see how this is done if it seems confusing to you.)
Cut another piece of white cardstock 5 1/4" x 4 1/4". Adhere this piece to the bottom of the flap. Be sure to watch the video to see how this is done.

Now glue the flap assembly to the 2nd piece of cardstock that is 6" x 5 1/4" on the sides and bottom only. The slider should be sandwich between the 2 layers and slide out the top. At this point you should have the basic card with the slider mechanism working. Now the fun part, embellishing!
The slider is easier to operate if there is some sort of pull on it so I glued on a Christmas token.

To serve as a backdrop for my floral cluster I used Tim Holtz's new Mini Tree Rings Die w/Texture Fade to die-cut a couple of tree rings from Core'dinations cardstock. Then I sanded, inked and glammed the tree rings up with Stamperia gold and white Glamour Gel. Then some pretty poinsettias, a tidy bow and pine cone charms finish it off quite nicely, don't you think?


Supplies from The Funkie Junkie Boutique
Thanks so much for joining me today. I'm hosting the challenge next week here on The Funkie Junkie Boutique Challenge Blog and I'm hoping to see some slider cards!
Cards that DO something! The possibilities are endless. Yours are SO pretty. Thanks.
ReplyDeleteGorgeous, love it !!
ReplyDeleteLove these cards. Copied your directions and watched the video. Going to try it. Thanks.
ReplyDeleteThese are simply gorgeous, Maggi - and it's lovely to be let in on some of your secrets!
ReplyDeleteAlison x
This is awesome and sooo beautiful Maggi, and thanks sooo much for the tut for this too.
ReplyDeleteBeautiful slider cards and fab tutorial!
ReplyDelete