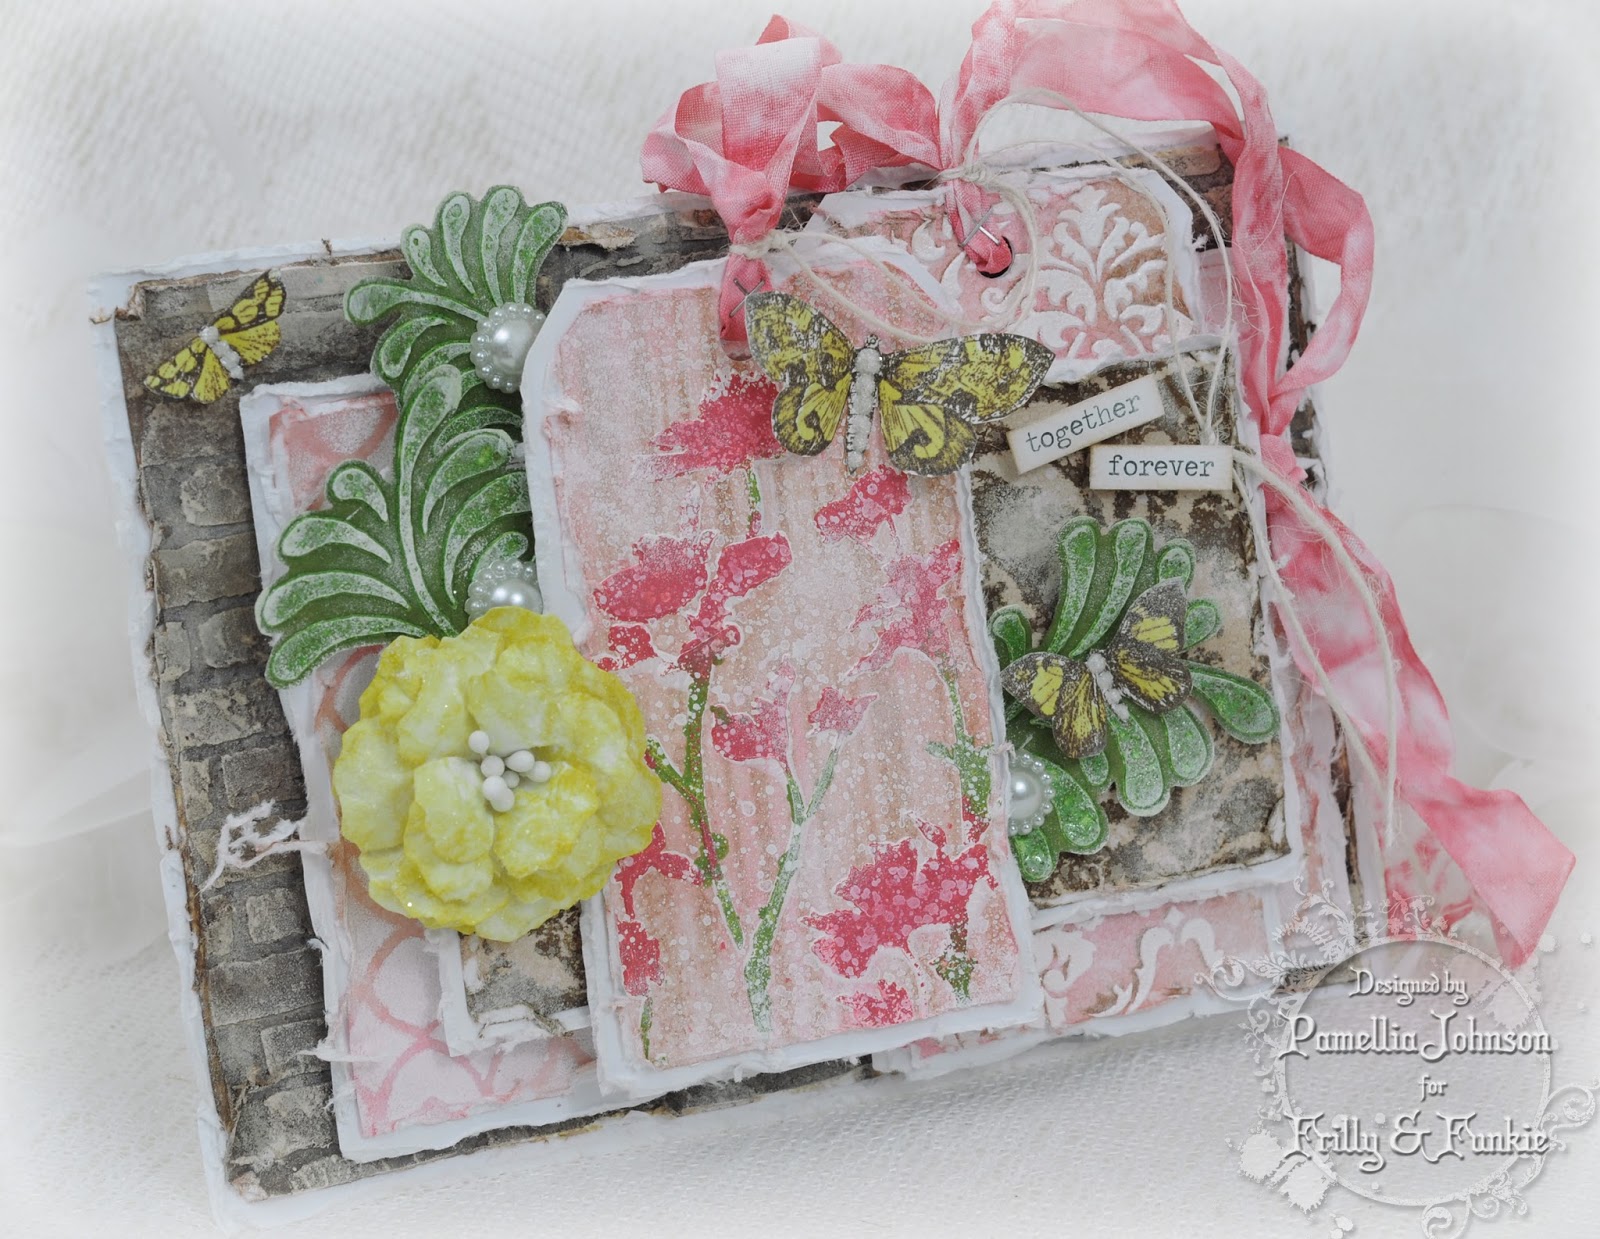
I decided to put together a card that can be used for a wedding card or for an anniversary card. The "together forever" sentiment is from the Tim Holtz Chit Chat sticker book and I think it will work for both occasions just fine.

For the back panel, I used some texture paste and the Wendy Vecchi Basically Bricks stencil to lay down the pattern. I coloured the bricks with some Gathered Twigs distress ink spray and Dylusions Melted Chocolate ink spray. I dabbed a little Picket Fence paint on the top to highlight the ridges.


For the middle panel, I coloured a piece of paper with Tim Holtz distress inks Worn Lipstick and Vintage Photo, then I used the Latticework stencil and dabbed the Picket Fence paint through the stencil to create the pattern. I did two coats to get a nice stark white.


For the top panel, I coloured the paper with Vintage Photo and spritzed on a little water to create some interest, then I sprayed the Flourish stencil with Gathered Twigs distress spray. I turned the stencil over and pressed it down onto the paper created a wonderful distressed version of the negative part of the stencil.


Both of the tags were cut with the Sizzix Tag Collection die set and coloured with Worn Lipstick and Vintage Photo. For the top tag, I used the Tim Holtz Stripes stencil and sponged on some Vintage Photo to create stripes.


I used some texture paste and the Wildflower stencil to lay down the pattern. Once the paste was dried, I placed the stencil back down on the tag in the same position and used Distress paints Barn Door and Peeled Paint to add colour to the texture paste. This is a great technique for experimenting with colours. The paste changes the hues of the paint, turning the red and green into more of a deep salmon pink and olive.


For the second tag I used the Gothic stencil and sponged on some Vintage Photo to create the base pattern. I slightly nudged the stencil a bit and then put down a layer of texture paste creating a shadowed look on the design.


I used the Wendy Vecchi 3 Flourishes stencil and some texture paste on a scrap piece of paper and while the paste was still wet, I covered it with Wendy Vecchi's Fern Green embossing powder. When the paste was dry I heated the powder and melted it.

I fussy cut out the leaves and sprayed them with Twisted Citron and Chopped Pesto ink sprays. I ended up going back after I put the camera away and spritizing it again with some Peeled Paint to darken it up a bit, then I dabbed a little Picket Fence on them to mute the colour.

I layered everything with some white backing panels just to break up the colours a bit. I added some butterflies from the French Flight stamp set which I stamped with Wendy Vecchi Potting Soil ink and coloured with Mustard Seed. The flower was cut with the Tattered Florals die and also coloured with Mustard Seed and dusted with Rock Candy Dry distress glitter. The beautiful pearls are from Linda's shop.


The seam binding was coloured with Tim Holtz distress ink Festive Berries and I dabbed it with Picket Fence to mute the colour to match the flowers on the tag. The bodies of the butterflies was done with Liquid Pearls covered in Distress Dry Glitter Rock Candy. I included a close up so you can see the pretty glitter.


I hope you enjoyed my techniques on different ways you can use stencils to decorate you cards. There are many more stencils available at Linda's shop that I know you will just love! And all the stencils (with the exception of the new 2015 Summer Releases) are on sale.
All of the below products can be found at The Funkie Junkie Boutique and don't forget that all the stencils in the shop will have an extra 15% discount applied for the next two weeks.
Happy crafting, Pamellia :)