Hi everyone, Trace here. Well it is my turn for the Saturday Step x Step and that will follow, but firstly I would like to let you know that this will be my last post as a member of this wonderful team. Sadly life means that I am having to take a step away from blogging and so have to leave this wonderful team. It has been a huge honour to be part of this amazing and inspiring team and it is with a heavy heart that I say goodbye x
I would like to say a huge thank you to Linda for allowing me the honour of being part of such an amazing team; it is an amazing team and one I was thrilled to be part of. Huge thanks too to Jenny who works so hard to lead us all and help us out. And finally huge thanks to all my lovely team mates.
So now here is my Step X Step; this was my piece for the 'Autumn Colours' challenge and I promised you a tutorial...
I started by covering a piece of mdf board with some paper in a reddy orange. I then applied some of Wendy Vecchi's yummy Embossing Crackle Paste in various thicknesses across the piece and left to dry.
Here is a close up as it starts to dry and crackle.
I then added some Distress Stain and dried to add colour to the paste.
I loved how it coloured up the crackle.
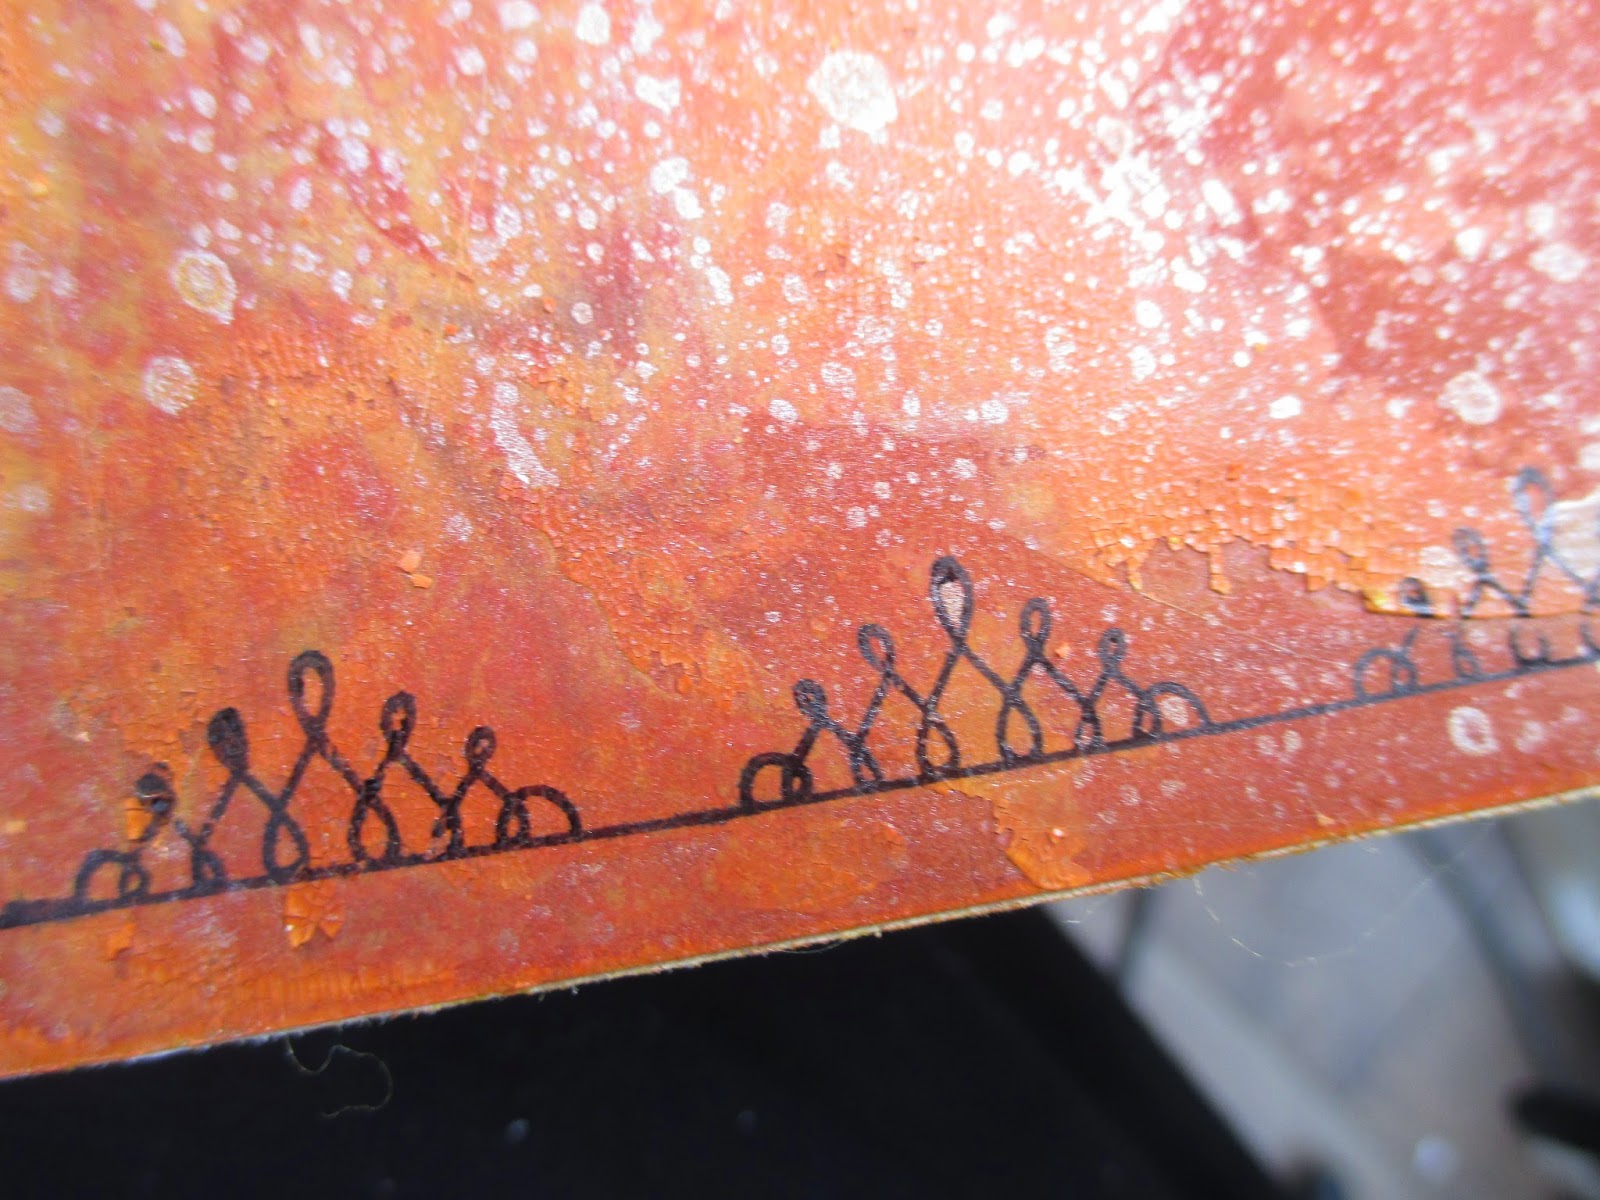
Now I spritzed with the new Tarnished Brass Distress Stains Spray from a fair distance to get this lovely splatters of colour and metallic shimmer.
Now I used one of Wendy Vecchi's stencils and applied some Walnut Stain Distress Ink to add some soft flourish detail. I love building up all the layers in this way.
Here is the background so far, with that stencilled detail.
Now for some coloured paste, I added some of the Stain and some of Wendy Vecchi White Embossing Paste and mixed them together.
Now I applied some Tissue Tape; any tape will do to hold the stencil, but mainly to mask off the area next to where I was applying the paste as I only wanted a small part of the stencil.
I then applied my coloured paste and repeated this in the other corner of the background too.
Now for the heart; I drew around the heart from Wendy's stencil, cut it out three times and layered these up to give a bit of thickness. This was then coated with Glue n Seal before I applied a generous layer of Crackle Paste.
The flowers were die cut using Tattered Florals die, spritzed with water, scrunched up and left to dry to give all those crinkles. They were then sprayed with the new Distress Stain Spray on both sides and then with water before being dried.
I added some more colour with Distress Ink and Stain so they didn't look too flat. The leaves had been cut, spritzed with water, scrunched up and left overnight to dry.
I then spritzed the leaves with water and swiped over surfaces with various Distress Stains, spritzing them and drying to get a lovely blended colour.
I continued to spritz them with Distress Stain Spray and water to get the right look.
To add another colour and tone down some of the orange I also added some Crushed Olive Stain, applied with kitchen towel to main background surface.
Here are the flower layers after spritzing with lots of water to remove the bright orange and adding in some other colours before layering up.
I love how you can layer colour and water until happy
I added a row of stamping to the top and bottom of the board using Jet Black Archival Ink.
I love how all the colours and that shimmer from the Distress Stain Sprays work together.
So here are the flowers and leaves in place...
And the crackled heart all coloured up with Stains rubbed in with a baby wipe before a focal sentiment is added.
Hope you've enjoyed my tutorial and maybe even give it a go yourselves sometime.
Thanks again to all my wonderful team mates and all those who have commented on my blog... I will be back in blogland sometime I hope xx
keep those fingers inky!
and those hearts full x
trace x
Editor's Note; Trace, you will definitely be missed. We have loved having you on the team and thank you for all the beautiful projects you have contributed for our visitors to drool over! The whole team are sad to see you go, and even though we understand and fully support your decision, we look forward to the time when you are able to refocus on your art. Wishing you and your family all the best for the future xxx


Such a stunning piece Trace and I just know that you will be very sadly missed!! Sending lots and lots of hugs and hoping that one day soon you will be able to return to blogging again and share your talents with us all!
ReplyDeleteHow sad that you are having to leave blogland Trace. You have such talent, thanks for sharing this lovely piece and wishing you all the very best xx
ReplyDeleteOh Trace you will be very sadly missed too, by those of us who visit F&F for the wonderful inspiration you provide - today's tutorial is an excellent example of your amazing creativity! Take care, huge hugs and wishing you all the very best. Anne xx
ReplyDeleteTrace, sad to see you have to leave blog land at the moment, you always have such inspiration in your craft. Look forward to seeing you back in the future.
ReplyDeleteJulie x
We're sad to see you go too, Trace, but are so grateful for all the wonderful inspiration you have given our visitors over the past two years. We wish all the best for you and your family!
ReplyDeleteHugs,
Linda
Missing you already Trace :( but you are going out (temporarily I hope) on a high with this wonderful tutorial. Huge hugs, Jenny xxx
ReplyDeleteI am so sorry to hear that you are leaving and taking a step back from blogging as I really have enjoyed and been inspired by your wonderful step by step tutorials and fabulous projects here and elsewhere. Sending hugs Jennie xxx
ReplyDeletePS I love your Autumn project - such wonderful textures and colours and as always a fabulous tutorial. xxx