Hello there Funkie Junkie Fans, Lisa Hoel here and I have a "Halloween in August" make for you today! I think now is not to early to start holiday crafting. Every year I have more ideas than time so starting earlier is a good strategy. This Idea-ology Vignette Shrine decor piece makes use of old and new Tim Holtz Halloween products. Let's take a look…
Mr. Hipster Skellie makes an appearance and we can clearly discern his main interest in the holiday, especially when we turn on…
… the Halloween Idea-ology Tiny Lights! I used an orange strand from years past (the 2022 lights are green and purple). You can also use regular Tiny Lights and put a drop of orange alcohol ink on each bulb to color them yourself. Mr. Hipster's message, "I'm here for the candy" was cut using the new Sizzix Bold Text Halloween Die Set.
The sides of the Vignette Shrine feature another new die set, Mischievous. I love those little cats and can't wait to add them to future projects.
More words from the Bold Text Halloween set also included!
The lights really make an impact when it's dark:
Sweet! and spooky!
Now for the how-to:
1) I drilled a hole in the back of the Vignette Shrine to thread the strand of Tiny Lights through. (I was originally going to use green lights but changed my mind to use orange.)
2) I used Distress Paint to create the backgrounds to cut the side strips from. I dripped Villainous Potion, Wilted Violet, and Twisted Citron onto my craft sheet, lightly spritzed with water and swiped my paper through it.
While it's wet, Distress Paint is highly reactive to water. I also dripped water on the paper and added more layers once the first layer was dry. It is a really fun technique! You can see Tim demo it in his Distress Paint Demo video.
The finished backgrounds!
3) Next I made the little light box. I cut the sentiment out of Distress White Heavystock and trimmed around it. The box was made with black foamcore to fit my sentiment piece. To give the front piece a "candy" feel, I applied Embossing Ink with a Ranger Emboss It Dabber and then heat embossed with Villainous Potion Distress Glaze. To diffuse the lights that were going to go behind it, I applied Frosted Film (a retired product) to a piece of clear plastic and cut it to fit inside the box behind the front piece. (Heavy vellum would work too.)
I also applied Crypt Grit Paste to the sides of box to cover up the black foam core.
4) I cut strips from my painted papers to fit the sides of the Shrine. I die cut the words and cats through the top purple and green layer. I backed them with strips of paper I had spritzed with last year's Seasonal Halloween Mica Stains - Jack-O-Lantern and Flickering Candle. (I can't wait to see what this year's colors look like!)
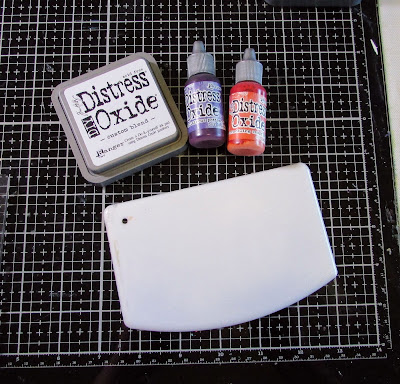
5) Next it was time to work on the background paper that was going inside of the Shrine! I decided to make a custom ink pad using an empty Oxide Distress It Yourself Ink Pad and Oxide reinkers in Villainous Potion and Crackling Campfire. Tim gives DIY pad ideas and instructions in this video demo.
I used my custom pad to ink the woodgrain background stamp from the CMS384 Lumberjack stamp set. I wanted to have a striped look so the custom pad made that really easy to achieve. I wasn't sure if I'd like black or grey paper better so I stamped on both to see. (Black won!)
6) I lined the Shrine with my stamped background. The box edges I covered with Trims Design Tape.
7) Mr. Hipster came from the Wicked Hipsters Stamp Set (currently on sale!) I stamped it on White Heavystock, watercolored it and then fussy cut it.
8) Most of the lights I twisted into a bundle that would lie behind the sentiment window box. I tacked the wires down with hot glue to keep them in place.
9) Final steps were creating all the candies using the Sweet Treats Die Set and attaching them to the back. I also added some black and grey pearl gems I had. Tim's new Halloween Idea-ology Droplets would be perfect for a similar look.
I hot glued the end of the light string into place where it would lie under the skull piece.
Thanks for stopping by! Lots of exciting Halloween products are coming out this month so get ready to get your creep on! Pay the store a visit and check it all out.
Products Used:
Stampers Anonymous Tim Holtz Stamp Set - Lumberjack CMS384
Sizzix Tim Holtz Thinlits Dies - Sweet Treats 664204
Ranger Tim Holtz Distress Paints - Villainous Potion TDF78845, Wilted Violet, Twisted Citron TDF50216
Ranger Tim Holtz Distress Oxide Reinkers - Villainous Potion TDR78838, Crackling Campfire TDR72324


Veeeeeery COOL!!!
ReplyDeleteI added the photo to my “Love This!” file!