
Hello friends,
It's Teri with TerisMailbox and I'm posting for The Funkie Junkie Boutique today. This Saturday Spotlight post is all about creating your own Ephemera using some of the new Sizzix dies including Vintage Labels, Collector and Specimen sets. In the end I created a journal cover, and I will walk you along creating the collection of ephemera pieces.
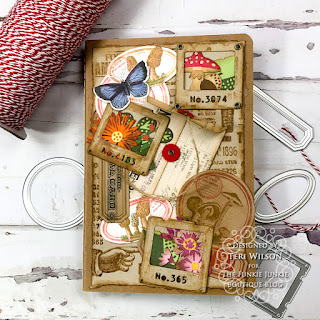
Check all the fun layers of Vintage Goodness here!
I have a video on my YouTube Channel if you prefer to follow the process. Link: https://youtu.be/c_XEkzMzivc
I started with the Vintage Label set. I love ephemera and layering tags etc. on my projects! This set gives the user so many opportunities to be creative!

I read on one of the FaceBook pages (Tim Holtz Addicts?) that if you coated the dies with embossing ink prior to adding the Archival ink that you would get better coverage. The top label was my first attempt without the embossing ink. Look at the difference with the embossing ink on the bottom label. I'm sold on this idea! Archival inks used include Barn Door, Peeled Paint, Faded Jeans and Walnut Stain.
The other thing I did was attach the dies onto a sticky sheet so I could ink and cut multiples at once. I am a fan of going for it once I have all the supplies out!

Check out all the labels I was able to create in one sitting, by stamping with Field Notes CMS496, Tiny Toadstools CMS 377 and Holiday Things CMS 441.
The next project was creating the specimen slides using the Sizzix Specimen Dies, Foliage Die and Funky Florals - large.
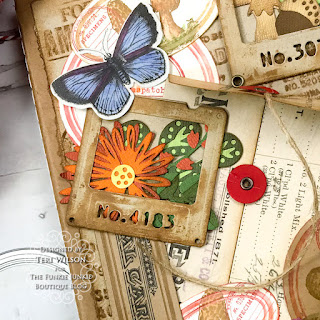
Here is one of the three slides I created. After cutting them out from Neenah Desert Storm cardstock, I inked the edges with Tea Die Distress Inks and dipped them in a puddle of the same ink to age them.
I had a bag of flowers and mushrooms from a prior crafting time that I simply pulled out and used in the slides. It makes crafting so much easier when you have pieces and parts saved!
I created the envelop using a panel from Backdrops Volume 3, cut with the large envelope die from Sizzix Collector Die Set.
You can see the envelope under all the labels. I cut the fasteners from red cardstock, added the eyelets and twine!The background is another piece of Neenah Desert Storm stamped and inked using the Ecclectic CMS 448 stamp and Tea Die Ink. I did not remove the stamps from the backing and used the entire stamp!I assembled all the pieces onto a Kraft Covered Folio my husband brought home. It promptly went to my craft room as I knew it would be perfect for a project!

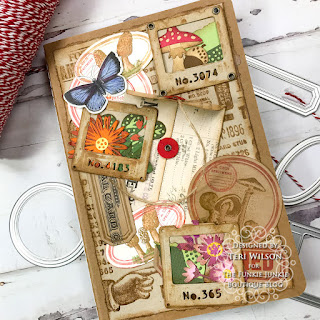
All of the pieces were arranged and attached using Collage Medium. Here is another close up of one of the slides and labels.


Products Used:
Thanks so much for stopping by. I hope you will take time to explore all the wonderful items carried by The Funkie Junkie Boutique!
No comments:
Post a Comment