Wednesday, February 23, 2022

For the Love of Mixed Media

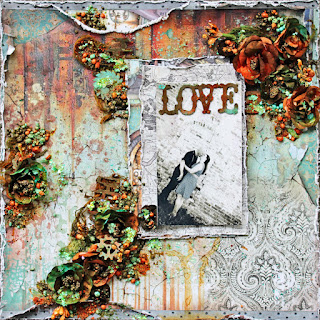
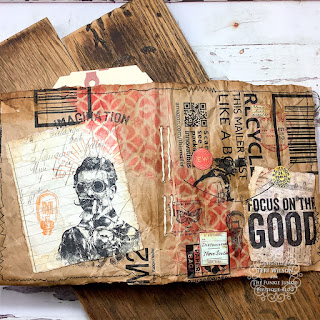
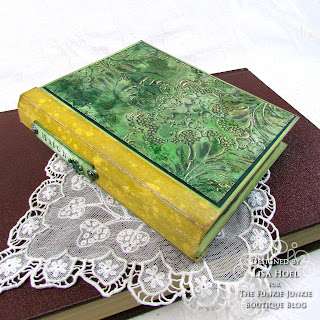
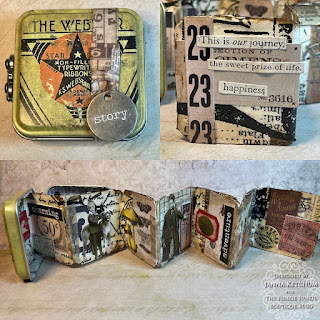
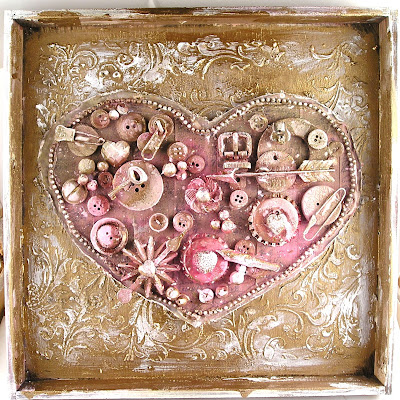
Laura is our host for the new challenge here on The Funkie Junkie Boutique Blog, and she's asking us to create "a mixed media piece about or for someone or something you love." What are your favorite mediums to use? Do you prefer tags, cardstock, wood, chipboard, or some other substrate as a base? Are you a fan of three dimensional creations or collage? Your imagination is the only limit this time. Here are the projects our Design Team made to inspire you - we can hardly wait to see what you're creating!

Laura Gilhuly - Angel Scraps

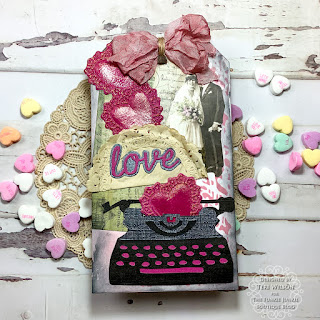
Teri Wilson - TerisMailbox


Lisa Hoel - Creative Juice

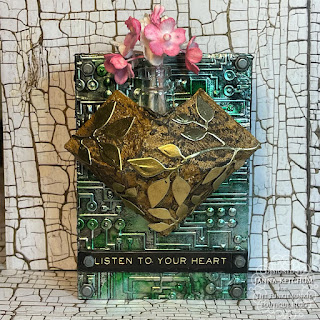
Janna Ketchum - treasuresofthesea_jannak

Suzanne Czosek - Suzz's Stamping Spot


The overall winner will be offered the chance to be a Guest Designer at a future date here at The Funkie Junkie Boutique Blog, and everyone who enters and follows the rules will go into the drawing for the chance to win a $25.00 spending spree at The Funkie Junkie Boutique. There are also Top 3 Badges for three additional outstanding entries, chosen by the Design Team.

The guidelines for entering are simple: create a new vintage or shabby chic project following the challenge theme, link it to your post (not just your blog) and also include a link to this challenge in your post. You can combine our challenge with up to 10 challenges (including this one) to be in with a chance for winning. If you are entering through a public forum (such as Instagram) you'll need to include the words 'Funkie Junkie Boutique Challenge'. Also, please turn off your Word Verification so our Design Team can leave comments on your blogs. Make sure you follow these rules as unfortunately, we have had to eliminate entrants from the prize drawing in the past.

Whatever you create, enjoy the making! We look forward to seeing your projects! This challenge is open through 11:55pm Eastern Time on Tuesday, March 8, 2022.

Wednesday, February 16, 2022

Guest Designer - Linda Coughlin

This is a big HELLO to friends near and far whom I haven’t been in touch with and who haven’t seen me crafting in several years. My craft room, tools and supplies have been gathering dust while I’ve been consumed with running The Funkie Junkie Boutique. From crafter to small business woman…it’s been a journey that hasn’t always been fun but has been interesting.


This week with our challenge blog needing a guest designer, my team has nudged and cajoled me to fill the guest designer gap by creating a piece of artwork. WHOA! That’s not as easy as you would think. First I had to knock down the cobwebs that smacked me in the face when I opened my craft room door (figuratively, but still the first mental hurdle), then to clean up all the junk that I’ve been shoving in here (out of sight…ya know?). I spent two days getting reacquainted with all my craft supplies and filling up three waste baskets as I opened dried out jars and bottles.

After cleaning and organizing, I plopped myself down at the craft table and…ugh, now what? What do I do, where do I go for inspiration? I watched a few YouTube videos and went to The Funkie Junkie Boutique to shop. I messed around and played at my craft table for a couple of evenings, made a couple of tags for fun but threw them in the trash. Finally I went back to my frilly vintage roots and came up with something.


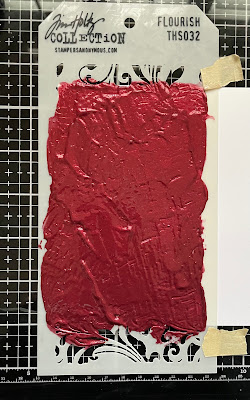
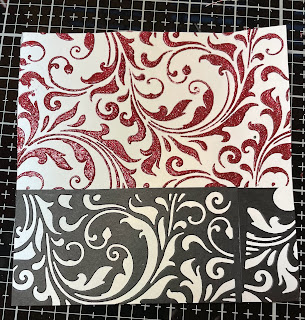
To start with, I wanted to use some sort of medium paste through a stencil. We just received a huge shipment from Prima Marketing with some great Jewel Effect glitter pastes. I wanted red for my Valentine’s make, chose Precious Rubies and used it with the Tim Holtz Layering Stencil THS032 Flourish. The paste is wonderful. It goes on smoothly and cleanly and dried in a couple of hours (even in the cold, rainy north Florida weather this week).


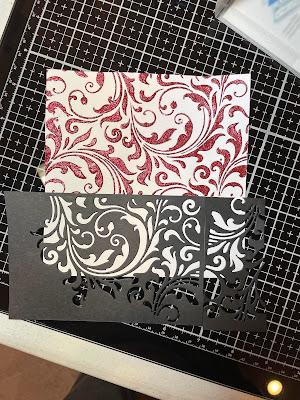
The stencil area only covered 2/3 of the area of my card’s panel, so I needed to fill in the rest. My mind was really trending toward red and black and I decided to coordinate the stenciling with a die cut. One of the great things about using Tim Holtz products is that many of the designs from product line to product line coordinate and work together. Tim’s Sizzix Thinlits Mixed Media #2 has a die that matches the stencil I used.


Using a piece of black card stock, I applied Sizzix Adhesive Sheets #656802 to the back and then ran it through my Big Shot. If you are not using this (or a similar product) when cutting your intricate dies, let me tell you, it is life changing. Being able to peel off the sticker backing and press down the die cut makes it not only effortless but allows for a perfect adherence. The die cut wasn't wide enough to fill the space so I had to piece it.


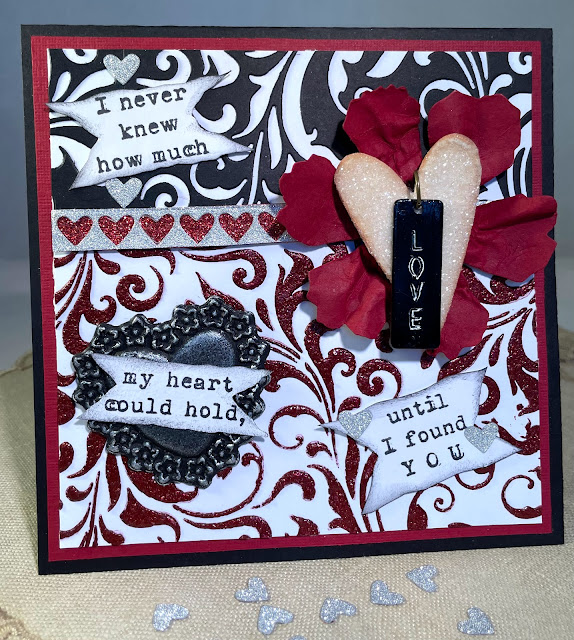
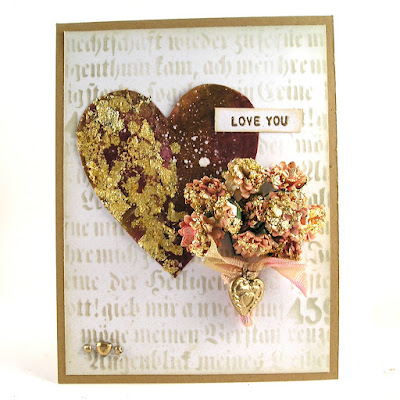
Now I needed a strip or ribbon to cover where the two panels joined. Searching my stash, I found just what I had in mind. Years ago, there was a Tim Holtz Idea-ology product called Deco Sheets and I found some left over glittery silver plus some glittery red from an unknown source. Pulling out my old Shape Strips Thinlits set 660226, I cut a strip of the silver and then backed it with the glittery red (bonus, a bunch of tiny silver glittery hearts). Digging through some set aside embellishments, I came across a flower that had been cut with the old Tattered Florals die plus a vintage looking sparkly heart that already had the attached “Love” charm in black! Why make something new when just the right thing jumps out and says “hey, give me some love too”?

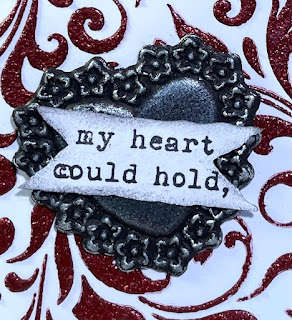
Next, I needed a sentiment and riffled through all my old stamp sets. The one that really grabbed me was from Wendy Vecchi/Stampers Anonymous SCS131 A Passion For Art: "I never knew how much LOVE my heart could hold until I found YOU." It all seemed to come together with that sentiment.


I felt the card needed one more element, and sticking with the black and red theme, I cut a black heart using the Sizzix Impresslit Lucky Love 665227 (we still have a couple of these discontinued Impresslits left in the shop!). I very lightly burnished it with Prima Metallique Wax in White Pearl to give it the tarnished antique silver look. I'm a huge fan of the Prima Metallique Waxes. I love the way the black cardstock now looks like a heavily tarnished silver piece.

Tim Holtz Layering Stencil - Flourish THS032
Prima Finnabair Art Extravagance Jewel Effect Texture Paste - Precious Rubies 969042
Sizzix Adhesive Sheets - 6" x 6", Permanent, 10 Sheets 656802
Wendy Vecchi "A Passion For Art" Stamp Set SCS131
Tim Holtz Idea-ology Kraft Stock, Black TH94145
Sizzix Impresslits Lucky Love
Prima Marketing Metallique Wax - White Pearl

I hope you have enjoyed my return to blogging. If so, I have this post over on my blog The Funkie Junkie, where it all started. You can stop by and say hi over there.

Monday, February 14, 2022

Challenge Winners - Icy and Cold

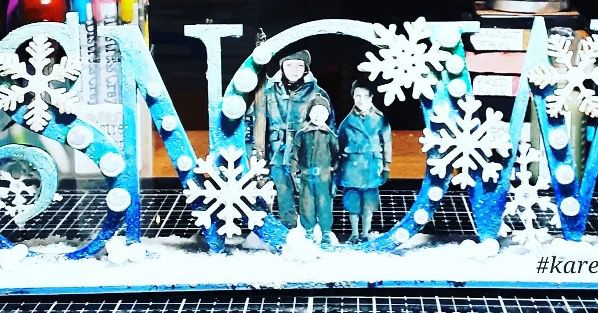
Thank you to everyone who participated in the 'Icy and Cold' challenge earlier this month. Our Design Team certainly had their work cut out for them choosing from among so many wonderful entries. There were so many great entries that it was truly a difficult choice, but ultimately the Team chose KarenP.31 as our overall winner.


The Design Team really enjoyed seeing how Karen altered this MDF "SNOW" with icy colors and snowflakes.

Congratulations to Karen for winning an opportunity to be a Guest Designer at a future date here on The Funkie Junkie Boutique Blog. You'll be contacted shortly with all of the details. And now our picks of three additional outstanding entries for the The Funkie Junkie Boutique Blog Top 3 Badges. In numerical order they are #1 Martina Stoycheva, #8 Lia and #12 Repolainen. You'll be contacted shortly with the Top 3 badges so that you can display them proudly on your blog.

And finally for the lucky randomly drawn winner for the $25 gift certificate to The Funkie Junkie Boutique; our congratulations go to #3 Krafty Jean. Please email Linda at thefunkiejunkie@gmail.com for the gift certificate details.

Thank you again to everyone who took part in this challenge and congratulations to all our winners. The current challenge - 'Funky Frilly Valentines' - can be found HERE and runs through Tuesday, February 22nd at 11:55 pm EST, so there's still plenty of time to link your projects.

Saturday, February 12, 2022

Saturday Showcase: Tim Holtz Distress Embossing Glazes

Hello and welcome, I’m Janna and today we will be highlighting Tim Holtz Distress Embossing Glazes. In this blog post I will be showing you three ways to create with glazes and a few projects too.

This week I have created a card using Distress Glaze as a resist for Distress Spray Stains. Click here for tutorial on Distress Embossing Glazes.


We will also look at using Distress Glazes to add color to large spaces for die cutting.

Then we will have a blast from the past and play with Distress Glazes and the Ranger Melting Pot for a journal spread.


For these techniques I used the following: 

1: Embossing Resist: Distress Glaze Salvaged Patina, Broken China, and Kitsch Flamingo, embossing ink, Distress Spray Stains Speckled Egg, Salvaged Patina, and Distress Oxide Spray Stain Weathered Wood, stamp set CMS058 Fairytale Frenzy.

2: Texture and Die cutting: Distress Glaze Rustic Wilderness, Peeled Paint, and Vintage Photo, Sizzix die set Prehistoric, embossing dabber.

3: Melting pot and Distress Glazes: Distress Glazes Weathered Wood and Mustard Seed, Ranger embossing powders Silver and Black, Tim Holtz Filiment Bigz die.

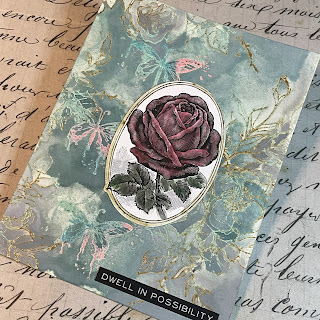
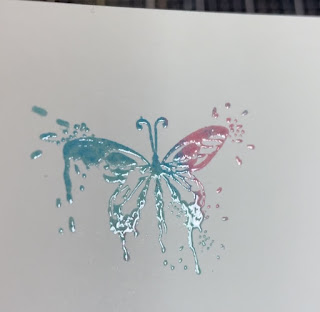
For our first technique with glazes I will be doing an embossing resist. For the stamp I used the butterfly from the Tim Holtz Fairytale Frenzy set CMS058. Before stamping I also used the anti-static pouch to avoid smudges and smears.


Next I stamped with Tim Holtz Embossing Ink to stamp out three butterflies.


For embossing glazes I decided to use Kitsch Flamingo, Salvaged Patina, and Broken China.


Then I used my fingers and sprinkled the glaze over the stamped images. 


Next I gently tapped the extra off the paper leaving behind these multi colored butterflies.


Here is the end result after embossing.


With the butterflies embossed, I then decided to add in some more stamping. This stamp above is from the Floral Outlines set CMS430.


Once the images were stamped, I then added some Distress Glazes Salvaged Patina and Vintage Photo.


Again I tapped off the excess before embossing.


Here is where the resist part of this technique comes into play. I spritzed the paper with water and then added Distress Spray Stains Salvaged Patina, Speckled Egg, and Weathered Wood Distress Oxide Spray Stain.


Here are the finished results after drying the background with the Ranger heat tool.


To start the next technique we are starting with a base of mixed media heavy white cardstock. First I added a layer of Distress Embossing Ink over the surface with the Distress Embossing Dabber.


Next I sprinkled on Peeled Paint, Vintage Photo, and Rustic Wilderness Embossing Glazes.


Then I shifted the Embossing Glaze around to cover most of the surface. In this case it is great to have some random gaps and empty spaces showing. Then I embossed with an embossing heat gun.


Now to fill in the gaps. Here I have used the Tim Holtz Pearlescent Distress Crayons Tree Lot and Bubbling Cauldron.


Then with a little water I smudged out the Distress Crayon.


Now it is time to die cut. For die cutting I am using this cute little stegosaurus from the Tim Holtz die set Prehistoric.


Below are the die cut parts. See video for assembly process. Click here for video.


Here is the finished stegosaurus.


For our final technique we will have a blast from the past and create using the Ranger melting pot. To start I turned the heat all the way up to the UTT setting. I am using the base pan of the melting pot, no additional project pan layer.


Here we will be using the Filament Bigz die. For the die cuts I am using heavy white mixed media cardstock. I placed the bulb portion of the light bulb in the melting pot and the sprinkled Ultra Thick Embossing powder over the top of it.


Once the Ultra Thick had melted I then sprinkled on a layer of Mustard Seed Distress Glaze.


When the glaze was melted I added a final layer of Ranger Holographic Embossing Powder. To extract these pieces I recommend using the Sizzix Tim Holtz Squeezers.


Next we colored the glass support with Ranger Black and Silver Embossing Powder.


Then I colored the filament with Ranger Silver Embossing Powder. I used about half a scoop of embossing powder to color this piece.


The last piece I added color to was the base of the light bulb. For this piece I used Weathered Wood Embossing Glaze and Ranger Silver Embossing Powder.


Here is the finished assembly of the light bulb die cut.


Below are the finished creations made with Distress Embossing Glaze elements. Part 2 process video click here.


Thank you so much for joining me here today for the Funkie Junkie Saturday Showcase. Until next time, happy crafting!
Janna~ 💕🎨💕

Below are some links for some inspired shopping at the Funkie Junkie.

Wednesday, February 9, 2022

Funkie Frilly Valentines

"It's getting to be that time of year when hearts and flowers come out in full force,"  says Janna, our host for the new Funkie Frilly Valentines challenge here on The Funkie Junkie Boutique. "Create a frilly and/or funkie Valentine. Will yours be created with vintage inspired colors or frilly with glitter and lace? We look forward to seeing your creations, happy crafting!"

Janna Ketchum - treasuresofthesea_jannak

Lisa Hoel - Creative Juice


Teri Wilson - TerisMailbox

Suzanne Czosek - Suzz's Stamping Spot


The overall winner will be offered the chance to be a Guest Designer at a future date here at The Funkie Junkie Boutique Blog, and everyone who enters and follows the rules will go into the drawing for the chance to win a $25.00 spending spree at The Funkie Junkie Boutique. There are also Top 3 Badges for three additional outstanding entries, chosen by the Design Team.

The guidelines for entering are simple: create a new vintage or shabby chic project following the challenge theme, link it to your post (not just your blog) and also include a link to this challenge in your post. You can combine our challenge with up to 10 challenges (including this one) to be in with a chance for winning. If you are entering through a public forum (such as Instagram) you'll need to include the words 'Funkie Junkie Boutique Challenge'. Also, please turn off your Word Verification so our Design Team can leave comments on your blogs. Make sure you follow these rules as unfortunately, we have had to eliminate entrants from the prize drawing in the past.

Whatever you create, enjoy the making! We look forward to seeing your projects! This challenge is open through 11:55pm Eastern Time on Tuesday, February 22nd, 2022.

Wednesday, February 2, 2022

Guest Designer - Carole Jones

The Funkie Junkie Boutique welcomes Carole Jones (Craftilicious Creations) as our first Guest Designer for 2022. Carole was the Design Team's top choice for the Yuletide Delights challenge in December.


Hello, I'm Carole from the North West of England. I am delighted to be Guest Designer for the Funkie Junkie Boutique Blog Challenge. From an early age, I loved to get messy and make things and so over the years I've tried my hand at lots of different crafts including sewing, embroidery, crochet, knitting, cross stitch, batik and mosaic making. These days, however, I enjoy paper crafting and, in particular, mixed-media paper crafting with all the diverse 'sub-crafts' that mixed-media entails. I can happily spend hours in my craft room, losing all track of time. And, most probably like you, I spend an absolute fortune on craft supplies and yet still have an extensive, ever-growing wish list. I have quite an eclectic taste from cute and whimsical to shabby chic and vintage. I hope you'll pop over to visit my blog to see what I make.
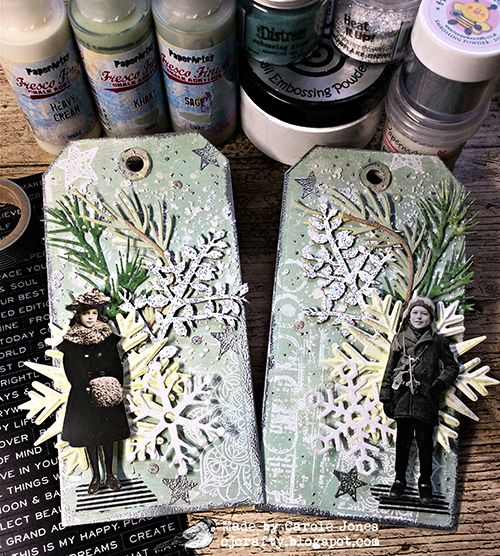
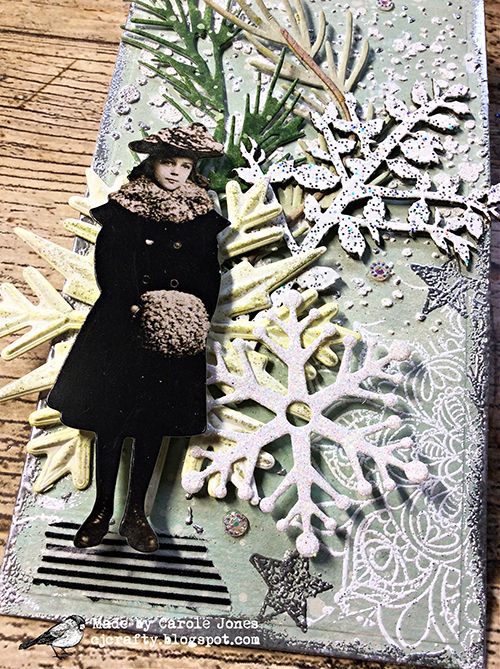
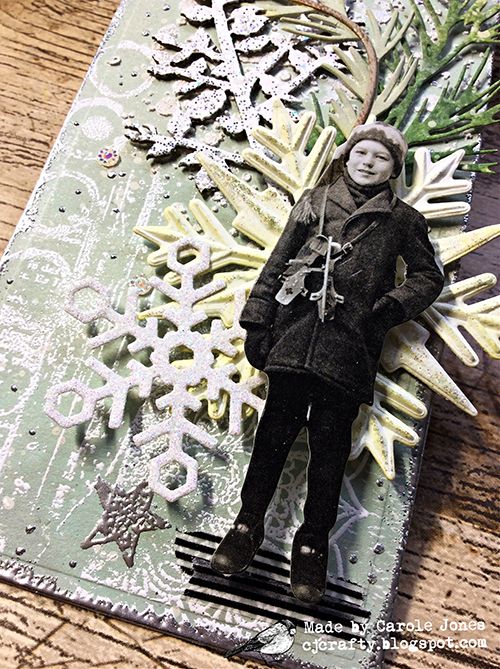
My 'Icy and Cold' project is a pair of tags featuring the beautiful, vintage paper dolls. I made the tag base using PaperArtsy paints, heat embossed AALL & Create stamps and grit paste through a Tim Holtz stencil. I added die cuts, chipboard and Impresslit elements to make a cluster and topped each with a paper doll. You'll find the details on my blog post.


* * *
Aren't these tags wonderful? The details are just exquisite, and we love the die cut and Impresslit snowflakes. Thank you, Carole, for sharing your inspiration for the "Icy and Cold" challenge, and for being our first Guest Designer of 2022.

Make sure you check out Craftilicious Creations to find out more about Carole's work. Then come on back and share your 'Icy and Cold' projects with us. The challenge can be found HERE and runs through 11:55 pm EST on Tuesday, February 8th.