Hello and welcome, I’m Janna and today we will be highlighting Tim Holtz Distress Embossing Glazes. In this blog post I will be showing you three ways to create with glazes and a few projects too.
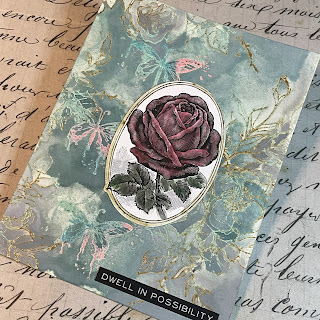
This week I have created a card using Distress Glaze as a resist for Distress Spray Stains. Click here for tutorial on Distress Embossing Glazes.
We will also look at using Distress Glazes to add color to large spaces for die cutting.
Then we will have a blast from the past and play with Distress Glazes and the Ranger Melting Pot for a journal spread.
For these techniques I used the following:
1: Embossing Resist: Distress Glaze Salvaged Patina, Broken China, and Kitsch Flamingo, embossing ink, Distress Spray Stains Speckled Egg, Salvaged Patina, and Distress Oxide Spray Stain Weathered Wood, stamp set CMS058 Fairytale Frenzy.
2: Texture and Die cutting: Distress Glaze Rustic Wilderness, Peeled Paint, and Vintage Photo, Sizzix die set Prehistoric, embossing dabber.
3: Melting pot and Distress Glazes: Distress Glazes Weathered Wood and Mustard Seed, Ranger embossing powders Silver and Black, Tim Holtz Filiment Bigz die.
For our first technique with glazes I will be doing an embossing resist. For the stamp I used the butterfly from the Tim Holtz Fairytale Frenzy set CMS058. Before stamping I also used the anti-static pouch to avoid smudges and smears.
Next I stamped with Tim Holtz Embossing Ink to stamp out three butterflies.
For embossing glazes I decided to use Kitsch Flamingo, Salvaged Patina, and Broken China.
Then I used my fingers and sprinkled the glaze over the stamped images.
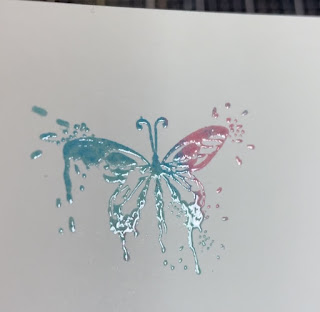
Next I gently tapped the extra off the paper leaving behind these multi colored butterflies.
Here is the end result after embossing.
With the butterflies embossed, I then decided to add in some more stamping. This stamp above is from the Floral Outlines set CMS430.
Once the images were stamped, I then added some Distress Glazes Salvaged Patina and Vintage Photo.
Again I tapped off the excess before embossing.
Here is where the resist part of this technique comes into play. I spritzed the paper with water and then added Distress Spray Stains Salvaged Patina, Speckled Egg, and Weathered Wood Distress Oxide Spray Stain.
Here are the finished results after drying the background with the Ranger heat tool.
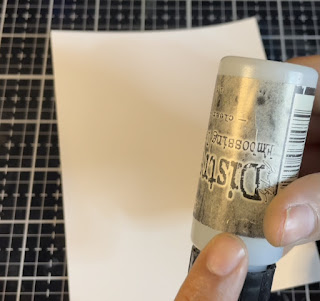
To start the next technique we are starting with a base of mixed media heavy white cardstock. First I added a layer of Distress Embossing Ink over the surface with the Distress Embossing Dabber.
Next I sprinkled on Peeled Paint, Vintage Photo, and Rustic Wilderness Embossing Glazes.
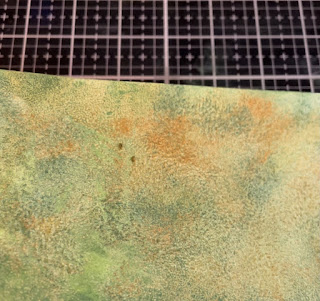
Then I shifted the Embossing Glaze around to cover most of the surface. In this case it is great to have some random gaps and empty spaces showing. Then I embossed with an embossing heat gun.
Now to fill in the gaps. Here I have used the Tim Holtz Pearlescent Distress Crayons Tree Lot and Bubbling Cauldron.
Then with a little water I smudged out the Distress Crayon.
Now it is time to die cut. For die cutting I am using this cute little stegosaurus from the Tim Holtz die set Prehistoric.
Below are the die cut parts. See video for assembly process. Click here for video.
Here is the finished stegosaurus.
For our final technique we will have a blast from the past and create using the Ranger melting pot. To start I turned the heat all the way up to the UTT setting. I am using the base pan of the melting pot, no additional project pan layer.
Here we will be using the Filament Bigz die. For the die cuts I am using heavy white mixed media cardstock. I placed the bulb portion of the light bulb in the melting pot and the sprinkled Ultra Thick Embossing powder over the top of it.
Once the Ultra Thick had melted I then sprinkled on a layer of Mustard Seed Distress Glaze.
When the glaze was melted I added a final layer of Ranger Holographic Embossing Powder. To extract these pieces I recommend using the Sizzix Tim Holtz Squeezers.
Next we colored the glass support with Ranger Black and Silver Embossing Powder.
Then I colored the filament with Ranger Silver Embossing Powder. I used about half a scoop of embossing powder to color this piece.
The last piece I added color to was the base of the light bulb. For this piece I used Weathered Wood Embossing Glaze and Ranger Silver Embossing Powder.
Here is the finished assembly of the light bulb die cut.
Below are the finished creations made with Distress Embossing Glaze elements. Part 2 process video click here.
Thank you so much for joining me here today for the Funkie Junkie Saturday Showcase. Until next time, happy crafting!
Janna~ 💕🎨💕
Janna~ 💕🎨💕
Below are some links for some inspired shopping at the Funkie Junkie.


No comments:
Post a Comment