Saturday, March 30, 2013

10% Facebook Discount

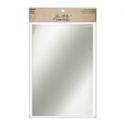
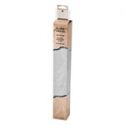
We're taking a little Easter break with Saturday StepXStep this week but we do have something special to offer you.  Earlier this week we rolled out our Facebook page for The Funkie Junkie Boutique.  And now we are having a coupon special and a raffle drawing for those who "like" us on Facebook.  Check us out, Like us and pick up your coupon code for 10% off at The Funkie Junkie Boutique.  That's an extra 10% off on the Artistic Outpost stamps that are on Friday Focus this week as well as your entire purchase.  We still have the sets of 24 Distress Paints for $89.99 and will receive a shipment of the new Metallic Distress Paints on Wednesday.

And we have all the new Tim Holtz rubber stamps, almost all the new dies and texture fades too.  So like us on Facebook and have yourself a little holiday shop!

Post Update:  You can now pre-order these metallic distress paints here.  The orders will be shipped on Thursday, April 4th.  

Friday, March 29, 2013

Friday Focus - Artistic Outpost Stamps

Welcome to this week's Friday Focus ! I hope you're all ready for the Easter break and have lots of Easter Eggs ready and waiting for you on Sunday ! It's Sue here and today I'm focussing on Artistic Outpost stamps. I have to say this was not hard for me at all as I love these stamps ! So, grab a cuppa and get comfy as there's lots to share !


 For those of you who aren't familiar with Artistic Outpost stamps they are vintage inspired stamps made from rubber. They come unmounted so you will need to mount them onto foam mount and cut them out. They stamp beautifully and the clarity of the images is fabulous.


I decided to make a triptych style card using the Tim Holtz Arch Frame die which Linda has in stock in the Funkie Junkie Boutique. I was inspired by a piece that the very talented Candy Colwell made recently.


 I cut 6 arches as I wanted to double up on each section.


 I gave all of the panels some colour using the Tattered Rose Distress Ink and then started to build up the stamping. I've used Archival Sepia ink which gives a more faded look, which is what I was after and I've also used Victorian Velvet Distress Ink.


The lady image has been masked off and then I've stamped the text over her and used a corner punch to round off one corner. The pencil was stamped and cut out and stuck to the same panel. The paper flowers have been rubbed with some Vintage Photo Distress Ink.


For the second panel I've masked off parts of the stamps and also parts of the card to achieve the look I was after, again using Sepia Archival ink.


This time I stamped and cut out the image and then watercoloured her using Distress Markers.


I've added some more paper roses, this time I've used Victorian Velvet Distress Ink to colour them. The lace is May Arts and I've cut it in half so that it would fit the space between my stamped areas. I've used a stencil with Victorian Velvet Distress Ink to add some interest over the text.


For the final panel I've done lots of stamping without using an acrylic block (I've not got round to mounting all of my stamps onto foam mount either !) I use this technique alot as it gives an imperfect image which is perfect for vintage projects. I've also done some more stencilling using Gathered Twigs Distress Ink. Apologies, I forgot to take a separate photo of this last panel before I put the whole thing together !


This is the project completed laying out flat. I've attached some seam binding by sandwiching it in between the front and rear panels. What I didn't do is make it tight enough and as a result the card doesn't stand as perfectly as I would have liked, but you live and learn !


I really wanted to get the stamp on this tag inked up, I love it ! I can see me using it alot, the image is so clear and I love the almost photographic quality to it. The tag has had lots of stencilling and stamping using acrylic paint. The text is actually one stamp and I've cut it up in to the separate words. The flower is metal and started it's life copper coloured, I then sponged acrylic paint over it and did the same to the filigree metal embellishment.


This is a card I made recently and just wanted to share it here so you can get a real feel for the diversity of these stamps.

I hope you've enjoyed today's Friday Focus and remember that Artistic Outposts stamps will have a 15% discount for one week, so get shopping !

Wednesday, March 27, 2013

Easter/Spring Gifts, But Not in a Basket!

We're back today to kick off week #2, the Funkie week, of our Easter/Spring Gifts challenge.  We'd love to see those hostess gifts or table decorations for Easter or other spring gathering but don't forget - they can't be in a basket.  Here's how our Funkie girls have interpreted Rebecca's challenge.  To get the full details, scroll down to week #1 of this challenge.


Linda Coughlin - The Funkie Junkie

******************Week 1*****************
Hello friends of Frilly and Funkie.  Thank you so much to everyone who played along with our last challenge "William Morris Style".  There were some drop-dead amazing pieces submitted and the design team is going to have a though time picking just one winner!

We are back with you today to kick off Rebecca's Spring/Easter gifts challenge.  Rebecca wants us to mix it up this year and think of some different ways to package those chocolate bunnies, sweet treats and little gifts of the season. A ticket a tasket but not in a basket!  To get you started, here are our Frilly designers with their take on the challenge theme, and since it's Rebecca's challenge this week, she outdid herself and created several samples.

Rebecca Deeprose - Paper Primrose


Sue Carrington - Stamping Sue Style 

Linda Coughlin - The Funkie Junkie


Monday, March 25, 2013

William Morris Style Challenge WInner

Good morning friends!  So great to see so many of you over on our new Facebook page!  Thanks so much for "liking" us!  And how did you like Jenny's William Morris challenge?  I loved the unique artistic nature of that challenge and we are back today to hand out our Funkie Favorite award for it.  Thanks so much to all of you who played along!  We all loved seeing the beautiful workmanship you put into your pieces for this challenge.  And it is always hard to choose just one winner, but the team has voted for this stunning wall hanging created by Laura from Laurart.
Laura has a wonderful step by step tutorial on exactly how she made this masterpiece so be sure to stop by her blog and check it out!  Congratulations to Laura for being our Funkie Favorite!

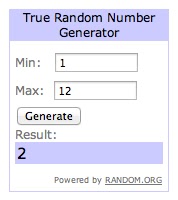
And now for our $25 gift certificate winner.  Random.org has been working for us again and has selected entry #2 Sue Andrew as our gift certificate winner.   Congratulations Sue!  Lots of great new stuff in at the Funkie Junkie Boutique.  Please contact me at thefunkiejunkie@gmail.com for your gift certificate code so you can start your shopping spree.
Congratulations again to our winners and thanks again to all who joined in the William Morris Style challenge.  And thanks to everyone who has entered our newest challenge Spring/Easter Gifts - But Not in a Basket!  You still have until April 2nd to play along.

Sunday, March 24, 2013

The Funkie Junkie Boutique on Facebook

Hi everyone and thanks for joining us here at Frilly and Funkie. We are proud to announce that there is now a Facebook page for The Funkie Junkie Boutique. Click HERE to see it. You will also be able to access it in future via the Facebook badge on the sidebar.


This will give you another option for accessing both the shop website and the latest Frilly and Funkie Challenge blog posts. And we'll be sharing all the latest news about new products in stock at the Boutique as well as sales and special offers.  We'd love to see you there. If you like what you see and don't want to miss the latest updates on our Facebook page don't forget to 'Like' us.

Saturday, March 23, 2013

Saturday StepXStep - Tim Holtz Alterations Brick Wall and Cobblestone

Greetings Everyone!  Donna here with your Saturday StepXStep.  If you recall I posted a Friday Focus in February spotlighting these cool dies from Tim's Sizzix Alterations line.  Today I'm going to show you how I created those brick and cobblestone walls/walkways.  I'll also show you how to use one to create a cobblestone facade on Tim's Rickety House die and share a couple more projects with you.  This is a pretty long post so bear with me.  I hope you'll stick around until the end!

Now, I'll admit that in the beginning I was stumped. I expected there to be a repeat pattern on the die that would make it quick and easy to cut the die with two different colors of paper and then exchange the bricks or stones from one color die cut to the other. But guess what??!! There are no repeat shapes in the stones or bricks in either of these dies! At least, none that I could find! So I decided that the best way to use these dies is to keep the entire strip intact and alter it as one piece.

In order to keep the die cut intact you need to stabilize it so that the stones or bricks don't fall out while you're distressing and/or coloring it. I created my samples using two different colors of Tim's Distress Core-dinations paper, Pumice Stone and Antique Linen. After running the die and paper through my Big Shot I very carefully trimmed the scraps from each side of the die cuts. When doing this you should handle them gently so that the bricks/stones don't start to pop out.


Next, carefully coat the back of the die cuts with a glue stick. Glue each strip down to a large piece of paper. I used a large piece of ledger paper but a 12x12 piece of scrapbook paper will work fine. Use a brayer to ensure that the pieces are securely glued down. Let the glue dry.


Once dry you can sand the pieces, if desired.


Now you're ready to add color! I used Distress markers to color to my pieces. On the cobblestone die cuts I added Ranger Glossy Accents to the stones for dimension.  Once you've finished coloring the die cuts you can cut them out of the backing sheet using scissors.  Below are the finished pieces and I love how they turned out!


Below are close-up photos of each piece and specific details on the colors I used.


Mossy Cobblestones: I colored the mortar between the stones using the Pumice Stone distress marker direct-to-paper. Then I used the detail water brush to pick up Forest Moss distress marker from my craft sheet to add color to each stone. Once dry I applied the glossy accents to just the stones.


Mossy Brick Wall: I used the detail water brush to pick up Black Soot and Forest Moss distress markers from my craft sheet to add color to each brick. Using a small paint brush I randomly applied the embossing fluid from a Ranger embossing paint dabber and then heat embossed with Peeled Paint distress embossing powder.


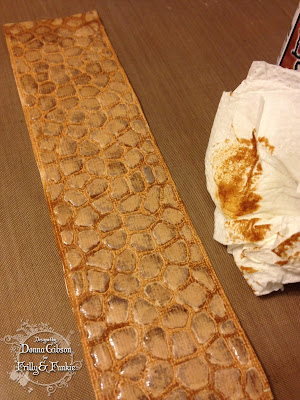
Brown Cobblestones: I used the detail water brush to pick up Walnut Stain distress marker from my craft sheet to add color to each stone.  See how the sanding causes the ink to be darker in areas!  Then I applied glossy accents to just the stones.


Red Brick Wall: I used the detail water brush to pick up Vintage Photo, Fired Brick and Walnut Stain distress markers, in that order, to add color to each stone.

It's as easy as that! It didn't take very long to make these and it would be really simple to create different variations of the dies and have them on hand for adding to a tag or other piece of art.

I wanted to use these as more than a wall or walkway so I added a stone front to the Tim Holtz Sizzix Alterations Rickety House die.  Below are the steps.  I learned something along the way...you may want to wait and add the glossy accents to the die cut as a last step. You'll see why as you read through these steps!


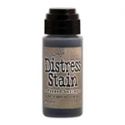
First, I wanted a darker background on the cobblestones so I covered the die cut with Distress Stain in Brushed Corduroy.

Wipe the piece down with a paper towel to remove the excess stain from the glossy stones.  Let dry.


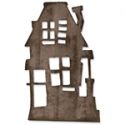
Die cut the Rickety House from a piece of brown Core-dinations paper.  Set the die cut aside.  Use the outside piece to trace the outline of the house onto another piece of Core-dinations.  I used a white pencil.  It doesn't matter what you trace with since you'll be covering it up with the cobblestones.


Cut the cobblestones apart and glue it down in sections over the tracing you made.  I did it this way so that I wouldn't waste any of the cobblestone piece.  You certainly can cut it in four even pieces and paste it down to create a rectangle but I wanted to use the piece as efficiently as possible.  Line the piece up to your die cut and run it through your machine.


As you can see, the stones coated with the glossy accents are rigid and might pull away from the backing paper when you die cut it.  So, you can either just glue them back on, as I did, or you might want to wait and add the glossy accents AFTER you've decided how to use the die cut strips.  If you do that you have to remember that the distress stain that I added in the first step will change the color of the stones and not resist as it did on my piece.


Here's the house after I glued the pieces back into place.


I wanted to create extra dimension so I decided to cut away certain pieces of the house so that I could replace them using the original house die cut from the brown Core-dinations paper.


Here's the final piece.  I sanded the original die cut before gluing the cobblestone front to it.  I added a black chimney.  Pretty cool!


I'm saving the piece above for another project.  Here's a tag I made where I used the mossy cobblestone die cut to create a stone front on Tim's Sizzix Alterations Arftul Dwelings die using the same steps detailed above.  Notice the steps beneath the door?  Those were cut from pieces leftover after die-cutting the Rickety House cobblestone front!  Also, I backed the little windows with a piece of mirror covered with the frosted film.  It looks just like glass!


And here's a pop-up card that I created using the mossy brick wall strip.  The base card and pop-up is the Sizzix Pop 'N Cuts Card with Circle Label die by Karen Burniston.  The die on the front is Karen's Fancy Frame die.  I attached the mossy brick wall to the circle pop-up label inside.


Thanks so much for making it through this long post!  I hope you enjoyed this Saturday StepXStep.  Why not use your brick wall and cobblestone dies to make something and share it with us on the Sunday Share post?!  We'd love to see what you create!

The following items that I used on my project can be found at The Funkie Junkie Boutique! The boutique offers it's merchandise at up to a 20% discount from the typical retail price! That's a great deal and you should check it out!!