Hello and welcome to Saturday and another step x step for you. It is Cec here and today I am going to share three very different gift card holders all made using Graphic 45 papers.
The first one will take the longest to make but it is not difficult. I started with a mitten template that I found years ago online and adjusted it so the cuff was a foldover to hide the card.
I have created a photo of the adjusted template for you. Just click on the photo and when the larger version comes up, right click on it and save it to your computer. To get the right size for printing, open your word processing program, create a new letter sized document with 1/4" margins in portrait orientation and insert this picture. It should be the right size automatically but if it doesn't look right, click on the picture and adjust the size to at least 9.76" high and 7.89" wide. If it is slightly larger that is no problem. Make sure you print it on card stock.
After the template was printed I fussy cut both images. Don't worry at this point if it is perfect. I scored the front of the mitten where indicated and then turned it over and trimmed the cuff so both the front and back were identical. When I added the cuff foldover part on the template I just added a rounded rectangle so it isn't an exact match to the cuff that was there until you make it identical.
Next I added lines to define the area where the gift card will sit. On the printed side of the piece with no foldover, I cut 1/2" off the top and then positioned the gift card so it hang over that cut edge by 3/8". I drew a line around the gift card, removed the gift card and drew lines down the outside of each vertical line at least 1/16" away from the previous line - 1/8" would have been better but I didn't have enough space.
Then I added 1/4" double sided tape on the outside of all three outside
lines. This will give you a little ease for the gift card to go in and
out.
The next step was to cover the pieces with patterned paper and of course I got started and once everything was glued together I realized I forgot to take photos of each step but here is the order that you want to add your paper. For this mitten I used papers from the Christmas Carol collection.
First I added paper to the inside of the foldover cuff making sure that it ended below where the other mitten piece was going to be attached. I just glued a piece of paper that was slightly larger than the area and once it is dry, turned it over and trimmed away the excess.
Next I covered the mitten piece with the tape on the unprinted side in the same manner and then set it aside.
Next I covered the back side of the mitten (gold paper) and finally the whole cuff, including the part that folds over to the front (striped paper).
Then I attached the mitten pieces together. I added liquid glue to the taped side of the mitten piece without the foldover making sure to go right to the edges but not to get any glue inside the taped area. I removed the backing from the tape and joined the two mitten pieces together starting at the bottom and moving upwards. Once the double sided tape hits the other part of the mitten it will be stuck so you want to work slowly to ensure you get the edges aligned before that happens. If it isn't exact, don't worry because once it is dry, you are going to trim around the whole mitten where required to make sure the edges are even.
Once trimmed, I took a sanding block and went around all the edges just to ensure it looked even and then inked all the edges with Vintage Photo Distress Ink.
The next step was to add a Velcro closure. I happened to find 3/8" clear self adhesive Velcro dots at Michaels that I thought would be perfect but as it turns out only the loop side is clear so I just inked the other side with some Vintage Photo DI. At this point I also decided to add some second and third generation script stamping on the gold patterned paper using Jet Black Archival Ink and a stamp from Recollections.
Now it was time to decorate. I cut one of the graphics from the paper pad and mounted it on some of the patterned paper. Next I die cut a little poinsettia using a couple more papers and added gold gems to the centre. This was mounted on top of some gold mesh and then I added a few more gems.
If you want to hang this on your tree, you will have to add a little ribbon hanger on the back of the cuff - I would add it on the side at the top.
Next I made a really simple pop-up gift card holder using black card stock and paper from the Mon Amour collection.
Using the measurements above, I cut black card stock and scored on the long side where indicated at 3", 4", 5" and 8". I made a slit on the 4" score line leaving 1/4" intact on each edge. This is where your gift card will be inserted. I used a corner rounder punch on the outside corners.
Then I cut patterned paper as follows:
For Inside
2 pieces 2 3/4" x 4"
1 piece 1 3/4" x 4"
2 pieces 3/4" x 4"
For Outside
2 pieces 2 3/4" x 4"
1 piece 1 3/4" x 4"
I didn't ink the edges of the patterned paper but you could before you adhere them to the card stock making sure to round any corners that will correspond with the rounded corners on the card stock. Note: On the outside there will not be any patterned paper on the two sections of the card stock between the 3" score line and the 5" score line.
On the outside, I added a piece of double sided tape right along the edge where I have printed the words Score 3" (Remember there is no patterned paper here). Next I folded the score lines - the 4" fold is a valley fold and the rest are mountain folds.
I removed the backing on the double sided tape and joined the two narrow sections together making sure they lined up on the edges. This is the pop-up portion that will hold the gift card. I added a couple of elements cut from from the paper collection for a bit of decoration. Then I closed everything up, lifted the flap and add a Velcro closure - for this one I added a half of a black self adhesive dot.
Finally I made a little tag style holder using papers from A Ladies Diary collection. I cut a tag from a scrap of card stock with a fancy die cut for the top. I am not showing you exact measurements for this one because it depends on the size of your gift card. Your tag should be long enough that 3/4" shows above the pocket and the gift card is completely hidden.
I used a self adhesive Reinforcement Label from Avery for the hole at the top. It was white so I just inked it with Vintage Photo DI along with the edges of the tag and added some satin ribbon. I placed the gift card on the tag, marked 1/4" on each side of two opposite corners and cut two slits to hold it in place.
Next I made a pocket from black card stock and have provided a basic pattern for you to follow. I cut a piece of card stock that was twice as long as I wanted based on the length of my tag and as wide as my tag plus 1/4" for ease and another 1/2" on each side for flaps. I scored on the dotted lines as shown, cut away the flap below the middle fold on each side and then cut the little angle piece away on the remaining flaps. I used double sided tape on the flaps to adhere the pocket together.
Finally I covered both sides with patterned paper and then made a belly band with two more papers, added a chipboard element from the collection and some burlap string.
As gift cards become more and more popular, it is nice to have a lovely way to present them rather than just putting them inside a card so I hope I have inspired you to create some fun holders for gift cards you purchase for your loved ones.
Saturday, July 30, 2016
Thursday, July 28, 2016
Guest Designer - Karen Heins
It is time to introduce our Guest Designer for the current challenge. Please say hello and give a warm welcome to Karen Heins of Kaleidoscope Sparkles. Karen was the Design Team's top choice for our Pastels and Pearls challenge.
"Hello, sweet friends! I am honored to be joining the Frilly and Funkie artists. They richly inspire me and it is a joy to craft alongside them. My heart drives my creativity, as most of my work is for charitable purposes. Every detail is chosen for a specific reason, where trims and design become far more than what they appear. Lace sends ruffles of love into broken hearts, while sparkling flowers offer a glimmer of blossoming hope. My project today serves such a purpose."
"Hello, sweet friends! I am honored to be joining the Frilly and Funkie artists. They richly inspire me and it is a joy to craft alongside them. My heart drives my creativity, as most of my work is for charitable purposes. Every detail is chosen for a specific reason, where trims and design become far more than what they appear. Lace sends ruffles of love into broken hearts, while sparkling flowers offer a glimmer of blossoming hope. My project today serves such a purpose."
"Kathy's theme of "By the Sea!" inspired a frilly wall hanging. This gift is intended to whisk away the recipient to nature's beauty, where wishes are whispered into the sea. Rough, yet beautiful, waters release into a whimsical sky, where everything has turned rosy with love. The waves are stenciled with colored texture paste, making them Salt Water Taffy pink as they carry a special wish. White sandy beaches inspired my choice of pure white flowers, which are dusted with sparkling sunbeams. Seashells and pearls are nestled within... sweet gifts from the sea. Chipboard pieces are covered in Shabby White Frantage for touches of sunny gold. A wispy ocean breeze engulfs my little scene, created with two types of ruffly trims."
* * *
To get more details about the poetry in Karen's words and her frilly wall hanging just pop over to her blog. Once you have checked out her lovely work, come back and share your sea-themed project with us. The current challenge runs until August 9th at 11:55 pm EST.
Monday, July 25, 2016
Huge Blowout Clearance Sale at The Funkie Junkie Boutique!
Just a quick heads up, friends. We are having a huge clearance sale over at The Funkie Junkie Boutique. It's 50% off retail on everything in our Clearance section. Great products from favorite brands and designers. Hurry before we sell out. Sale ends July 31st.
SaveSave
Friday, July 22, 2016
Friday Focus - Wendy Vecchi Stamps
Hi everyone and welcome! It's Jenny here with a brand new Friday Focus. This our opportunity to share with you ideas, tips and techniques for using a specific product or range currently available at The Funkie Junkie Boutique. And even better news, that product then has an extra 15% discount added through the coming two weeks!
In the spotlight this time are Wendy Vecchi stamps, a real favourite with the whole Design Team. When trying to figure out a way to show them being used for a new canvas I was inspired by Wendy's own gorgeous home decor, iconic American red barns and the Folk Art/Primitive Art movements. So, from all of that here's my finished canvas (click on each image for a closer look - and trust me, you need to get in all close and personal to see the detail of these beautiful stamps!)...
Wendy loves her flowers so I added a floral display over the background. The hearts were covered in one of Tim Holtz Textile Surfaces and the Mat Minis Flower Pot with the remains of the coloured Texture Paste. Wendy often shows how you can use parts of larger stamped images so I used the Spring Bouquet SiSi set on Newsprint paper and coloured with more Distress Paints. Once glued/sealed to some Blackout Clearly for Art they were cut out and shaped with a heat tool before being stacked and arranged. Finally I added a single phrase from the Just Say It background stamp - as well as working beautifully for a background in its own right (as shown HERE) this stamp gives you so many useful phrases all in one!
This was such a fun project to do and I hope you're inspired to check out more of Wendy's fabulous designs, especially while they are carry that extra 15% discount at The Funkie Junkie Boutique!
For now take care of yourselves, Jenny xxx
In the spotlight this time are Wendy Vecchi stamps, a real favourite with the whole Design Team. When trying to figure out a way to show them being used for a new canvas I was inspired by Wendy's own gorgeous home decor, iconic American red barns and the Folk Art/Primitive Art movements. So, from all of that here's my finished canvas (click on each image for a closer look - and trust me, you need to get in all close and personal to see the detail of these beautiful stamps!)...
The background represents those red barns, though this is one that has weathered and aged over time. I used a bunch of little wooden canvas stretcher pieces and gave them a wash with layers of Walnut Stain, Weathered Wood and Barn Door (of course!) Distress Paint, rubbing each dried layer with a wax candle to provide some resist reaction. Many of the traditional barns appear to have white door and window frames but for this I went with another American icon, the traditional picket fence. By first adding a layer of Texture Paste coloured with Potting Soil Archival Reinker through the Picket Fence stencil the perfect base was created on the uneven surface to add a layer of Crackled Texture Paste and Picket Fence Distress Paint. I couldn't resist stamping the Botanical Register background stamp using Ground Espresso Distress Paint over the top for a little detail. I love that stamp because it adds just a small amount of vintage text where it's needed (as seen HERE).
This was such a fun project to do and I hope you're inspired to check out more of Wendy's fabulous designs, especially while they are carry that extra 15% discount at The Funkie Junkie Boutique!
For now take care of yourselves, Jenny xxx
Wednesday, July 20, 2016
All Lined Up
Hi everyone and welcome! Jenny here as your host for our latest challenge, 'All Lined Up' For this one we need you need to think in straight lines! Be it rows or columns, stripes or even grids make sure those vertical and/or horizontal lines or rows of things are a clearly visible part of your vintage or shabby chic projects (the edges don't count!)
The winner will earn the chance of a Guest DT spot here at Frilly and Funkie, and everyone who enters and follows the rules will go into the draw for the chance to win a $25 spending spree at The Funkie Junkie Boutique. And there are Top 3 Badges for three further outstanding entries, chosen by the Design Team.
The guidelines for entering are simple: create a new vintage or shabby chic project following the challenge theme, link it below to your post (not just your blog) and also include a link back to this challenge in your post. You can combine our challenge with up to 10 challenges (including this one) to be in with a chance of winning. If you are entering through a public forum please use keyword F&F. Also, please be sure to turn off your Word Verification so our Design Team can leave comments on your blogs.
In this our second week we take a look at the gorgeous inspiration from the Funkie side of the Design Team to give you even more ideas (just click on each image for a closer look);
It's time to see some amazing inspiration from the Frilly side of the Design Team to give you some ideas (just click on each image for a closer look):
Kathy Clement - Kathy by Design
The winner will earn the chance of a Guest DT spot here at Frilly and Funkie, and everyone who enters and follows the rules will go into the draw for the chance to win a $25 spending spree at The Funkie Junkie Boutique. And there are Top 3 Badges for three further outstanding entries, chosen by the Design Team.
The guidelines for entering are simple: create a new vintage or shabby chic project following the challenge theme, link it below to your post (not just your blog) and also include a link back to this challenge in your post. You can combine our challenge with up to 10 challenges (including this one) to be in with a chance of winning. If you are entering through a public forum please use keyword F&F. Also, please be sure to turn off your Word Verification so our Design Team can leave comments on your blogs.
In this our second week we take a look at the gorgeous inspiration from the Funkie side of the Design Team to give you even more ideas (just click on each image for a closer look);
Sue Carrington - Stamping Sue Style
Jenny Marples - Pushing The Right Buttons
Linda Coughlin - The Funkie Junkie
***************************************************************
WEEK ONE
It's time to see some amazing inspiration from the Frilly side of the Design Team to give you some ideas (just click on each image for a closer look):
Kathy Clement - Kathy by Design
Nancy Dynes - Tattered Treasures
Now it's over to you; how will you include lines, rows or columns in your project? We'd love to see so you can be in with a chance to win. And remember to come back tomorrow to see what our latest Guest Designer has to share with us.
For now take care of yourselves,
Jenny xxx
Monday, July 18, 2016
Challenge Winners - All in The Family
Here we are again at the beginning of a new week and it's time to announce our latest winners here at Frilly and Funkie. Thank you so much to everyone who took the time to enter our 'All in The Family' challenge. There were lots of fabulous projects family based projects from you and the Design Team really enjoyed reading the stories behind each of them. After much deliberation we chose the overall winner, #18 Inkysplatters.
And finally Random.org has chosen a lucky winner for the $25 gift certificate to The Funkie Junkie Boutique. Our congratulations this time go to #19 Barb Turpin!
A huge thanks from the Frilly and Funkie team to everyone who took part in this challenge and congratulations again to our winners. Please email Linda at thefunkiejunkie@gmail.com for the codes for the winner's badge and to give us your email address for the Guest Designer details (Inkysplatters) for the Top 3 badges (Jane, Autumn and Susan) and for the gift certificate details (Barb).
Our current challenge, 'All Lined Up' runs through Tuesday, July 26th. We hope to see you entering this time around so that you too can be in with a chance to win.
Have a great week everyone!
Here's a glimpse of an amazing memory album, constructed over two weeks to hold precious family photos. We highly recommend you hop on over to see the whole album HERE. Congratulations Inkysplatters on being our favourite for the 'All in The Family' challenge and winning the opportunity to be a Guest Designer here at Frilly and Funkie for a future challenge.
And now for the next three winners of our Frilly and Funkie Top 3 Badges; this week's choices are... #1 Jane Tyrell, #7 Autumn Clark, and #17 Susan (Paper Puddle)!!! Please email Linda at thefunkiejunkie@gmail.com for the codes for the Top 3 badges so that you can display them proudly on your blog.
And now for the next three winners of our Frilly and Funkie Top 3 Badges; this week's choices are... #1 Jane Tyrell, #7 Autumn Clark, and #17 Susan (Paper Puddle)!!! Please email Linda at thefunkiejunkie@gmail.com for the codes for the Top 3 badges so that you can display them proudly on your blog.
A huge thanks from the Frilly and Funkie team to everyone who took part in this challenge and congratulations again to our winners. Please email Linda at thefunkiejunkie@gmail.com for the codes for the winner's badge and to give us your email address for the Guest Designer details (Inkysplatters) for the Top 3 badges (Jane, Autumn and Susan) and for the gift certificate details (Barb).
Our current challenge, 'All Lined Up' runs through Tuesday, July 26th. We hope to see you entering this time around so that you too can be in with a chance to win.
Have a great week everyone!
Saturday, July 16, 2016
Saturday Step by Step - Christmas Stripes
Hello Everyone, Pamellia here! So glad you dropped in to Frilly and Funkie today for my Saturday Step by Step. I have put together a complete tutorial on the Christmas card I made for Jenny's "All Lined Up" challenge. I really had fun playing with my wonderful new products from The Funkie Junkie Boutique!! I hope you enjoy!
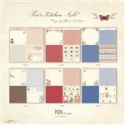
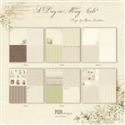
I cut three panels from the Pion Design paper stacks Siri's Kitchen and A Day in May, sizes 6", 5.5" and 5" squared. I layered them onto slightly larger panels of white, distressed all the edges and layered them together with foam squares.
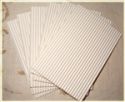
I cut a panel of corrugated cardboard about 5" x 3".
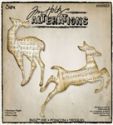
I cut a deer from striped Pion Design paper using the Tim Holtz Reindeer Flight die, and edged it with Potting Soil Archival ink from Ranger.
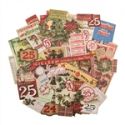
I chose a great image from the Tim Holtz Festive Ephemera pack and distressed it.
Some seam binding that I coloured with Distress ink spray Walnut stain and then tied in a bow.
I cut a doily with a Prima die and pulled out a couple of these fabulous wood chippies from Southern Trading Co.
I made this ruffled ribbon using May Arts ribbon. To see a full tutorial on how to create these wonderful ruffles, visit my Friday Focus on May Arts Ribbon here.
Time to layer a few things together to make sure the base design has a good balance.
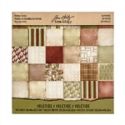
Next I cut some leaves out of a striped page from the Tim Holtz Yuletide paper pad and edged them with Potting Soil.
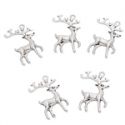
I used some of this lovely baker's twine, a beautiful reindeer charm and some jingle bells to add a little extra festive cheer.
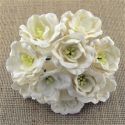
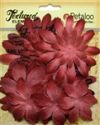
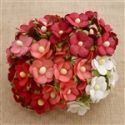
I added some Petaloo flowers and Wild Orchid flowers as well as some Tim Holtz Mirror Stars.
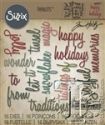
Some last minute touches with some Prima Gesso, Holiday Words die, a little clothes pin, Chit Chat stickers and a spritz of Picket Fence for good measure.
I hope you enjoyed my tutorial. Please feel free to let me know if you have any questions. There's still lots of time to enter our current challenge "ALL LINED UP". We'll be back first thing on Monday to announce the winners of our last challenge, so make sure to check in for that.
Thanks for stopping in!
Hugs, Pamellia :)
If you would like to try some of these wonderful products, they are available at The Funkie Junkie Boutique:

Subscribe to:
Comments (Atom)


