Monday, December 23, 2019

Challenge Winners - It's The Holidays

Today we announce our final winners of 2019 from the 'It's The Holidays' challenge. Thank you to everyone who shared their beautiful festive projects with us. We were totally spoiled for choice with so many amazing entries.


The team chose this stunning vintage Christmas card by #31 Zowie Dixon (Crafts from the Fairy Den) as our overall winner. We loved the carefully coordinated layers of papers with the vintage image all topped off with a music score poinsettia and kraft pine needles. Make sure to check it out HERE. Congratulations Zowie on being our favourite and winning the opportunity to be a Guest Designer here at The Funkie Junkie Boutique Blog for a future challenge. You will be contacted with all the details.

And now our picks for the three winners of the The Funkie Junkie Boutique Blog Top 3 Badges for this challenge. In numerical order they are; #7 Ann Chuang (Ann Chuang Crafts) #37 Jacqui Chimes (Jacques Junque) and #44 Elly (Elly's Creaties). Please email Linda at thefunkiejunkie@gmail.com for the codes for the Top 3 badges so that you can display them proudly on your blog.


And we have a randomly chosen lucky winner for the $25 gift certificate to The Funkie Junkie Boutique. Our congratulations this time go to #5 Vicki R (Heartful Validation of Vicki)! Please email Linda at thefunkiejunkie@gmail.com for the gift certificate details. Thank you again from all of us here at The Funkie Junkie Boutique Blog to everyone who took part in this challenge and congratulations to all our winners.


So that's it for 2019 here at The Funkie Junkie Boutique Blog! Thank you to everyone for joining us and sharing your creativity throughout the year. You'll be pleased to know we will be back on January 4th 2020 so make to join us then.

For now, from Linda, her team, and all of The Funkie Junkie Boutique Design Team, we wish you a very Merry Christmas and a Happy New Year xxx

Saturday, December 14, 2019

Saturday Showcase - Holiday Tags

Welcome to the last Saturday Showcase of 2019 here at The Funkie Junkie Boutique Blog. To round off the year the Design Team have all created tags with a holiday theme and each one has it's own tutorial. So this time you get six for the price of one! All the tags are shown below (click on the images to see them up close) together with a link to each of the blog posts that will explain in more detail how they've been made.

Maggi Harding - Scrap, Travel & Bark


Graphic 45's 12 Days of Christmas is one of my favorite Christmas collections and you can still find this Deluxe Collector's Edition in The Funkie Junkie Boutique.   My tags usually feature lots of dimension and layers that I create by using dimensional foam tape between my paper layers. I also like to add diecut layers like the rectangular frame behind the Joeux Noel cut-apart. Join me on my blog for a tutorial on how to make this card. I am really miserly with my paper and I'll show you some ways to use your scraps and save paper!

Cec Wintonyk - CW Creations


I am calling my tag Snowflake Tag as it features a number of the Tim Holtz snowflake dies.  The little snowflakes have been cut from plain card stock and covered in clear glitter while the large snowflake has been cut from Tim's metallic kraft stock.  The background is old music paper that was painted and then textured with texture paste and some silver embossing.  A little seam binding with distress inks and combined with some fun fibers tops the tag off.

Sara Emily - sarascloset


My tag features several products from Linda's shop perfect for Christmas crafting, and I can use them for projects throughout the winter season. I covered a Collage Frame with one of Tim Holtz fabulous retro designs from the Christmas Worn Wallpaper pack and adhered this to a small Etcetera Tag to frame a Tim Holtz Holiday Greetings sentiment.  I used Tim's Radiant 3D Impresslit and Fanciful Snowflakes Thinlits to embellish my snowy scene.  If you would like more details and to see how this goes from being Christmas home decor to a functional gift card holder, please drop by my blog.

Ginny Nemchak - Polly's Paper Studio


I created this quirky and whimsical Christmas tag with layers of the patterned papers from the Stamperia Blue Stars collection.  The image is fussy cut and added with spacers for loads of dimension.  The Antique Gold Mesh ribbon is wrapped around the bottom of the tag for texture. Pretty coordinating Prima flowers create a lovely arrangement when filled in with Die Cut Skeleton Leaves and loopy twine bows. Last but not least a few metal charms and a vintage button are the perfect finishing touch. For a full step out tutorial on this tag please join me on the Polly's Paper Studio Blog

Suzanne Czosek - Suzz's Stamping Spot

Sizzix Christmas Ribbon Sizzix Funky Festive Greens Stampers Anonymous Yuletide Gatherings for The Funkie Junkie Boutique

I was inspired by a cooking challenge where they were asked to create an all white design on their Christmas Baked goods. I love how soft it can look when you mix layers and textures of white. The background is stamped with Versamark and embossed to add a soft layer on the tag. The next layer is a mix of die cut flowers, sentiment, berries and branches. They are accented with a few metallic droplets painted white with a layer of frost. For a few more close ups and details pop on over to Suzz's Stamping Spot

Jenny Marples - Pushing The Right Buttons


I've created a set of gift tags by using a patchwork of papers for the background, painting, stencilling and stitching over them before adding stamping and embossing. With stamped seam binding ribbons and brass Christmas themed charms these are now ready to adorn parcels under the tree this year. Find out more about how these came together over on my blog.

**********

We hope you've enjoyed seeing how these Holiday tags were made. Remember there's still time to link your own Holiday makes to the current 'It's The Holidays' challenge which runs through Tuesday, December 17th to be in with a chance of winning. We'll be back on Monday December 23rd to announce the winners so make sure to join us then.

Monday, December 9, 2019

Challenge Winners - Lovely Leaves

Today we announce our winners from the 'Lovely Leaves' challenge. Thank you to everyone who shared their wonderful projects featuring leaves. We really enjoyed seeing them all.


The team chose this gorgeous set of Thanksgiving cards by #14 Ann Barnes (aksbarchitect CREATES) as our overall winner. The sophisticated design and finish of these cards pays homage to the beauty of Fall foliage.  Make sure to check them out HERE. Congratulations Ann on being our favourite and winning the opportunity to be a Guest Designer here at The Funkie Junkie Boutique Blog for a future challenge. You will be contacted with all the details.

And now our picks for the three winners of the The Funkie Junkie Boutique Blog Top 3 Badges for this challenge. In numerical order they are; #1 Esther Asbury (Shoregirl's Creations) #6 Elly (Elly's Creaties) and #18 Lyla Larimore (A Chief's Wife's Heart's 'aFire). Please email Linda at thefunkiejunkie@gmail.com for the codes for the Top 3 badges so that you can display them proudly on your blog.


And finally we have a randomly chosen lucky winner for the $25 gift certificate to The Funkie Junkie Boutique. Our congratulations this time go to #3 Donna T (Lakefront Stamping Creations)! Please email Linda at thefunkiejunkie@gmail.com for the gift certificate details.

Thank you again from all of us here at The Funkie Junkie Boutique Blog to everyone who took part in this challenge and congratulations to all our winners. The current challenge, 'It's The Holidays' runs through Tuesday, December 17th and we look forward to seeing your entries!

Have a great week everyone.

Saturday, December 7, 2019

Saturday Showcase -- Prima Christmas in the Country and Tim Holtz Idea-ology Christmas Tokens and Quote Chips

Hello friends and Funkie Junkie Boutique fans. Ginny here to share this week's Saturday Showcase. I'll be sharing how to create dimensional frames with mixed media supplies then using them on 2 cards with different styles.


Here's a schneaky peek of the completed cards. I love that they have similar elements but by changing the background papers I was able to get two distinctly different looks.


I pulled out all my beautiful Funkie Junkie Boutique Christmas Crafting Supplies and came up with my plan to create dimensional frames.  Having all the options gathered in one spot helps me to decide on a design and color scheme. 


I decided that the buffalo plaid patterned paper from the Prima Christmas in the Country 8 x 8 paper pad would be my common element for both cards. I was able to get 2 frames from one sheet.  I cut the rectangles pieces being careful to have the darker blocks around the outside. Next I used a  rectangle die to remove a portion out of the middle to create the frame shape. 


After swiping an anti static pouch over the surface of the paper I stamped the scripty font from the Prima Art Alchemy Stamp #6 by Finnabair in a random pattern around the frame using clear medium. I sprinkled on Liquid Platinum embossing powder from Ranger onto the stamped impressions then heat set it to create a shiny finish.


I added adhesive foam spacers to the back to create the dimension. Faux snow added randomly around the outside edge gives the frames a frosty look.  The frame on the left has the stamping right on the surface without the anti-static powder and it adds to the mottled look of the embossing. I like them both equally. You can decide how much is right for your project.


For the first card I chose the more altered frame. I think it adds a subtle frosty look that helps the frame look more wintry.


This card has a very traditional color scheme. The paper layers come from the 8 x 8 Prima Christmas in the Country Paper Pad. I used red cardstock between the layers to help keep the patterns from looking busy.


The focal image in the frame also comes from that same paper pad. What's more wintry than a big red barn covered in snow? I live out in the country so trust me on this I see them all the time!


Stacked trims are added between the layers to create a textural element. That red trim is simply gorgeous and I wish I had a whole roll just to keep in my stash as decor!


Holiday details come from the Christmas in the Country Ephemera Pack. The wreath is in the frame and the 25 is on the frame adding depth and dimension. I trimmed down the Tim Holtz Idea-ology Christmas Quote chip for a perfect fit then topped it off with pretty flowers and a loopy twine bow.


These flowers are a combination of made by me and ready made flowers from Prima. I've arranged them with die cut foliage for a nice full look. Last but not least is the Idea-olgy Christmas Token and silvery pine cone charm. I've added the Ice Resin Glass Glitter in Antique in Antique Gold for added sparkle.


To change up the look of this card I added a layer of pretty checkered pink paper from the 6 x 6 Prima Dulce Paper Pad and pink polka dot ribbon. Now I have a shabby chic inspired card with the same layout as the first card.


That darker colored frame looks great with the lighter color scheme of this card as the Santa image has a darker outfit and balances perfectly.


Like on the first card I chose a stacked rectangle layout with cardstock to separate the layers. This time I went for a soft dove gray. There is also spacers between the layers for added depth.


This time around I picked images and a sentiment from the Christmas in the Country Chipboard Stickers. That gold foiling is extra festive!


I've also swapped out a dimensional flower for a floral chipboard sticker. A few tiny stars from the ephemera pack are added to the layers.


Since I went outside the actual Christmas collection for the patterned paper I also added some not holiday flowers. These are just sweet and simple pink and white Prima flowers to coordinate with the paper. The same charm arrangement as on the first card are tucked under the flowers for the perfect finishing touch.

I hope this inspires you to create custom dimensional elements to add to your paper crafting.  What better way to get perfectly coordinating add ons that fit just right? Also consider getting all your supplies out to help you come up with unique combinations for a project that's uniquely your style.

Wishing you all a happy and productive day!
Ginny

Links for all products used on these cards from The Funkie Junkie Boutique.....


Thursday, December 5, 2019

Guest Designer - Alison Bomber

Please say hello to our Guest Designer for the last challenge of 2019, Alison Bomber of Words and Pictures.  Alison was the Top Pick from the It Looks Real challenge.


Hello all. I’m delighted to be here as a guest today on one of my all-time favourite challenge blogs. First here’s a little about me, and then we can get on to the important stuff - the crafting!

My creativity was never really on the visual side - I was more the words, music, books, theatre type. When I became a freelancer in Spring 2012 after eight years at the Royal Shakespeare Company as a Text and Voice Coach, it was supposed to give me more time for friends and family. I had no idea that within weeks I would be in thrall to a whole new creative passion - stamps/inks/paints/texture/stencils - you name it, I want to play with it! There's always so much to learn, discover and explore. Now I have to balance the two worlds - hence the name of my blog, Words and Pictures. So much for friends and family…

I love mixed media work, with lots of layers and techniques, but sometimes some simple inking and stamping is enough to make me happy. Given how busy we all are at this time of year, I’ve kept today’s Christmas gift tags pretty simple… and here they are.


I’ve wrapped my Christmas presents in brown parcel paper for years - each year with slightly different decorations. After all, you can’t go wrong with “brown paper packages, tied up with string”, can you? These tags will go on some of my kraft paper packages this year. Winter greenery is my favourite form of Christmas decoration, so that’s what I chose to add to the pre-cut kraft tags, along with some sparkling berries.


The fir branches are all cut using Tim Holtz’s Holiday Greens Mini Thinlits, and some of his glorious seasonal sentiments take pride of place, embossed in bright white powder. It’s all finished off with some snowy splatter and as soon as I’ve bought some presents I can start wrapping them!

* * *
Pop on over to Alison's blog post to check out the details for her tags and then come on back and share your holiday projects with us. The challenge can be found HERE and runs through 11:55 pm EST on Tuesday, December 17th. Don't forget to visit on Saturday when one of our designers will have a new Saturday Showcase with lots to inspire you.

Wednesday, December 4, 2019

December Craft Box Give-away and Our November Winner


It's time again to draw a winner of our monthly craft box give-away.  Our November winner is Kim H. who will be getting our Christmas-themed box of papercrafting supplies.  Congratulations to Kim and a huge thank you to everyone who entered our drawing.


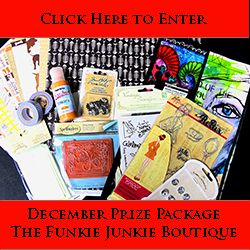
We have a nice assortment of stamps, embellishments and paint in our December craft box.  You have until December 31st to enter and we will be drawing a winner the first week in January.  Entering is easy!  Just click on the image below to land on our entry page.  Best of luck to all who enter!


It's the Holidays Challenge

Hello everyone, Maggi here to host the current challenge at The Funkie Junkie Challenge Blog, It's the Holidays.  This is such a busy time of the year that it's hard to find anytime to pursue our paper passion!  With that in mind, I designed a challenge that will hopefully give you some needed crafting time, while making something useful for the holiday season that is upon us! For this challenge, create a vintage or shabby chic card, tag, gift box, bag, anything holiday related, that you can use over the holidays.   That's it, give yourself a break and sneak off to your studio and craft a while!

The winner will earn a chance to be a Guest Designer at a future date here at The Funkie Junkie Boutique blog, and everyone who enters and follows the rules will go into the draw for the chance to win a $25 spending spree at The Funkie Junkie Boutique. There are also Top 3 Badges for three additional outstanding entries, chosen by the Design Team.

The guidelines for entering are simple; create a new vintage or shabby chic project following the challenge theme, link it below to your post (not just your blog) and also include a link back to this challenge in your post. You can combine our challenge with up to 10 challenges (including this one) to be in with a chance of winning. If you are entering through a public forum (such as Instagram) you'll need to include the words 'Funkie Junkie Boutique Challenge'. Also, please be sure to turn off your Word Verification so our Design Team can leave comments on your blogs. Make sure you follow these rules as unfortunately, we have had to eliminate entrants from the prize draws in the past.

Our amazing Design Team are here to kick you off with their projects for this challenge. Simply click on their blog names to find out more about their makes.

Maggi Harding - Scrap, Travel & Bark!


Ginny Nemchak - Polly's Paper Studio


Cec Wintonyk - CW Creations


Sara Emily - sarascloset


Jenny Marples - Pushing The Right Buttons


Suzanne Czosek - Suzz's Stamping Spot

Victorian Cone Stampers Anonymous Advert Sizzix Tim Holtz Chapter Two Crochet Sizzix Snowflake For The Funkie Junkie Boutique

Now it's your turn to get creating - we'd love to see your holiday creations. Use the link below to enter and be in with a chance of winning.