Wednesday, January 30, 2013

Spruce It Up!

Welcome back to our second week of Rebecca's Spruce it Up challenge.  We've had some fabulous projects entered into our challenge and it still has another week to run  Here's some more inspiration for you from our Funkie team.  Hope you will play along!


**********Week 1 Post**********
Hello!  Rebecca is our host this week but before we dive into it, all of us at Frilly and Funkie want to say how thrilled we were with the participation in our first challenge of 2013.  What a super welcome you all gave our sensational new designers. We hope you will all be back again to play with us for this challenge.

Rebecca's challenge to you is to Spruce It Up!  Take a look around your desk or workspace and the things on it that you use to organize, communicate and run your life. It's amazing how we stop really seeing those everyday items! Think of calendars, birthday/anniversary planners, writing implements, checkbooks, iPads, index card files, cell phones, file folders, etc.. Then, set yourself the challenge of making one of those 'plain jane' items into something that makes you smile, every time you use it!  And to get you started thinking in that direction, here is some inspiration from our Frilly girls:

Sue Carrington - Stamping Sue Style

Linda Coughin - The Funkie Junkie

Whatever your vintage style, Frilly or Funkie, you are welcome to play along with our vintage inspired challenge. You may upload your project at any time. If using a public forum, please use keyword F&F. Please be sure to provide a link back to our challenge in your post. Please please please be sure to turn off your Word Verification so our design team can leave comments on your blogs. And don't forget, you can only play in 4 other challenges besides ours.   We had a few entries that didn't qualify last time because they had entered too many challenges.  From now on, we will be deleting those entries.  

Monday, January 28, 2013

Winner, Winer, Chicken Dinner...er rather Tag and Muse

...but chicken dinner rhymed better :)  Good Monday morning friends!  Linda here in a great mood 'cause the UPS man just unloaded a pile of boxes with RANGER written on the sides.  If you are one of the 9 lucky people who purchased the full set of Distress Paints for $89.99, they will be going out today as well as others who will be getting inky with some of the new Tim Holtz stamp sets and the new Dylusion sprays from The Funkie Junkie Boutique.

But back to the business at hand.  Thanks so much for kicking off your week with us here at Frilly and Funkie.  We are here today to announce the winners of the recently closed Follow Your Muse challenge, but before we do that, an apology is in order.    I am so sorry that we never announced the winners of the Christmas Tag challenge from December.  I was in the middle of moving and with the Christmas rush, that post just got forgotten.  We had 25 entries and thank each and every one of you for playing along at that very busy time of year.  Our Funkie Favorite was Alison of Words and Picture's sensational Star of Wonder tag with all sorts of silvery and blue/gray loveliness.

And of course, we have a random draw winner too.  The winner of the $25 shopping spree at The Funkie Junkie Boutique for that challenge is entry #2 - Sharon R. of Sharon's Showcase.
Congratulations to both of our Holiday Tag winners!

And thank you all for starting the new year off with Frilly and Funkie.  We had a record number of entries for the Follow Your Muse challenge and had a wonderful time visiting all of your blogs and looking at your seriously wonderful pieces of art.  The design team has selected Brenda of Bumblebees and Butterflies as our Funkie Favorite with this sensational piece:
Brenda followed her muse into creating with some new techniques.  Just look at that gorgeous background her muse led her to create.  Congratulations Brenda on being first our Funkie Favorite of 2013!

Random.org has also selected a $25 Funkie Junkie Boutique gift certificate for this challenge.  Our winner is #32 Cindy from The Creative Pointe.  Congratulations Cindy - we hope you will have a ball shopping at The Funkie Junkie Boutique.  

Another big CONGRATULATIONS to all of our winners and a thank you to our readers and to all who played along in our challenges.  Winners, please email Linda at thefunkiejunkie@gmail.com for your winner codes.  

And don't forget about our Spruce it Up challenge running through February 5th.  What can you spruce up for the new year?  Join our challenge and have some fun!

Saturday, January 26, 2013

Saturday StepXStep - Ranger Foil Flowers

Well it is my turn (Trace ) to share a stepxstep today and I want to show you how to make some dimensional metal flowers that can be grunged up or made to look delicate.These are made using ranger foil, embossing folders and either paint or alcohol inks ..so here goes:

Here are the finished flowers, on some projects to show you how they can be made to look quite different.
and then a more grungy look 
I started by die cutting the flowers using ranger foil sheets that I had  stuck on to some manila cardstock.  To make the dimensional flowers I used two larger and one smaller flowers, cut from the tattered floral die.  I have cut enough here to make two dimensional flowers.
                                                       
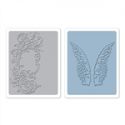
Then I embossed the flowers using different embossing folders, one set here using the gorgeous flourish and one set these fab and more grungy rivets. These flowers will of course work for any embossing folders you choose.

Once cut and embossed the fun comes with selecting how to colour them up For the delicate flourish I chose to use paint dabbers and for the more grungy flowers I used  alcohol inks. Both of these work wonderfully to colour the foil and slightly different looks and finishes.

This shows the flower coloured with paint dabber, then rub it on with your finger and I then lightly sanded the one on the right, depends which look you prefer. Sanding will remove some of the colour. I also colour the underneath as this may be seen when they are shaped.

For layer one and three, so for one large and one small flower I shaped the petals to create dimension. For the second layer, I made small cuts in between the petals to allow the petals to curl more.
Then stack the flowers and apply a small amount of glue between each layer. To complete I added an idea-ology washer and either brad or pearl for the centre, but you could use large pearls, buttons and anything else you fancy!
Well all the products I have used are listed below, hope you will have some fun making these flowers in any colour and style!

And just before I go here is a completed project using one of them.

have a fun and inky day!
trace  x


Friday, January 25, 2013

Friday Focus - Vintaj Patinas

For this week's Friday Focus at Frilly and Funky I've made my first foray into the world of Vintaj Patinas.  (Our Friday Focus 15% off products at The Funkie Junkie Boutique is Vintaj Patinas.) Having played a little and watched the various tutorials which are available (you can see one of them HERE) I considered the possibility of doing something similar, and promptly rejected that. Then, a eureka moment! and I had something which you can use as a background or to make embellishments from.


And guess what the Patina embossed background/leaves started life as? Nothing more than basic mirrored card!!! Now this took me a while to figure out and I'm not putting you through that, so here's a 'how it's done' for you to follow if you want to achieve a similar look.

For this demo I used the Weathered Copper set, but there are a number of other colour combos to play with too. Start by adding the Vintaj Patinas to your pre-embossed shiny card or metal foil. These may look like alcohol inks but they're not, acting more like very fast drying paints and are opaque. Put a few drops of the first colour (Jade) onto your craftmat and apply to your card with a brush. A little goes a long way and you don't need to be very precise. Don't dry it because as you add the next layers (Moss, then Verdigris) they blend a little.

Try to create a more streaky feel if you want all the colours to show through at the end. Allow them to dry or use your heat gun. Next, take some wire wool and rub gently over the top to remove the Patinas from the raised areas. Finally take your Sepia Archival Ink and rub it over the top so that it catches the exposed card (and some of the Patina areas too). I tried Silver and Gold card and they both came out the same. It only matters if you want to leave some of the original card exposed. When finished I patted my anti-static bag over the whole lot.

I used some for the background and also die cut some for use as leaves. A touch of Treasure Gold (Rennaissance) around the edges added to the aged look. So then what? Two freebie postcard images (courtesy of The Graphics Fairy) were dabbed with DS Old Paper and Brushed Cordrouy and edged with DI Walnut Stain. The birds (Tim Holtz' Paris Collection and Inkylicious) were stamped in Sepia Archival Ink and DI Pumice Stone was used for the Paris postmark. Silver Ferro was stencilled through a leafy mask and covered in Treasure Gold.

Lace from the Funkie Junkie Boutique  was a necessity here, and as well as  the Patina leaves I also cut some from  their rusty tin wire net. I love this lace because it is fine enough to be able to see the detail underneath still. Glossy Accents on  top of the stamps, a brief yet appropriate sentiment stamped in Black Archival Ink and a scattering of buttons from my stash completed the vintage look. Oh, and the backing paper is an old Basic Grey one, again  from my stash (using papers up slowly but surely!!)  There are links below to the products used so you can  play too.

Now in order to maximise time I'm going to enter this card into Hels Sheridan's Sunday Stamper challenge - And Your Bird Can Sing.
If you are looking for a challenge yourself why not have a go at entering the latest Frilly and Funkie challenge - Spruce It Up where you are asked to makeover an everyday object. The Frilly team have come up with some amazing examples of their own to inspire you. 
Take care of yourselves and enjoy your crafting.
Hugs, Jenny xx

Thursday, January 24, 2013

Woohoo! Happy Mail From Ranger!

I got a happy email from Ranger Ink last night that my order of some of the new products has shipped!  It is scheduled to arrive on my doorstep on Monday.  I have set up listings in the store for the full set of the new Tim Holtz distress paints - $89.99 for the set of 24, as well as the full set of the new Dylysions sprays - set of 6 for $22.50.

I also have all the newly released Tim Holtz "blueprint" stamps coming in on Monday and they have been listed in the boutique also.  Check out the New Arrivals tab in The Funkie Junkie Boutique to see all the new products.  Quantities are listed there so you can see how many are in stock.  You may want to act fast for the full sets of the distress paints as I only have 9 right now and once I re-order, it could be months before I get more.
I will also be listing the distress paints and Dylusions sprays individually, but that will take another few hours before those listings appear.

Happy shopping!


Sunday, January 20, 2013

Sunday Share

Good Sunday morning to you!  We are back today to announce the winner of our last Sunday Share which closed last night and to kick of another two weeks of sharing what you have made with products you purchased from The Funkie Junkie Boutique.  A huge thank you to all who participated and helped us kick off Sunday Share for 2013!
We had four artists share their lovely work with us during our last Sunday Share.  Random.org has chosen Entry #1 - Samantha from Hettiecraft as our Sunday Share coupon winner this time around.  Here is the fantastic card Samantha made using products from The Funkie Junkie Boutique.
Congratulations Samantha!  Please email me at thefunkiejunkie@gmail.com for your 25% discount shopping code.  That's a 25% discount on your entire order on products that are already discounted 25% off MSRP - what a deal!

Have you shopped at The Funkie Junkie Boutique? All you have to do to enter is link up any creation you have made using products from my boutique here at Sunday Share. The only requirements are:

1) you must use something you purchased from The Funkie Junkie Boutique (the new one or Zibbet or Etsy)
2) you haven't shared it already here at Sunday Share
3) you have to mention the product in your post as well as my boutique and provide a link to my boutique

That's it - easy peasy and a fun way for you to showcase your work over here at Frilly and Funkie! So what are you waiting for? Link your work up below. If you need some guidance in knowing how to share your work here, read this post and let us know if you need further assistance.

Sunday Share is currently running for two weeks, every other Sunday from 5:00 a.m. ET until midnight on Saturday night. We will do a random drawing of all the entires that week and the winner will receive a coupon to shop with a 25% discount at the shop. This is our little way of rewarding those who shop at The Funkie Junkie Boutique. What are you waiting for. I know lots of you have already purchased items from The Funkie Junkie Boutique. Link them up here - it's a great opportunity to share your work with us and you just might shop next time for 25% off.