It is Cec here and I am presenting the Saturday Showcase this week showing you how I make fabric paper.
I started with a piece of cotton canvas-like fabric and painted it with acrylic paint. For this piece I used a brayer to add Lemon Zest and Squeezed Orange Acrylic Paint (Dylusions) and I purposely left some white space.
Next I used some Jet Black Archival Ink (Ranger) to stamp some flowers from a set called Flower Garden (Tim Holtz).
Once the stamping was dry, I crumpled up some tissue, opened it back up and glued it over the fabric using Mod Podge. While it was still wet, I carefully patted it down so it was completely attached to the fabric.
Do not pull on it while it is wet because the tissue will tear. Once it was dry, I trimmed the tissue away.
Now that my fabric paper was ready, I decided to make a purse card with it so I trimmed it down to 5" wide x 12" long and then adhered it to a piece of yellow card stock.
In the future, I would attach the card stock in sections and leave the area where the folds are free of card stock.
I wanted the flap of my purse to have a fancy edge so I traced a fancy edge on the card stock side using a template that I picked up at the dollar store and then fussy cut it.
Next I added a "strap" made from a string of pearl trim (my stash) and covered the area with a strip of the fabric paper. If I had not put card stock in the crease area, the trim would have fit better, I think but it is still fun. I added a pair of adhesive Velcro circles as a fastener.
Using some paper from Voyage Beneath the Sea (Graphic 45) and the Pinwheel Posies die (Tammy Tutterow) I cut several flower petals and layered them.
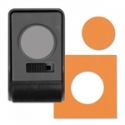
I also cut a strip of the same paper to add to the edge of the portion that folds up and used a lace edge punch to give it a fancy edge.
To finish my purse card, I inked all the edges with Rusty Hinge Distress Ink (Tim Holtz), added a strip of venise lace on the front of the flap, glued seed beads to the flower centre and then adhered it to the flap.
Here are a couple more examples of fabric paper that I made:
For this one, I used a brush and painted Melted Chocolate Acrylic Paint (Dylusions) on my canvas.
Because the brown is so dark, there is no stamping this time but after the tissue was dry, I ran it through a Pinwheel Embossing Folder (Tim Holtz) to give it a bit of a faux leather look although any embossing folder with a repetitive pattern would have worked.
Tip: If you don't crumple the tissue too tightly, there will be less texture from it and the embossing will be more pronounced. A lighter brown paint would also look great but after it was embossed, I would go over the whole thing with some Distress Ink in Walnut Stain or Gathered Twigs Distress Ink for example to make that embossing pop.
For this one I used a sponge to add Mermaid Lagoon and Cracked Pistachio Distress Paint to the canvas.
Jet Black Archival Ink was used again to add some shell stamps before I added the tissue. I used some individual stamps from my stash but a border stamp would look great too and I have linked one below. You can use it along one edge or use parts of it randomly over the fabric paper piece.
Note: If you want your stamping to be more vibrant, add it on top of the tissue but be aware that you will not be stamping on a smooth surface so bits of the stamp may disappear. You can also use stencils to add pattern to your fabric paper - either under or over the tissue layer.
There you have fabric paper - fabric that is still flexible but has the feel of paper. I have plans to use the brown and blue samples in future projects so even small pieces are useful in creating and I hope you will give this a try.


