Wednesday, May 29, 2019

Mother May I?

Welcome back to the latest Frilly and Funkie Challenge!

May in the U.S. is when we celebrate Mother's Day and honor our mothers. I am challenging you to create something that is vintage or shabby chic which is inspired by your Mother or any mother figure in your life. It can be a favorite memory, something based on her style, something she said/says to you, or anything that reminds you of your mother figure. Make sure to share with us how your mother inspired your art!

The winner will earn the chance of a Guest Designer spot here at Frilly and Funkie, and everyone who enters and follows the rules will go into the draw for the chance to win a $25 spending spree at The Funkie Junkie Boutique. And there are Top 3 Badges for three further outstanding entries, chosen by the Design Team, because choosing just one winner is so hard!

The guidelines for entering are simple; create a new vintage or shabby chic project following the challenge theme, link it below to your post (not just your blog) and also include a link back to this challenge in your post. You can combine our challenge with up to 10 challenges (including this one) to be in with a chance of winning. If you are entering through a public forum (such as Instagram) you'll need to include the words Frilly and Funkie Challenge. Also, please be sure to turn off your Word Verification so our Design Team can leave comments on your blogs. Make sure you follow these rules as unfortunately, we have had to eliminate entrants from the prize draws in the past.

This week the Funkie side of the team has even more inspiration for you:

Sara Emily - sarascloset


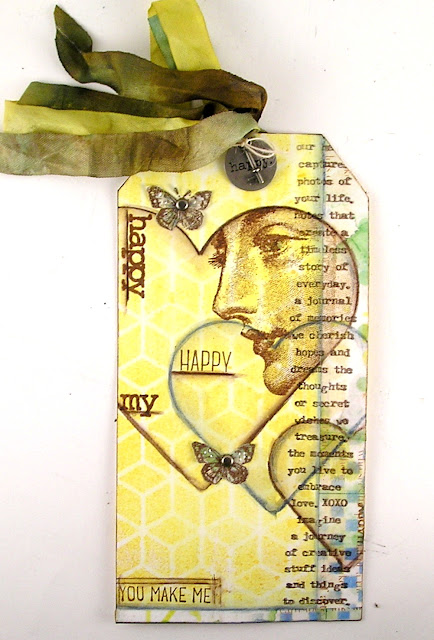
Suzanne Czosek - Suzz's Stamping Spot 

Stampers Anonymous Natures Walk Stampers Anonymous Say Something Prima Marketing Wendy Vecchi Washi Tape Sizzix Wildflower For the Funkie Junkie Boutique

Jenny Marples - Pushing The Right Buttons


********************************************
WEEK ONE

The Frilly side of the team has inspiration galore to get your creative juices flowing:

Maggi Harding - Scrap, Travel & Bark!


Cec Wintonyk - CW Creations


Kathy Clement - Kathy by Design


Come join us in sharing how your mother or mother figures inspire you! We can't wait to see your take on this creative challenge. Link your project up using the Linky tool below before 11:59PM EDT on Tuesday, June 4th. And be sure to check back next week to see what the Funkie side of the Design Team have come up with to inspire you.

Suzz

Monday, May 27, 2019

Challenge Winners - I love it because...

Today we announce our winners from the 'I love it because... ' challenge. Thank you to everyone who shared their beautiful creations with us. We loved seeing them all.


With so many wonderful entries it was a challenge just to pick out one, but our final choice this time was #6 Lucy (Paper Glitter Glue). We were all in awe of the way Lucy had constructed and decorated her amazing beach house! Check it out in more detail HERE. Congratulations to Lucy on being our favorite and winning the opportunity to be a Guest Designer here at Frilly and Funkie for a future challenge. You will be contacted with all the details.

And now our picks for the three winners of the Frilly and Funkie Top 3 Badges for this challenge. As already mentioned it was so difficult to choose between these entries and we recommend you hop on over to take a look at them all. In numerical order they are; #9 Alison (Butterfly), #12 Michelle Gorel and #13 Cathy Frailey. Please email Linda at thefunkiejunkie@gmail.com for the codes for the Top 3 badges so that you can display them proudly on your blog.


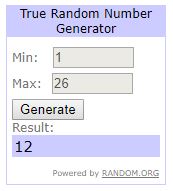
And finally we have a randomly chosen lucky winner for the $25 gift certificate to The Funkie Junkie Boutique. Our congratulations this time go to #2 Plony! Again, please do make sure you check out her amazing project for this challenge. Please email Linda at thefunkiejunkie@gmail.com for the gift certificate details.

Thank you again from all of us here at Frilly and Funkie to everyone who took part in this challenge and congratulations to all our winners. The current challenge, 'Mother May !?' runs through Tuesday, June 4th and the Funkie side of the Design Team will be back here this Wednesday, May 29th with some more inspiration for you. We look forward to seeing your entries!

Have a great week everyone.

Saturday, May 25, 2019

Saturday Showcase - A Layered Tag with Graphic 45's Bloom Collection

Happy Saturday and welcome to The Frilly and Funkie Saturday Showcase! Maggi here with you to share a tutorial as well as some of my favorite products available at The Funkie Junkie Boutique.  I want to show you Graphic 45's recently released Bloom collection and how to make a really pretty tag that is also a card using different products, layers, shapes, and flowers, of course!


The Process

I'm using a large ivory Graphic 45 tag. I love the shape of these tags as they are just a bit wider than many tags of a similar size. I also love the fact that Graphic 45 has a die that makes a perfect die-cut to fit onto the tag. In this photo the tag is in the center and the front and back pieces are on either side. I'm using the gorgeous Bloom collection available at The Funkie Junkie Boutique. Lots of Graphic 45 products at the Funkie Junkie, do stop and check it out!

Step 1:
To begin, select your tag (you can make this whatever size you like) and cut a front and back for the tag.  Set these aside for a moment and go to Step 2.


Step 2:
Select some lace that would look nice with your tag. I've used some Venise Lace. The Funkie Junkie Boutique has several laces that would work great for this application.

After gluing the lace to the sides of the tag, glue a piece of cardboard that is about the same thickness as the lace down the center. This keeps the tag level and prevents the tag from dipping inward. Now glue the front cover to the tag.

Cut a shape for the center of the tag. Circles and ovals usually work nicely. I've used a scalloped die-cut and popped it up with cardboard. I want my tags to have lots of dimension. Of course, you can use dimensional foam but I like to use cardboard when I'm popping up something as large as this circle. Be sure that whatever you use, does not peek out from the tags on the side as you want the back of the tag to have a completely finished look.


Step 3:
Fussy cut some flowers and tuck just the edge under the circle. Use dimensional foam to pop up the blooms and leaves. Use different heights when popping this up.


Step 4:
Now for one of my favorite techniques! I'm using a chipboard frame, if you don't have one, you can die-cut a frame or use a purchased frame like some of the Tim Holtz Baseboard Frames. Coat the frame with embossing ink and sprinkle with Emerald Creek's Allure Powder - Soft Fallen Snow. Heat and after it cools, randomly dab embossing ink on the chippy and sprinkle with Seth Apter's Baked Velvet - Dusk by Emerald Creek. I love the mottled effect. Adhere the chippy to the tag. Add a sentiment of your choice. I chose chipboard words that I embossed with detail embossing powder. (I didn't think the thick texture of the Allure powder would work well on the small letters.)


Here's a closeup where you can see the thick texture of the Soft Fallen Snow embossing powder.


Step 5:
Turn the tag over and adhere the back piece cut in step 1. Select a large horizontal ephemera card and fold in half. Chose one that has room to write a message. Most of the back sides of the ephemera cards make perfect card "insides". Then adhere a small ephemera card to the front of the larger folded card so that you have a pretty front to the card. Adhere the card to the back of the tag and now you have a card and tag all in one!  


Step 6:
Chose a chipboard piece to go at the bottom of the tag as shown in the photo. Cut some design paper to cover the back of the chipboard piece so that it looks nice from both sides. Embellish with flowers and a pretty bow.


In this photo you can see the different levels created by popping up the layers.


More closeups


Links to the products used from The Funkie Junkie Boutique;

Graphic 45 - Staples - Large Tag and Flowers Dies
Emerald Creek Allure Powder - Soft Fallen Snow - out of stock  
Try Seth Apter's Baked Texture by Emerald Creek - Blizzard for a similar look

Thanks so much for spending part of your day with me.  Give yourself a break and take some time to craft!
xxo  Maggi

Thursday, May 23, 2019

Guest Designer - Corinne Rollet (a.k.a. Coco)

Please welcome our Guest Designer for the 'Mother May I?' challenge, Corinne Rollet (a.k.a. Coco).


Hi, I was thrilled to be invited to be a guest here at the Frilly and Funkie blog, after I won with this make with natural elements for the ‘Back to nature’ challenge last September. Thank you so much again to Linda and her team for choosing me as the winner. The team is made up of such talented ladies, and the projects are just brilliant. Thank you for the honor!

My name is Corinne Rollet from France, known as Cocofolies or simply Coco – my nickname – in our crafty world. I'm a happy stamper, mixed-media crafter and teacher, working in freelance from 2015 after I stopped my initial profession of engineer to follow my dreams. I am also a mother of five children including twin daughters of only 11, so, very busy every day as you can guess :) But working full-time among my stash of goodies & art supplies in my messy space, with my cup of coffee always on my table - and chocolate too Lol - make me just very happy.

In the past I have been a proud designer member for Katzelkraft, Tando Creative and Crafty Individuals for a long time, and published in several craft magazines (the most recent one being Rubber Stamp Madness Summer 2019). I have no particular style, I just love what is beautiful, detailed, and a bit whimsical and colorful sometimes.

Over the years I've made many friends in the crafting world who have shared great lessons and techniques with me. Today I enjoy passing along my techniques and my love for Mixed Media in my area too to the ones attending my workshops and classes, not only on my blog. My only hope is to continue to grow as an artist and teacher for many years to come. But living of our art nowadays is not easy, sadly. So let’s see what life will be in the future for me! As long as I can continue to create, I am glad.

This is really an honor for me to be the feature Guest today on the blog and share with you two lovely projects for my mother made with love for the occasion. Based on the 'Mother May I' theme I chose to make a beautiful inchies card for my mum, with delicate birds as she loves them and nature. She is the one who gave me in my childhood the taste for natural elements and birds too myself!
Here my card.


My apologies because I don't have many photos of the intermediate steps but here is a peek at my work in progress:


I started with some scraps of gel printed papers. Your leftovers are perfect for this type of project! I used small punchers to create my inchies, in combination with some small rectangles perfectly cut out thanks to a very useful Bigz die, ‘Mosaïc’.

For the background, I had the idea to repeat on a plain black cardstock a beautiful Crafty Individuals square stamp using blank ink. I then played with all the inchies, trying to do a pleasant patchwork on my background. You need a bit of patience, but this is a fun process! Don’t glue anything at this stage, just keep in mind your arrangement or take a picture!

The next step was to stamp small birds - also stamps by Crafty Individuals (CI-265 and CI-266), I chose the most lovely small ones from my collection of bird beauties – on some of the inchies. I mated them on kraft cardstock and distressed them for a lovely vintage look.

I then had a lovely playtime to highlight some areas around the birds using pencils or paint markers and my fingers.

I used a little piece of recycled corrugated cardstock to frame one of my bird inchies, to make it pop out a little.

As shown on the picture I played with a mix of enamel chunky/vintage embossing powders, and also some great ones I have from Seth Apter. It is so easy to do, just drag around all the borders your Versamark pad then heat emboss with a mix of powders! Of course, you can repeat this process until you are happy with the result.


My mother celebrates her birthday at the same time as Mother’s Day! So I have also created a lovely dreamy scene with this young lady coming from my stash of Tim’s ephemera on a chunky arch in complement of the card. All stamped images are from Carabelle Studio, the small and tall greyboard leaves are from my old but still loved stock of Tando Creative goodies. Everything was painted with love, and If it could be inspiring for you that would be great for me.

Hopefully you will be inspired to create your own ‘Mother May I’ project and share it here at the Frillie and Funkie challenge nlog. I really enjoyed working with this theme - thank you Suzz for choosing it! Huge thanks to the whole Design Team for inviting me to be a Feature Artist this month. It’s been a real joy. Hugs! xxx

* * *
Pop over to Coco's blog and check out the details of her project and all her other fabulous work and then come on back and share your creation with us. The 'Mother May I?' challenge can be found HERE and runs through 11:55 pm EST on Tuesday, June 4th.

On Saturday one of our designers will be here with a new Saturday Showcase and then the gals on the Funkie side of the team will be here next Wednesday with more inspiration for the challenge.

Saturday, May 18, 2019

Saturday Showcase - Dina Wakley Good Idea & Always Flowers Stamps

Happy Saturday to you! Suzz here, I am going to share with you some fun I had playing with Dina Wakley Stamps.

Dina Wakely Always Flowers Stampers Anonymous Fragments Ranger Tim Holtz Layering Stencil Gradient Square For the Funkie Junkie Boutique

The flowers in the Always Flowers and Good Ideas stamp sets have beautiful sketched outline stamps perfect for coloring and trying different techniques. 

Dina Wakely Always Flowers Stampers Anonymous Fragments Ranger Tim Holtz Layering Stencil Gradient Square For the Funkie Junkie Boutique

I created this tag using the lovely Always Flowers rose stamp and a background created from a masterboard I created last week.

The masterboard was created by doing the following:
  1. Collage strips of tissue paper to a mixed media paper. 
  2. Stencil the gradient squares using white embossing paste randomly over the background. 
  3. Let everything dry. 
  4. Spritz and splatter brown dye ink spray and gold paint (mixed with water).  
  5. Spritz with water to soften the brown and the gold splatters. 
  6. Let everything dry.  
  7. Cut into various pieces.  (I cut out a card and two tags) 
After the background I did the following:
  1. Sponged the edges with Versamark and heat embossed with gold embossing powder. 
  2. Stamped the flower with Versamark on the tag. Heat embossed with gold embossing powder. 
  3. Stamped the flower with Versamark on another piece left over from my masterboard. 
  4. Heat emboss the flower with gold embossing powder.  Cut out the flower into pieces. 
  5. Color the flowers with watercolor pencils and soften with waterbrush. 
  6. Layer the flower petals and leaves. onto the flower on the tag. 
  7. Stamp the sentiment on tissue paper with brown ink. 
  8. Cut out sentiment and add to tag with collage paste. 
  9. Stamp fragments using versamark on corner of tags and heat emboss with gold embossing powder. 
I also played with the Good Ideas stamp set and created a variety of cards.

Dina Wakely Good Ideas Stamp Watercolor For the Funkie Junkie Boutique

 I started with the concept of creating a set of cards to give as a gift set. 

Dina Wakely Stamps - Good Ideas Ranger Layering Stencil Nordic Stampers Anonymous Entomology For the Funkie Junkie Boutique

I stamped the image using archival ink and colored with watercolor pencils. The background was sponged with a stencil and stamped the script over the background.

Dina Wakely Stamps - Good Ideas Ranger Distress Oxide Inks For the Funkie Junkie Boutique

I repeated the process but used different colors and added a light splattering of the colored pencils across the background, 

Dina Wakely Stamps - Good Ideas Ranger Distress Oxide Inks For the Funkie Junkie Boutique

My next card used a soft stamped background over the entire image and then was coated with clear embossing powder to create a softer effect. 

I then decided to try stamping the image and embossing with clear embossing powder to create a resist effect.

Dina Wakely Stamps - Good Ideas Ranger Distress Oxide Inks For the Funkie Junkie Boutique

I sponged the background with a mix of yellow and green distress oxide.  I then added patches of distress oxide inks into the petals and leaves to provide focal points of color.

The Supply list is below for all the fun products used in these cards!

Have a great weekend!

Suzz

Supply List:

Dina Wakley Stamps - Good Idea
Dina Wakley Stamps - Always Flowers
Stampers Anonymous - Entomology
Stampers Anonymous - Fragments 
Ranger Layering Stencil - Nordic
Ranger Distress Oxide - Mustard SeedShabby Shutters, Picked Raspberry
Ranger Distress Ink - Walnut Stain,  Antique Linen
Ranger Archival Ink - Jet Black, Watering Can, Coffee
Versamark Watermark Ink
Ranger Gold Embossing Powder
Wendy Vecchi White Embossing Paste
Prima Marketing Sparks Unicorn Hair
Dina Wakley White Acrylic Paint 
Ranger Clear Embossing Powder 
Prima Marketing Soft Neutrals Watercolor Pencils
Prima Marketing Waterbrush Set
White Gel Pen
Idea-Ology - Story Sticks

Wednesday, May 15, 2019

I love it because...

Hello there and welcome to the latest Frilly and Funkie challenge! How often do you create something just for you that makes your heart sing? Doesn't it feel great when you do! My challenge to you is to make a vintage or shabby chic piece of art, be it a journal page, a tag, a card, a home decor project etc, that fills you with happiness and makes you smile - don't forget to tell us why you love it so much.

The winner will earn the chance of a Guest Designer spot here at Frilly and Funkie, and everyone who enters and follows the rules will go into the draw for the chance to win a $25 spending spree at The Funkie Junkie Boutique. And there are Top 3 Badges for three further outstanding entries, chosen by the Design Team, because choosing just one winner is so hard!

The guidelines for entering are simple; create a new vintage or shabby chic project following the challenge theme, link it below to your post (not just your blog) and also include a link back to this challenge in your post. You can combine our challenge with up to 10 challenges (including this one) to be in with a chance of winning. If you are entering through a public forum (such as Instagram) you'll need to include the words Frilly and Funkie Challenge. Also, please be sure to turn off your Word Verification so our Design Team can leave comments on your blogs. Make sure you follow these rules as unfortunately, we have had to eliminate entrants from the prize draws in the past.

For the second week of this challenge the Funkie side of the Design Team are sharing more gorgeous projects with you. Make sure to click on each photo for a closer look and use the links to their blogs to find out more about how they were created;

Sara Emily -- sarascloset


Suzanne Czosek - Suzz's Stamping Spot

Stampers Anonymous Entomology Stampers Anonymous The Professor Prima Marketing Wild and Free Stampers Anonymous Fragments For the Funkie Junkie Boutique

Jenny Marples - Pushing The Right Buttons


************************************
WEEK ONE

We kick things off with these stunning projects from the Frilly side of the Design Team. Make sure to click on each photo for a closer look and use the links to their blogs to find out more about how they were created;

Kathy Clement - Kathy by Design


Maggi Harding - Scrap, Travel & Bark


Cec Wintonyk - CW Creations


Now it's over to you! We can't wait to see your take on this creative challenge. Link your project up using the Linky tool below before 11:59PM EDT on Tuesday, May 21st. And be sure to check back next week to see what the Funkie side of the Design Team have come up with to inspire you.

Monday, May 13, 2019

Challenge Winners - Spring is in Full Bloom

Today we announce our winners from the 'Spring is in Full Bloom' challenge. Thank you to everyone who shared their beautiful Spring creations with us. We loved seeing them all.


With so many wonderful entries it was a challenge just to pick out one, but our final choice this time was #13 Adrijana Knez (Paper Beauty AK Studio). We loved how she'd transformed this little box into a celebration of Spring - take a look at how she incorporated so many little elements to create her Springtime garden! Congratulations to Adrijana on being our favorite and winning the opportunity to be a Guest Designer here at Frilly and Funkie for a future challenge. You will be contacted with all the details.

And now our picks for the three winners of the Frilly and Funkie Top 3 Badges for this challenge. As already mentioned it was so difficult to choose between these entries and we recommend you hop on over to take a look at them all. In numerical order they are; #15 Ann Chuang, #18 Michelle and #22 Adrijana Knez (with her second entry). Please email Linda at thefunkiejunkie@gmail.com for the codes for the Top 3 badges so that you can display them proudly on your blog.


And finally we have a randomly chosen lucky winner for the $25 gift certificate to The Funkie Junkie Boutique. Our congratulations this time go to #12 Dianne (September Girl Designs)! Again, please do make sure you check out her amazing project for this challenge. Please email Linda at thefunkiejunkie@gmail.com for the gift certificate details.

Thank you again from all of us here at Frilly and Funkie to everyone who took part in this challenge and congratulations to all our winners. The current challenge, 'I love it because... ' runs through Tuesday, May 21st and the Funkie side of the Design Team will be back here this Wednesday, May 15th with some more inspiration for you. We look forward to seeing your entries!

Have a great week everyone.

Saturday, May 11, 2019

Saturday Showcase: Eileen Hull Notebook Die Tutorial with Stamperia Spring Botanic Papers

Hello, Friends!  Welcome to the weekend!  It's Kathy here, with this week's Saturday Showcase.  Today we are going to take another look at the fabulous Eileen Hull Notebook Die.


I've been having the best time with this little die!  It is easy to use, a really fun size at 3 1/2" x 5" and incredibly versatile to boot!


I've paired the die up with Stamperia Paper's gorgeous Spring Botanic Paper Pad to create this shabby chic botanical beauty that I like to call a "lap book."  It's not design to hold photos.  Rather, it is mean to be something that you can hold in your hand and relax while you enjoy beautiful images and little quotes. 


To facilitate this process, I've created interactive pages with inserts.  All the pages for the album were cut using Eileen's Notebook die.  I'll show you how to alter them in the video tutorial below.


You will learn simple tricks that allow you to fit larger images like this one onto smaller pages.


Simple folding techniques will allow you to create really interesting interactive pages.


I've also incorporated some Tim Holtz Paper Dolls and older Wendy Vecchi stamps in the album design.


These little notebooks make wonderful gifts.  They are unique, can be themed to the interests and style of the recipient and best of all...they can be made in a couple of hours!  So join me for this step by step process video tutorial, and we'll get our craft on.


You'll find a linked supply list below.  I'd love to hear your thoughts about this project, too!  

Wishing you a joyful and creative weekend!

Kathy

Supply List:


SUPPLY LIST From The Funkie Junkie Boutique
Other Products:

Thursday, May 9, 2019

Guest Designer - Clareene Forbes

Please say hello and give a warm welcome to our Guest Designer for the I Love It Because . . . challenge. Clareene Forbes of Reene's Room was the Top Pick from the March Madness challenge.


My name is Clareene Forbes. I was born and raised in the beautiful Napa Valley in California. I'm a mother of two wonderful children, four grandchildren and one , just added, great granddaughter.

I've always been a crafter in one medium or another since early childhood. I have pretty much settled into 'Mixed Media and Altered Art'. Over the years I've made so many friends in the crafting world. They have shared great lessons and techniques with me that I enjoy passing along to others in my craft workshops.

My hope is to continue to grow as an artist and teacher for many years to come...


Based on the 'I love it because' theme I choose to make something involving my favorite animal...the giraffe. Just the most lovely and graceful animal ever created. I've attached pics of the 6" x 6" easel card that holds a small 'slide and pop draw box'.


Upon opening the box a small monkey 'pops' out...

* * *
Head on over top Clareene's blog and check out the details on this fun interactive creation and then come on back and share what you love with us.  The challenge can be found HERE and runs through 11:55 pm EST on Tuesday, May 21st.

Don't forget to pop back on Saturday for another fabulous showcase from one of our designers and then next Wednesday the gals on the funkie side of the team will be here with more inspiration for the challenge.