Saturday, June 29, 2013

Saturday StepXStep

This week's Saturday Step by Step at Frilly & Funky is about the fastest, easiest way of making a fun and polished mini album, that I know. If you've thought about making one, but hesitated because it all looked too complicated, this might be your answer~

RebeccaDeeprose Box-4 (7)

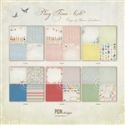
This wonderfully chunky little album uses a single collection of 'Play Time' papers from Pion. It was very quick to make because all the paper tags, cards, strips, etc. are from the same collection. The designs are split between those with typical 'boy' themes, 'girl' themes and lots of gender neutral papers and embellishments to pull it all together. This particular album has one side (all the pages facing in one direction) with a boy in mind and the opposite side is girly! Perfect for the parents of fraternal boy-girl twins or a family with a girl and a boy. Here's the 'how-to'...

RebeccaDeeprose Box-4

I began with white, medium weight chipboard, cut to 4-1/2"x 6". Use a 'stub' corner cutter (I used a Crop-A-Dile) all around. There are 5 pages in this album, but there is more than sufficient paper to make two albums this size or a very chunky album! The next step is so simple and essential to getting an end result that you will be proud of...

RebeccaDeeprose Box-4 (1)

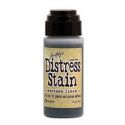
The cut edges of each page need to be stained or painted white, since the edges of each page will show. The easiest, quickest way to achieve this is with distress stain. The picket fence color is a necessity for me and I've happily gone through a few bottles since it was first released... You just 'prime' the applicator by pressing it against a craft mat until the stain starts to flow and then an easy swipe along the cut edges, will give you a good finish...

RebeccaDeeprose Box-4 (2)

Select 5 papers for the boy side of the album and 5 for the girl side. I arranged them in the order I planned on using them. The photo above, shows them in reverse order. In an assembly line fashion, cut each sheet into a 4"x 5" piece, paying attention to the direction you desire and which portion of the design you want to see...

RebeccaDeeprose Box-4 (3)

Before you adhere these papers to the chipboard, remember to use the corner punch! I nearly forgot this little detail when making my album...

RebeccaDeeprose Box-4 (5)

Repeat the paper selection for the other side, cut, punch corners and adhere, placing the desired top or first page on the last page of the first set. In other words, the boy side goes in the opposite direction to the girl side. Punch a hole a quarter of an inch in from the upper left corner of each page. I used a red, 2" notebook ring to assemble the pages and then began cutting out trims and embellishments from the add-on pages included in the Play Time collection. This is what was left after I finished!!..

RebeccaDeeprose Box-4 (6)

Here's the line up on the girl's side...

RebeccaDeeprose Box-4 (1)

There are sweet little butterflies and tickets...

RebeccaDeeprose Box-4 (2)

little flags and tags, borders...

RebeccaDeeprose Box-4 (3)

and the sweetest images...

RebeccaDeeprose Box-4 (5)

and such creative design ideas!...

RebeccaDeeprose Box-4

I added buttons and ribbons to this really delightful paper collection. As you've seen, I tied (double knotted) left over bits of ribbons around the notebook ring and in between the album pages. In case you want to see every finished page, the cover on the boy side is the first picture of the album at the top of this post. Here are the rest of the pages...

RebeccaDeeprose Box-4

Oh yeah...the canceled postage stamp is also an image I added...

RebeccaDeeprose Box-4 (1)

The little flags under the gingham bow are from the embellishment (or add-on) pages...

RebeccaDeeprose Box-4 (2)

Stacking buttons make an interesting embellishment..these are navy and yellow...

RebeccaDeeprose Box-4 (3)


These little images make me smile. They're whimsical and classic all at once. I just remembered that I wanted to tell you that the bands of paper that you can see on the left page above, are only attached at the ends. A photo or journaling card can be slipped into place and the idea can be used throughout if you desire.

Thanks so much for spending time with me~ I hope you have the opportunity to create something wonderful this weekend!  And don't forget, there is a coupon for 10% discount at The Funkie Junkie Boutique this week, good through July 7th.  Use the code 10off at checkout to get your discount.


((Hugs))


Rebecca


Friday, June 28, 2013

Friday Focus

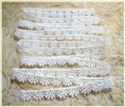
QUICK ANNOUNCEMENT:  Rebecca has a great Friday Focus highlighting Venise lace, but this week instead of having one group of products on sale, we are putting the entire shop at The Funkie Junkie Boutique is on a 10% off discount - USE COUPON CODE 10off.   That means, over and above the normal 20% discount, you will be getting 30% off on most of the name brands at the boutique through July 7th.  And then the boutique will be closed from July 8th through July 16th.  So stock up before our first summer vacation break!

********************

Hi Everyone~ Happy friday. I hope this week was a fruitful one for you. It was for me and now I'm looking forward to a day of rest, but not before I share a simple project using one of my favorite embellishments, lace trims....

RebeccaDeeprose F&F-1

This gift package began from a simple can, that I pulled from a recycling bin...

RebeccaDeeprose F&F-2

I just love to re-use, re-purpose...call it what you will, but this is one sturdy little can that can hold markers, paint brushes, crochet hooks, rolls of tape, ribbons or trims, a stack of cookies, assorted round tea bags or in this case, it will hold a collection of knitting needles as a gift!...

RebeccaDeeprose F&F-3

The first step is to wipe out the inside with a rolled up kitchen cloth. Then I cut a piece of kraft card stock 10-3/16" high x 10-1/2" wide. Using 1/4" wonder tape, I attached it to the can. Diving into my stash of luscious lace trims, I located a favorite 1/2" venice lace to edge the bottom of the can. Again, I used wonder tape to adhere the trims. It's the simplest, easiest way I have found. My personal preference is to attach the tape to the trim and then adhere it to the can. It works the other way around as well...

RebeccaDeeprose F&F-4

My deepest, elaborate trim was placed above that. I love the way it swags across the surface. It only requires a single strip of wonder tape along the top edge of each trim. That's a lot easier than it may first appear! Another layer of white rose trim sits above it. A die cut oval and some white embossing fill the center portion...

RebeccaDeeprose F&F-5

Just below the rim of the can, I adhered another deep trim, though not quite as deep as the one at the bottom. Since the lid is clear, I added a 3" doily to the top of the lid by glueing it just along the outer edge. Another narrow trim covers the lip of the lid. It is very pretty having the little trim cascading over the deeper trim on the can...

RebeccaDeeprose F&F-6

The very last embellishment is made of two triple bows that were adhered at right angles to the top of the lid. A cluster of paper or silk flowers would be beautiful as well. Add some lace to your repertoire of creative products. Even if you lean to the funky side, it's too much fun to skip playing with this versatile supply. It lends itself to distress stains, distress inks, craft sprays, markers and all the ideas yet to be dreamed of!! Enjoy~

((Hugs))

Rebecca

Monday, June 24, 2013

Friday Focus (Part 2) Distress

Hi everyone. It's Buttons, back with a special extra edition of Friday Focus to celebrate a week of massive discounts on all individual Distress products over at The Funkie Junkie Boutique. In case you haven't heard, Linda has applied an extra 15% discount on top of the normal 20% off Ranger items at the Boutique.

Many of us follow Tim Holtz's tag projects each month and marvel at the way he weaves his magic with the Distress range. I took inspiration from his June tag and came up with my own extra twist. So here goes...


Begin by taking a piece of white cardstock (about A6 size) and emboss it with a folder of your choice.


Now squeeze out some Distress Paint onto your craft mat (in this case Picket Fence but I also use the Metallic Paints and other pale shades). Use a brayer to roll the paint across the raised areas of the card. You may need to roll in several directions to get an even coverage. Let this layer dry fully before adding more ink.


Now we are back to the Tim Holtz method - add some Distress Paint, Distress Ink and Distress Stain to your clean craft mat and spritz with a little water. Now drag your embossed card through it.


After the first swipe add a little water to the surface to allow the colours to bleed into each other, then dry. You can then re-drag your card through the remaining colour until the surface is completely covered, drying at each stage. The effect will become more mottled as you go.


When inking up this sample I found it necessary to go over some slightly patchy areas with a little extra ink. You will see that the ink/stain/paint reacts with the previously painted areas, adding extra pattern to the card. Even when you use paint over paint, the embossed areas still seem to resist. This is true when you use the Metallic paints as well as the paler colours.


At this point you can chop up/die cut your card to the size required. This is really useful for allowing you to choose the 'best' part of the card - don't discard the rest though. It can be die cut and have extra ink added to it especially as it already coordinates with your background piece. Now use Archival ink on a patterned background stamp of your choice and cover the main piece of card, then blend the edges with dark ink.


Tim has done a fabulous job of explaining how to paint your image with Distress Inks HERE, so I won't reinvent the wheel. I used another die on some watercolour paper and painted my pear with Distress Inks and Distress Stain with added water. They blend so beautifully. Remember to blend the edges with dark ink again once this is finished as it gives a great border to your focal point. Now you are ready to build your card up using your background, main image and any other elements you want.


Using the same Distress Paints/Inks/Stains means that your background piece and the picture coordinate beautifully together. Here are some close ups.


The flowers were created from the off cut of card having had some extra ink applied.


As this card is intended for a male member of the family it was good to add metal embellishments and some of Linda's fabulous rusted tin mesh which is very easy to cut as required.


Rather usefully I discovered that 'rusted' bees can be created by applying a layer of copper embossing powder to card, followed by a layer of Distress Walnut Stain embossing powder. It combines so well.


So that's it for today. I hope you feel inspired to grab your Distress products and create your own backgrounds. And don't forget, now is DEFINITELY the time to add to your collection with a shopping spree at The Funkie Junkie Boutique whilst your money can go so much further.
Take care of yourselves, hugs Jenny x